 FREE 1 to 3-Day Delivery on Orders $149+ Details
How to Install a Clutch and Pilot Bearing on Your 2001-2004 GT, Bullitt, Mach 1 or 1999-2004 Cobra
Installation Time
4 hours
Tools Required
- Car Jack with high lift capabilities (If not, block of wood may be required)
- 4 jack stands
- 12mm wrench (must be 12 point)
- 3/8 Ratchet
- 8mm, 10mm, 12mm, 13mm, 15mm 18mm sockets
- An array of extensions, at least 12’’ worth
- Swivel attachment
- Pry bar
- Rubber mallet or 2 hammers (one with rubber handle)
- Blue thread locker
- Blue RTV gasket maker
- Breaker bar
- Torque wrench
- Impact (if available)
- 3 quarts of Dextron/Mercron
- 1 bottle of friction additive
- Pilot Bearing removal tool & Slide Hammer (Rent at auto parts store)

Shop Parts in this Guide
Installation
Set-up:
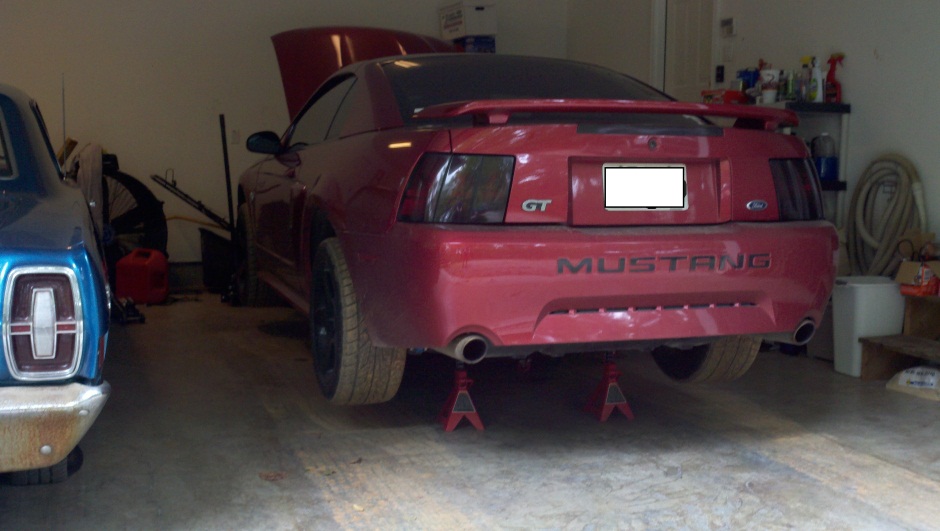
Before you start the install process, you need to jack the car up high enough to work under it comfortably. Make sure to alternate sides and lift the car a little at a time. Place jack stands under the rear end, as well as the frame rails in the front of the vehicle.
Installation:
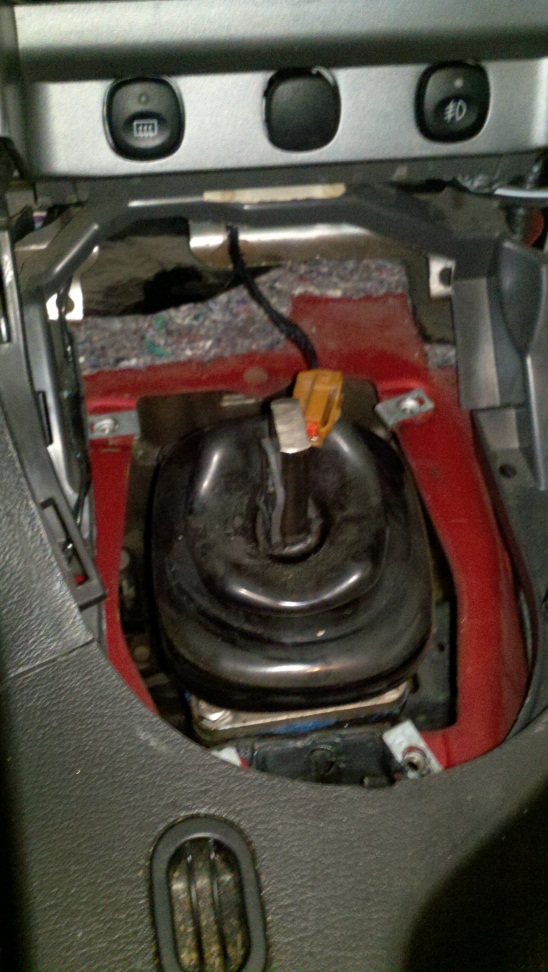
1. The first step before getting underneath the car is to remove the shifter:
- Remove shift knob.
- Pop off shifter bezel and unplug cigarette lighter plug.
- Use an 8mm or 10mm socket to remove outer boot (depending on bolts used previously).
- Use 13mm to unbolt shifter from the transmission.
- Wiggle shifter until it separates from the transmission.
2. Drain the transmission using a 3/8 drive.
3. Remove mid-pipe using 15mm socket, swivel, at least a 6’’ extension, and a breaker bar.
Note:Impacts and penetrating oil makes life easier. Also, remember to unplug the O2 sensors.
4. Mark driveshaft at the differential and then remove with 12mm 12-point wrench:
- Place drain pain under the tail shaft of the transmission (some fluid will come out).
- Slide driveshaft towards rear of the car and remove.
- Store driveshaft somewhere where spline will not get dirt or other contaminants on it.
5. Remove cross brace underneath bell-housing of transmission.
6. Remove the starter:
- Note: (3) bolts hold it in place.
- Use 12’’ extension swivel and a 13mm socket
- Top bolt is the trickiest to get out, but can be accomplished with patience
- Place starter on A-arm out of the way.
7. Remove clutch cable:
- Remove dust cover over clutch fork with a 10mm socket.
- Use a pry bar on the clutch fork to allow cable to slide out of the fork.
- Pull cable all the way out and place it out of the way.
8. With a jack supporting the transmission, remove the (4) bolts holding the transmission cross-member to the body using a 15mm socket.
9. Lower the transmission. The motor and transmission should now be slanted to the rear of the car.
10. Remove the view plate attached to the bell-housing of the transmission:
- Use a 15mm socket to remove the (2) bolts.
11. Remove the transmission bolts:
- Unplug all of the sensors from the wiring harness on the transmission and get it out of the way.
- NOTE: (4) bolts on the driver side and (3) on the passenger side.
- The lower bolts are straight forward, but the uppers will require extensions, a swivel, and a breaker bar.
- Once you have removed all of them, the dowel pins will hold the transmission on.
12. Now you are ready to remove the transmission!
- You can use a transmission jack, but I found it easier to just do it by hand mainly due to the lack of space underneath the car. DEFINITELY USE A FRIEND!!
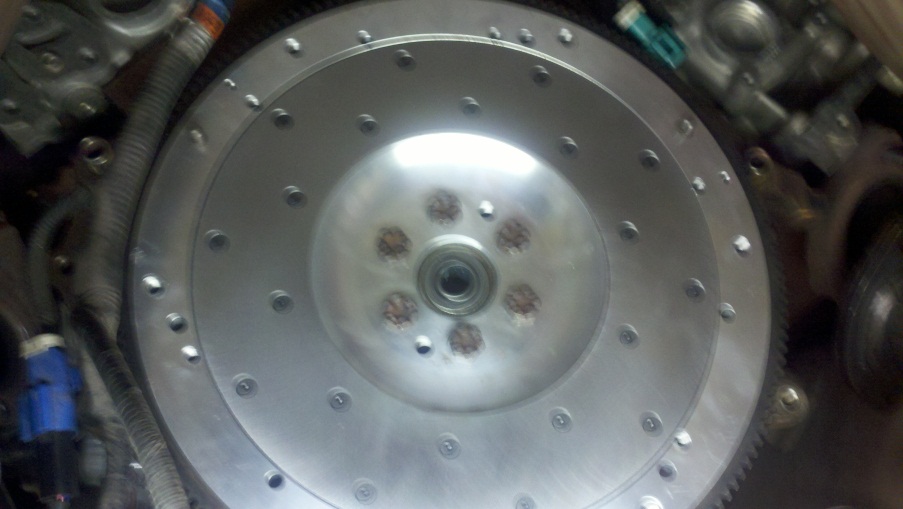
13. Remove the factory clutch:
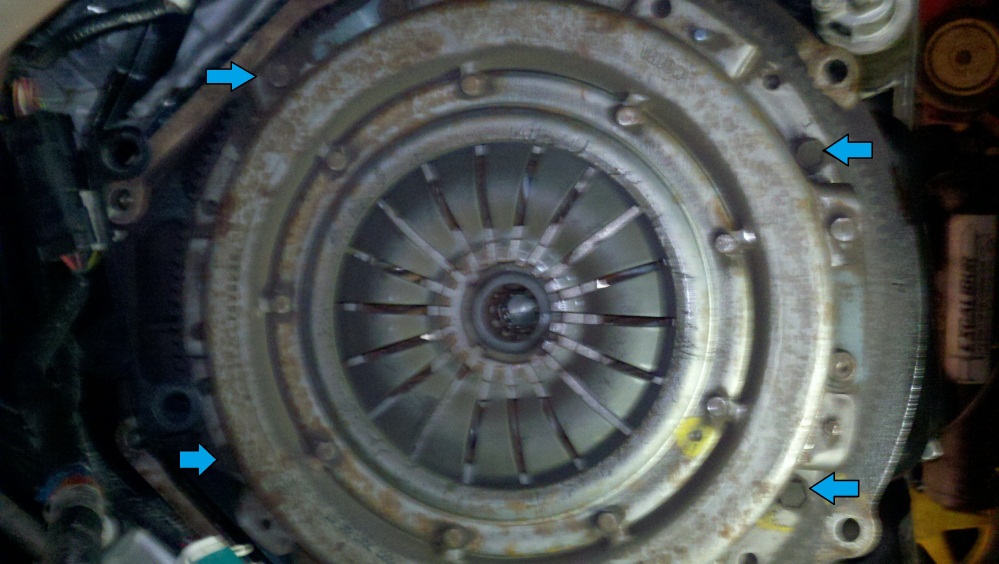
- Remove the (4) bolts holding the pressure plate to the flywheel (arrowed in photo above).
- The pressure plate will be heavy so be prepared when you get the last bolt out.
- Remove clutch disk.
14. Remove Flywheel:
- Remove the (6) castle head bolts with an 18mm socket.
- Be careful as the flywheel is also heavy.
**At this point, you should be looking at the back of your block**
NOTE #1:You should be installing a corresponding Exedy Flywheel for proper fitment and to prolong the longevity of this Exedy clutch. If you choose not to install the recommended new flywheel, you will need to resurface your factory flywheel.
NOTE #2:I had a small oil leak so I took this opportunity to replace the rear main seal. Now is the time to do so. Just remove the plate on the back of the motor and use a punch to remove and install the new one. Use gasket maker when re-installing.
15. Removing the Pilot Bearing:
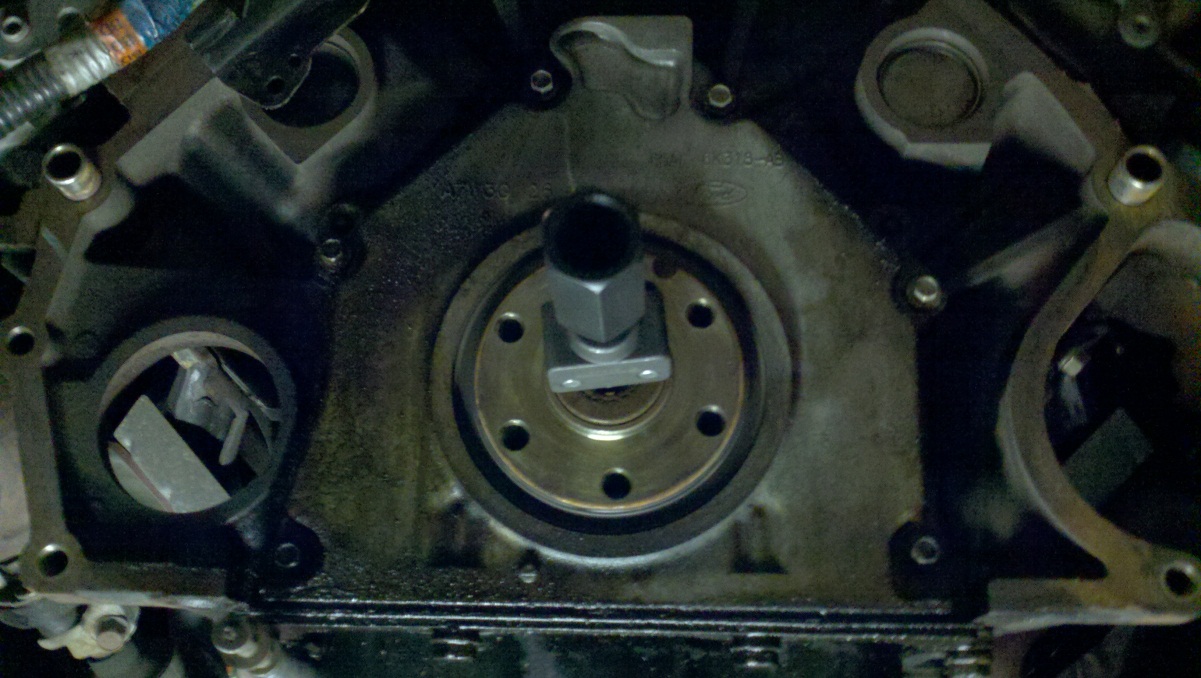
- Use the rented puller tool and insert into the pilot bearing. Expand the tool until locked in the pilot bearing. Slots were at 6 and 12 o’clock on my stock motor.
- Install the slide hammer on the puller and pull the hammer away from the motor until the bearing is removed (mine only took 5 hits).
- Now everything gets installed in reverse order!
16. Installing new pilot bearing:
- Use a rubber mallet to tap the new bearing into place.
- I didn’t have a rubber mallet so we used the rubber handle of a hammer and then tapped on the hammer with another and it worked great!
17. Install new or resurfaced flywheel:
- Make sure holes on the flywheel line up with those on the motor.
- Install factory castle bolts and torque them down to 60-63 ft/lbs -- use some blue thread locker!
18. Install Clutch kit:
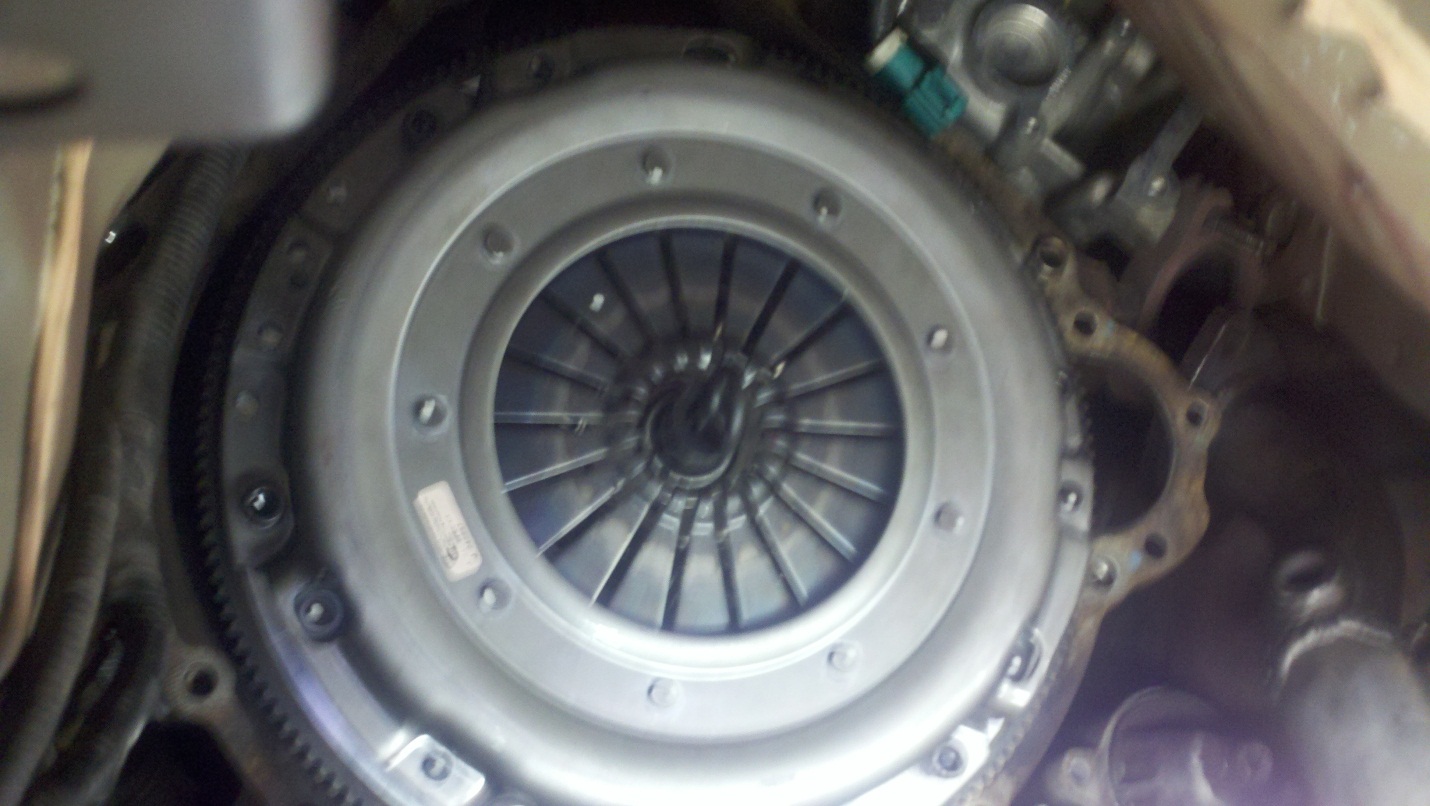
- Place disk on flywheel, making sure the sides are as labeled.
- Use the alignment tool to keep the disk held in place while installing the pressure plate.
- Install pressure plate at 33 ft/lbs 60 degrees and use blue thread locker. Make sure you install a few bolts because the dowel pins will not hold it up by themselves, but make sure it is lined up on the pins.
- MAKE SURE THE ALINMENT TOOL SLIDES IN AND OUT EASILY TO ENSURE THAT THE DISK IS NOT BOUND.
19. Transmission installation:
- Critical step is to jack the front of the motor up to tilt the rear down.
- Make sure to grease the dowel pins for easier installation.
- Install transmission. You may have trouble getting the dowel pins lined up & may take a little wiggling.
- Next, install the bolts back into the bell-housing and torque down to 28 to 38 ft/lbs.
- Now you can remove the jack from under the motor.
20. Re-install transmission cross member.
21. Plug in sensors into transmission.
22. Re-install viewing plate on front of the bell-housing.
23. Re-install starter.
24. Re-install cross bar underneath bell housing.
25. Re-install Driveshaft:
- Remember to line up your markings on the driveshaft and differential
- Torque bolts down to 76 ft/lbs.
26. Re-install mid-pipe back on the car:
- Replace the gasket on the passenger side depending on the condition; it’s better to replace it to prevent leaks rather than re-using the old gasket.
- Plug in O2 sensors.
27. Re-install clutch cable by prying the clutch fork (same as tear down).
28. Now you are ready to fill the transmission:
- Use (3) quarts Dextron/Mercron to fill up the transmission.
- Add (1) quart of transmission friction additive first if you feel the need.
- Not required but will increase life of the transmission!
- Use (4) quarts total!
29. Re-install shifter:
- Make sure you clean the surface of the transmission and underside of shifter.
- Add a bead on blue gasket maker all the way around the transmission to seal the shifter.
- Reverse step 1 to complete the install.
30. Adjust clutch as needed via firewall adjuster or other method.
31. Take the car off jack stands.
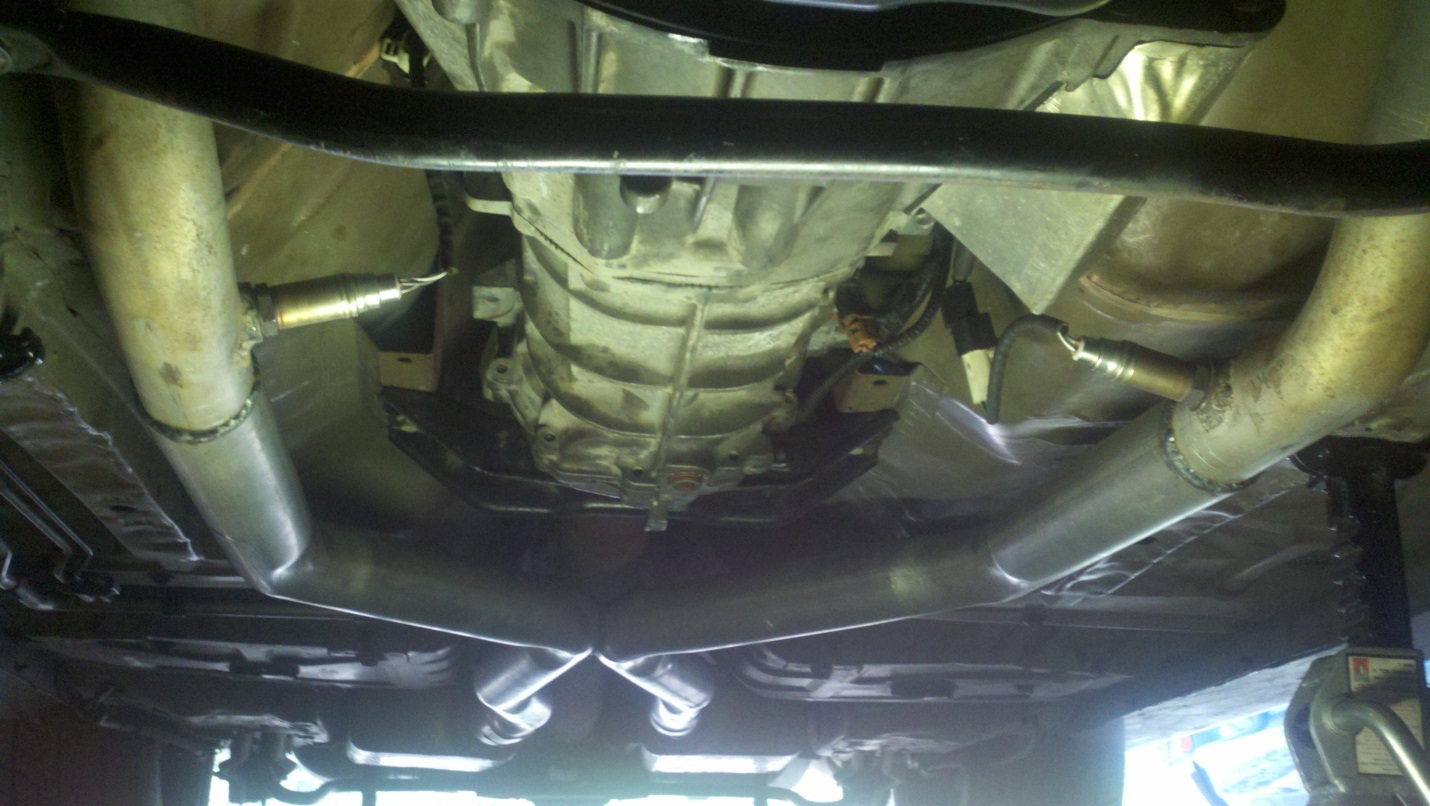
Everything back together under the car
NOTE: Break in period Exedy calls for is 750 miles. During this period, take it easy and keep the RPM’s relatively low. After that, you can really test out your new clutch!!!
Installation Instructions written by AmericanMuscle customer RJ Webber 10.5.11
