 FREE 1 to 3-Day Delivery on Orders $149+ Details
How to Install Eibach Pro-Damper Shock & Struts on Your 2005-2009 Mustang
Installation Time
2 hours
Tools Required
- 3/8" and 1/2" drive ratchets
- 7, 8, 10, 15, 16, 17, 18, 21 & 22 mm open ended wrenches
- 8 & 10 mm box end wrenches
- 10mm socket
- 13, 15 & 18 mm deep well sockets
- 8mm Allen wrench
- (2) Jack stands
- Floor jack (1 is required but 2 is preferred)
- Torque wrench
- Spring compressor tool (can be rented at your local auto parts store)
- Pneumatic or Electric impact wrench (optional)
- M8 x 1.25 Tap (optional)
- Panel Puller (or) needle nose pliers

Shop Parts in this Guide
Installation
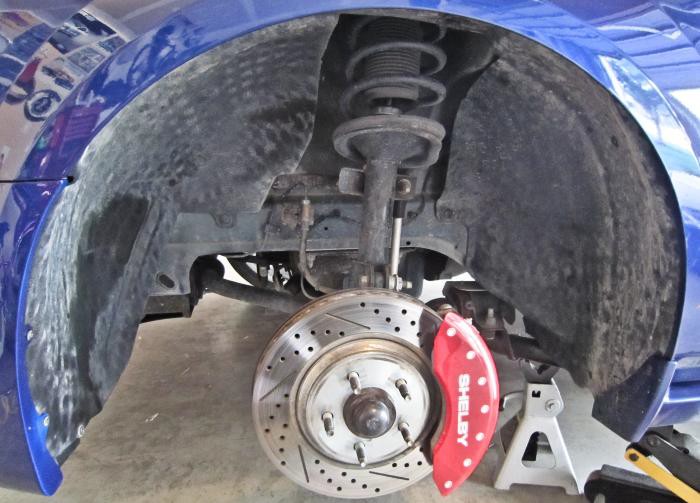
Front Strut Installation:
1. Check the contents of the Eibach kit and verify that you have all the parts needed before starting your installation.
2. Set the emergency brake.
3. From under the hood, remove the (4) upper strut nuts from each strut tower using a deep 13mm socket.
- Tip: You may leave (1) nut loosely attached to each strut to keep the strut assembly from coming loose when detached from lower suspension.
- Note: If equipped, remove the strut tower brace.
4. Loosen front wheel lug nuts, but do not remove them.
5. Raise the vehicle with your jack and secure with jack stands.
6. Remove both front wheels.
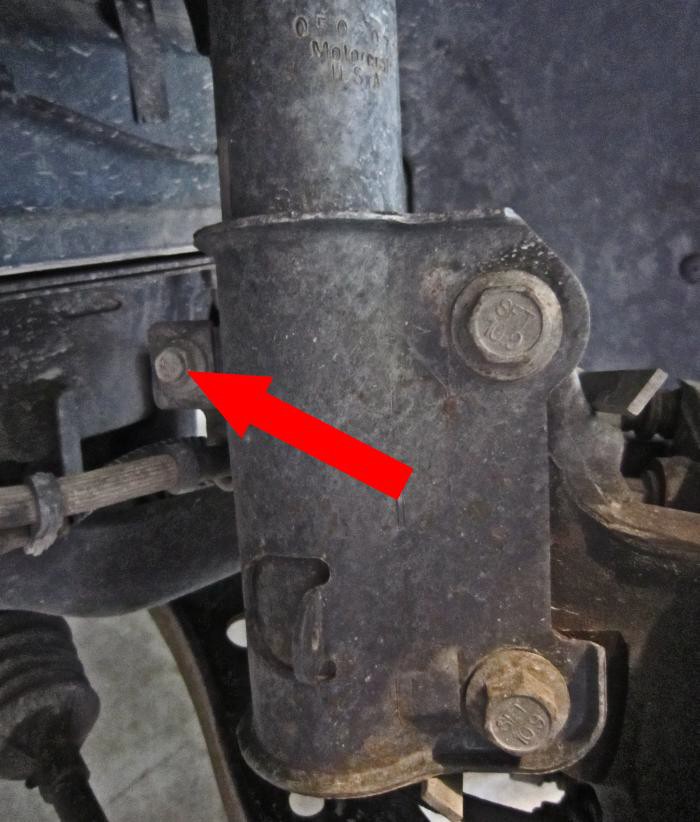
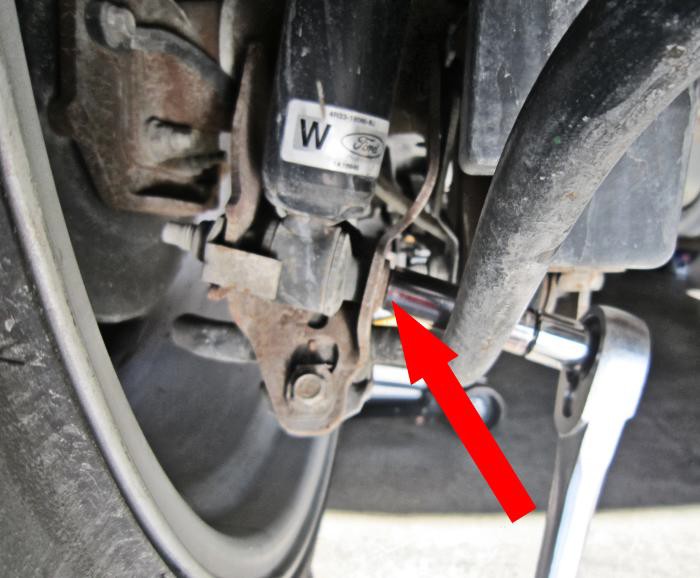
7. Remove the bolt from the Brake Line bracket using a 10mm socket.
Tip: Since this bolt is on the back side of the strut, turning the steering wheel will allow better access with your socket.
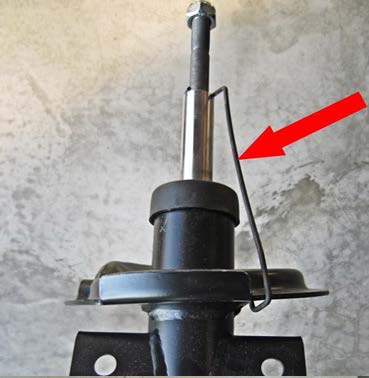
8. Using a panel puller or needle-nose pliers, remove the plastic ABS sensor wire retaining clip.

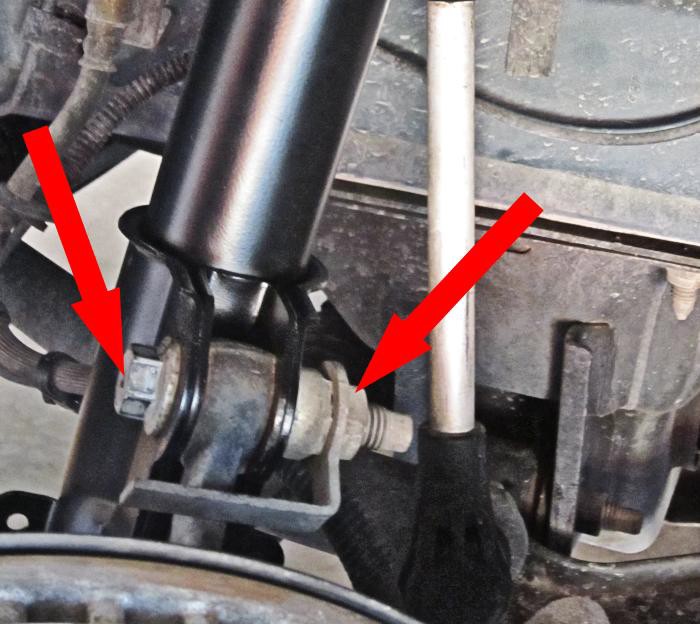
9. Loosen the upper stabilizer end link nut from the strut using an 18mm deep well socket.
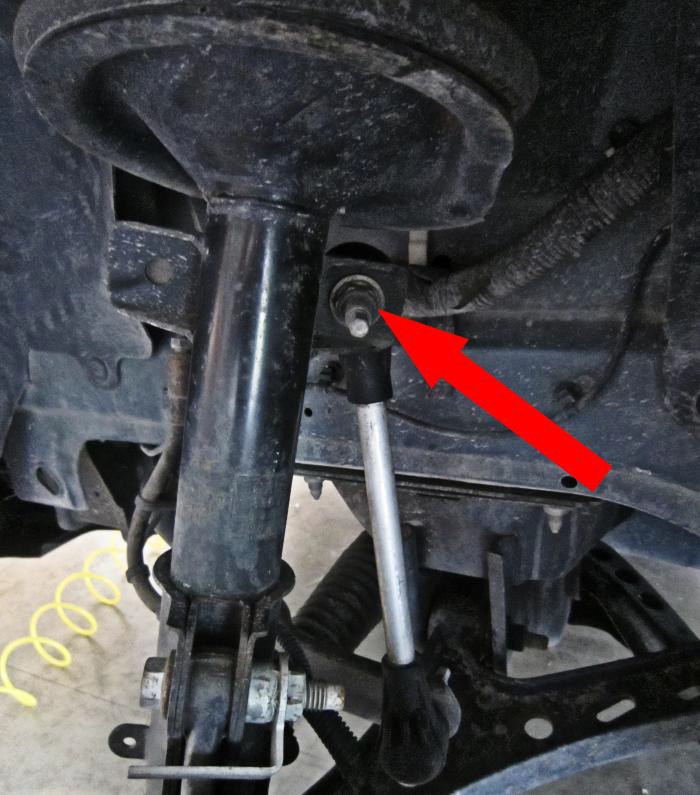
10. Using an 8mm box wrench to keep the end link stud from spinning, remove the end link nut using an 18mm box wrench.

11. Support the lower control arm and spindle with a jack and jack stand.
- Caution: Failure to properly support the lower control arm can cause damage to the control arm bushings.
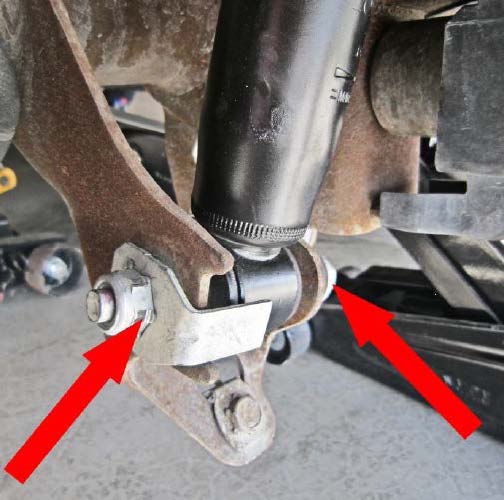
12. Remove the (2) strut-to-spindle bolts using an 18mm socket (use an impact wrench if available).
- Note: Set aside the (2) strut-to-spindle cam nuts that become disengaged when bolts are removed.
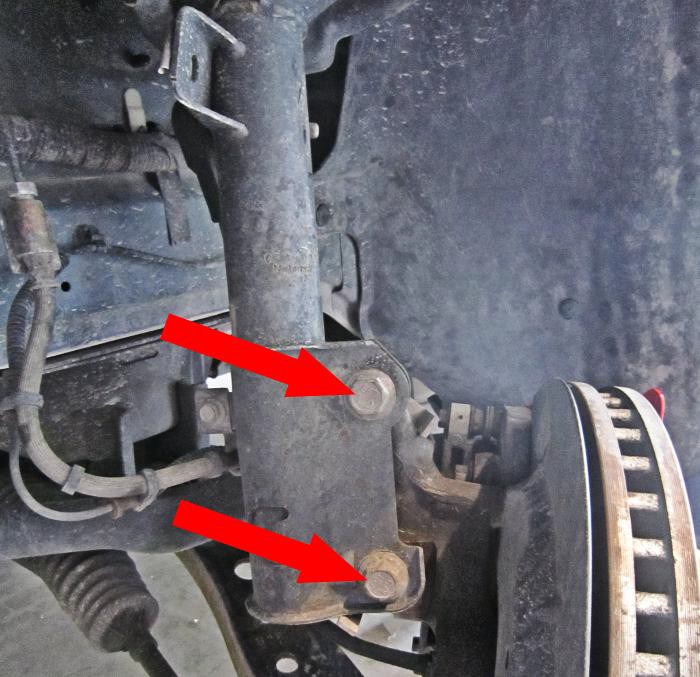
13. Carefully lower the lower control arm to relieve the tension from the strut assembly.
14. Remove the loosely attached remaining upper strut tower nut if still attached, and remove the entire strut assembly by pulling downward and away from the stabilizer end link stud.
15. With the strut assembly removed from the car, loosely attach a Spring-Compressor tool across as many spring coils as possible.
- Note: Spring-Compressor tool can be rented from most auto parts stores.
- Caution: Wear eye protection when compressing and decompressing springs.
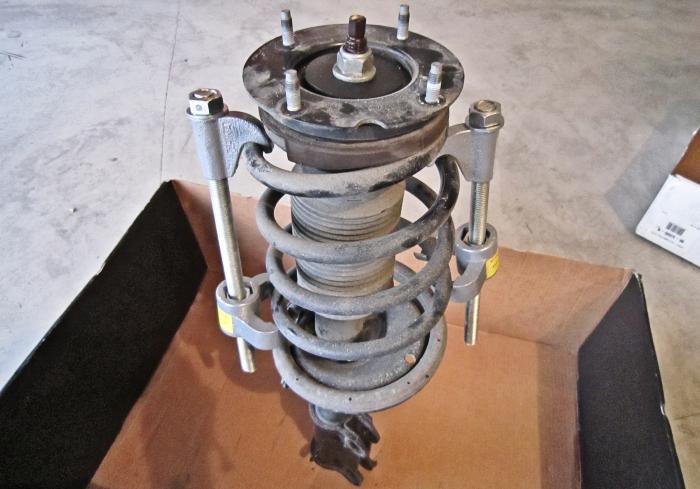
16. Using the attached Spring-Compressor tool, further compress the spring until the tension is relieved from the upper strut mount assembly.
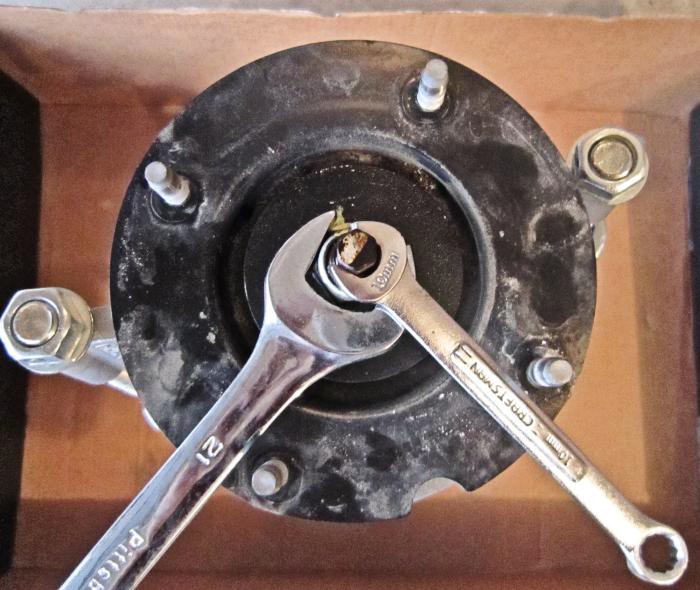
17. Using a 10mm wrench to keep the strut stud from spinning, remove the upper strut nut using a 21mm wrench.
18. Carefully release the tension of the spring by slowly removing the Spring-Compressor tool.
19. Slide off the upper strut mount assembly, dust boot cover, spring, and then finally the jounce bumper stop.
20. Discard only the old strut and upper strut mount nut.
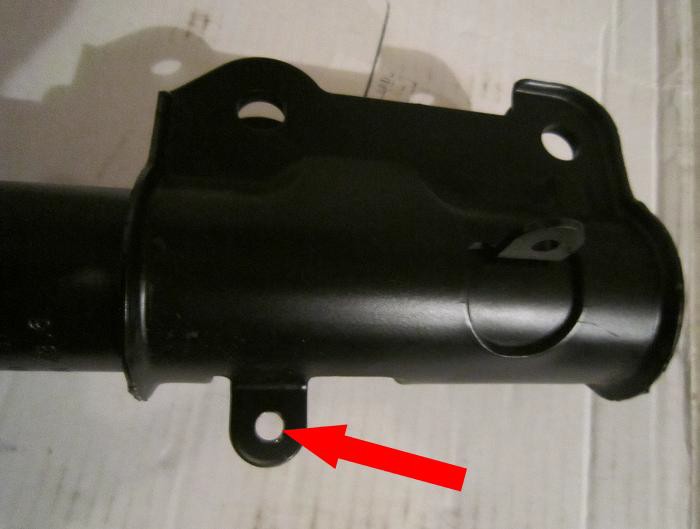
21. Check to see if the new Eibach strut brake line bracket mounting flange hole is threaded.
- Note: If hole is not threaded, case the hole with an M8x1.25 tap.
22. Remove the safety strap from the new Eibach strut.
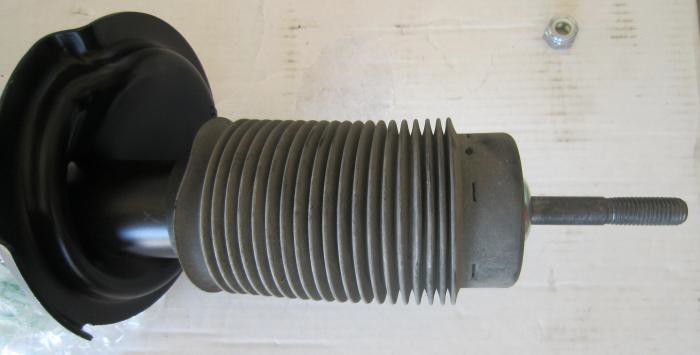
23. Slide the factory jounce bumper stop onto the new strut with the larger flat side towards the piston rod threads

24. Slide the factory boot cover over the jounce bumper stop.
25. Compress the spring using the Spring-Compressor tool, leaving the top and bottom coils clear for installation onto the strut.
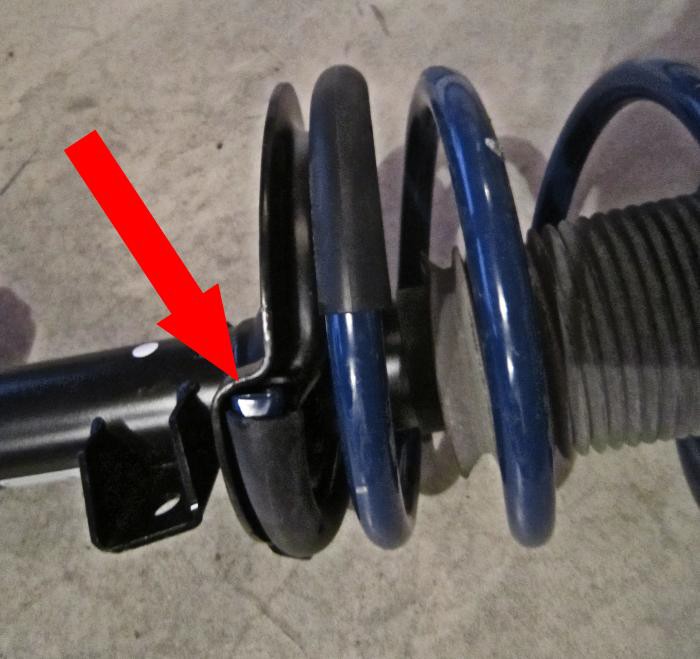
26. Place the spring onto the strut, making sure the bottom coil is aligned with the flange notch.
27. Slide the upper strut mount assembly onto the strut piston rod.
28. Make sure the top spring coil is aligned with the notch in strut mount.
29. Loosely attach the new upper strut mount nut provided in the Eibach kit.
- Note: The Eibach strut nut is larger than the stock piece from Ford, so a bigger wrench will be required.
30. Using an 8mm Allen wrench to keep the strut piston from spinning, use a 22mm wrench to tighten the upper strut nut.
- Caution: Do not use an Impact driver on this nut, this could damage the piston.
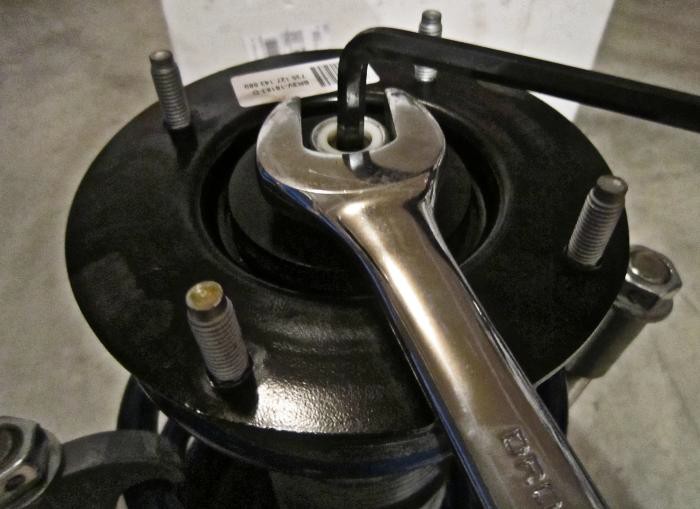
31. Torque the upper strut nut to 46 ft-lbs.
- Note: The nut may bottom out before reaching the torque specification.
32. Carefully remove the Spring-Compressor tool from the strut assembly.
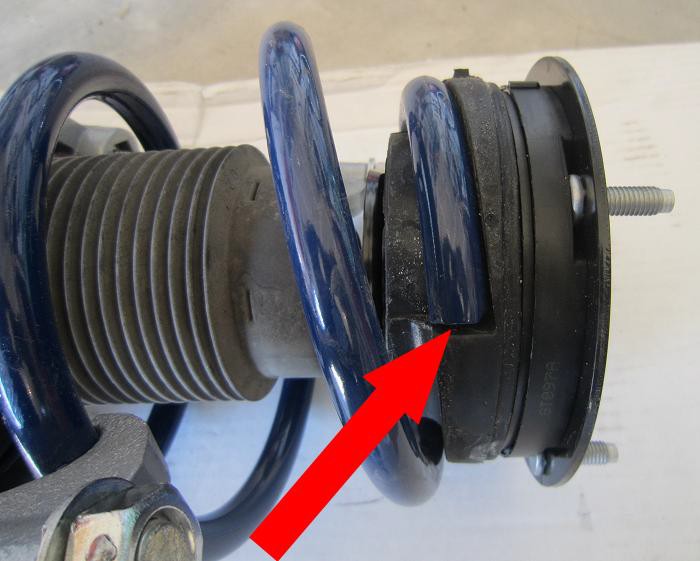
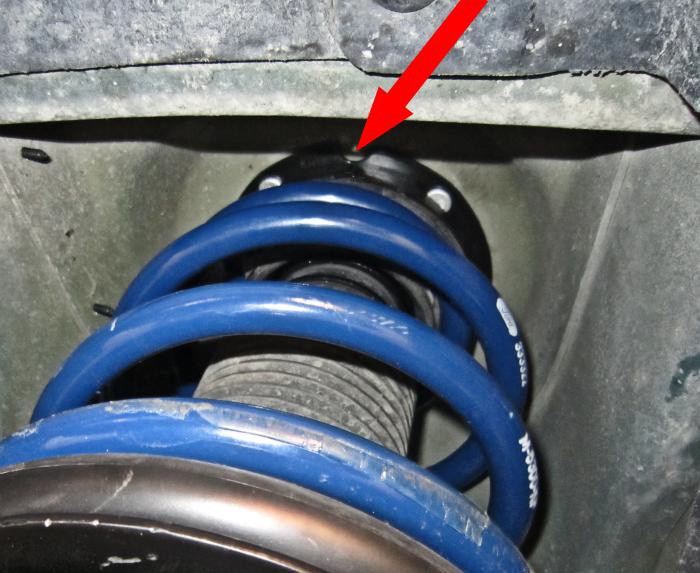
33. Turn the upper strut mount assembly so that the indicator mark (notch and arrow) is aligned with the clevis at the bottom of the strut.
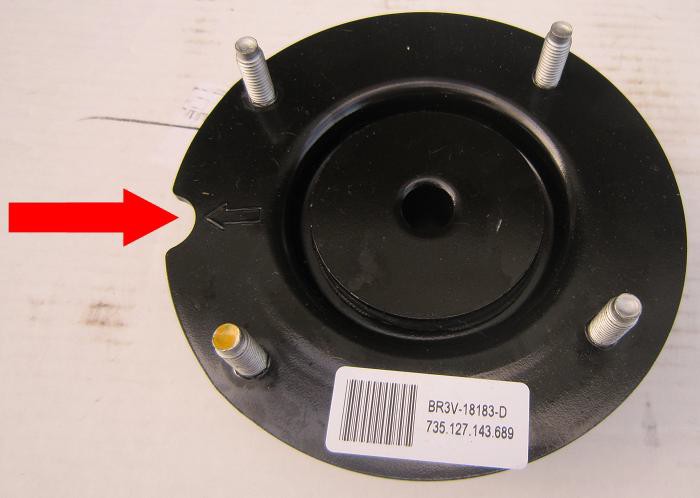
34. Slide the reassembled strut assembly into the strut tower.
- The upper strut mount assembly indicator mark should point to the outboard side of the vehicle.
35. Support the lower suspension and strut assembly.
36. If equipped, reattach the strut tower brace.
37. Loosely attach the upper strut tower nuts.
38. Slide both strut-to-spindle bolts through the lower strut clevis and spindle (left picture below).
39. Using an 18mm socket on the bolts, attach the cam nuts on the back side of the strut clevis (right picture below).
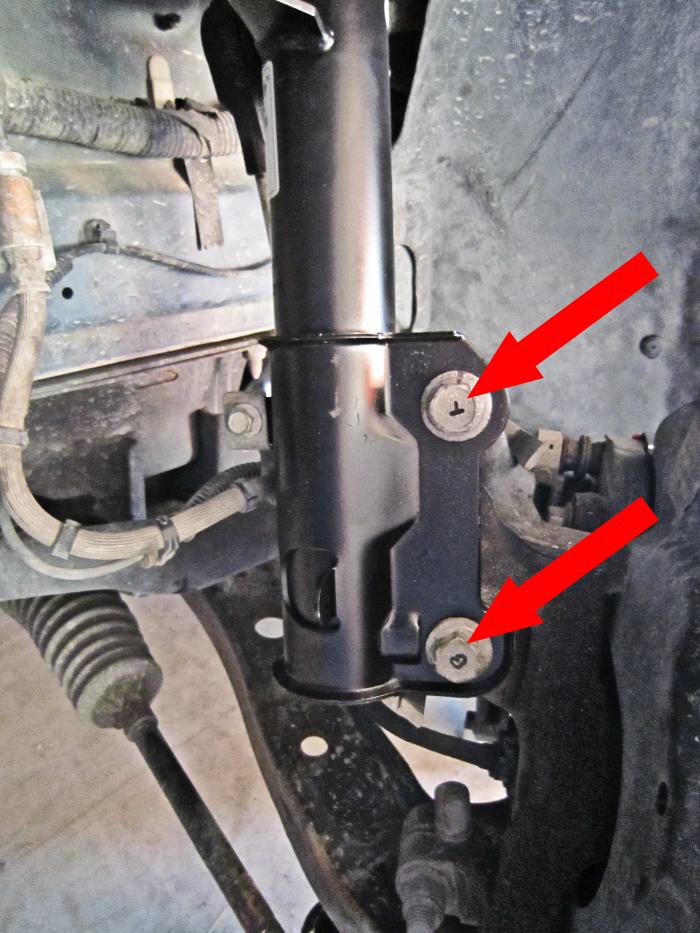
40. Torque the strut-to spindle bolts to 148 ft-lbs.
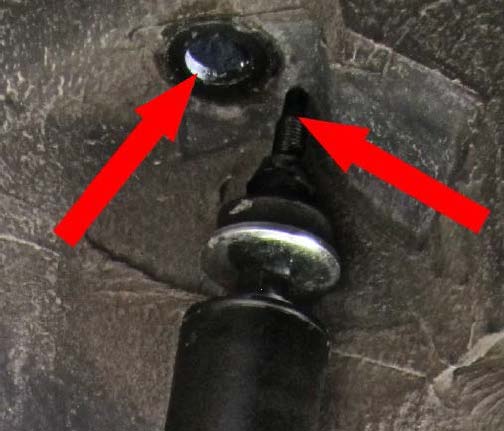
41. Slide the upper stabilizer end link stud into the strut bracket hole and loosely attach nut.
Tip: If necessary, preload the suspension by jacking up the lower control arm until the end link stud is lined up with the strut bracket hole.
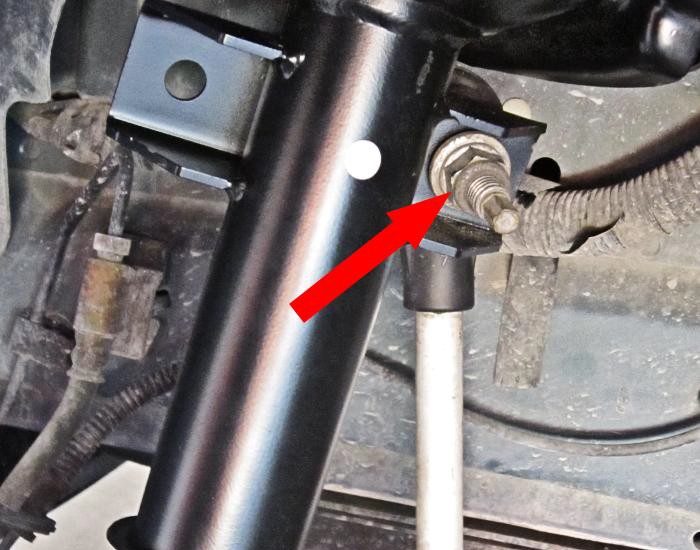
42. Reattach the upper stabilizer end link nut onto the stud using an 18mm box wrench.
- Note: Use an 8mm wrench on the stabilizer end link stud to keep from spinning.
43. Torque the upper stabilizer end link nut to 85 ft-lbs using an 18mm deep socket.
44. Reattach the plastic ABS sensor wire retaining clip.
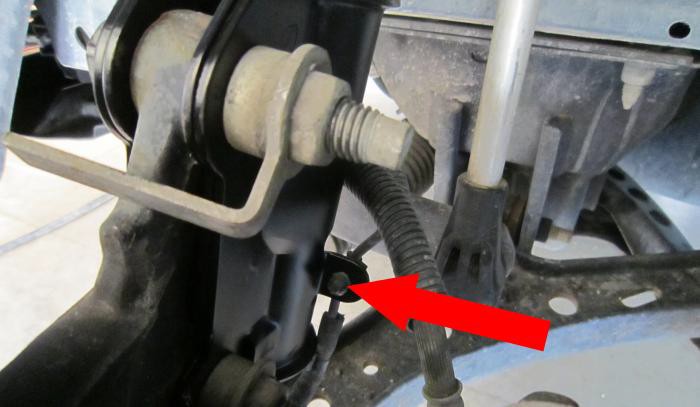
45. Slide the Brake Line bracket onto the lower strut flange.
46. Reinstall the Brake Line bracket bolt using a 10mm socket and torque to 11 ft-lbs.
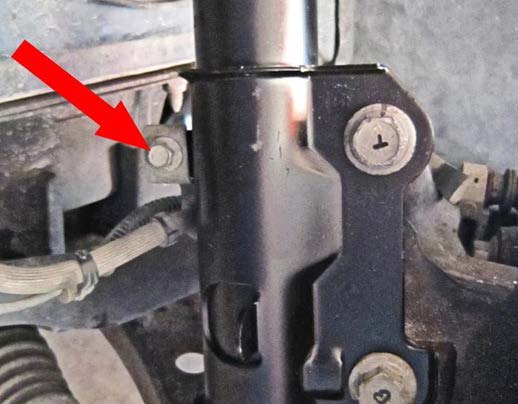
47. Under the hood, torque the upper strut tower nuts to 26 ft-lbs using a 13mm deep socket.
48. Reattach front wheels and lug nuts.
49. Remove jack stands and lower the vehicle.
50. Tighten all wheel lug nuts.
Rear Shock Installation:
Caution: Make sure the vehicle’s exhaust has had sufficient time to cool before working on the rear of the car.
1. Chock the front tires to keep the car from rolling.

2. Raise the vehicle with your jack, secure with jack stands and remove rear wheels.
- Note: You can install the rear shocks without removing the rear wheels, but you will have a lot more room to work if you do so.
3. Remove the lower shock bolt using a 15mm deep well socket (use an impact wrench if available).
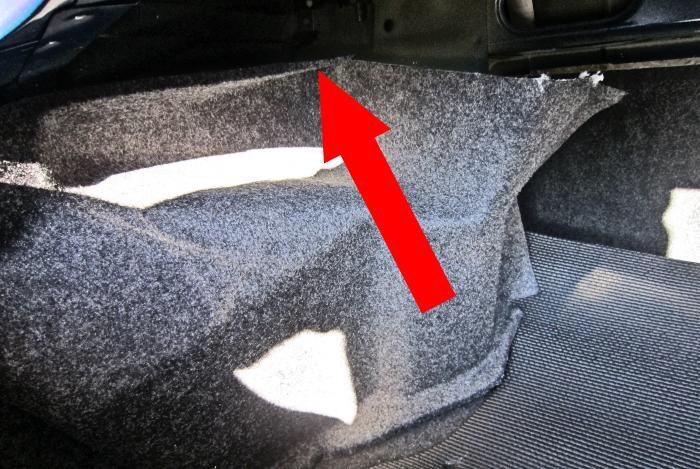
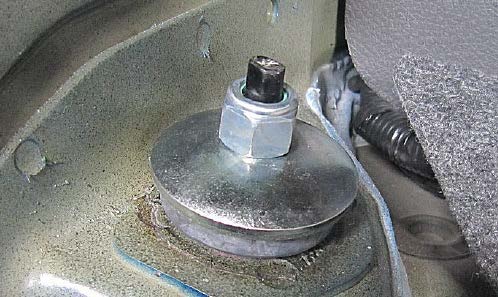
4. Inside the vehicle’s trunk, pull back the upper edge of the trunk wall lining to expose the top of the shock.
5. Using a 7mm wrench to keep the shock from spinning, use a 15mm wrench to remove the upper shock nut.
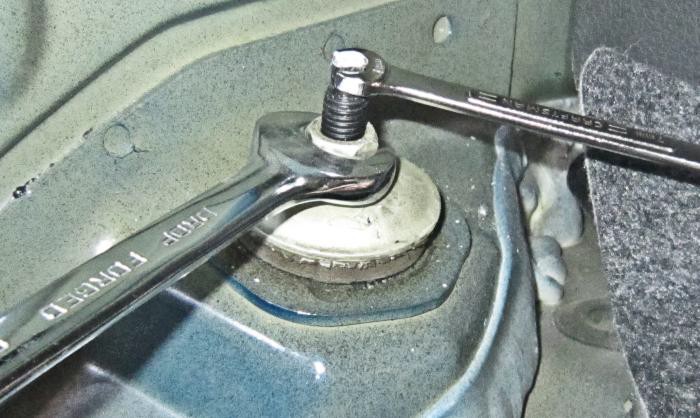
6. Remove the upper shock washer and bushing. Discard them along with the upper shock nut.
7. With the shock fasteners removed, pull the shock downward out the bottom of the vehicle and discard.
8. Slide the new shock washer and the new lower rubber bushing, provided in the kit, onto the new shock stud.
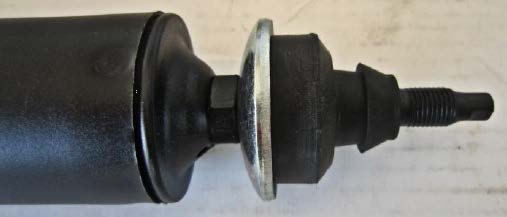
9. Install the new shock by loosely placing it into position and inserting the lower shock bolt and cam nut.
10. Torque the lower shock bolt using a 15 mm deep well socket to 85 ft-lbs.
11. Using a jack, raise the lower suspension or axle tube while guiding the upper shock stud into the shock hole.
12. Inside the vehicle’s trunk, slide a new upper rubber bushing, new shock washer and new upper shock nut, provided in the kit, onto the shock piston.
- Note: The Eibach shock nut is larger than the stock piece from Ford so a bigger wrench will be required.
13. Using a 7mm wrench to keep the shock from spinning, use a 16mm wrench and torque the shock nut to 30 ft-lbs.
- Note: The nut may bottom out before reaching the torque specification.
14. Reinstall the trunk wall lining.
15. If previously removed, reinstall the rear wheels, remove jack stands, lower the vehicle and tighten the lug nuts.
16. Take your car on a test drive and check for any unusual noises or suspension binding.
17. After you have driven the vehicle 5 to 10 miles, it is recommended that you re-torque all fasteners.
18. Have the alignment of your vehicle checked.

Installation Instructions written by AmericanMuscle customer Jason Decker 10.12.11
Related Guides
-
Installation
-
Installation
-
Installation

