
How To Install Eibach Pro-Damper Shock & Struts On Your 1979-2004 V8, 1994-2004 V6 Mustang
Installation Time
2 hours
Tools Required
- Floor Jack
- Jack Stands (2 min)
- Breaker Bar (recommended)
- 3/8” Ratchet Socket Drive
- 1⁄2” Ratchet Socket Drive
- Torque Wrench (recommended)
- 2 Flat Screwdrivers (Med – Large)
- Crescent Wrench (Med ~ 10”)
- 15 MM Deep Socket
- 18 MM Deep Socket
- 19 MM Deep Socket
- 21 MM Socket
- 24 MM Socket
- 11 MM Wrench
- 12 MM Wrench
- 15 MM Wrench
- 18 MM Wrench
- 13/16” Wrench
- 15/16” Wrench
- 2 Extensions (Recommended)
- Universal Joint (Recommended)
- 2 Wheel Chocks (Recommended)
- Impact Gun (recommended)
- 1 roll Painters or electrical tape (Recommended)
- 1 can WD-40 or PB Blaster (Recommended)
- 1 pair Safety Glassed (Recommended)
- 1 pair Closed Toe or Safety Shoes
- Light / Flashlight / Shop Light (as needed)

Shop Parts in this Guide
SCOPE
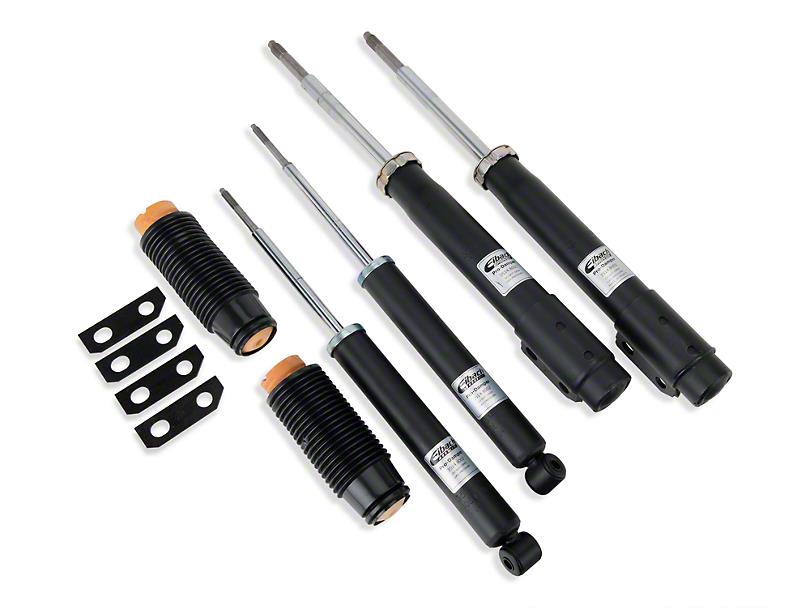
The following guide will show you how to install an Eibach Pro Damper Shock and Strut Kit, mfg: part # 3514.84, or American Muscle Item #: 478000. This guide is intended for the home mechanic with basic tools who is willing to perform the work themselves.
FRONT STRUT REMOVAL
Start out by parking your Mustang in a flat area, put it in park and put on your emergency brake or parking brake. Then pop your hood open and disconnect your batter terminals.
Loosen your lug nuts on your front wheels with a 21 MM deep socket and a breaker bar. Just do about a turn on each lug nut.
Raise your front-end of the car and support it on jack stands. (I raised mine with the floor jack underneath the motor cross member, and then I put a jack stand on each side of the body frame.)
Note:
To make life easier, I recommend that you grab your can of WD-40 or PB Blaster, and start spraying the |
nuts and bolts involved with the removal of the front struts. That’s the nut on the top side of the strut assembly (inside the hood), the three nuts holding the bottom of the strut assembly to the spindle. |
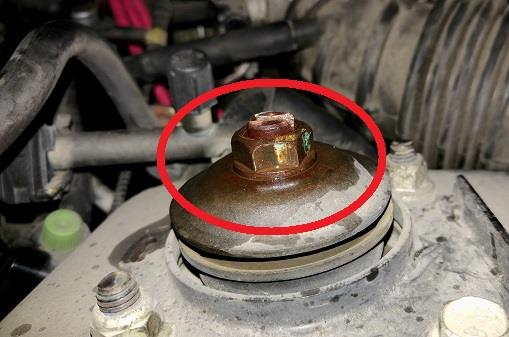
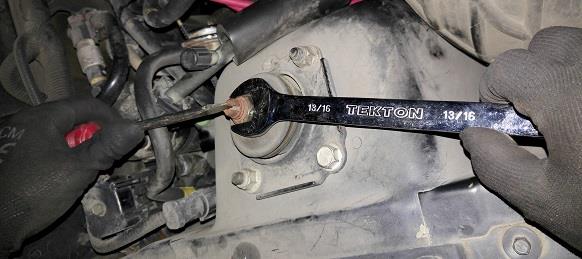
Use a medium or large flat screwdriver and a 13/16” Wrench and remove the top nut holding the strut. You want to turn the wrench counter clockwise while pushing the screwdriver clockwise.
Once the nut breaks, unscrew it about 90% of the way. Leave it engaged about 1 or 2 full threads. This will help with the removal process.
5. Now it’s time to remove the bottom side of the strut assembly. Grab your 15/16” & 13/16” Wrench, and your 21 MM sockets.
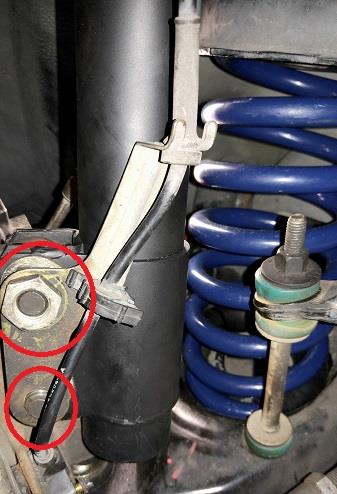
6. Use a 15/16” Wrench to remove the nut holding the ABS sensor bracket onto the strut. Move to the side.
7. If space allows it, use the 21 MM socket on the cap side of the bolt, and a 15/16” Wrench on the nut side. (If space is too much of a constraint, use a 21 MM Wrench or a 13/16” Wrench on the cap.) Crack the nut
open on both screws and remove them. Put the nuts aside in a safe location.
8. Once the nuts are loose, grab your floor jack and jack up the spindle/strut assembly. I found it convenient
and helpful to lift it from underneath the control arm where the spring sits.
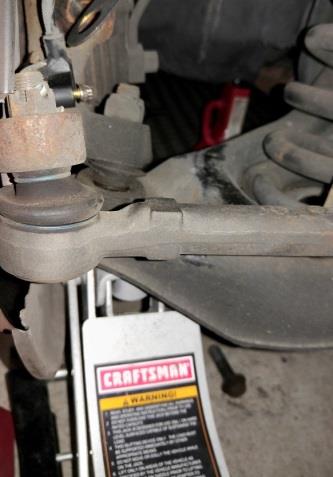
Lift the control arm slowly until you can remove the bolts off the strut and spindle. (You should be able to remove them easily). If not, make sure you’re at the right height to remove them. I found it helpful to put pressure on the bolts with one hand, as I slowly pushed on the lever of the car jack with my other hand.
Once the two bolts are off the strut and spindle, go to the top of the car and completely remove the nut holding the strut assembly. Use a 13/16” Wrench and a flat screwdriver if needed. Place the nut, washer, and rubber bushing aside in a safe location as you will reuse some of the components.
Now slowly remove the pressure off the car jack with one hand while holding onto the strut assembly with the other hand.
Caution:
The spindle may fall forward once the strut is removed, keep a knee on it, or use some type of wooden block to keep it from hitting you. I put a jack stand underneath the rotor.
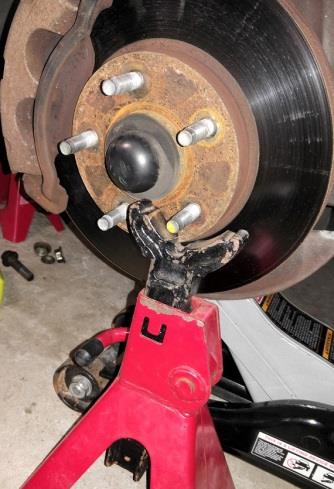
12. Put the strut assembly to the side with the other components you just removed.
13. At this point it is a good idea to inspect some of your suspension components. Make sure none of the rubber components are torn or have significant wear. Consider replacing any rubber components that
have significant wear, (or at least keep it mind for your next maintenance inspection).
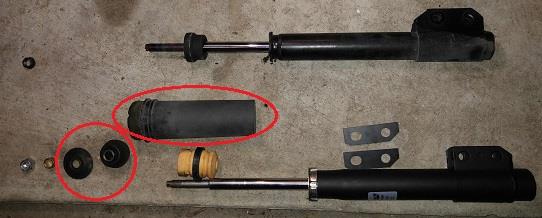
14. Compare your old assembly with new assembly. (See the red circled items, these are the ones to keep
for your new assembly.
FRONT STRUT INSTALLATION
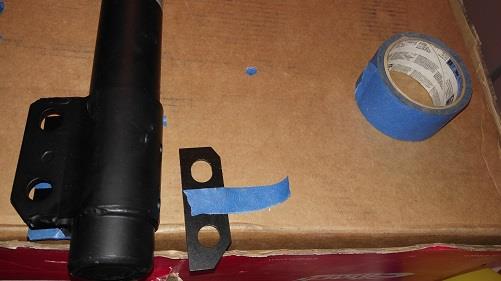
The Eibach struts come with two shims, and they make the installation a hassle for one person to do the job correctly. I used painters tape to hold the shims into the strut bracket. If you don’t want to tape the shims, go to step 2.
Grab yourself some tape and line up one shim at a time with the holes on the bottom bracket of the strut. Tape the shim in several places to the bracket without covering the holes. Make sure the tape doesn’t roll or fold. You want it as flat as possible.
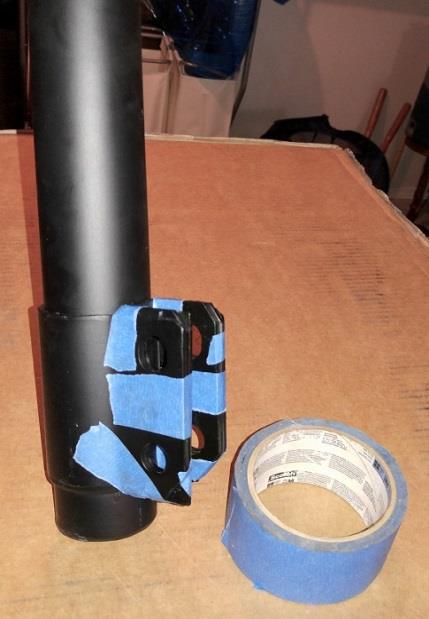
2. Place the top strut washer, the new nut, and the bushing somewhere near in the engine bay.
3. Insert the new bump stop into the strut rod, (flat side facing up), go below the shoulder of the rod. Then insert the dust cover
4. Insert the strut from inside the wheel well into the strut hole.
5. Hold the strut with one hand, and use the other hand to put the bushing, washer and nut onto the threaded rod. Hand tighten it for now.
6. With the strut hanging, try to line up the spindle with the strut bracket. DO NOT push the spindle into the bracket just yet. Check alignment 1st.
7. If the holes don’t line up, use the floor jack to either push the spindle up in order to line up the holes. OR, reduce the pressure on the jack so that the holes come down to align with the holes on the strut bracket.
8. Once you feel like you have a relative good alignment, with one hand push the spindle into the strut bracket, make sure the holes align. With the second hand, insert a bolt through the top hole. Once in, put on the top nut.
9. Do the same for the bottom hole.
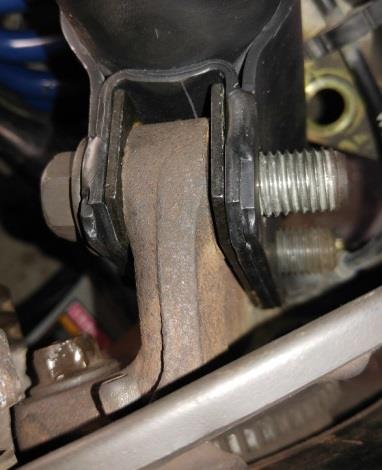
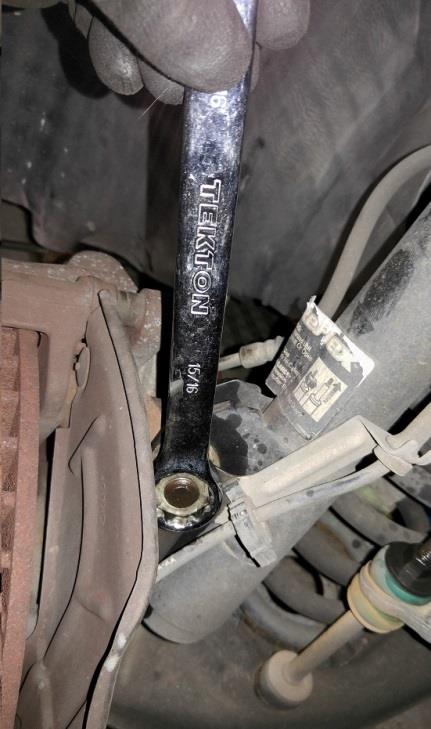
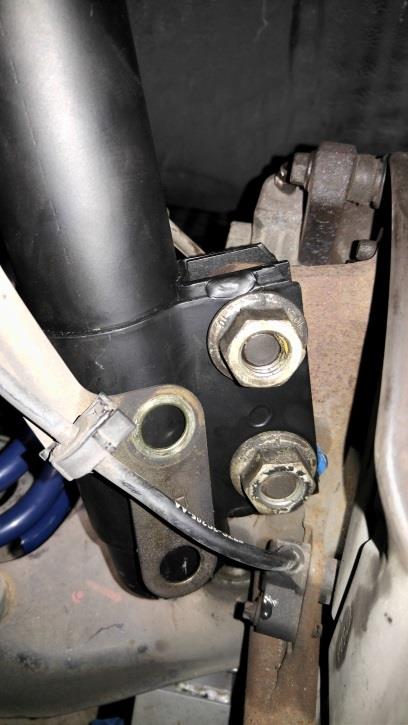
Using a 15/16” Wrench and a 13/16” Wrench and/or a 21 MM socket, tighten the bolts and nuts. (Recommended torque for the nuts on to spindle is 148 lb-ft, and 21 lb-ft for the ABS bracket nut.)
Use a 15/16” Wrench and a Crescent Wrench to tighten the nut on the top side of the strut. (Recommended torque is 74 lb-ft).
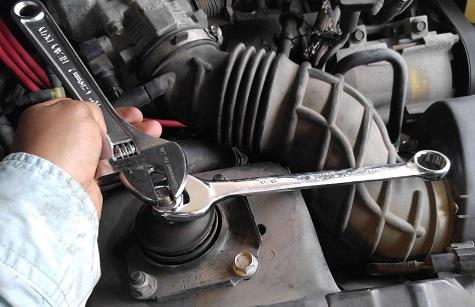
12. Repeat steps 3.1 through 4.11 to remove and install the strut on the opposite side.
13. Once both struts are completed, mount the wheels and tighten the wheel lugs. Use your floor jack to lift the car and remove the jack stands.
14. Lower the car slowly, and fully tighten your lug nuts. (Recommended torque is 95 lb-ft). Continue to the rear shocks installation.
REAR SHOCK REMOVAL
The rear shocks are the easiest part of this install, and it should now be easier.
Start off by loosening the lug nuts on both wheels, (give them 2 full turns).
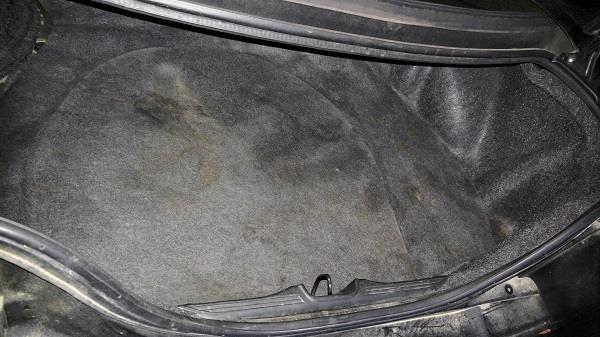
Open the trunk and start removing the carpet panels. Loosen the metal clips and plastic nuts off both sides. Then pull on the panels, you may have to wiggle them side to side as you pull on them.
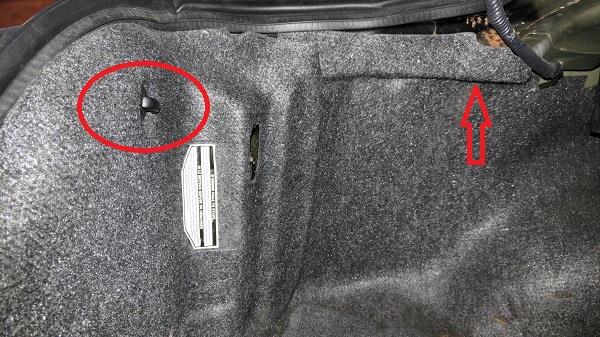
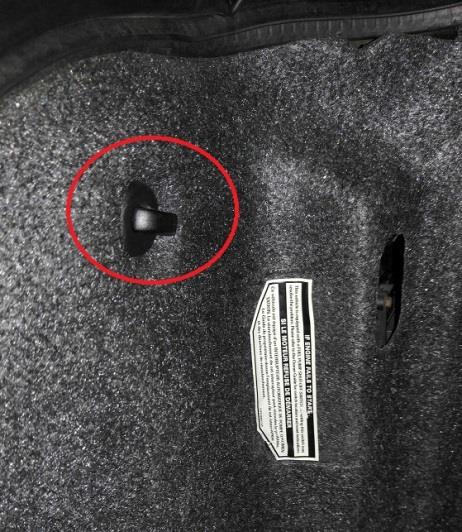
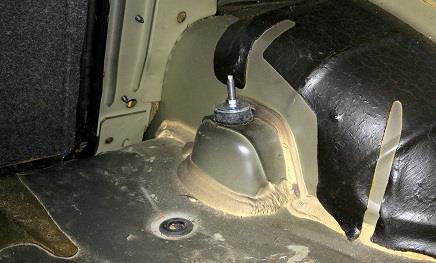
Once the panels are removed, use a 15 MM deep socket to remove the nut holding the shock. You will reuse the washers, so keep them aside in a safe location. Do the same for the opposite side.
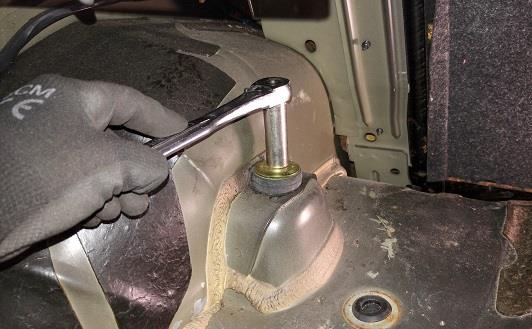
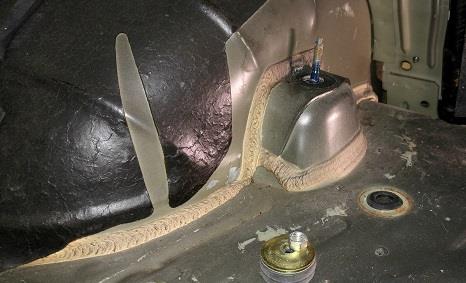
4. Jack the rear end of the car, and support it on jack stands. (I supported the rear end by putting two jack stands underneath the drive axle.
5. Remove the lug nuts and the wheels.
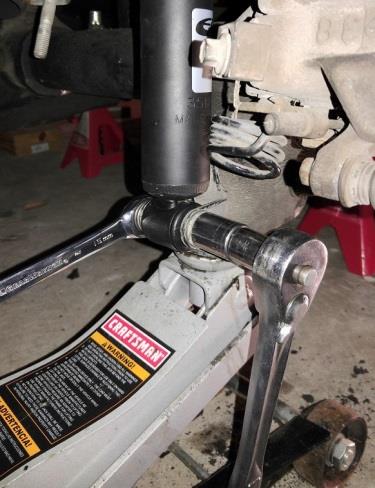
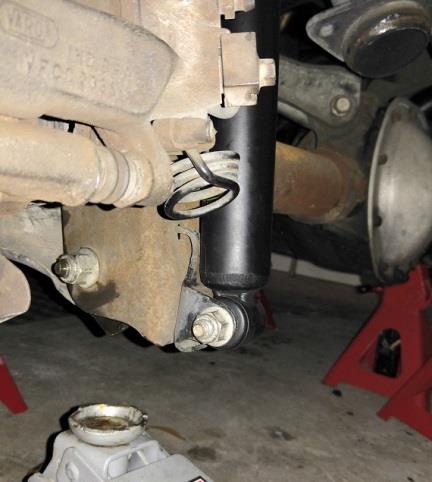
6. Use an 18 MM socket and a 15 MM socket to loosen the nut holding the shock to the axle. If you don’t have two ratchets, substitute a socket for a Wrench.
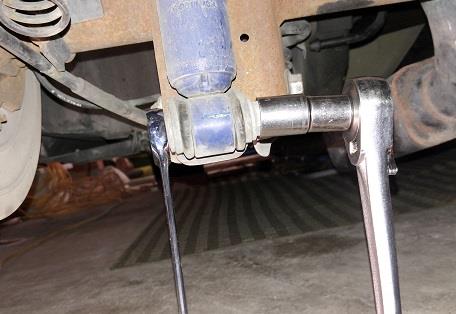
7. Once the nut is removed, there’s a small possibility that the bolt will come out easily. Not for me.
8. Put the floor jack underneath the shock mount and slowly raise the jack. This will also help remove tension on the bolt. Pull on the bolt as you raise the jack.
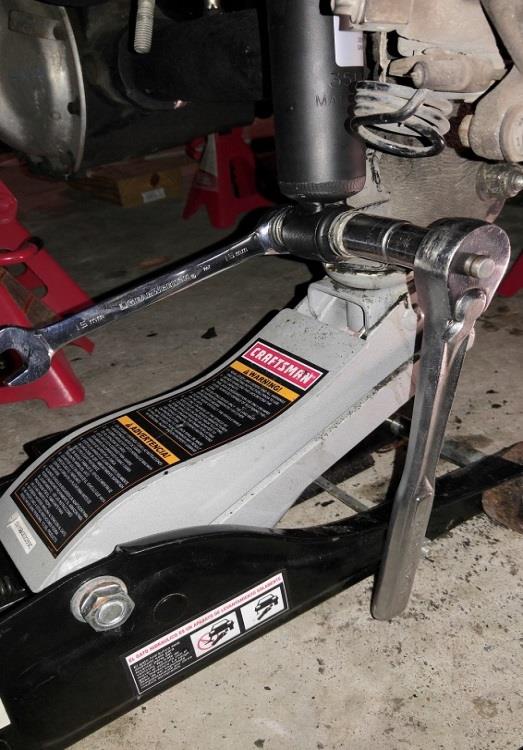
9. Once the bolt is removed, you can slowly pull the shock out. Once the shock is removed, take some time to examine your other components and see if anything may need servicing or replacing.
10. Compare your old shock assembly with the new. The circled items are the things you will reuse.
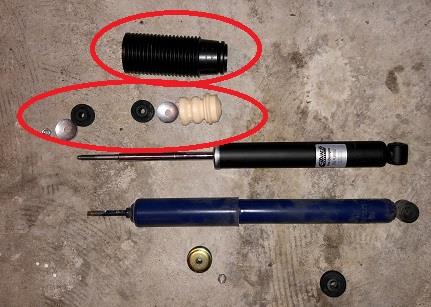
11. Continue to the installation
REAR SHOCK INSTALLATION
Insert the bump stop into the shock rod, with the flat side facing up. Then insert the washer with the cup side facing up, followed by one of the bushings. Install the dust boot with the larger ID in first.
Place your new Eibach shock into the top shock mount.
Insert the 2nd bushing into the shock rod, followed by the metal washer with its cup side facing down. Then install the nut, but do not fully tighten it.
Line up the bottom side of the shock to the bottom shock mount, you have to raise or lower the jack to get the holes to line up.
Once the holes are lined up, insert the bolt and install the nut.
Use your 18 MM Wrench and 15 MM socket, (or vise versa), and fully tighten the bolt. (Recommended torque is 59 lb-ft).
Lower the jack stand and continue to the opposite side.
Repeat steps 5.1 through 6.18 for the removal and installation of your 2nd Eibach Shock.
Once both shocks are installed, put your wheels back on and use a 21 MM socket to tighten your lug nuts. (Recommended torque is 95 lb-ft)
Lift the rear end slightly in order to remove your jack stands, and then slowly lower the car.
Once the car is lowered, head into your trunk, use a 15 MM or 16 MM socket, (depending what size nut comes with your kit), and tighten the nuts on the top side of the shock mount. (Recommended torque is 30 lb-ft)
Reinstall your panels.
You’re now complete with the installation of your Eibach Pro-Damper Shocks and Struts.
Before driving off, check everything over. Make sure nothing is lose and that there are no items underneath your car.
Re-connect your battery terminals.
An alignment is recommended after installing shocks and struts, but because this is not my daily driver, I let it sit in the garage for a week in order for the shocks and struts to settle. Give it a few weeks before you see a real difference in height and handling.
