 FREE 1 to 3-Day Delivery on Orders $149+ Details
How to Install Ford Performance Aluminum Radiator (05-14 GT; 12-13 BOSS 302) on your Ford Mustang
Installation Time
2 hours
Tools Required
- Floor Jack and Jack Stands (or a Lift)
- Flashlight
- 1/4" Drive Ratchet
- 1/4" Drive 10mm Socket (Deep and Shallow)
- 1/4" Drive 7mm Socket
- 1/4" Drive E5 Inverted Torx Socket
- 3/8" Drive Ratchet
- 3/8" Drive 12mm Socket
- 3/8" Drive 19mm Socket
- Catch Pan
- Channel Lock Pliers
- Flat Head Screwdriver
- Fastener Removal Tool
- Small Pick Tool or Pocket Screwdriver
- Safety Glasses
- 1 to 2 Gallons of Coolant (I Recommend OEM Motorcraft Orange Coolant)

Shop Parts in this Guide
**Highly recommended to allow vehicle to sit for a few hours without running so the system is cool to avoid burns!
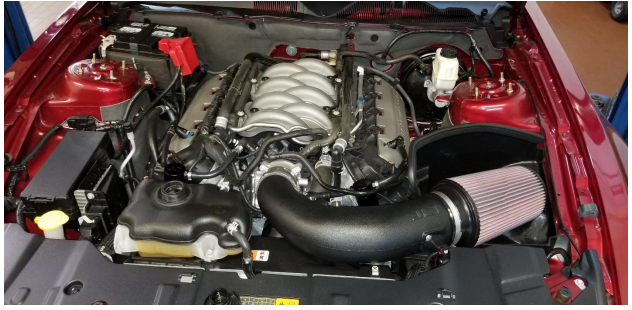
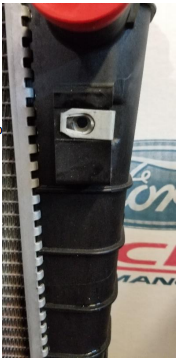
Before
Installation Instructions
Step 1: Using a floor jack at the designated lifting points raise your mustang so the vehicle is as high as you can safely make it and install jack stands under the frame rails or on the pinch weld. If using a lift set the lift at the lifting points shown by little arrows on the side skirt on all 4 corners and lift the car just so the wheels are off the ground and check it is secure.
Step 2: Remove cap on coolant reservoir slowly to relieve any pressure in system.
Step 3: From bottom of the vehicle remove front splash guard by removing the 17 7mm screws. There is another plastic panel behind the front one, normally removed to perform oil service. Remove 3 8mm screws from this panel and let it hang down.
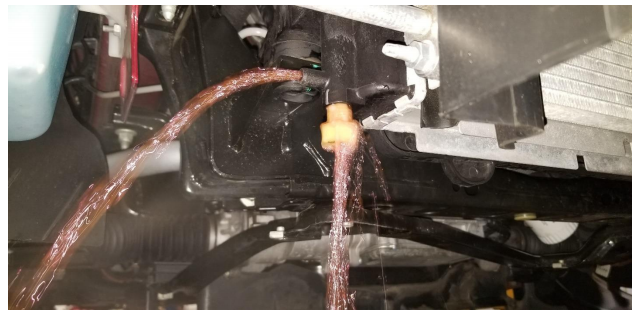
Step 4: On the passenger side, on the bottom of the radiator you will see a white plug. Position your catch pan under the plug and slightly out towards the passenger side as the fluid will drain straight down and out of the side. See picture for clarity. Using a 19mm socket, loosen plug and allow radiator to drain.
Step 5: While still under the vehicle, move to the driver side and locate the lower radiator hose connection to the radiator. Using channel lock pliers, you will squeeze the two tabs on the clamp. While squeezing the tabs slide the clamp back far enough that it is no longer over the radiator connection. Position your catch pan under hose and pull hose off radiator. Not much fluid should come out as it was already drained but there will still be some in there so watch your eyes and face when removing hose.

Step 6: On each side of the lower radiator you will see 10mm nuts, one per side, holding the condenser to the radiator. Remove both 10mm nuts. Using an E5 inverted Torx socket, remove the studs that the nuts were on.
Step 7: Back under the hood now, remove the strut tower brace by removing the 4 12mm nuts holding it to the strut towers. With the strut brace out of the way, remove engine cover by gently pulling up in the front and then the rear.
Step 8: Remove intake pipe. If you have a cold air intake install this should be quicker. Using a flat head loosen hose clamp holding intake pipe to throttle body. If still installed, use pliers to remove clamp from sound tube and disconnect. Unplug mass air flow sensor. Unlatch airbox and remove intake pipe. Next remove airbox, my JLT intake had just 1 10mm bolt holding it in, stock intake and other aftermarket ones may differ slightly. The fresh air duct that goes from the side of radiator into airbox also needs to be removed. Using a flat head, you can just pull it out past the small tab that holds it in place.
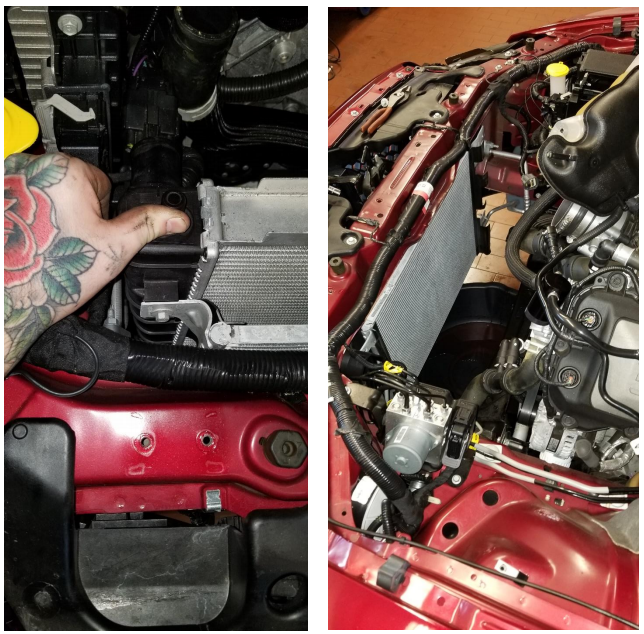
Step 9: Remove radiator cover using a small flat head or fastener removal tool to remove the 8 clips holding it in.
Step 10: Using your pliers remove the clamps holding both small hoses going into top of coolant reservoir. Disconnect hose going to engine and move to the side. The other hose goes to the top of the radiator, remove this form the radiator side also and put hose to the side. Remove both 10mm bolts holding reservoir in. Reservoir should be empty at this point but reinstall the cap so it doesn’t drip everywhere and move reservoir off to the side on top of the engine, leaving the lower hose connected to it.
Step 11: Remove clamp on upper hose and pull hose off. Disconnect fan plug connection. There is 2 10mm bolts holding fan to radiator, remove these. Pull fan straight up and out of engine bay. When you first pull it up you may have to move it around a little to get pat hoses and things, but it shouldn’t fight you too much.
Step 12: There are 2 brackets with rubber inserts on top of the radiator. Remove the 2 10mm bolts on each side bracket and remove brackets. With these removed the radiator will move back a little towards the engine, just enough to remove the 2 10mm bolts holding the condenser on to the radiator. After removing these, pull radiator straight up and out of engine bay.
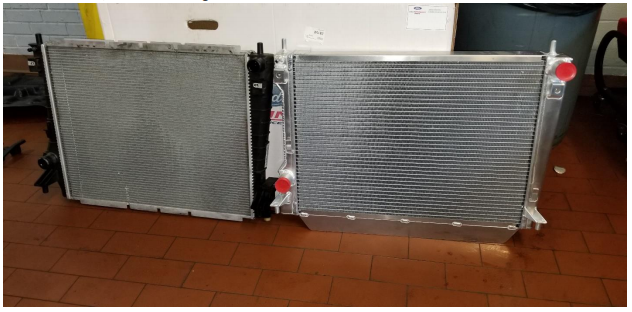
Step 13: There are little tabs on radiator that all the bolts thread into. These need to be transferred to the new radiator, there are 6 altogether.
Step 14: From this point you will reinstall radiator and follow all instruction Steps in reverse. Install radiator, top condenser bolts, top brackets, install Fan, connect upper hose, install reservoir, install hoses on reservoir and top Of radiator, back on the bottom install the lower hose and make sure the Drain valve on new radiator is closed. Also reinstall lower condenser studs And nuts.
Step 15: Fill cooling system with new fresh coolant. Bleed system as per Included Ford Racing instructions. During this process you will obviously Need to check for any leaks. If there are no leaks you can begin to reinstall The radiator cover, the lower panels, the intake, engine cover and strut brace.
Step 16: When system is full and hot, and everything is operating correctly, and you have reinstalled everything, road test the vehicle. Allow the vehicle to get nice and hot and keep your eye on temperature gauge and coolant light. Let vehicle cool before removing cap, and check and add coolant as needed.
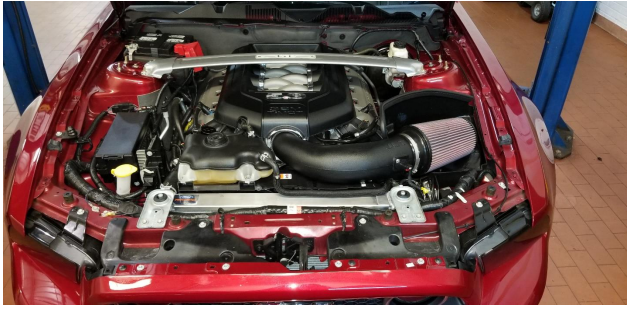
After
Installation Instructions written by American Muscle customer Corey Davis 10.25.17

