FREE 1 to 3-Day Delivery on Orders $149+ Details
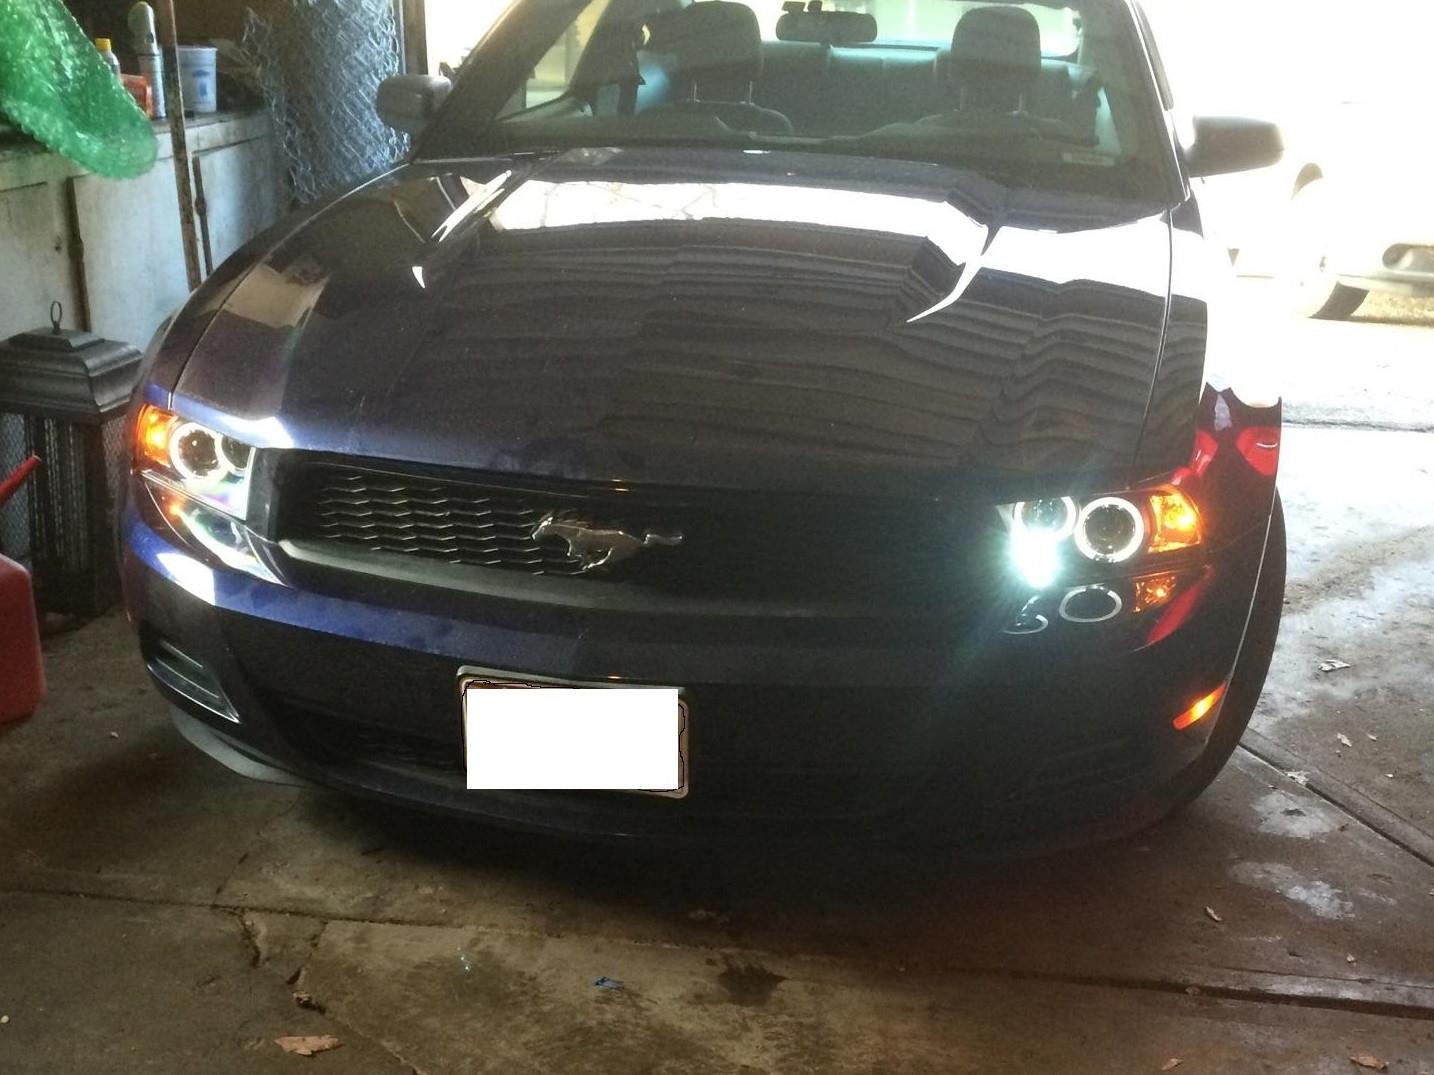
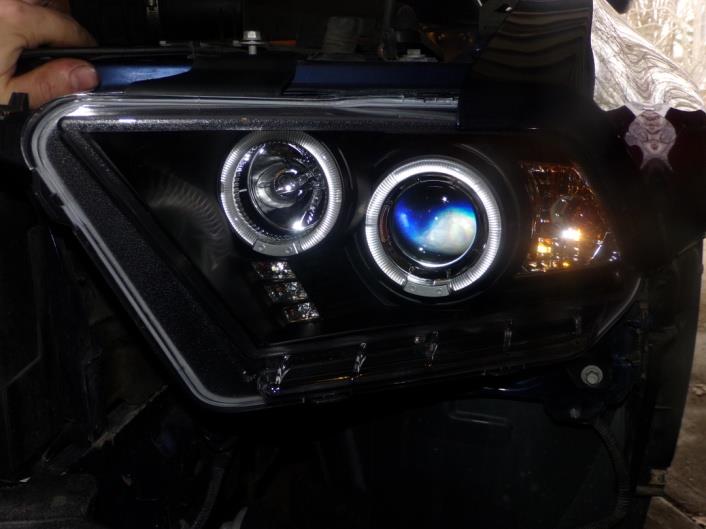
How To Install Black Projector Dual Halo Headlights - LED on your 2010-2012 GT, V6 Mustang
Installation Time
1 hours
Tools Required
- Clip popper tool
- Ratchet
- Extension
- 7,8 and 10 mm sockets
- Pliers to crimp wire connectors

Shop Parts in this Guide
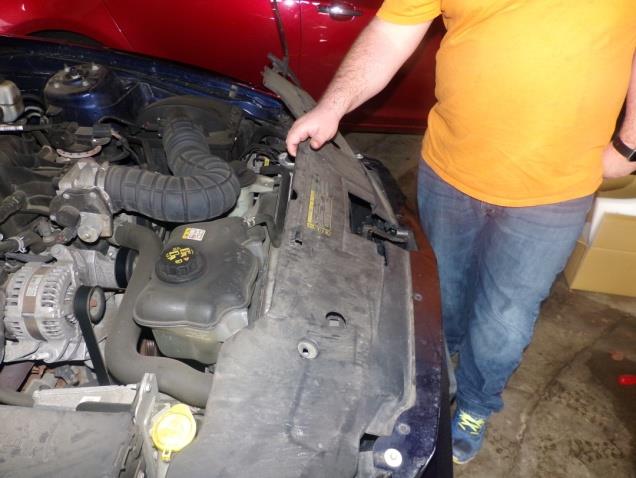
Step 1
Open hood and remove the clips from the plastic cover behind and attached to the bumper. Requires removal of two 8mm screws, one on each side of the cover attached to the front bumper and 4 clips scattered across the cover itself.
Step 2
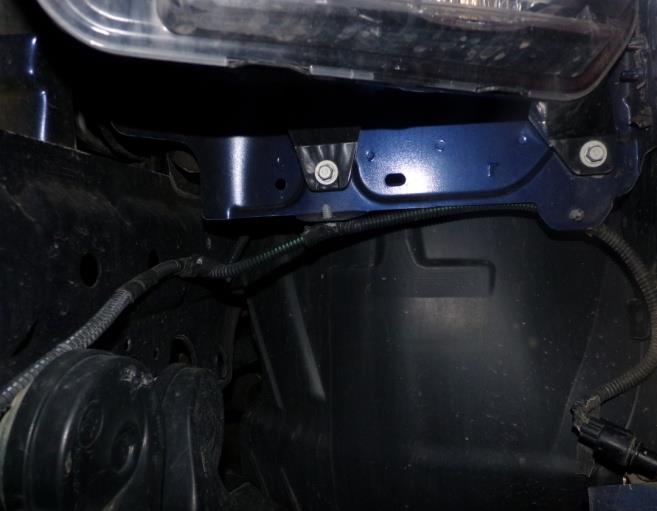
Remove the 4 bolts on the bottom of the front bumper. Also the two 7mm bolts in the wheel well in front of both tires. From the Back of the bumper where those screws were pull out and forward to remove front bumper from the car.
ATTENTION: If equipped with fog lights and side marker lights the wire harness will have to be disconnected to remove.
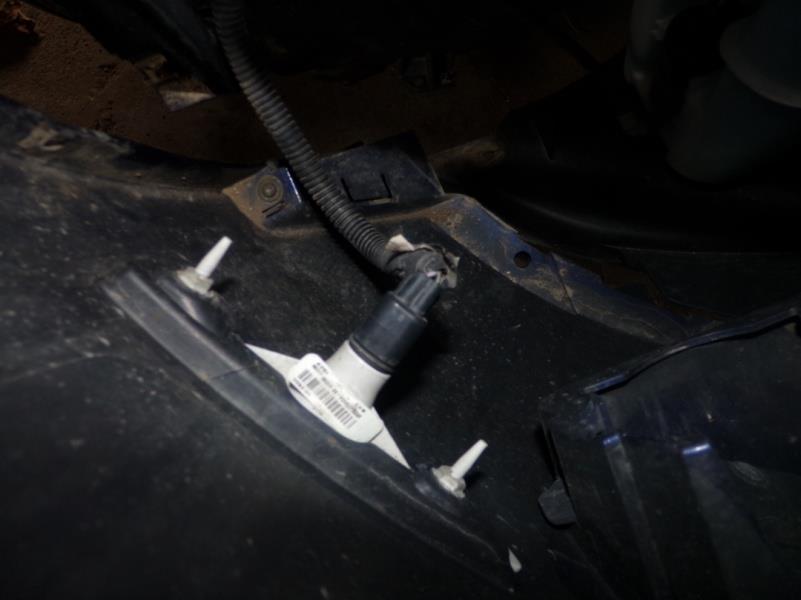
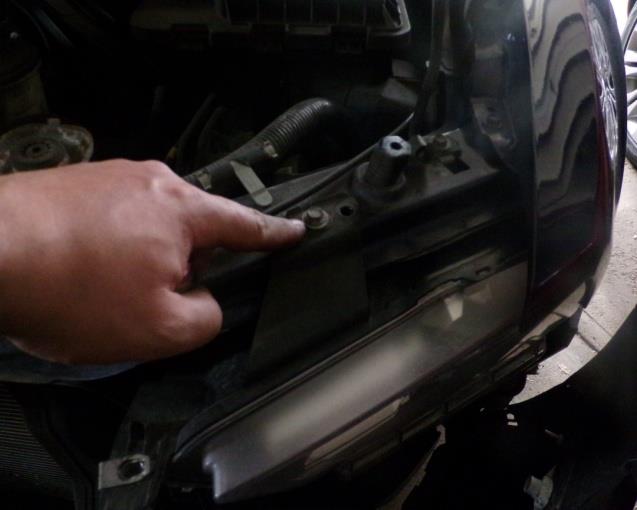
Step 3
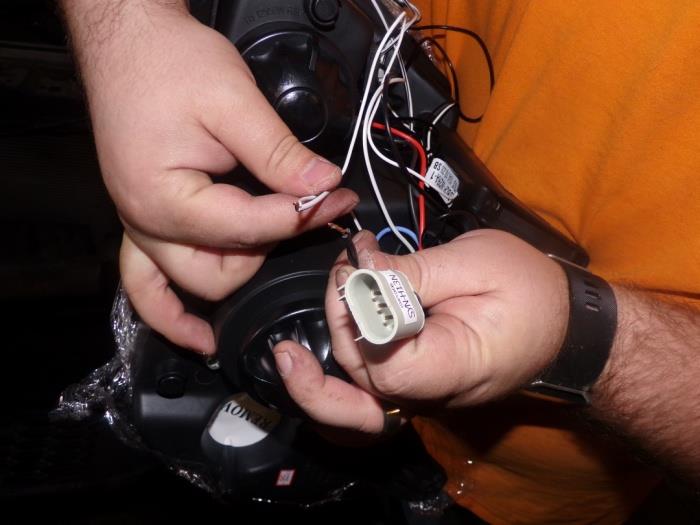
To remove the headlights remove the three 10mm bolts, one on top of the headlight and two underneath. Unplug the main headlight connector and twist out the blinker it will be used in the new headlight after you replace the bulb with provided bulb in this kit.
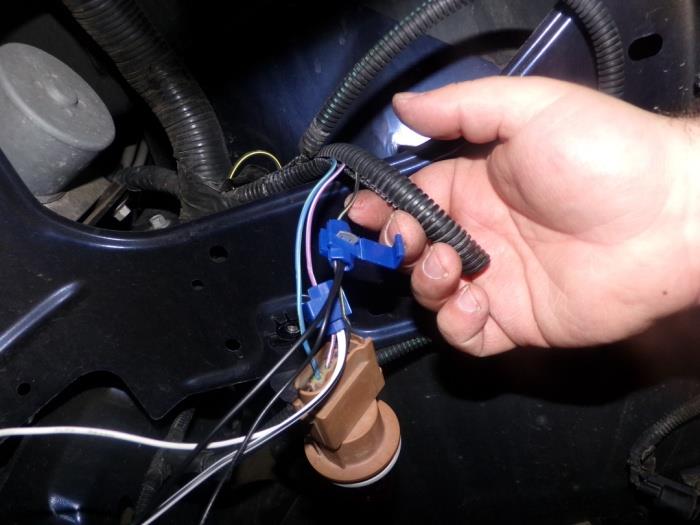
Step 4
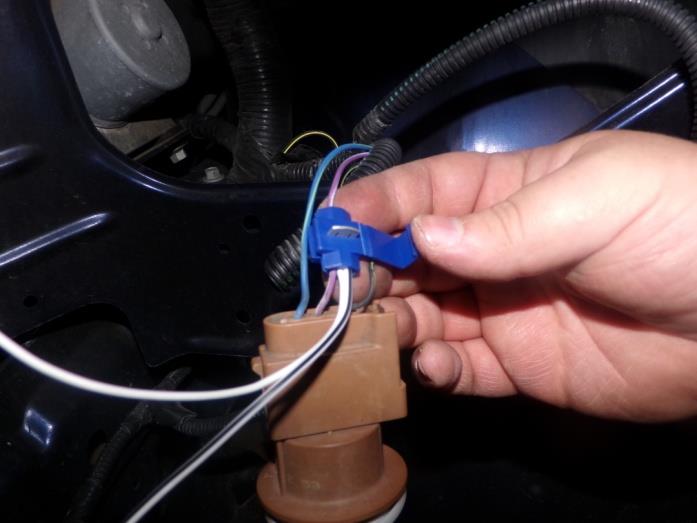
Remove some of the tape from the 3 wires on the main headlight plug to prepare to splice into the wires with provided wire connectors for the Halos and LED lights. Twist the 2 white wires together and the 2 black wires together and crimp them to the corresponding wires from your harness. Replace the blinker bulb with provided bulbs.
Step 5
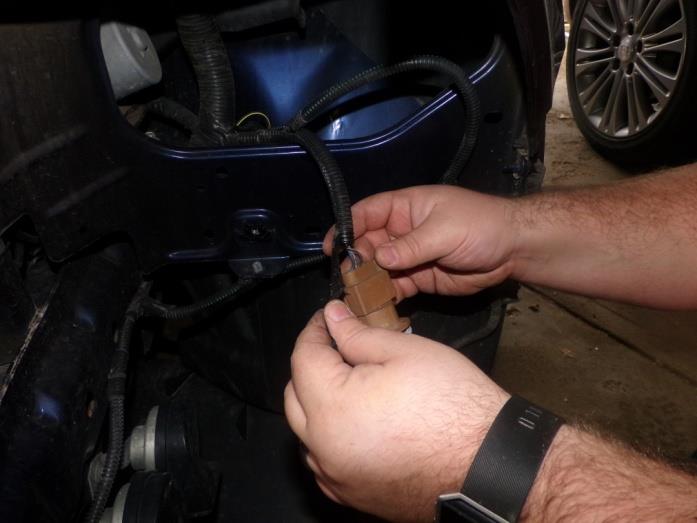
Attach the new headlight to the connectors and twist the blinker into the new headlight. Check to make sure all lights are working properly then fasten the headlight to the body with the three 10mm bolts from step 3 and adjust before tightening them completely.

Step 6
Attach the Bumper by snapping it back on and replacing the bolts removed in step 2. Replace plastic cover from step 1 by replacing the clips and bolts mentioned in step 1.
Step 7
Close the hood and pat yourself on the back as you admire your beautiful new headlights.
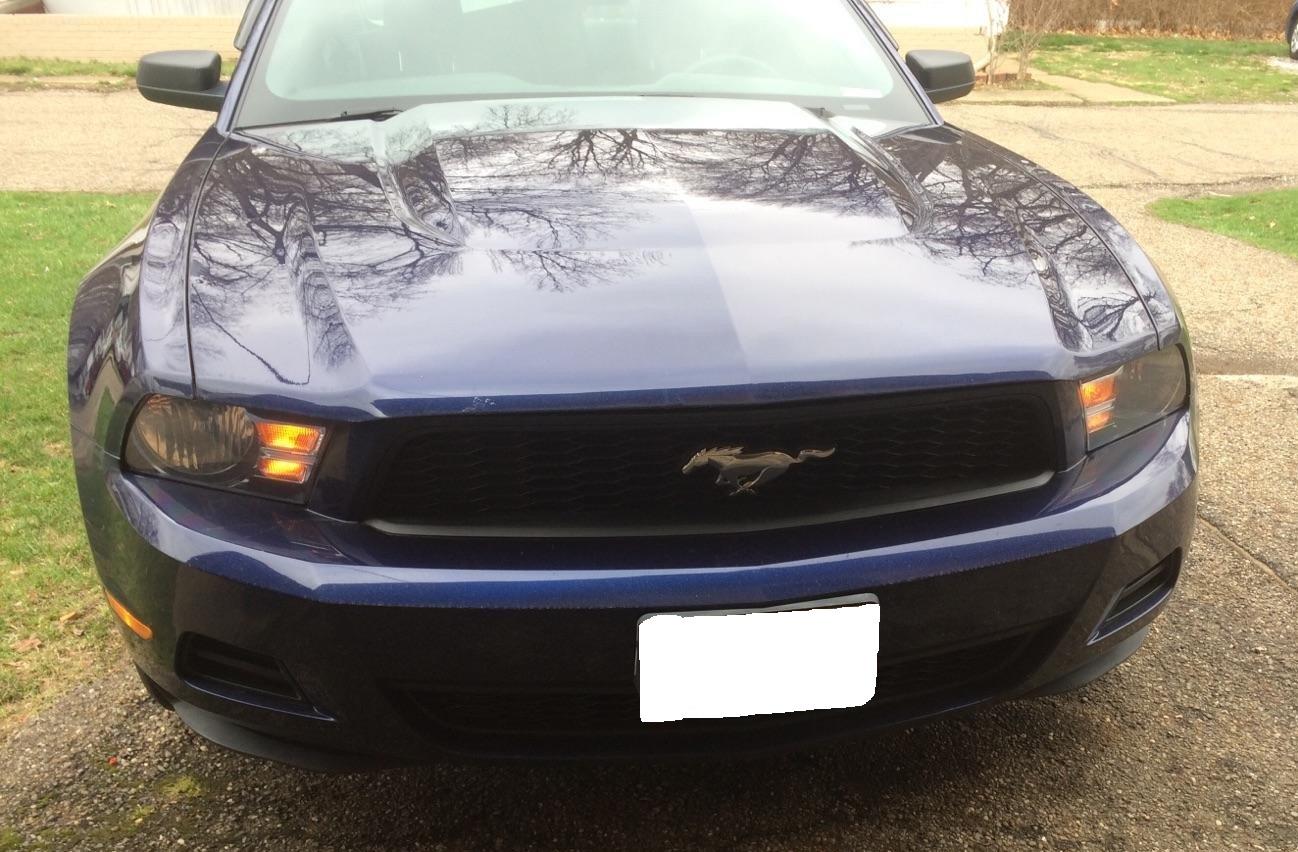
BEFORE
AFTER