 FREE 1 to 3-Day Delivery on Orders $149+ Details
J&M Mustang 4-Bolt Caster Camber Plates Installation Guide ('94-'04)
Tools Required
- Floor Jack
- (2) Jack Stands
- Impact Gun
- Air Compressor
- Drill and Drill Bit (1/4" and 13/32")
- Deep Well Sockets
- Metric Wrench Set
- Torque Wrench

Shop Parts in this Guide
Installation
1. Check to make sure all items are included in the kit are there, and that they are in good condition.
2. For safety, the emergency brake should be on and the rear tires should be chocked.
3. Jack up the front of car and place it on jack stands. Also, check to see that the chocks have not moved.
4.Remove the front wheels and tires.
5. Remove the push pins that hold the front inside fender cover, in order to access bottom of the strut mounting unit
6. Using a floor jack, preload the suspension by jacking up on the control arm, just enough to take the weight off the strut.
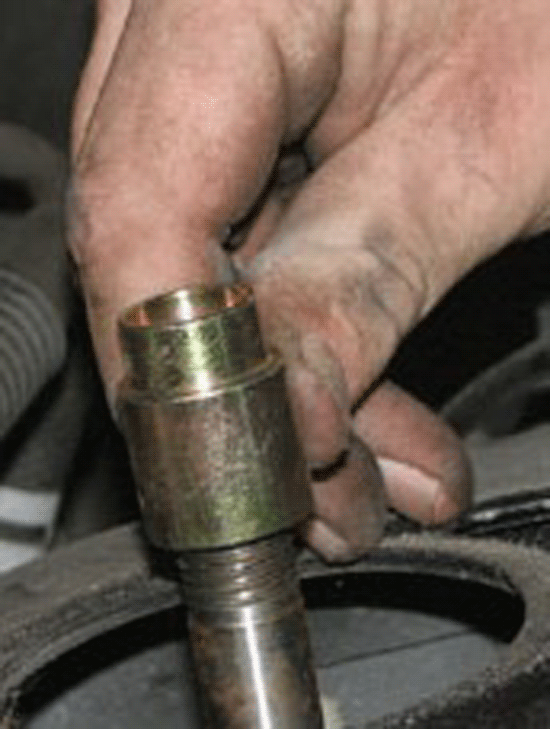
7. Remove the strut mounting nut, using an impact gun.
8. Remove the large top washer and rubber bushing from the strut.
9. Remove the three nuts holding the existing plate in place
10.Remove the strut mounting bracket by drilling out any rivets holding it in place.
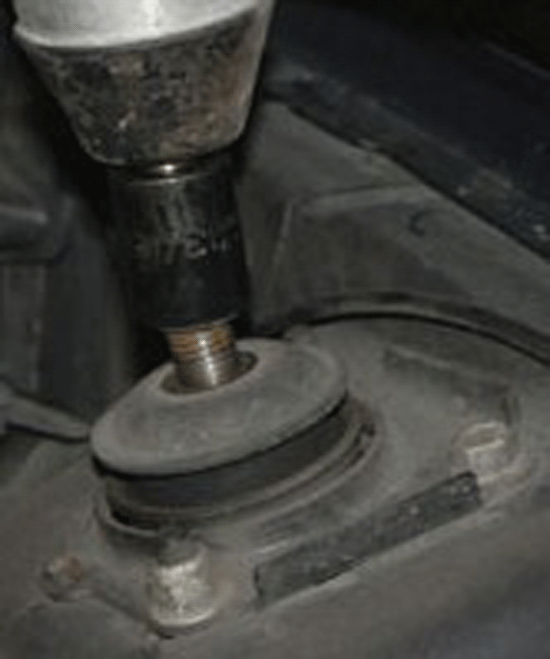
11. Lower the jack in order to bring the strut shaft down through the top hole of the strut tower.
12. When pushing the strut down through the hole and clear of the bottom plate, be careful not to let it spring back and hit the fender. To gain clearance, compress the strut until the rod is below the strut tower.
13. Remove the bottom strut mounting plate.
14. If using the fourth bolt option, follow steps 12-16 (coil over option).
15. Install the new lower bolt plate with three studs underneath the strut tower, so the studs protrude in to the engine compartment.
16. Attach the top camber plate, without the bearing housing attached, and slide in the most positive camber position possible (toward the outside of the vehicle).

17. Mark the 4th bolt location, which will also be the most positive camber location (Check two or more times before drilling).
18. Center punch and drill using a 1/4" pilot hole. Finish with a 13/32" drill bit.
19. Place the 15mm strut spacer on the strut shaft (needed for strut clearance in engine compartment).
20. Install the new lower bolt plate over the strut.
21. Compress the strut and slide unit up through the mounting slots of the factory tower.
22. Install the.270” thick spacers onto each of the lower bolt plate studs.
23. Install the top camber plate with the bearing cup plate over the studs of the lower bolt plate.
24. Test fit, making sure strut body does NOT contact the lower bolt plate. It needs to slide seamlessly.
25. Place the 10mm washers on all studs.
26. Hand tighten the 10mm nylon locks.
27. Slide the bolt plate to the most positive location, toward the outside of the vehicle. Then, tighten down with wrench.
28. Place the 10mm strut spacer over the strut tower.
29. Install the strut shaft nut and torque 60-90 lb-ft, using impact gun.
30. Check to verify that the strut does not hit the hood when closed.

31. Reinstall the front wheels and tires. Torque to factory specifications.
32. Lower the floor jack.
33. Repeat on other side of vehicle.
34. Immediately have your vehicle professionally aligned. Alignment will improve handling and decrease tire wear.
35. Remove the three bolts that hold the existing strut mounting plates in place, with the 14 mm socket wrench. If removing stock mounting plates, be sure to keep the factory plate handy, as it will be needed later.
Installation instructions provided by AmericanMuscle customer Charles Bixler 8.7.08
