 FREE 1 to 3-Day Delivery on Orders $149+ Details
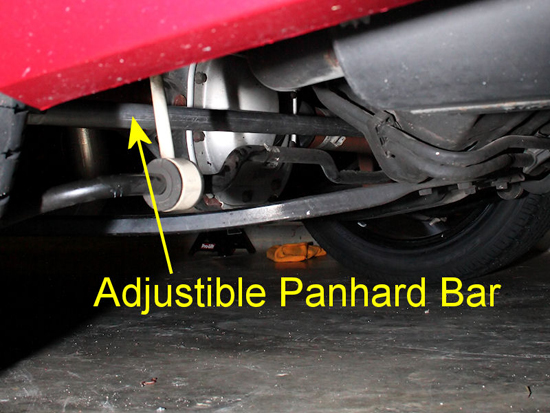
J&M Mustang Adjustable Panhard Rod ('05-'10 V6; '05-'11 GT, GT500) - Installation Instructions
Installation Time
2 hours
Tools Required
- Tools needed: At first, replacing the panhard bar may appear to be an intimidating task. After all, it’s part of the suspension, and that’s not exactly the same thing as mounting on a pair of side scoops with some double sided 3M tape. However, you’ll soon see that replacing your panhard bar isn’t that complicated of a task. You just need a few basic tools. Obviously air tools would make this even simpler, but given most people do not have access to them we’ll stick to the basics. Socket Wrench
- Torque Wrench
- 18mm Socket
- 18mm Wrench
- 1 inch Wrench (Or Adjustable Wrench)
- 1-1/8 inch Wrench (Or Adjustable Wrench)
- Jack
- Jack Stands
Shop Parts in this Guide
Installation
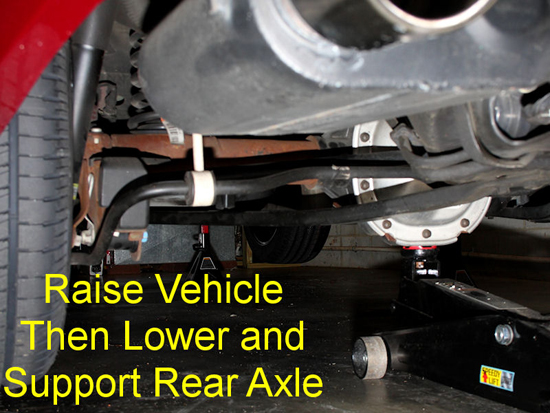
1. You’ll want to jack the car up first, and then set it on jack stands. The location of the front jack stands isn’t crucial, so long as they properly support the vehicle. The rear jack stands should be placed so they support the chassis of the vehicle, not the rear axle. I used the support areas directly in front of the rear tires. This will allow you to lower the rear axle and support it with the jack. Again, make sure the car is supported by the jack stands, and only the rear axle is supported by the jack. You certainly don’t want to be crawling and wrenching under a car supported only by a jack! You can do this swap with the tires on the vehicle, but you’lldefinitely have more room with them removed. Note that I removed my wheels and tires for clarity purposes in some of the pictures.
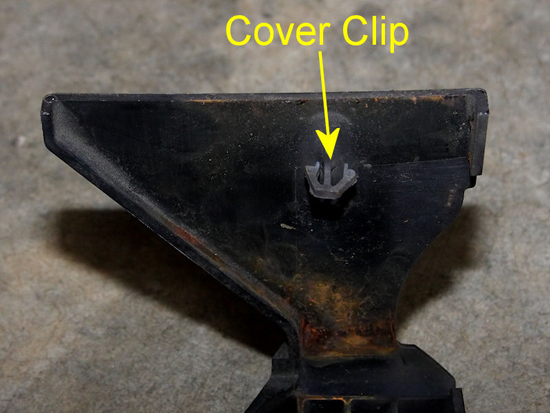
2. Next, you’ll need to crawl under the car and remove the plastic cover that resides over the bolt on the driver’s side end of the factory panhard bar. You should be able to grab the rear of the cover and pull it back. Then lift the top up, and it should snap off. A little plastic clip on the underside of the cover is all that holds it in place. You can see this clip in the second picture below.

3. Next, it’s time to start wrenching. Use your 18mm socket and socket wrench to loosen the bolt that was behind the plastic cover. There is a nut on the other end of the bolt that will drop once it’s free. I left the bolt in place, just to support the factory panhard bar while working on the other side.
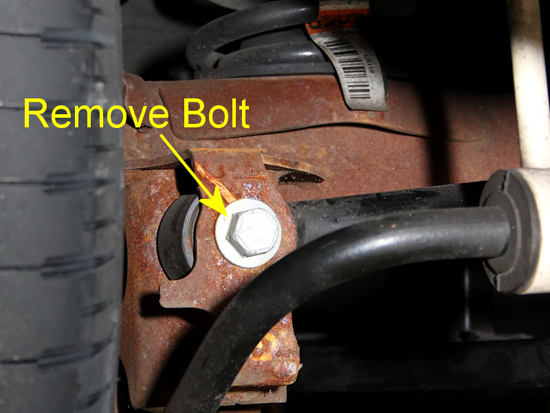
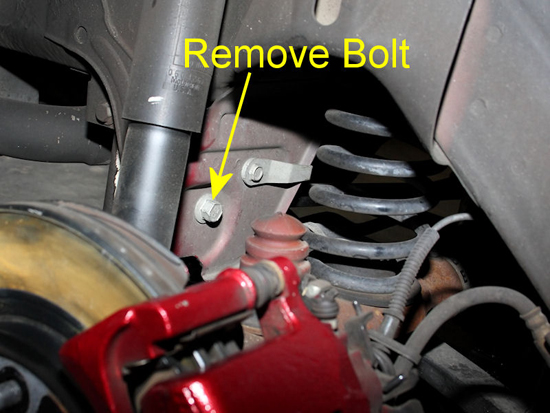
4. Now, head to the passenger side of your car, and the forward facing side of the panhard bar mount. While it’s not a requirement, this is an example of where removal of the wheels and tires really helps. Using your 18mm socket wrench, loosen the bolt indicated in the picture below. The nut on the other side should drop off once you have freed it. Leave the bolt in place for the moment, just as a support for the panhard bar.
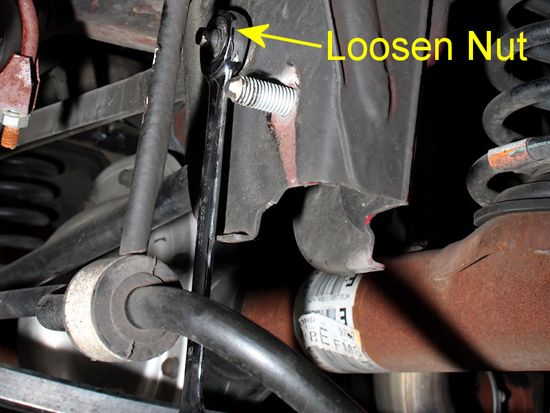
5. The panhard bar will not free itself until we loosen the nut for the panhard bar support brace. It’s located just above where the nut on the bolt we were working with came from. Clearance is a little tighter here, and so an 18mm wrench comes in handy. You don’t need to remove this nut, merely loosen it a few rounds and take the pressure off of the panhard bar. Once complete, you should be able to remove the panhard bar bolt, and drop the passenger side of the bar. Following that, remove the bolt for the driver’s side of the bar, and then remove the bar completely from the vehicle. You’re halfway to completion!
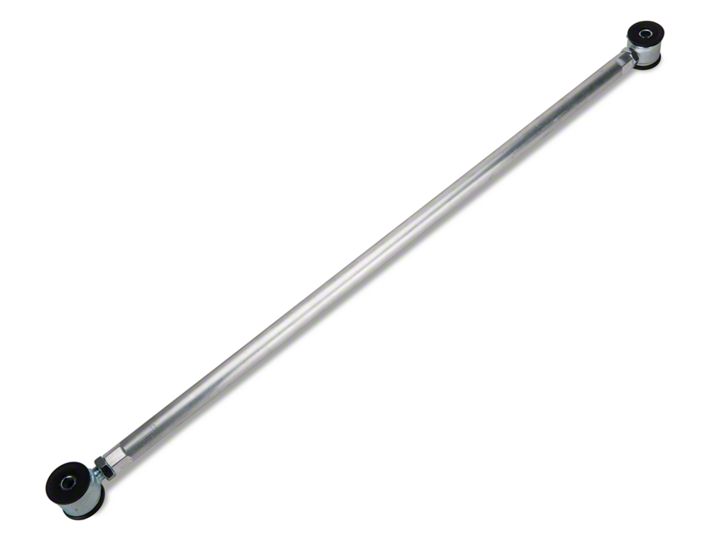
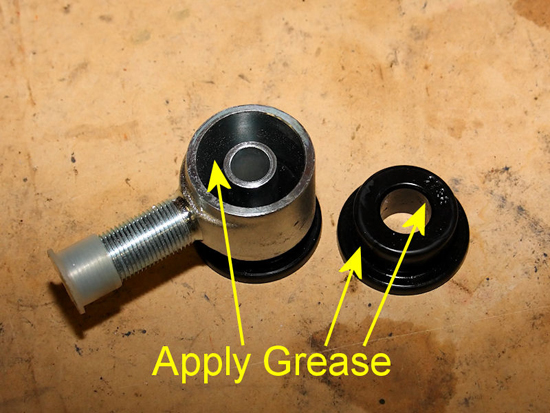
6. Next, it’s time to assemble the J&M Panhard Bar. Apply some of the supplied grease to the outer and inner bushing surfaces before assembling them.
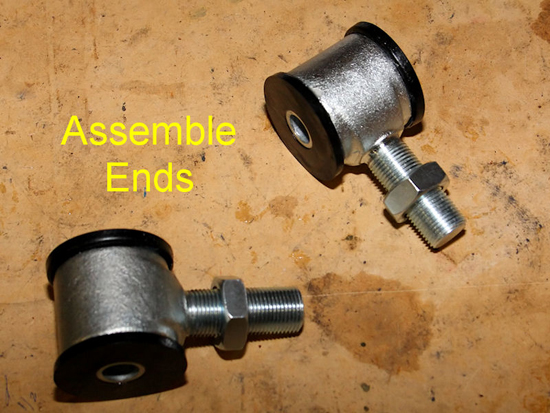
7. The assembled ends should look like the ones in the picture below. Don’t forget to thread the jam nuts into place, andkeep in mind that one of the ends of the rod is reverse-threaded!
8. Thread the ends into the aluminum rod matching the amount of threads on each end, as you’ll want the ends to be equal. Then place one of the bolts into both the factory bar end, and the J&M bar end, to hold them together.
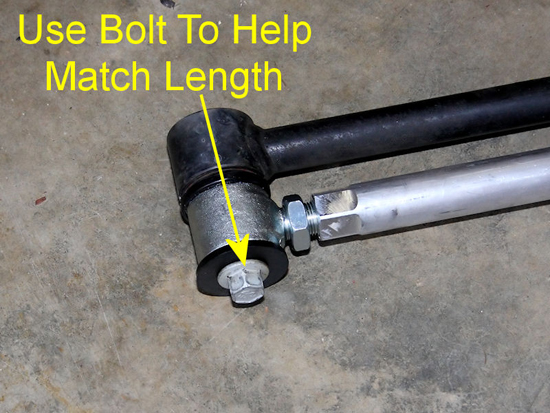
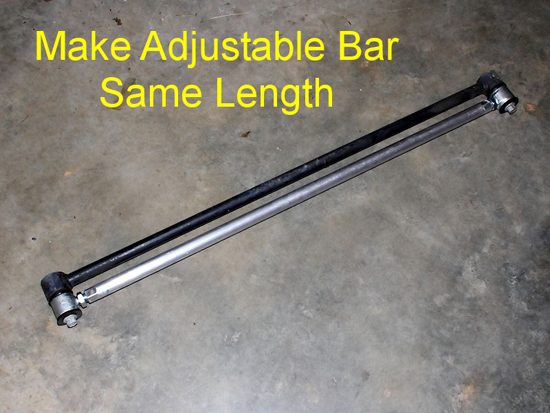
9. Turning both ends one turn at a time, to keep the amount they’re threaded in matching, match the J&M panhard bar to the length of the factory bar. Use the other bolt to ensure the holes in the two bar assemblies are exactly equal. You’ll perform your adjustment with the new panhard bar installed at the stock length. It’s more difficult to install the bar, if the size is different than the factory bar which you removed.
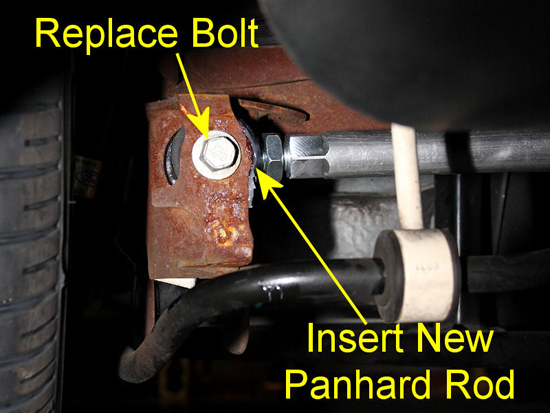
10. With the panhard bar readied, it’s time to place it onto the vehicle. Installation should be the reverse of removal. Since the rear axle of the Mustang isn’t painted, it isn’t unusual to have some surface rust on it. You can clean the inside of the driver’s side bracket up a bit, but the fit may still be tight. If you apply a bit of the supplied grease to the bushings, the bar end will slide into place easier. Replace the bolt, and thread the nut into place. However, do not tighten the nut and bolt just yet.
11. The other side of the panhard bar should be much easier, as there should be no surface rust to deal with. Go ahead and insert the bolt, after installing the passenger side of the bar, and thread the nut into place. Again, do not tighten the bolt and nut up just yet.
12. If the tires were removed, reinstall them and lower the car back to the ground. The car must be properly resting on its suspension before tightening down the fasteners that secure the panhard bar. After the car is resting on its wheels, it’salso a good idea to try and bounce the rear of the car up and down by hand a few times to help settle the suspension. Then tighten all three of the bolts you worked with earlier. They should be two panhard bolts, and the panhard support brace bolt. You’ll want to tighten them back to 129 ft/lbs. of torque. If you need to raise the vehicle back up to gain some clearance, you should raise the rear of the vehicle up by the axle, and support it with jack stands under the axle. This will keep the rear suspension loaded properly during the tightening process.
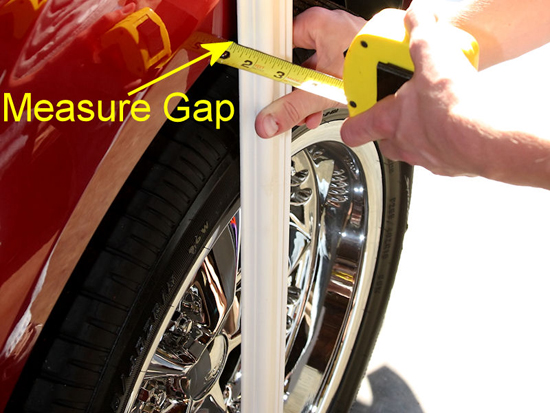
13. Now that the panhard bar has been installed, it’s time to adjust it. The jam nuts should not be tightened down yet, and so you should be able to crawl under the car and twist the panhard bar to adjust your Mustang’s body over the axle. It will take very little effort, and can be accomplished by hand. Ultimately, you want to center the body perfectly over the axle. To check to ensure the body of the car is properly centered, you’ll need to measure each side after you turn the panhard bar a few rounds. Since the middle of my sidewalls of my tires will poke out from the quarter panel just slightly when I’m finished, I found something to make a straight edge, made sure it rested properly on the tire’s sidewall at the top and bottom, and then used a tape measure to check each side. For narrower wheels and tires, you can simply tape a string and weight (to make a plumb-bob) as a reference point to measure from.

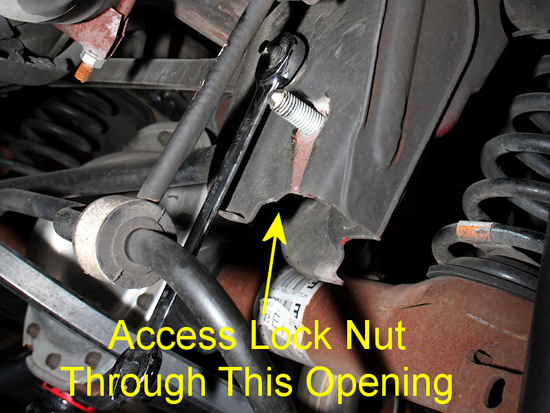
14. It’s time to lock the panhard bar in place. You’ll notice that the jam nut on the passenger side is inaccessible for a wrench. To accomplish tightening the nut, use a screwdriver in the opening that you placed the panhard bar into. The location is illustrated in one of the pictures below, using a picture taken during the removal process. Spin the nut until it contacts the aluminum panhard bar, and then wedge the screwdriver into place to prevent the nut from turning while tightening the panhard bar against it. If you get someone to hold the screwdriver, you can use a 1 inch or adjustable wrench on the opposite end of the bar to help snug it up.
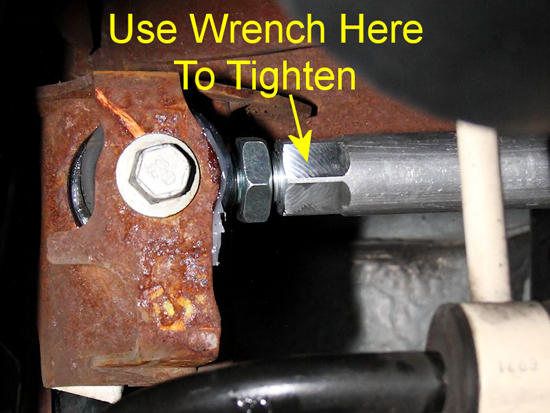
15. Finally, tighten down the jam nut on the other end of the panhard bar. This can be accomplished easily by spinning the nut with a 1-1/8 inch or adjustable wrench.

16. Your installation is now complete. While the panhard bar is not something that’s easily seen, you can feel comfortable with the knowledge that should you change your suspension later on, you can easily tweak the rear suspension so that it’s properly centered under your Mustang!
Related Guides
-
Installation
-
Installation
-
Installation

