 FREE 1 to 3-Day Delivery on Orders $149+ Details
How to Install Magnaflow Competition Cat-Back Exhaust on your Mustang
Installation Time
2 hours
Tools Required
- Lift or Jacks
- Wrenches/Ratchets
- Screwdriver (Optional)
- Gloves
Shop Parts in this Guide
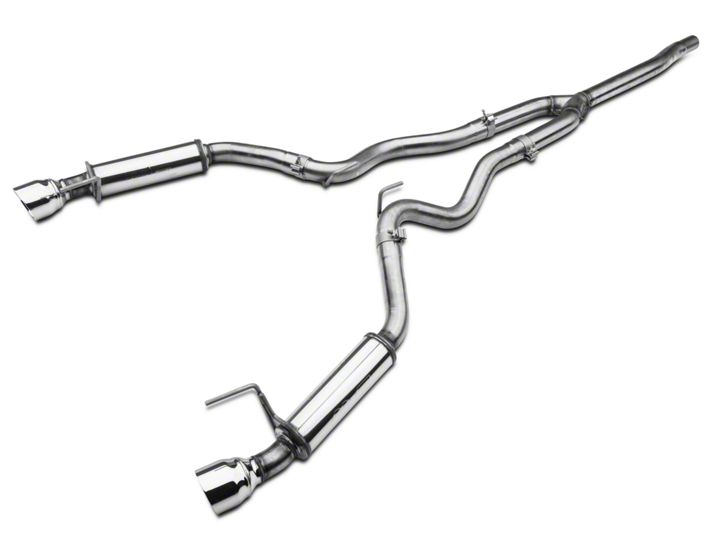
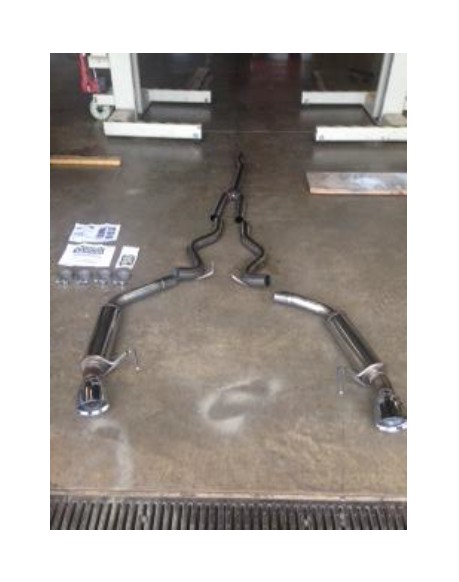
Pre Installation Instructions: Check your parts that you have everything before you get started. You should have 4 clamps and 5 sections of the new muffler system. (Y-pipe, 2 Midpipes, 2 Muffler/Tailpipes)
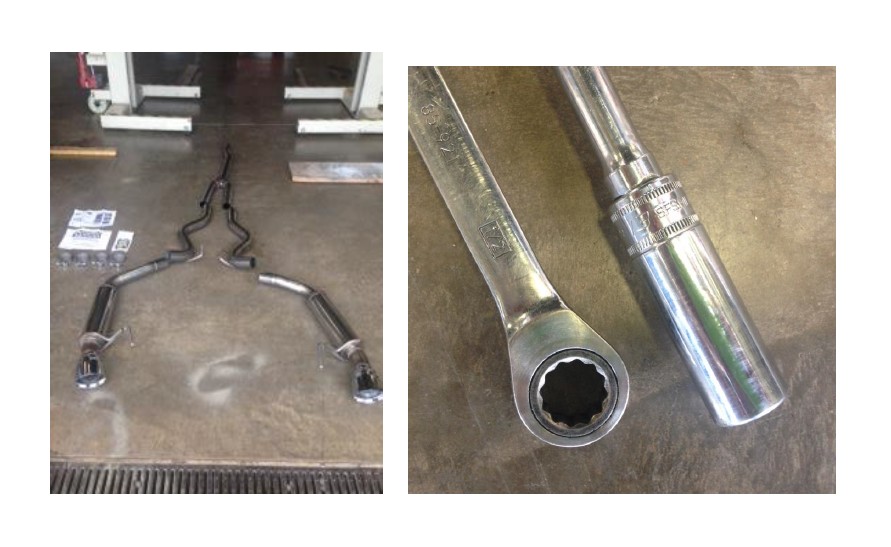
Note: This install was done with hydraulic lifts. The complete removal and install took an hour (with stopping to taking pictures and rummaging in the tool box for the proper socket (#13). It is a PERFECT project for a 2nd person to help (spouse or responsible child), as removing the existing muffler will be easier with a second person.
We did note that if you were doing this install with just jacks it would probably take longer because of the limited amount of space and contortion you might need to use to get the existing muffler system out. A second set of jacks might be useful for dropping the existing system if you use ramps/jacks instead of a lift.
On a good note – The 2016 Ecoboost muffler system is all secured with tabs/hooks. So when you remove all the bolts, it will still stay in place until you are ready to remove it completely. We worked back to front on the removal after we removed the resonator area clamp.
Phase 1: Remove the Existing Muffler System
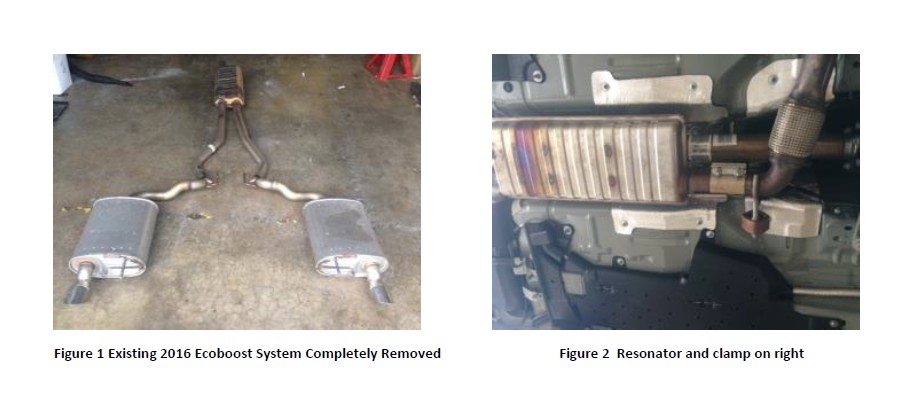
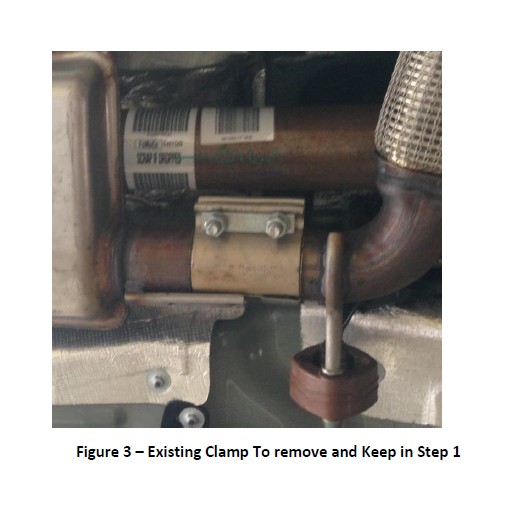
1) Start at front of muffler system (Figure 1) . Locate your rectangular resonator (Figure 2) and the clamp you will be removing (Figure 3). This is pretty intuitive if you follow your muffler system back to the catalytic converter area. There will be 2 bolts to remove on the clamp. You may want to use a screwdriver and penetrating oil to help pry the clamp open if you are working on an older car. Loosen both bolts and remove this clamp. (You will reuse the clamp and bolts)
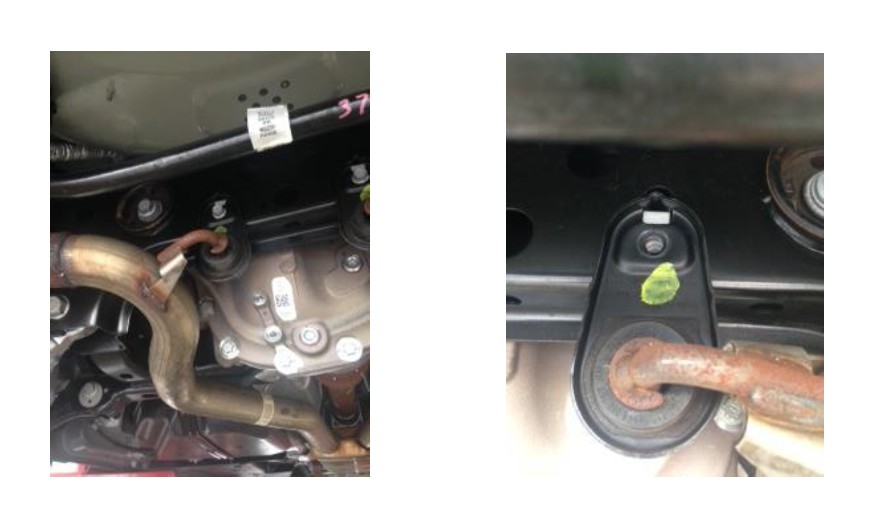
2) Locate the other underbracing/bolts (midpipe area and back at muffler) for the existing system (Figure 4) NOTE: There are hanging tabs so that once you remove your bolts so the existing system will stay in place! (Figure 5). When you remove your entire muffler you will slide the hanger rubber doohickers off and reuse them. (Figure 6)
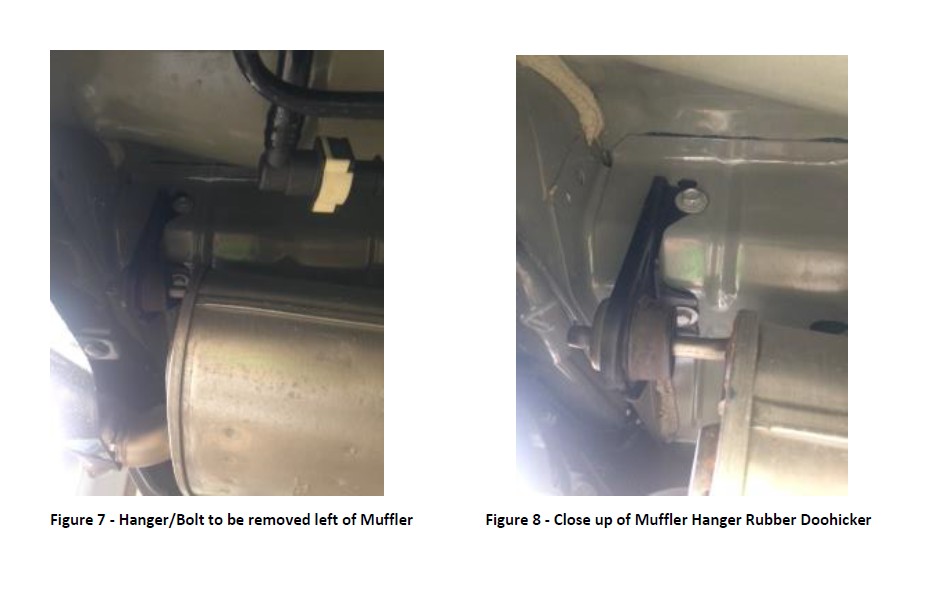
3) Start back at the right muffler and remove the hanger doohicker bolts (Figure 7 & 8 ) and work forward and then remove the right hanger doohicker midpipe bolts. (You will reuse the bolts/washers)
4) Repeat Step 3 for the left muffler.
5) Once your bolts are all removed, lift the old system out. It will remove in one big section. It can be removed with one person, but two (2) are recommended to make it easier. We did it by removing the back and worked toward the front. (The back is heavier, don’t put a child back there to hold it up if you are working with a lift, or they will drop it.)
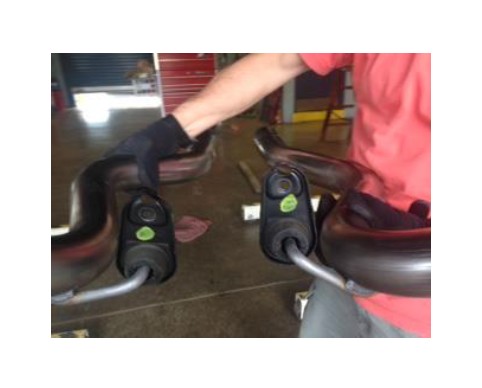
6) Remove the rubber hanger doohickers to reuse on the new system. They will slide onto the new system hanger rods. (Figure 6)
Phase 2: Install the New Magnaflow System
7) You will be starting with the Y pipe install and working backwards. (Figure 9)
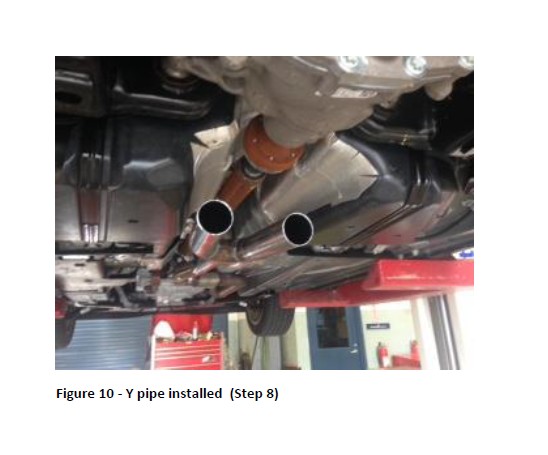
8) Start at the front and install the Y-Pipe by sliding it in the existing system. Add the clamp you removed in Step 1. Don’t tighten it completely. You will be adjusting the overall system and tightening this later. (Figure 10)
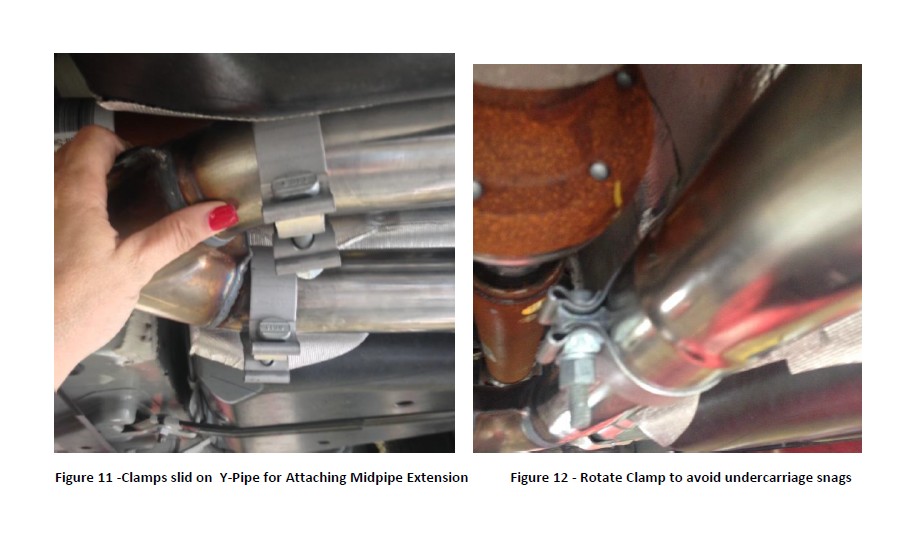
9) Slide two (2) clamps onto the Y section to secure the extension pipes! Don’t forget to do this before you hang your midpipe extension or you will have to unbolt it and go back and add the clamps! Also, note that when you are inserting your clamps, you want to have them set up so that you can access them, but not be subject to snagging/breaking. Make sure you will be able to rotate them sideways so you access them to tighten them, but they aren’t hanging down where they could be snagged. (Figure 11 & 12)
10) Add the rubber hanger doohickers to both the midpipe extensions. (Figure 6)
11) Hang the right midpipe extension.
a. Insert into your Y Pipe
b. Tighten the rubber hanger doohicker bolts (Leave enough play for final adjustments)
12) Repeat Step 11 for the left extension pipe.
13) Loosely tighten the clamps on the Y Pipe and midpipe extensions (Figure 11 & 12)
14) Slide the clamps to attach the mufflers onto the back section of the midpipe extension to attach the back tailpiece to.
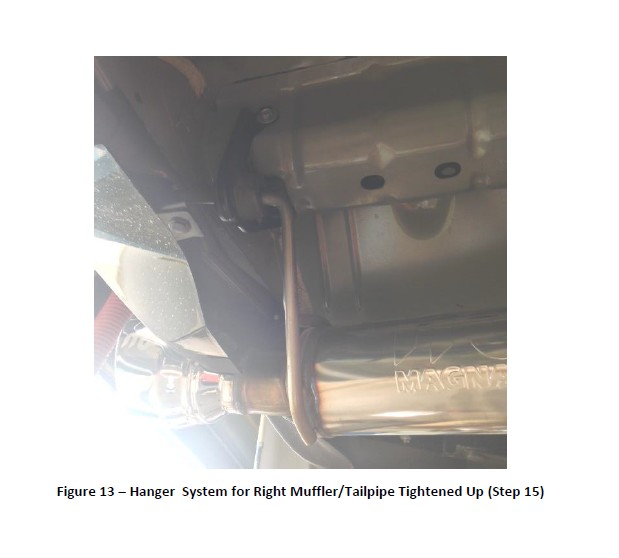
15) Slide the right muffler pipe in to the midpipe extension section and hang the right muffler pipe. (Figure 13)
a. Secure the rubber hanger bolts
b. Loosely secure the clamp on the extension pipe/muffler. (Remember to rotate the clamp to avoid undercarriage snagging)
16) Repeat Step 15 for the left muffler
17) Now, go through and check your clearances. You want an inch clearance on your newly installed exhaust system around other items. Our install did not take much adjustment or tweaking at all. The specs/build was pretty spot on!
18) Start at the Y pipe area and tighten all your bolts and clamps. Work your way back to the muffler making adjustments as necessary and tighten all your bolts/clamps.
19) Check the back end of your car and verify that your pipes/muffler are even.
20) Do a final tightening of all your bolts.
21) Sit back and enjoy the awesomeness of your new exhaust, and ponder what you are going to do with the old exhaust system sitting taking up space on your garage floor.
22) Drop the car and fire it up.
23) Technically, you should then drive around a bit and then go back and check to make sure all your bolts/clamps are tight and that you are clear of all other items and nothing has shifted/loosened.
