 FREE 1 to 3-Day Delivery on Orders $149+ Details
How to Install MBRP Installer Series Resonator Delete X-Pipe (15-19 GT) on your Ford Mustang
Installation Time
1 hours
Tools Required
- Jack and Jack stands
- Penetrating oil (I used Rubber Care by Wurth)
- 3/8 Ratchet
- 15 mm socket
- 13 mm socket
- Sawzall or similar tool for cutting
- File
MBRP Installer Series Resonator Delete X-Pipe (15-19 GT)
Installation Notes, and pre-installation: before you begin MAKE SURE the exhaust system is completely cool
Installation Instructions: Removal of Stock System
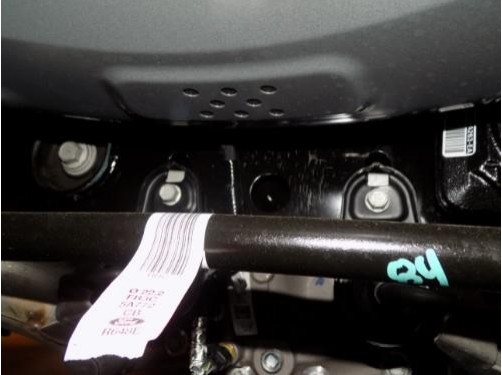
1. Apply a penetrating lubricant liberally to all exhaust fasteners, hangers, and rubber insulators.
2. Remove the 2 piece undercar brace. (Convertible Only)
3. Remove the M8 bolts from the mid hanger brackets using the 13mm socket and remove them from the vehicle. (Retain these parts as they will be reused.)
4. Loosen both clamps ahead of the resonator, lift the lock tabs and slide the clamps rearward to disconnect the OEM catback from the front section of the exhaust. Use caution, The OEM catback is one piece and heavy.
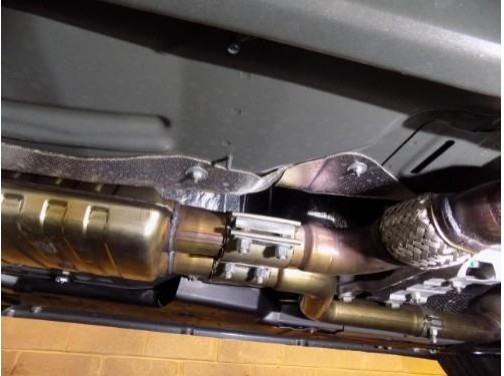
5. Remove the OEM catback by lowering the inlet end and sliding the assembly forward to remove it from the rear hangers. Remove the OEM clamps as they will be reused.
6. Unbolt and remove the rear hanger brackets. Retain these parts, they will be reused.
Installation of MBRP Installer Series Resonator Delete X-pipe (15-19 GT)
1. Lay the Resonator Delete Assembly on top of the OEM Cat Back being sure the inlets are aligned with each other. Note that the passenger-side outlet has more bend angle than the driver-side outlet. Transfer marks or use tape from the end of the Resonator Delete Assembly to the OEM Catback.
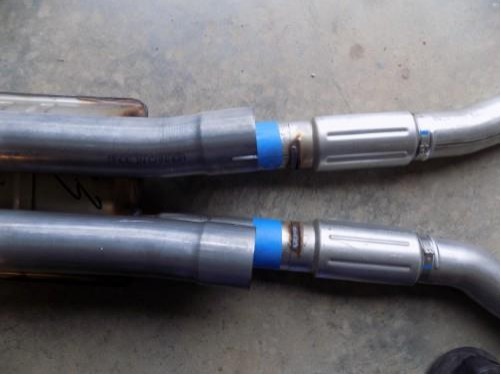
2. Measure 2” forward of the marks made in step 1 and scribe a cut line on the OEM pipes. The cut lines should be at the end of the straight section of pipe right next to the bends exiting the OEM Resonator. Using a Sawzall or similar tool, cut and deburr the OEM pipes with a file.

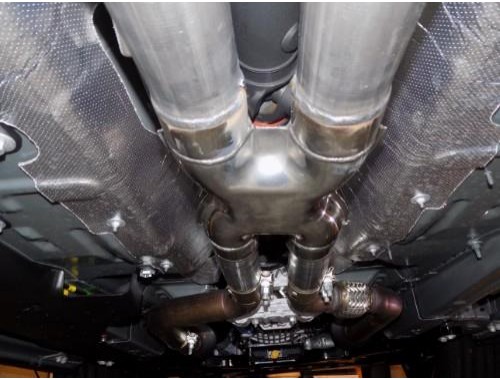
3. Reusing the original clamps, install the Resonator Delete Assembly being sure that the outlet with more bend angle is located on the passenger side of the car. Ensure the Assembly is installed level as viewed from the rear and tighten the clamps.
4. Install a 2.5” Clamp onto the passenger side outlet of the Resonator Delete Assembly. Reinstall the passenger-side of the OEM catback using the previously removed mid and rear hanger brackets.
5. Reinstall the driver-side of the OEM catback using the same mentioned procedure
6. Install the undercar brace [Convertible Only] using the previously removed hardware.
7. Align the exhaust and tighten all clamps. Check along the whole length of the exhaust system to ensure that there is adequate clearance around fuel and brake lines or any other components. If any interference is detected relocate or adjust
Congratulations! You are ready to begin experiencing the improved performance and sound of your MBRP Installer Series Resonator Delete X-Pipe. I know you will enjoy your purchase.
● And as a side note: While you are under the car, go ahead and inspect everything making sure nothing is loose, cut or frayed.
● And as a personal favorite. Clean the inside of those beautiful wheels
Installation Instructions Written by AmericanMuscle Customer Lamar Newton 06/06/2019


