Installation Time
(approx) 2 Hours
Difficulty Level:
Light to Moderate mechanical skill required.
Guaranteed Free Delivery by 12/24! available on most items - Details
$324.99 (pair)
FREE Shipping Market Price $379.99 You Save 14% ($55.00)Add Local Shop Installation
Saved - View your saved items
We're sorry. We couldn't save this product at this time.
or use
Hey, guys. Adam here, with americanmuscle.com. And today, we're taking a closer look at and installing the retro style projector headlight with the black housing and clear lens, available for the '10-'12 GT and V6 Mustangs with factory halogen headlights. You should be checking these out if you're looking to modernize the front end of your vehicle by getting rid of the factory, very traditional reflector-style headlights, in favor for some blacked out, really stealthy, and aggressive projector-style headlights. The projectors use a rounded lens here with an H1 high and low beam already built in, which is going to be brighter and more attractive than your factory light. It is much more fixated in one specific spot, as opposed to your factory headlights, which really lights up that entire area. You definitely get something that's a lot more modern-looking here. This one actually has two accent lights on the side here in a horizontal position, as opposed to some of the vertical ones you see in the aftermarket here in the category. These look a lot similar to the factory lights, just more of a modern upgrade. They're gonna be a more vibrant amber color when it comes time for your turn signals and hazard lights as well as parking lights.Now, the black interior housing, mixed with the clear lens, gives you the impression of a smoked headlight, so you get the stealthy appearance without blocking any of that lighting output. Now, this is going to be a plug-and-play light. It's gonna use your factory corner lightbulb, mixed with, again, the H1s built in for the high and lows, to plug right into the factory harnesses, so no cutting or splicing of any kind. With that said, the price tag for both of these comes in right around 300 bucks for the pair, and the install I'm giving two out of three wrenches on our difficulty meter. Swapping the headlights on an S197 does require you to take off the front bumper here, but you can do it in about two hours from start to finish with very simple hand tools in a driveway at home. Now, I'm gonna show you every step of the process, what do you say we get started.Tools used in this install include an impact gun, a ratchet, 7-millimeter short socket, 8- and 10-millimeter deep sockets, flat-head screwdriver, and a panel removal tool. First things first, for the uninstall here, we got to get our factory bumper off in order to uninstall our factory headlights. Start by popping your hood. We're gonna focus on taking the top radiator shroud off first, so grab a panel removal tool, and let's get to work. All right. So we're just gonna pop off these plastic black push pin clips by prying up on the center section and then pulling up on the bottom section underneath all in one piece. Do that for all of them.All right. Lift up on your shroud and set it aside. All right. Underneath of that shroud, there are two factory bumper bolts holding this guy on, eight millimeters right here on each side. Grab your eight-socket and impact gun and get them off. With both of those out of the way, we can focus on the wheel wells.We have our vehicle up in the air for the next step here in the wheel well. We have two small seven-millimeter bolts holding in the wheel outliner to this factory bumper on the sides here, so grab a quarter-inch ratchet and a socket or a wrench and get these two guys off. You can repeat that on the other side as well.All right. So next up, we're underneath of our vehicle. We have ours on a lift. You might be working on a jack stand and a hydraulic jack on the floor. But either way, we have to disconnect our fog lights and the harnesses connecting to our marker lights and turn signals on the side. Now, this vehicle has a BOSS 302 front fascia, so it's got different fog lights down here. If you have a GT Mustang, your fog lights are gonna be in the grille. If you have a V6, you don't have fog lights at all, so you can skip that. But because we have these unique fog lights, I'm going to disconnect them right here on each side, just like this, by pulling on the sides here. It can be a bit tight. Now, we can go up onto the sides of the bumper here and disconnect that marker light. All right. So that marker light is just up in here. You're just gonna pinch and disconnect that harness. Do the same thing on the other side.All right. The next step here, what we can do is start disconnecting the bumper from the body of the vehicle. The first step here is up at the grille. There's a little locking tab there. Just lift up and over. And then, from the sides, you're basically just going to crack it off. There's a couple of plastic clips that hold it into the fender there, just like that, pulling that away from the vehicle. Do the same thing on the other side, and we can lift up and off. All right, guys. Now, keep in mind, as you lift this off, if you have a GT with fog lights in the grille, you want to make sure you're disconnecting those harnesses prior so you don't pull the harnesses straight out. So what then you can do is lift up and directly off, set it straight down. If there is still one master harness at the bottom, disconnect that as well, and then you can set it aside. All right. Because this is an aftermarket bumper, we have to disconnect this horn retaining harness and just let that guy dangle down there. You may not have it on your stock bumper. Now, we can set it aside.All right. So now, we have three bolts holding on our factory headlight. I'm gonna start here on our driver's side. There's one at the top and two directly underneath that were covered by the bumper. Grab a 10-socket and get these off. All right. So now, we have two 10-millimeter bolts at the bottom and then one final push pin clip at the top. Up here by our factory 10-millimeter, we have one more push pin clip, so grab a panel removal tool and pry up on that middle section. Just pull it all out in one piece. All right. Pull your headlight straight back and disconnect the harnesses. Ours are pretty tight in there, so you may need to grab a flat-head to help pry up on that piece, just like that. Same thing for the other one. All right. Set your factory light aside. All right. Now, you can repeat on the other side.So we got our factory headlight off of our '11 GT behind me on the driver's side, and it's next to our new retro-style headlight with a projector finish. Now, I wanna go through some similarities and differences between the two. Starting with similarities, really the only similarity is the fact that they both use halogens and the quality of the housing. This is going to be an OEM fit and finish, but the inside has a little bit of a redesign. Now, your factory headlight is known as a reflector-style headlight. This is a projector-style headlight. You can see the complete difference, almost looks like a camera lens inside of this headlight. Now, that's gonna give you a brighter, more attractive headlight that's gonna keep you safer at night because it's gonna be a lot more visible. You're getting better visibility here even though they both use halogens. Now, this one here does have a black interior housing to give you the impression of a smoked headlight without actually giving you a darker lens. So you get a stealthy front-end look without hindering any of the light output. Now, another thing that differed is the marker lights on the side. Your turn signals here are a little bit more of an attractive finish than your factory one. This looks very traditional. Projectors are known to be a lot more modern. So you're gonna make that switch but still use halogens.This has H1 high and low beams already built in there, but we do have to transfer over our factory corner light. Now, that corner light is going to be easy. We're just gonna twist that out and twist it right back in, so let's do that next. All right. So now, you can take this brown or corner lightbulb, twist it counterclockwise, pop it out, let's swap it over. So now, you can put this guy right in that open socket, twist clockwise to lock it in, now we can install it with our plug-and-play harnesses.All right. So now, we can take our new headlight and just plug it into the factory harnesses. Push that all in. Make sure you're connecting them and hear the click. All right. Now, we can bolt it back up. All right. Put your factory 10 millimeters back in and tighten them down. All right. Do the same thing underneath with the factory 10 millimeters. Repeat on the other side.All right. So, at this point, we can lift up on our bumper, set it into place. First thing we're focusing on are the two little tabs on each side of the headlight, bringing that guy on, and hooking it on. Do that on both sides. And now, we can hook on the wheel well section.All right. So now, we have to hook in the bumper around the inner wheel well brackets. So we wanna make sure those are getting clipped in. Same thing with the inner wheel well itself to make sure that goes around. The top clips here where the bumper meets the fender are pretty easy. They line right up and snap it. Same thing on the other side.All right. Grab that factory eight-millimeter bolt, put that back through, and tighten it down. Same thing on the other side.All right. Now, we can put that radiator shroud back on there. Just make sure you're tucking it in where it needs to go, under the bumper and around the hood prop. And grab those push pin clips and put them all back through.All right. So back in the wheel well, we only have two screws to put back in here, both seven millimeters. I'm gonna set those guys in by hand and then grab my socket to tighten them down. All right. Do the same thing on the other side.Now, remember, our bumper is a little bit different than factory. It's an aftermarket one. So we have fog lights here. So I'm just gonna reconnect those, but you wanna make sure you're reconnecting your fog lights if you've got them in the grille like a traditional GT.All right. Last step, go into your bumper, connect your marker lights. Same thing on both sides. Bring it back down on the ground and you're good to go.That's gonna wrap up my review and install for the retro-style projector headlights with the black housing and clear lens, available for the '10 to '12 GT and V6 Mustangs with factory halogen. You can pick it up right here at americanmuscle.com.
Subscribe to our YouTube Channel
Features, Description, Reviews, Q&A, Specs & Installation
Headlight Type | Projector |
Headlight Housing Color | Black |
Headlight Lens Color | Clear |
Headlights Output | Halogen |
Headlight Style | Aftermarket Style |
Head-Turning Style. These Black Retro Style Projector Headlights are manufactured for style and superior utility. Showcasing a custom look, these sleek projector headlights will deliver an intense, concentrated light beam pattern for expanded road viewing in your Mustang.
Brilliant Light. Featuring brilliant halogen bulbs with a H1 hi/low beam projection, this product will provide more lighting coverage in dense weather situations. In addition, you’ll get increased nighttime visibility for safer driving.
Unmatched Construction. Crafted from premium materials, this stylish headlight features a clear plexiglass lens that’s sure to stand up in rough road conditions. In addition, the black finish ensures you won’t have to worry about deterioration that comes with extreme element exposures.
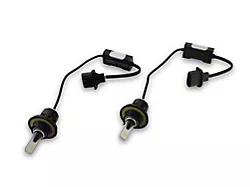
Installation. For install conveniences, plug-n-play harness are included for an easy and efficient installation process. The installation time is estimated at 2 hours and basic garage tools are required.
Warranty. A 1-year limited warranty will cover this product if any defective manufacturing is found in the materials or craftsmanship.
Application. The Black Retro Style Projector Headlights are engineered to be a direct fit for all 2010-2012 Ford Mustang with Halogen Headlights.
Fitment:
CA Residents: WARNING: Cancer and Reproductive Harm - www.P65Warnings.ca.gov
Installation Info
Installation Time
(approx) 2 Hours
Difficulty Level:
Light to Moderate mechanical skill required.
What's in the Box
10 More Questions