 2024-2026
 2015-2023
 2010-2014
 2005-2009
 1999-2004
 1994-1998
 1979-1993

Installation Time
(approx) 1 Hour
Difficulty Level:
Simple installation for anyone.
Installation Guides
No guide available for this part yet.
 FREE 1 to 3-Day Delivery on Orders $149+ Details

$1,250.00 pair
CONFIRM THIS FITS YOUR VEHICLE!
Saved - View your saved items
We're sorry. We couldn't save this product at this time.
or use
Features, Description, Reviews, Q&A, Specs & Installation
| Brand | AlphaRex |
| Headlight Type | Projector |
| Headlight Housing Color | Black |
| Headlight Lens Color | Clear |
| Headlights Output | LED |
| Headlight Style | Aftermarket Style |
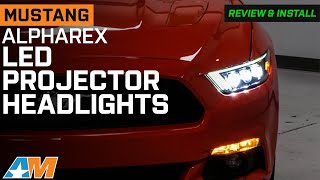
Advanced LED Projector Headlights. The AlphaRex NOVA-Series LED Projector Headlights; Alpha Black Housing; Clear Lens offer high-performance automotive lighting designed to enhance visibility and style. Featuring a cutting-edge tri-projector system with precision-engineered LED chips, these headlights provide superior low and high beam illumination along with dynamic DRL and sequential turn signals. This product is essential for drivers seeking improved safety and aesthetic upgrades.
Construction and Appearance. These headlights are constructed with a durable polypropylene housing finished in a sleek Alpha-Black glossy coating for a modern, chrome-delete look. The clear polycarbonate lens is treated with an anti-fog agent and a yellowing/oxidation-resistant coating to maintain clarity and performance under various weather conditions. Integrated Nitto Denko TEMISH CAPSEAL air vents ensure moisture is efficiently expelled, preserving longevity.
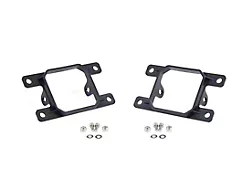
Installation. Installation requires moderate automotive knowledge with no drilling necessary, as the headlights are designed to fit directly onto specified models. Detailed online guides assist with configuration of selectable DRL colors and turn signal functions.
Warranty. These headlights come with a comprehensive two-year warranty covering defects in design and manufacturing.
Application. Specifically designed for fitment on 15-17 Mustang; 18-20 Mustang GT350, GT500 models.
AlphaRex 880114
CA Residents:  WARNING: Cancer and Reproductive Harm - www.P65Warnings.ca.gov
Installation Info
Installation Time
(approx) 1 Hour
Difficulty Level:
Simple installation for anyone.
Installation Guides
No guide available for this part yet.
What's in the Box
