 FREE 1 to 3-Day Delivery on Orders $149+ Details
Mustang Turn Signal Lights w/ Amber Corners ('05-'09) - Installation Instructions
Installation Time
2 hours
Tools Required
- Needle nose pliers
- Phillips screw driver
- Ratchet with Phillips attachment
- Tire iron (if removing tire)

Shop Parts in this Guide
Installation
Removal of Factory Headlight Assembly
1. Use the tire iron to loosen all lug nuts holding the tire on. (If you will not be removing the tire, skip this step)
2. Place the car on ramps, jack stands or a lift. Make sure that you use the lift points identified in the car’s user manual.
3. Remove the lug nuts holding the tire on, remove the tire and set it aside. (If you will not be removing the tire, skip this step)
4. Disconnect the negative (-) terminal of the battery.
5. Using a small Phillips head screwdriver or a ratchet with a Phillips head screwdriver attachment remove the three (3) screws holding the inner wheel well lining to the front bumper.
6. Using a small Phillips head screwdriver remove the five (5) quick fasteners holding the inner wheel well lining to the fender by turning them about ¼ counterclockwise. This should release the center portion of the quick fastener. Grasp the enter portion and completely remove the quick fasteners.
7. Remove the inner wheel well lining and set it aside.
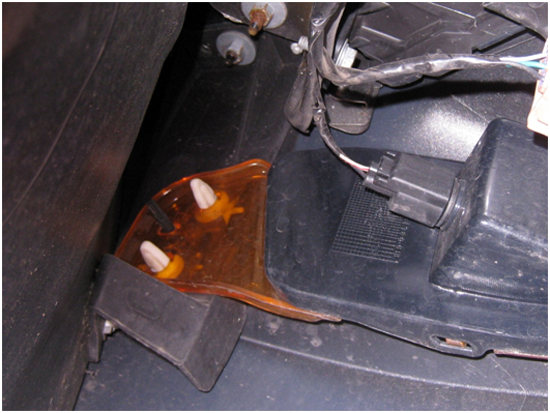
8. Remove the factory light sockets by turning them counterclockwise and pulling them out of the turn signal assembly.
9. Grasp the light socket and remove the factory bulbs from their sockets by pulling them straight out.
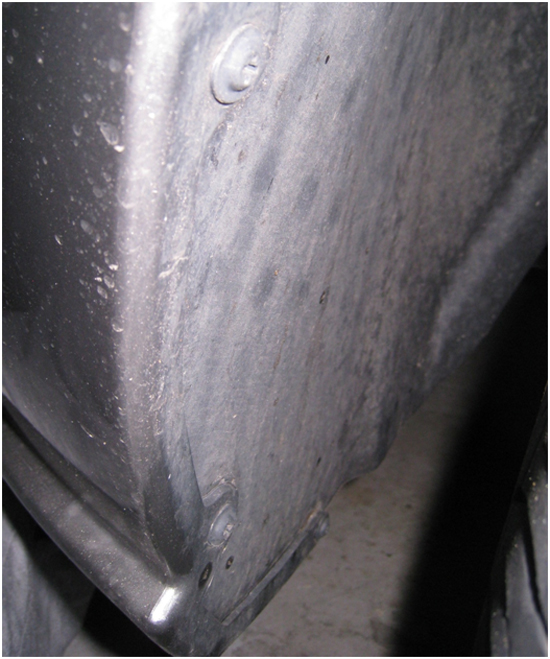
10. While slightly pushing the turn signal assembly from the outside simultaneously use a pair of needle nose pliers to squeeze the white retaining clips holding the turn assembly to the bumper. This will allow you to release the clips from the turn signal assembly and not have the assembly fall back into place and re-engage the retaining clips.
11. Once both clips are released simply push the turn signal assembly towards the inside of the car and the inner retaining tab will release the light assembly.
Installation of the Halo Headlight Assembly:
1. Place the inner retaining tab of the new turn signal assembly into the retaining tab slot located on the inner portion of the bumper.
2. Push the new turn signal assembly towards the bumper, lining up the holes with the white retaining clips. Push the turn signal assembly until the white retaining clips engage the turn signal assembly.
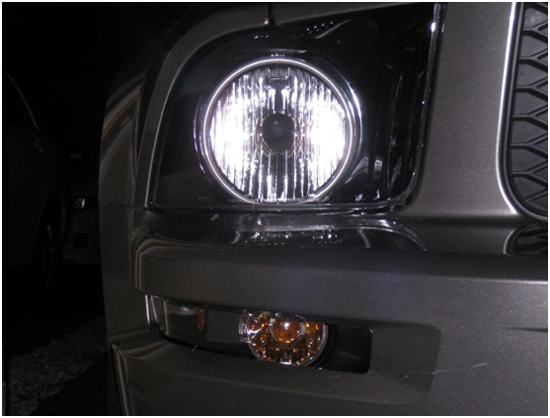
3. Place the both new orange bulbs into the factory light sockets.
4. Reconnect the battery and test the new bulbs to ensure proper operation.
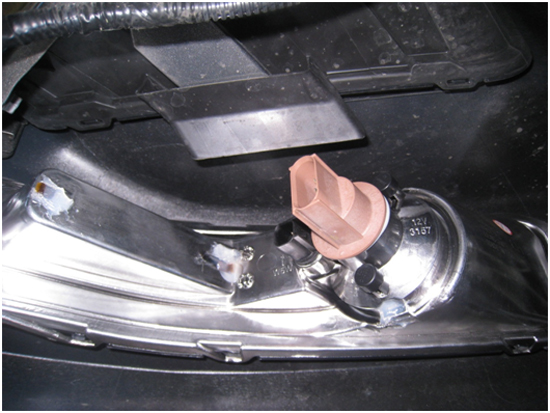
5. Replace the small light socket first inserting it into the turn signal assembly and turning it ¼ turn clockwise. Replace the large light socket into the turn signal assembly in the same manner. The lights are very close to each other and the fit is tight. If you place the large socket in first you may not be able to get the smaller one on.
6. Replace the inner wheel well lining in the same manner that you removed it. Make sure that the top portion of the lining is inserted between the fender and the inner wheel lining that is still in the car.
7. Replace the tire and tighten all the lug nuts. (If you removed the tire.)
8. Remove the car from the jack stands or lift and completely tighten all the lug nuts. (If you removed the tire.)
Installation instructions provided by AmericanMuscle customer Paul DeSanto 5.25.09
Related Guides
-
Installation
-
Installation
-
Installation
