 FREE 1 to 3-Day Delivery on Orders $149+ Details
How to Install Power Stop Z26 Street Warrior Brake & Rotor Pad Kit - Front (15-18 Standard GT, EcoBoost w/ Performance Pack) on your Ford Mustang
Installation Time
2 hours
Tools Required
- Jack and Jack Stands or Lift
- Socket Wrench
- Torque Wrench
- 19mm Socket
- 15mm Socket
- Short Socket Extension
- Small Drift or Punch
- Hammer
- Dead Blow Hammer
- Anti-Seize
- Brake Cleaner

Shop Parts in this Guide
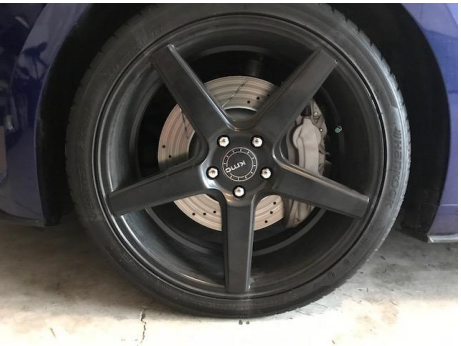
Before
1. Safely place vehicle on jack stands or lift.
2. Remove 19mm lug nuts and remove wheel.
3. Remove the brake pad pins retaining clip. The clip has a hook in the center that holds it to the caliper. Pull this portion of the clip free first, then remove the portion of the clip that goes through the pins
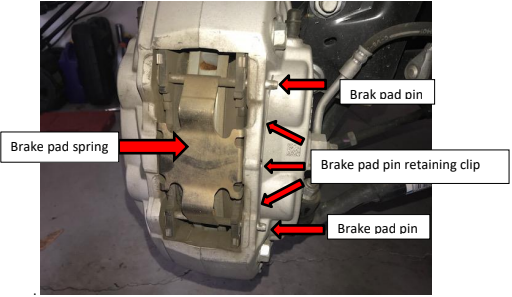
4. Tap brake pad pins with dead blow hammer so they are flush with caliper. Use a punch or drift to tap the brake pad pins out the rest of the way. The pins can only be removed in one direction, note that you are pushing on the side of the pin that does not have a lip preventing it from going through its housing in the caliper. Note the direction the pins are removed so they can be installed the same way.
5. The brake pad spring will become free after removing the first pin. Set pad spring and pins aside.
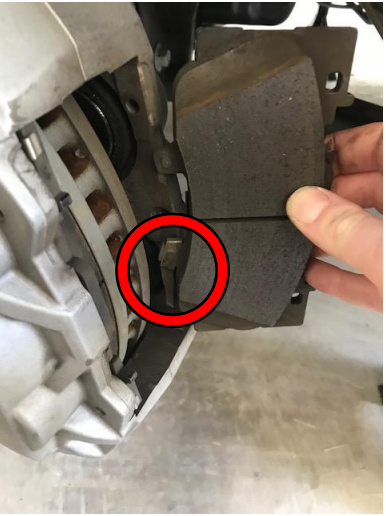
6. The brake pads may now be removed. Note the location of the brake pad tab in order to install the new pad in the same orientation. One of the two pads per wheel will have a tab on it.
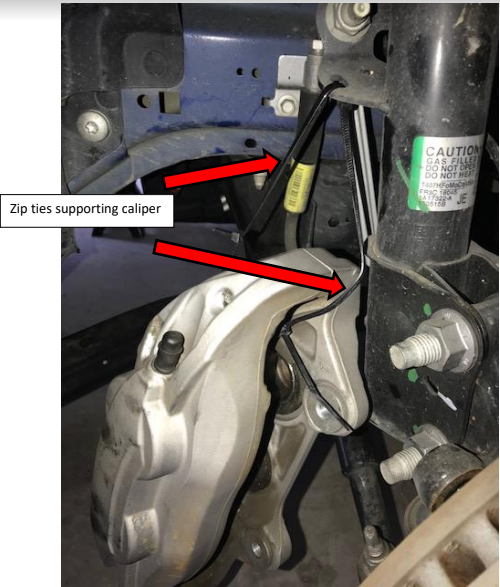
7. Remove the 2 15mm caliper to spindle bolts. Make sure the caliper is supported when removed. Do not let the caliper hang by brake fluid hose. Zip ties can be used to secure caliper.

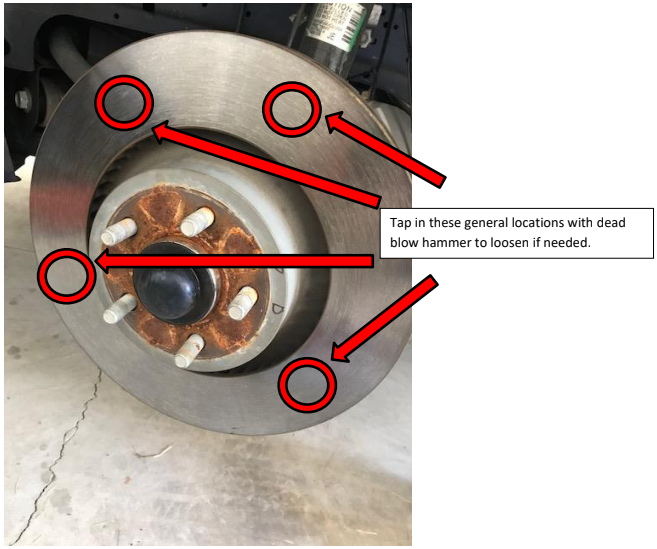
8. The rotor can now be removed. You will likely need to tap around the surface of the rotor with a dead blow hammer in order for it to be loosened and removed from the hub. Mark on the rotor which side it comes off, in case they are reinstalled in the future.
9. The new rotors are side specific. They are labeled with a sticker on the rotor.
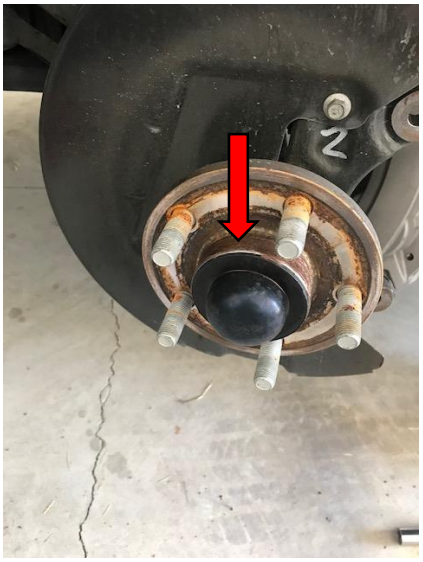
10. Before installing the new rotor, apply anti-seize to hub as shown in picture.
11. Thoroughly clean the surface of the new rotor with brake cleaner prior to installing.
12. Place new rotor on the hub. A lug nut can be installed to help hold the rotor in place.
13. This is a good time to depress the caliper pistons if needed. Remove the cap from the brake fluid reservoir. A brake pad can be used to apply equal force against the pistons. Be careful not to push the pistons past the piston seals. There are special tools for compressing pistons, but most people will be able to compress the pistons by hand.
14. Secure the caliper back to the spindle with the 2 15mm bolts. Tighten to 85 ft-lb.
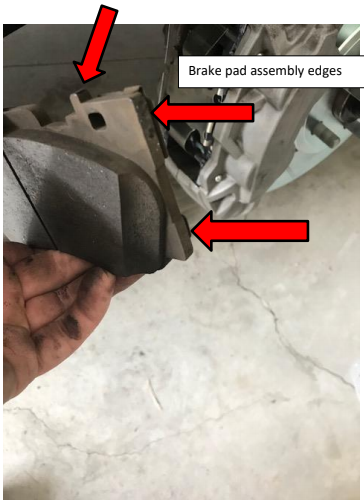
15. Clean the new brake pads with brake cleaner. Apply the supplied lubricant to the edges of the pad assembly that will come in contact with the caliper and brake pad spring. IMPORTANT: Do not get lubricant on the pad itself or any surface that comes in contact with the rotor.
16. Install the brake pads. Make note to install the pad with the tab in the same orientation as when removed.
17. Install the brake pad pins. Install with the lip of the pins in the same orientation as when removed.
18. Apply the provided lubricant to the new brake pad spring’s surfaces that will come in contact with the brake pad pins and brake pad assembly.
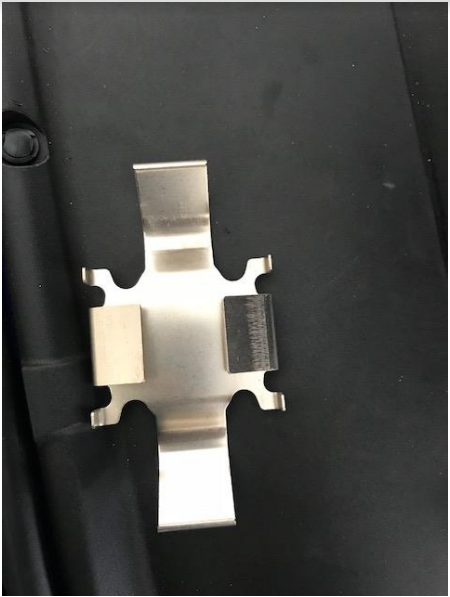
19. Install the brake pad spring. If you are unable to install the brake pad spring with both brake pad pins in place, remove one of the pins. Position the brake pad spring in place and install the brake pad pin through the portion of the pad spring that hooks to the pin.
20. Install the brake pad pin retaining clip. Make note that the hook located in the center of the clip is pushed into place in the same orientation as when removed.
21. Remove lug nut that was holder rotor in place.
22. Install wheel and torque lug nuts to 148 ft-lb.
23. Repeat on other side.
24. Put brake fluid reservoir cap back on reservoir securely.
25. Safely place car back on ground from jack stands or lift.
26. Turn car on and pump brakes until firmness returns.
27. Test drive and confirm proper function of brakes.
After
Installation Instructions provided by AmericanMuscle Customer
