 FREE 1 to 3-Day Delivery on Orders $149+ Details
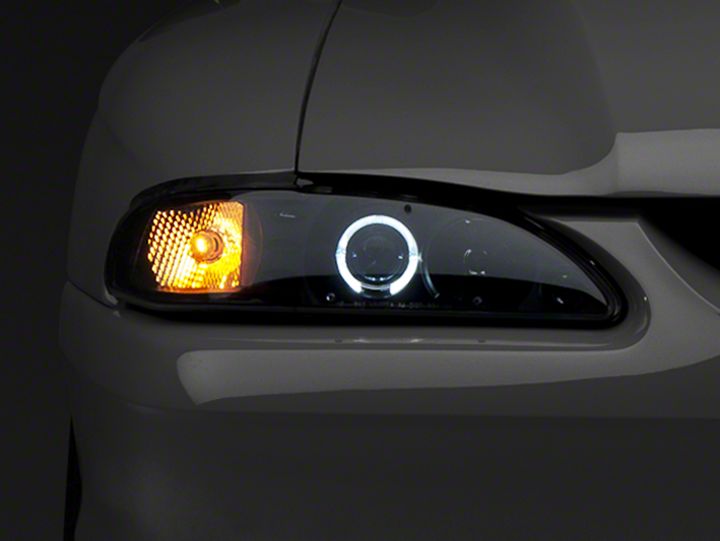
Mustang Angel Eye Projector Headlights Installation Guide
Installation Time
2 hours
Tools Required
- Dremel or Small Saw
- Pliers
- Wire Cutters/Strippers
- 4mm Socket Wrench (for adjustment)
Shop Parts in this Guide
Installation
Disassembly of Stock Lights:
1. Start on the driver’s side; remove the metal clips from behind Original Headlights (Pic.1)
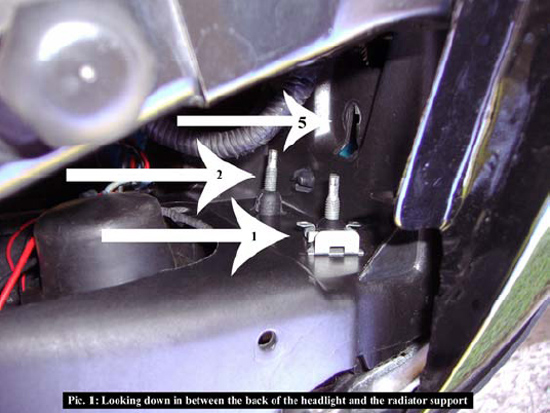
2. Use pliers to push in sides of the 2 plastic clips that will allow you to pull the headlight out. (Pic.1-2) (Note the screws that go through the plastic clips are the Adjuster Screws)
3. Pull the headlight out and remove the electrical connector from the housing.
4. Remove the nut that holds the parking lamp housing (Pic.1) (nut’s location shown)
5. Pull the park lamp assembly straight out (direction of arrows in Pic.1&2) and disconnect pigtail.
6. Repeat process for passenger side of car.
Prep for Install
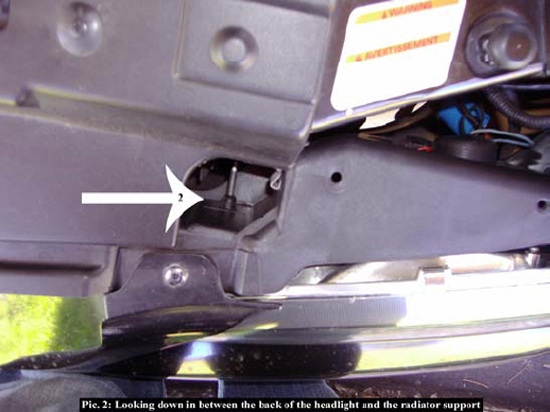
1. Must cut headlight retainer housing as shown (Pic.2). This is easily done with a dremel with a cutting bit, or a small saw. BE CAREFUL NOT TO CUT ANY ELECTRICAL WIRES.
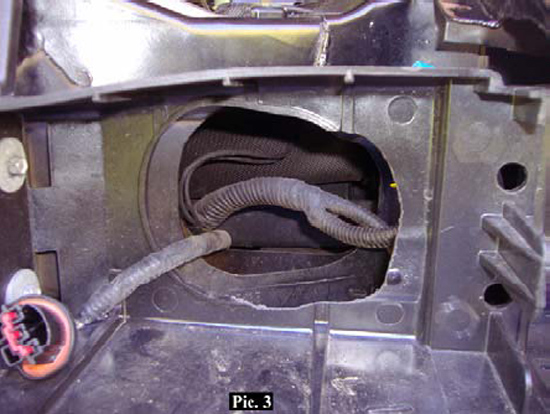
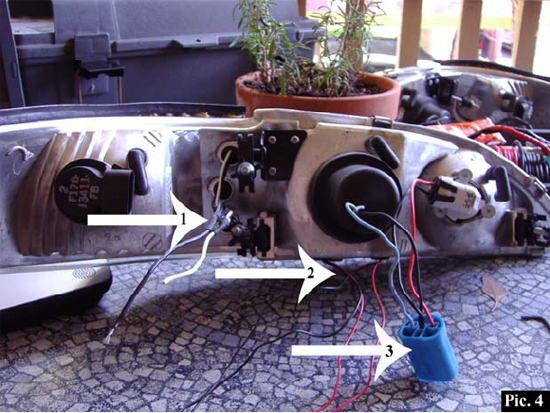
2. Pic.4 is the back of the new driver’s side projector headlight. In that picture, #1 is the accent lights wires, #2 the halo light wires, #3 the headlight pigtail that plugs in the factory harness.
3. First we are going to reroute the accent light wires to the halo wires so that they don’t get in the way during installation. Reroute as shown in Pic.5. To do this first remove the 3 screws that hold on the metal plate. Run wire as shown and replace the plate. Careful not to pinch the wire with the plate.

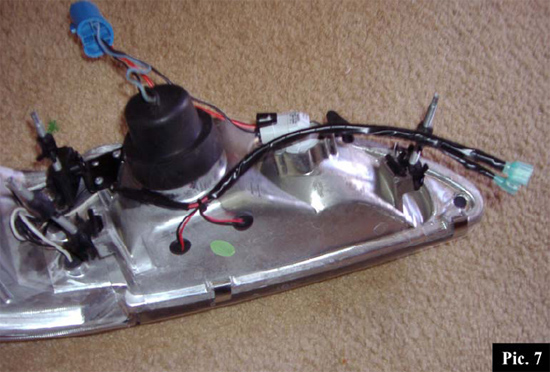
4. Zip tie the 2 accent light wires with the 4 halo wires right below the headlight, as shown in Pic.7.
5. Repeat for other side headlight.
Wiring Suggestions
1. These following steps are not needed but are highly recommended if you intend on removing your headlights at a later date.
2. Group the two red wires from the halos and the white wire from the accent lights together, strip them and crimp them into a female spade connector.
3. Group the two black wires from the halos and the black wire from the accent lights together, strip them and crimp them into a male spade connector.
4. Repeat process for other side headlights.
5. Create two red 9 inch extension wires with male spade connectors. (Pic.6)
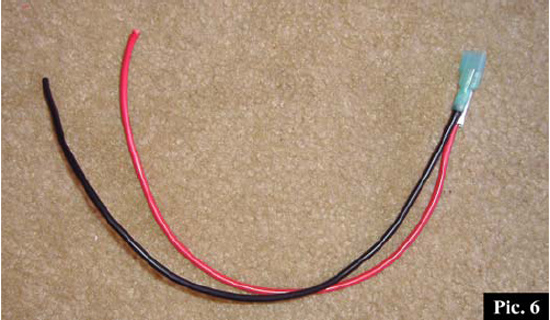
6. Create two black 9 inch extension wires with female spade connectors. (Pic.6)
7. Pic.7 is what the headlights should look like when they are ready to go into the car.
Installation of New Lights
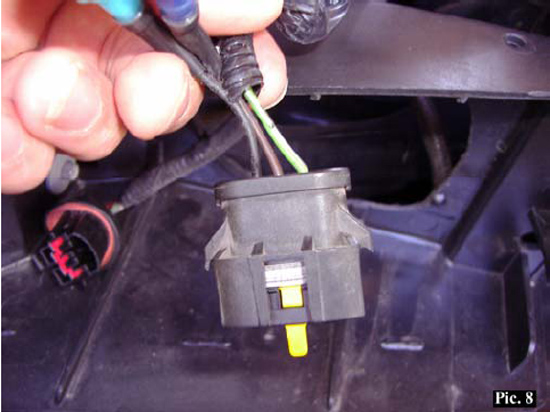
1. Remove the tape and pull back the plastic covering the wires on the park lamp/turn signal pigtail to expose the wires. The brown wire is the positive ( 12 volts) when the headlamp switch is in the “park” position. The black wire is the ground wire. (Pic.8)
2. If you followed the wiring suggestions, use a mid line wire tap (blue piece in Pic.9) connect one of the red extension wires to the brown wire about 6 inches back from the pigtail connector. (Pic.9) If you DID NOT follow the wiring suggestions, directly tap the two red halo wires and the white accent light wire to the brown wire.
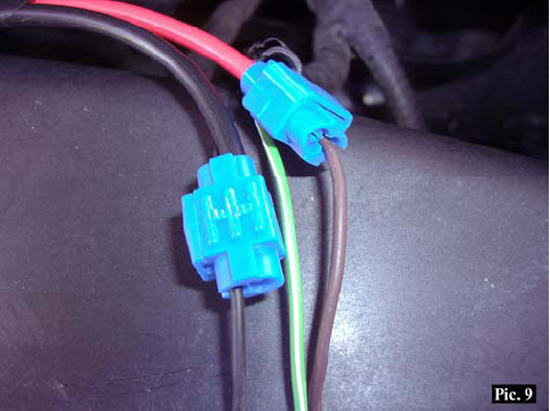
3. If you followed the wiring suggestions, use a mid line wire tap (blue piece in Pic.9) connect one of the black extension wires to the black wire about 6 inches back from the pigtail connector. (Pic.9). If you DID NOT follow the wiring suggestions, directly tap the two black halo wires and the black accent light wire to the black wire.
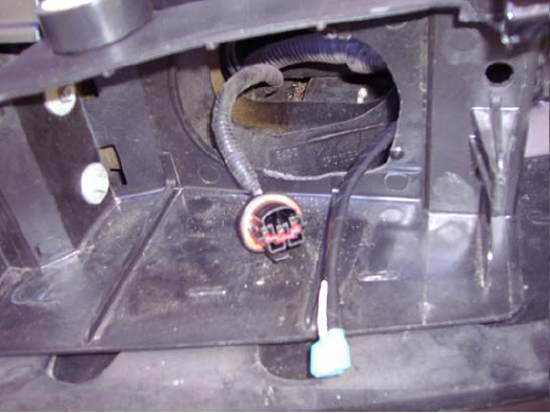
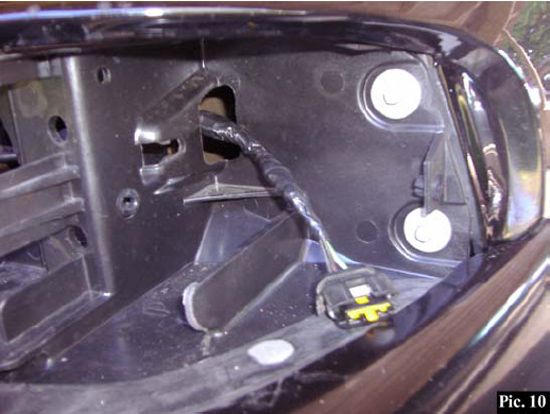
4. Route wires as shown in Pic.10. Be sure to properly tape the wires so that no wire or wire tap is directly exposed.
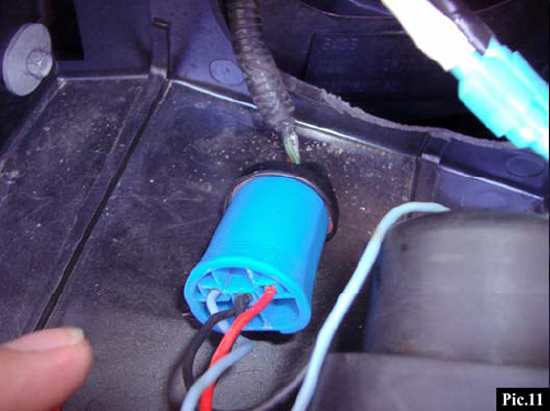
5. Connect factory headlight pigtail to the projectors pigtail (Pic.11)
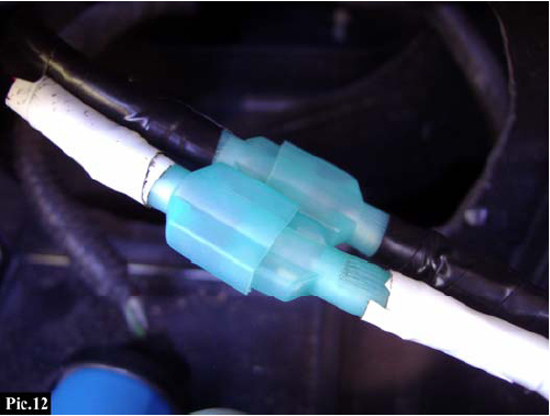
6. If you did followed the wiring suggestions, connect the two spade connectors together. Make sure that you connect the red to the red, and the black to the black (Pic.12)
7. Connect the factory park lamp/turn signal pigtail to the connector.
8. Push the headlamp into the headlamp housing. Make sure that the adjuster screws go into their holes.
9. Repeat steps 1-8 of "Installation of New Lights" on passenger side of car.
10. Adjust headlights
Installation instructions provided by American Muscle
Related Guides
-
Installation
-
Installation

