


Installation Time
(approx) 1 Hour
Difficulty Level:
Light to Moderate mechanical skill required.
Installation Guides
 FREE 1 to 3-Day Delivery on Orders $149+ Details
$404.99 pair
CONFIRM THIS FITS YOUR VEHICLE!
Saved - View your saved items
We're sorry. We couldn't save this product at this time.
or use

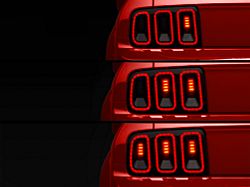
Raxiom Gen5 Tail Lights; Black Housing; Smoked Lens (05-09 Mustang)
 500+
500+

Raxiom LED Halo Fog Lights; Smoked (05-12 Mustang GT)
 500+
500+
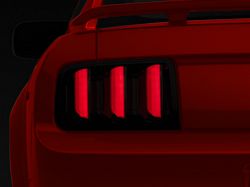
Raxiom Vector V2 LED Tail Lights; Black Housing; Smoked Lens (05-09 Mustang)
500+
Features, Description, Reviews, Q&A, Specs & Installation
| Headlight Type | Projector |
| Headlight Housing Color | Black |
| Headlight Lens Color | Clear |
| Headlights Output | Halogen |
| Headlight Style | Aftermarket Style |
Please note that the wires on the back of the Headlights for the DRL's can either be red and black, or green and black. Whether the wire on the back of your Headlight is red or green it will still be installed the same way. The only difference is that they were assembled in different factories.
CA Residents:  WARNING: Cancer and Reproductive Harm - www.P65Warnings.ca.gov
Installation Info
Installation Time
(approx) 1 Hour
Difficulty Level:
Light to Moderate mechanical skill required.
Installation Guides
What's in the Box
Designed for Mustangs equipped with Standard Halogen Bulbs.

