FREE 1 to 3-Day Delivery on Orders $149+ Details
How to install a Raxiom Auto-Dimming Rear View Mirror w/ 3.5in Display and Camera in your 2005-2014
Installation Time
2 hours
Tools Required
- T20 Torx
- Razor knife
- Small regular screwdriver
- phillips screwdriver
- pliers

Shop Parts in this Guide
Step 1:
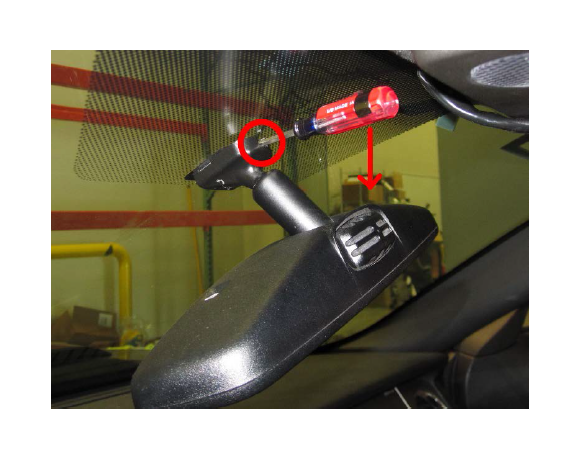
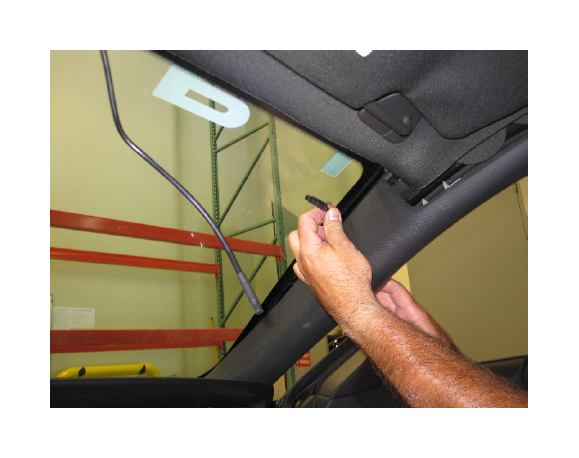
Maneuver the rearview mirror down to access the top of the mirror mount. Insert a small screwdriver into the top hole and pull down on the screwdriver, using the metal mount as a pivot point. Do this carefully to prevent windshield damage. Hold onto the mirror and screwdriver, there will be a lot of movement after the mirror is separated from the mount.
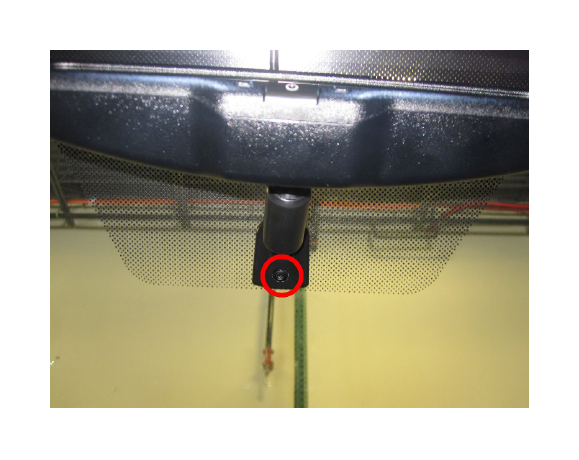
Step 2: Place the new mirror onto the windshield mount and tighten down the T20 torx screw until it isn’t wobbly.
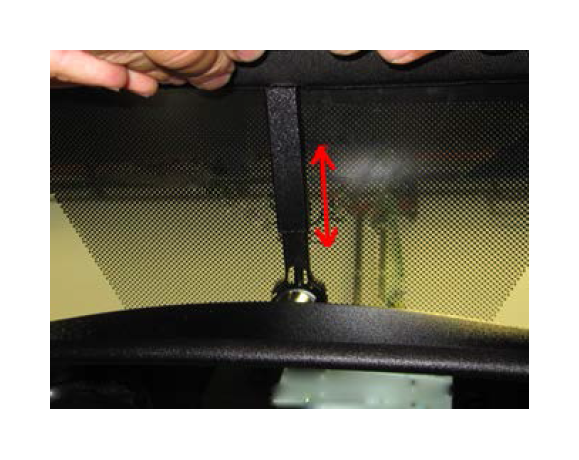
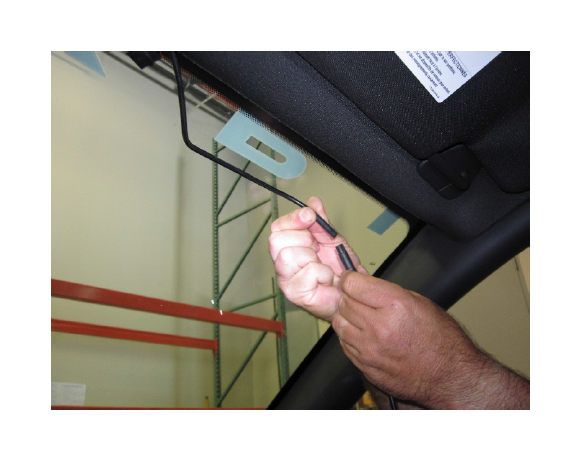
Step 3: Run the wires upward to the headliner. Place the included wire cover over the wiring. Clip it into the rearview mirror mount and extend it up to the headliner.
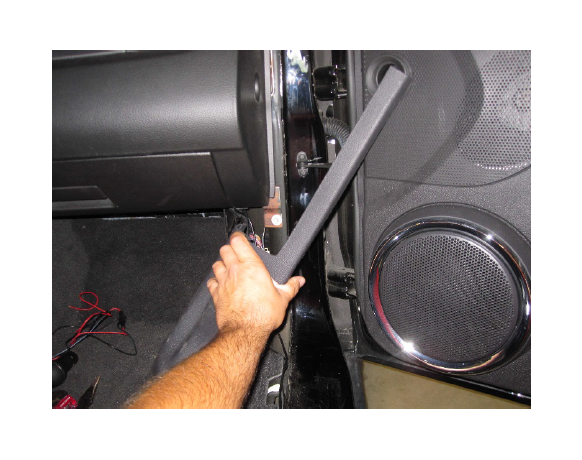
Step 4: Pull down part of the A plillar trim and run the intermediate mirror wire up from the kick panel to the rearview mirror wire.
Step 5: Attach the two wires together and securely tuck them up above the headliner.
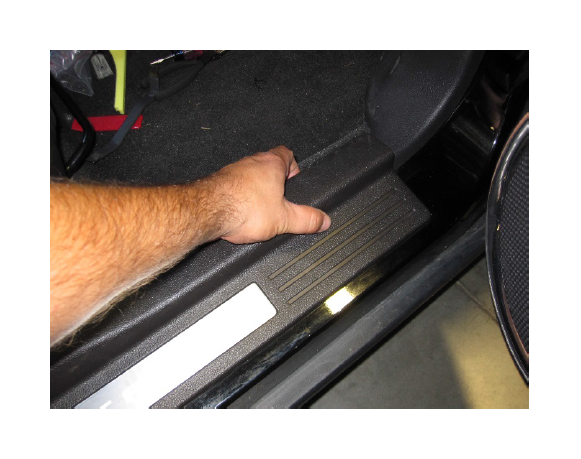
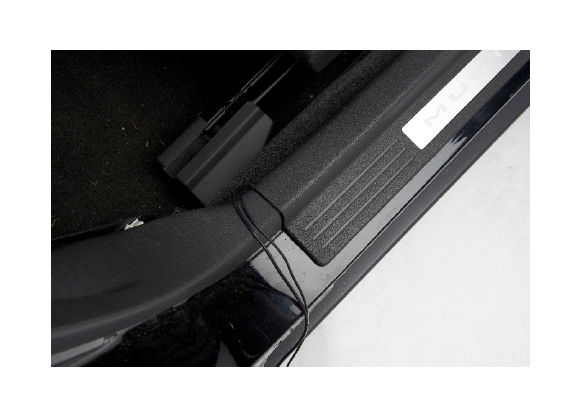
Step 6: Remove the step trim from the bottom of the doorway. Pull up on the inside to release the compression tabs and set aside.
Step 7: Remove the kick panel by pulling out on the panel. Route the wiring down to this area. The wiring will be connected after the camera wiring is run.
Step 8: Run the camera intermediate wiring under the step trim. Continue running the wire through the rest of the car.
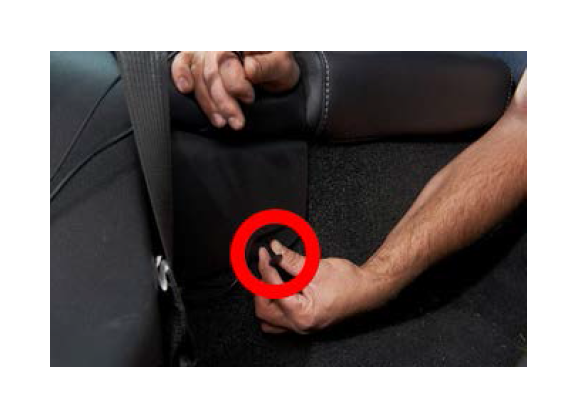
Step 9: Remove this push pin and route the wiring behind the trim panel. Press the wire down along the seats.
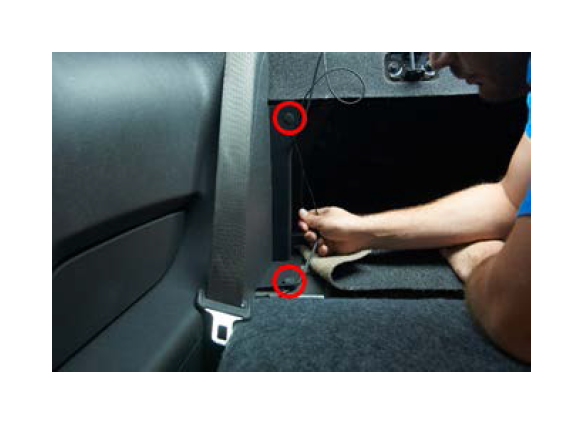
Step 10: Lay the rear seats down and run the wire back through the trim. Be sure the wires are clear of the rear seat hinges and pinch points. Remove these two push pins and route the wire behind them
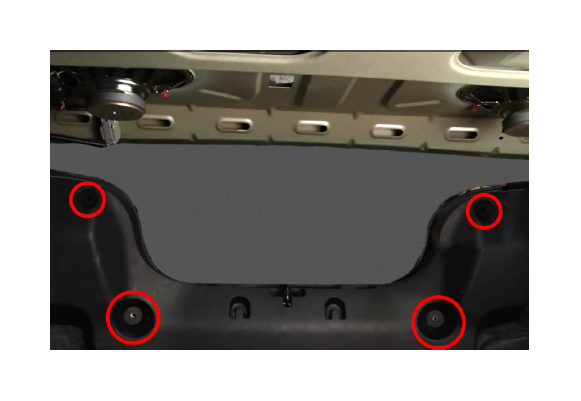
Step 11: Remove the (4) rear trunk trim retainers and remove the rear trunk trim from the car.
Step 12: Route the wiring through the passenger side of the trunk compartment, along the back of the trunk and out through the license plate light’s rubber grommet hole. Cut a hole in the rubber grommet to feed the wire through.

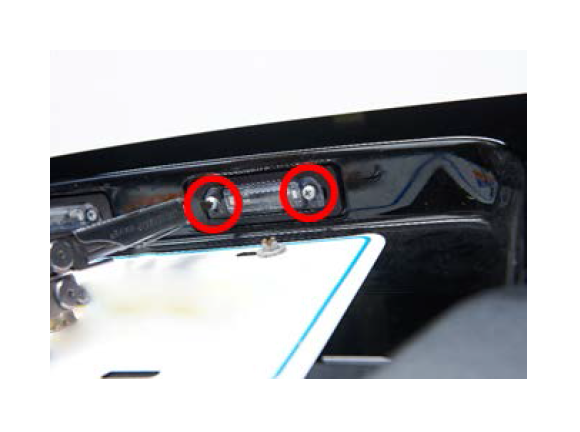
Step 13: Remove the (2) passenger side, license plate light bulb retainer screws.
Step 14a: Pull down on the outside of the license plate light bulb retainer and feed the wire through it. Attach the camera wire to the intermediate camera wire inside the trunk. The license plate bulb retainer may need to be notched a little to keep from pinching the wire.
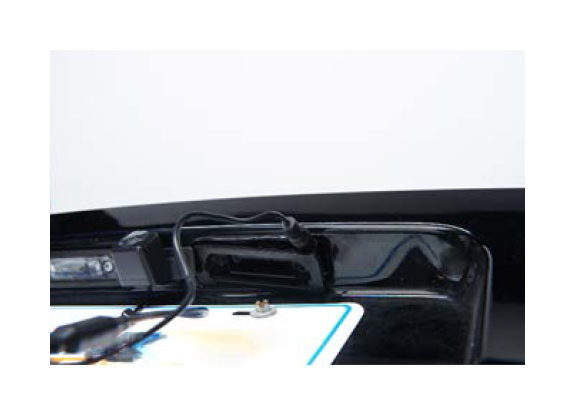
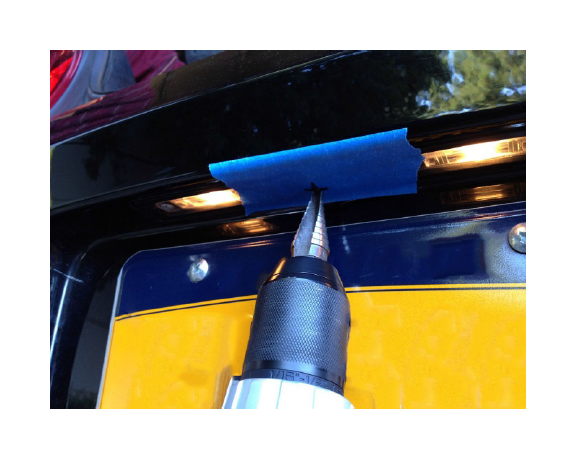
Step 14b: A hole can be drilled between the license plate lights to run the camera wire, if preferred.
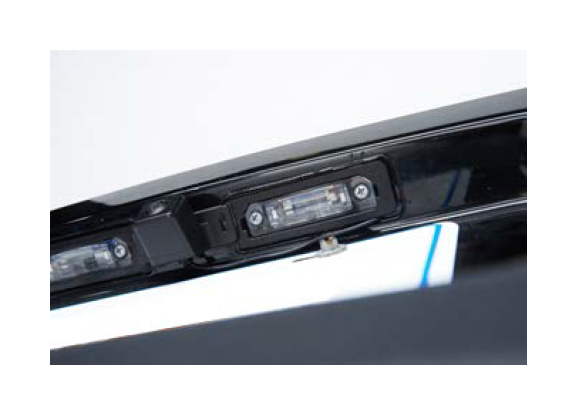
Step 15: Replace the light, retainer and mount the camera in the center of the bumper, between the lights.
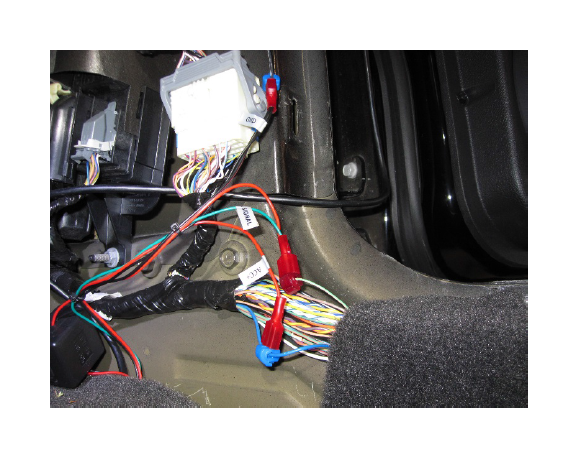
Step 16: Install the wires from the camera and rearview mirror into the exposed wiring on the passenger kick panel side. Some electric tape may need to be removed to access the body harness wires.
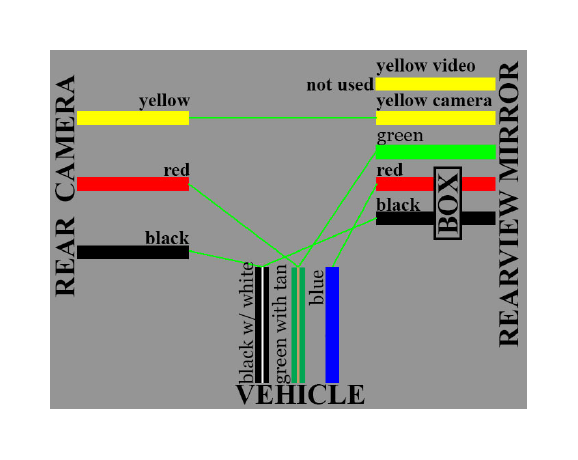
“Due to possible manufacturer changes, it is recommended that you test all wires using a voltage meter or similar device to confirm the wires being used are correct for purposes intended. Failure to do so may result in damage or product failure.”