 FREE 1 to 3-Day Delivery on Orders $149+ Details
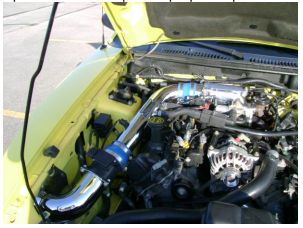
How to Install RedLine Tuning Hood QuickLIFT PLUS System (99-04 All) on your Ford Mustang
Installation Time
1 hours
Tools Required
- Power Drill
- 3/16" and 5/32" Drill Bits
- 5/16" Socket/Nut Driver and Ratchet/Impact Driver
- Permanent Marker
- Tape Measure
- Hammer/Center Punch
- Rivet Gun for 3/16" Rivets
- Flat Blade Screwdriver

Shop Parts in this Guide
Installation Instructions
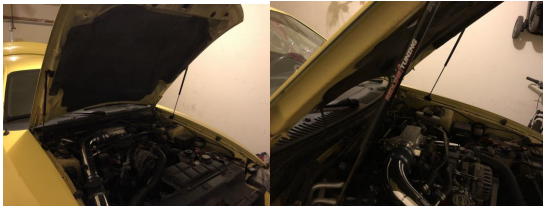
1. Open the hood and put the prop rod up.
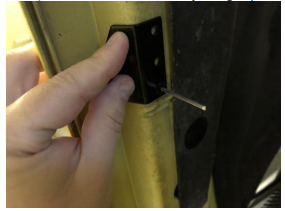
2. Find the angled brackets in your new RedLine Tuning Hood QuickLIFT PLUS strut kit.
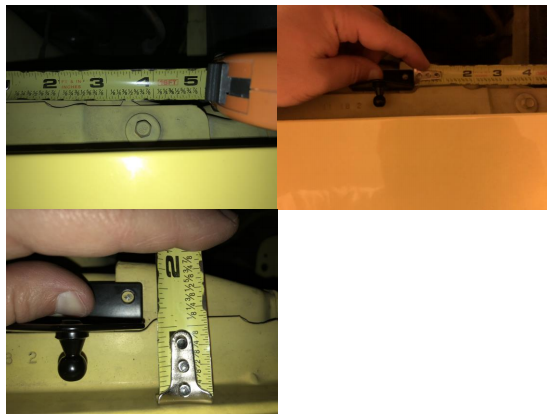
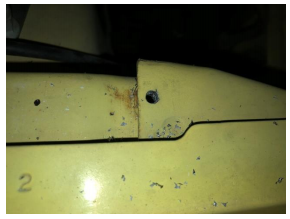
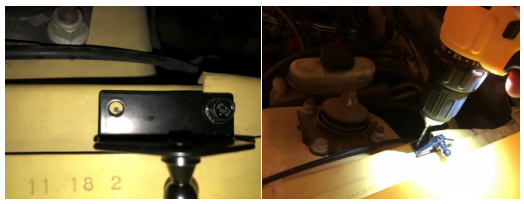
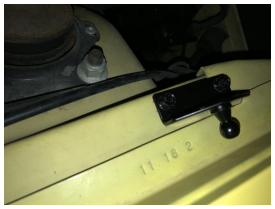
3. Place the angled bracket just above the lip on the stock hood with the ball stud pointed outwards away from the car. You’ll want to leave about 1/16” between the bracket and the lip.
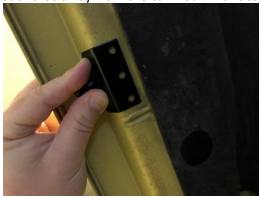
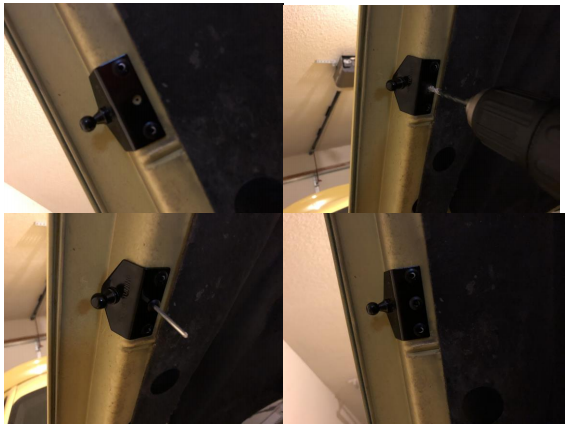
4. Holding the angled bracket flat against the hood. Using your permanent marker place a dot in the center of bottom hole.
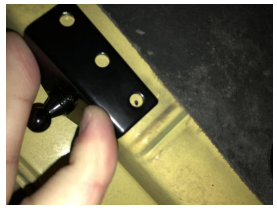
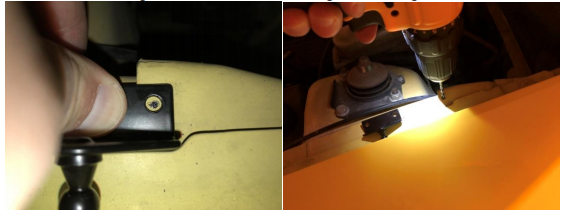
5. Use your center punch and hammer to indent the permanent marker to help guide the drill bit and keep it from wandering. Drill out the hole using your 3/16” drill bit, however be very careful as to not go too far through as you may damage the hood.
6. Test fit the bracket and one of the 4 shorter rivets (the two longer rivets are used for the center holes), if the rivet doesn’t fit in just right you may ream out the hole slightly with the 3/16” bit.
7. Once you have the bracket and rivet in place, slid your rivet gun onto the stem and while applying downward pressure firmly squeeze the rivet gun until the rivet pops. Now your bracket should be held in place.
8. Repeat steps 4-7 to the top bracket hole.
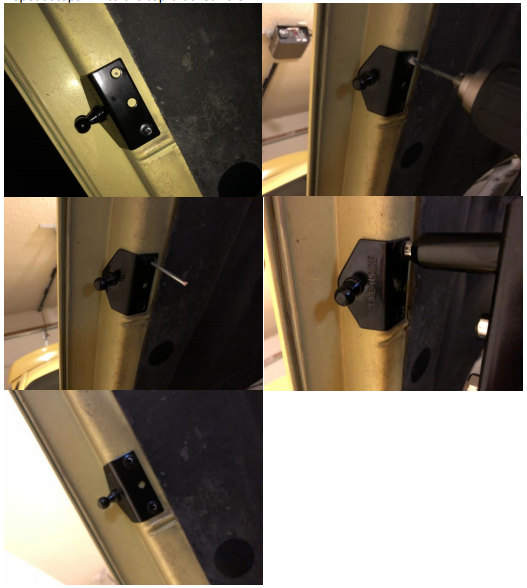
9. Repeat steps 4-7 for the center bracket hole, using the longer rivet.
10. Repeat steps 3-9 for the other side of the hood.
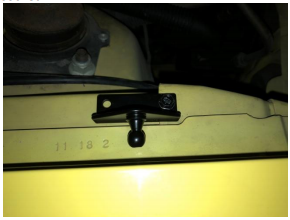
11. Now that you have both angled hood brackets securely riveted in place we can attach the fender brackets.
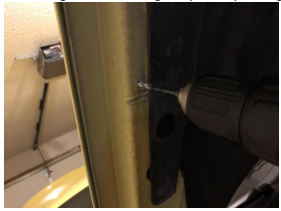
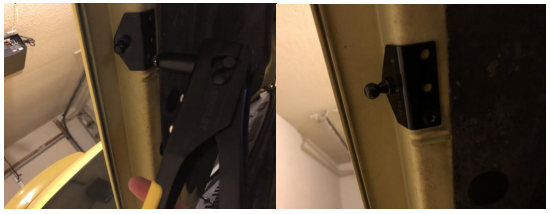
12. Take one of the 90 degree brackets and place it with the ball stud facing outwards, away from the car. These brackets go about 1” from the fender and about 3-3/4” from the center of the upper fender bolt to the edge of the bracket. (The bracket will overlap the two pieces of steel next to where the fender lip angles.)
13. With the bracket in place, mark the first hole. Center punch the permanent marker to keep the drill bit from wandering like before. Drill the hole straight down using the 5/32” drill bit.
14. Place your bracket over the hole, using the included self taping sheet metal screws, place one screw into the hole and tighten down, you can use a 5/16” socket and ratchet but I would recommend using the drill with a 5/16” nut driver attached or an impact driver with a 5/16” socket.
15. Once that screw is tighten down, make sure your bracket is parallel with the fender, mark the other hole, center punch the hole, drill it out using the 5/32” drill bit and attach the other side of the bracket with the self taping sheet metal screw.
16. Repeat steps 12-15 for the other fender bracket.
17. Now that both fender brackets are attached, we just need to install the gas powered struts.
18. Using a flat blade screw driver, pry all 4 c clips on the gas struts up so they can easily pop onto the ball studs. I found it easier to attach the bottom of the strut first and then you’ll have to open the hood a little farther than with the stock prop rod to attach the top of the strut. Once attached, lock in the c clips and repeat for the other side.

19. Once both sides are attached you can raise and lower your hood with ease and no unsightly prop rod, you can remove the prop rod with a 5/16” socket and ratchet.
Installation Instructions written by AmericanMuscle customer N. Trulson on 3/26/18.
