 FREE 1 to 3-Day Delivery on Orders $149+ Details
How to Install Roush Hood Strut Kit (10-14 All) on your Ford Mustang
Installation Time
1 hours
Tools Required
- 1/4” Flat Screw Driver or Pick tool
- 10mm Socket & Ratchet

Shop Parts in this Guide
Installation Instructions
Before installing your ROUSH Hood Prop Rod Eliminator Kit, please read through the entire installation procedure and check to make sure all items are present. Contact ROUSH Customer Service at 1-800-59-ROUSH, 9:00 AM to 5:00 PM weekdays, for any questions regarding fit or instructions that are unclear to you.
Packaging List for Hood Prop Rod Eliminator Kit

NOTICE – IF INSTALLING THIS KIT ONTO 2011 OR NEWER MUSTANG EQUIPPED WITH THE 5.0L 4V Ti-VCT ENGINE THE FOLLOWING MODIFICATIONS MUST BE COMPLETED PRIOR TO INSTALLING YOUR ROUSH HOOD PROP ROD ELIMINATOR KIT.
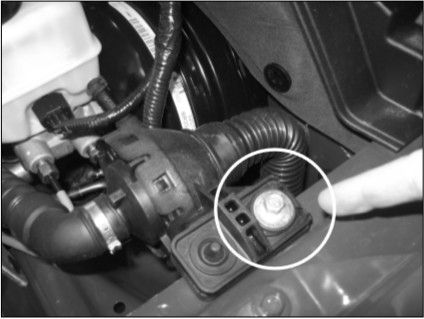
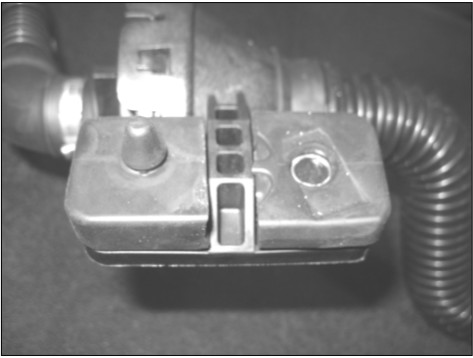
1. Remove the boom tube mounting bolt and J-clip from the vehicle. Set these aside for re-use.
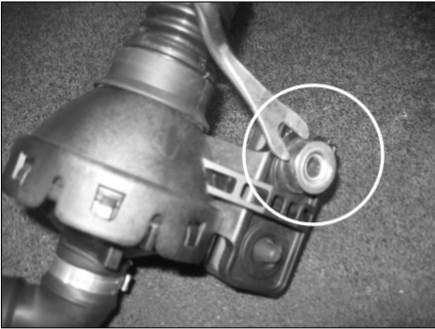
2. Remove the steel reinforcement insert from the rubber grommet. Note - Tube was removed from vehicle for clarity. This modification can be completed with the tube in vehicle position.
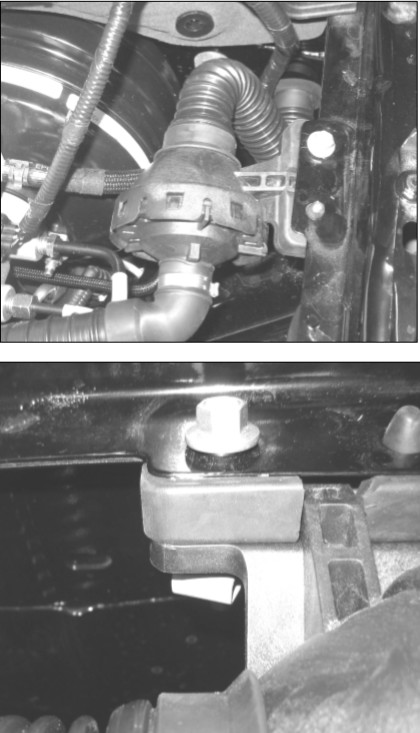
3. Remove the rubber grommet from the tube mounting bracket and cut it into two pieces as indicated by the dashed lines.
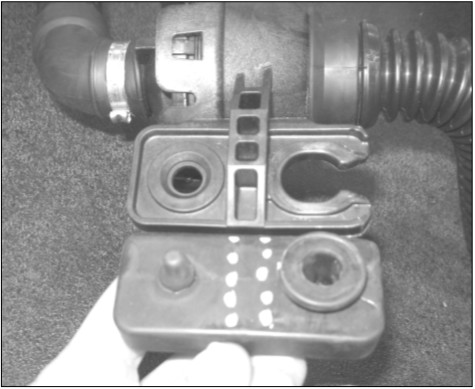
4. Place the rubber grommet onto the top surface of the tube mounting bracket. Re-install the steel insert from the bottom as shown.
5. Position the tube mounting bracket underneath the lip of the fender. Place the J-clip on the bottom side of the bracket against the steel insert and bolt the tube back into position.
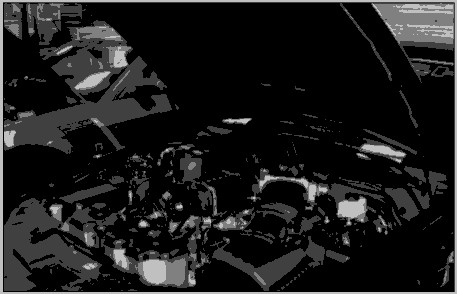
1. Open the hood of your vehicle.
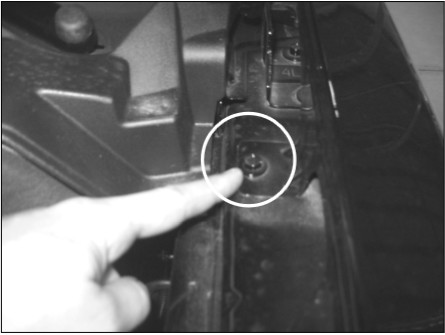
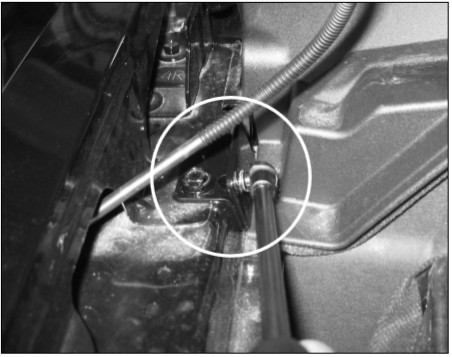
2. Remove the right hand fender (passenger side) bolt shown, closest to the windshield.
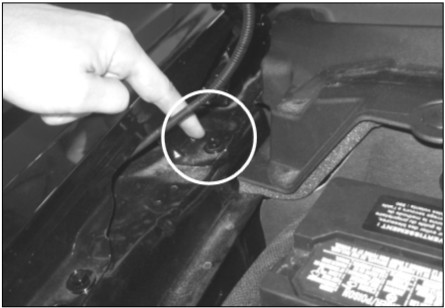
3. Install the right hand fender bracket (1312-RHFNDR) as shown, re-install the factory bolt and torque to 20 Nm.
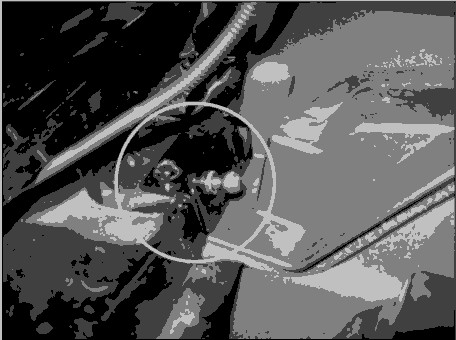
4. Remove the left hand fender bolt shown, closest to the windshield.
5. Install the left hand fender bracket (1312-LHFNDR), re-install the factory bolt and torque to 20 Nm.

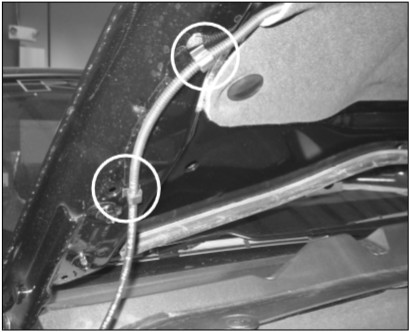
6. On the passenger side of the vehicle, remove the washer nozzle line retention clips from the hood.
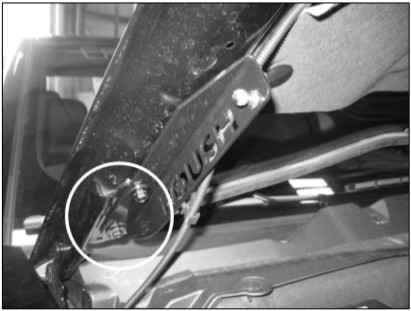
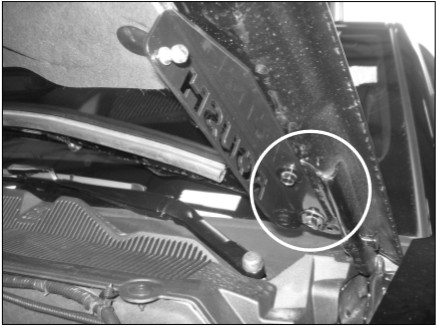
7. On the passenger side of the vehicle, remove the lower hood mounting fastener and slide the right hand hood mounting bracket (1312-RHHD) between the bolt head and the hood hinge.
8. With the help of an assistant, to hold the hood in position, remove the top hood mounting fastener, and rotate the bracket into position. Re-install the fasteners and torque to 20 Nm.
9. Insert the wiper washer retention clips into the holes on the bracket.
10. On the driver side of the vehicle, remove the lower hood mounting fastener and slide the left hand hood mounting bracket (1312-LHHD) between the bolt head and the hood hinge.
11. With the help of an assistant to hold the hood in position, remove the top hood mounting fastener, and rotate the bracket into position. Re-install the upper and lower fasteners and torque to 20 Nm
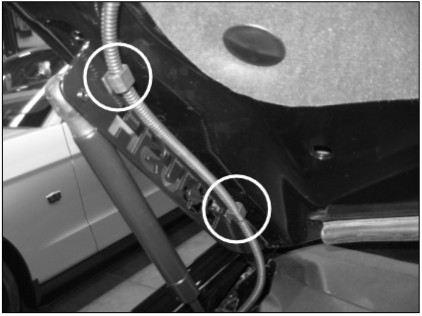
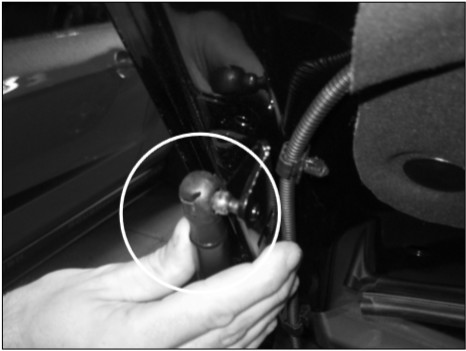
12. On either side, clip the strut onto the fender mounting brackets.
13. Raise the hood upward (to increase travel) and insert the opposite end of the strut onto the hood mounting brackets on either side.
Congratulations!!! You have completed the installation of the ROUSH Hood Prop Rod Eliminator Kit. It is recommended that you save all parts removed from your vehicle during the installation of this kit.

