Guaranteed 12/24 Delivery Still Available see item page for details! available on most items - Details
How to Install Steeda Billet Idler Pulleys (15-17 GT) on your Ford Mustang
Removal of Factory Idler and Tensioner Pulley
1. Turn off the engine and open the hood. Note: to avoid possible injury, we recommend disconnecting the battery, to ensure the engine cannot start.
2. Remove engine cover by lifting up on any corner of it. Rubber grommets simply hold it in place, it is not bolted or clipped on.
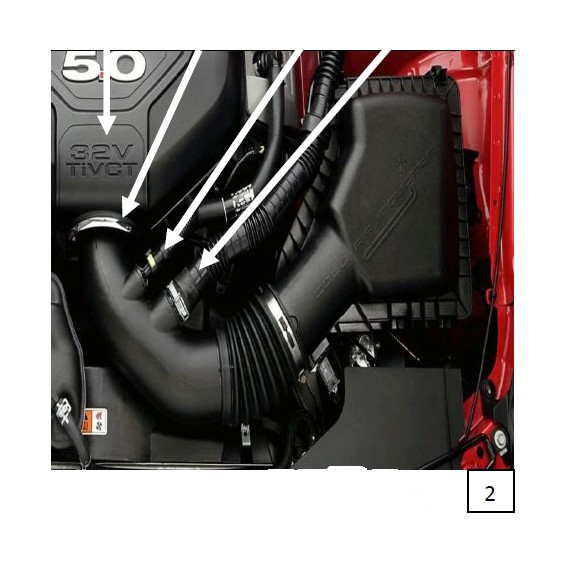
3. Remove the intake tube by first loosening the hose clamps at the throttle body and airbox. Then disconnect the noise and PCV tubes. Now pull it gently off the throttle body and airbox and set it aside. See figure 1.
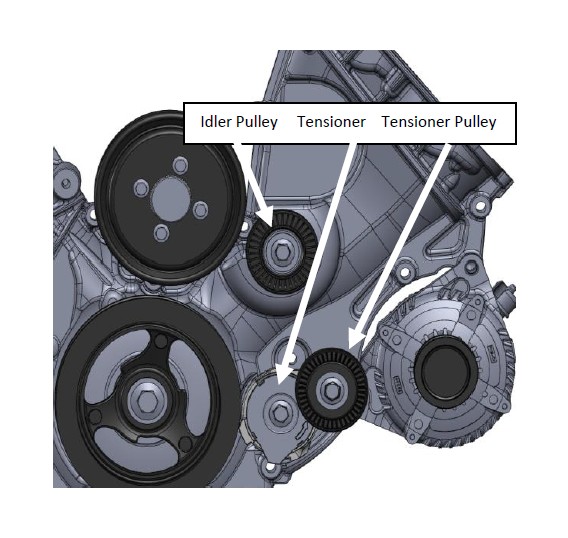
4. Remove the front serpentine belt by using a 15mm ratchet and socket, or wrench, on the end of the tensioner pulley and rotating it counter clockwise to loosen tension on the belt as seen in figure 2. Note: If you do not have a diagram of the belt routing you should draw it out on a sheet of paper to ensure proper fitment later.
5. With the belt loose, slip it off of any pulley and slowly release the tension on the tensioner.
6. Now remove the factory idler pulley by removing the 13mm flanged head bolt from the engine front cover as seen in figure 2.
7. Remove the tensioner assembly from the car by removing the 13mm flanged head bolt securing it to the engine front cover. Note: You may want to remove the factory airbox assembly to gain additional clearance for the tensioner removal.
8. With the tensioner off the car, gently clamp the arm of the tensioner in a vice to hold it in place while removing the pulley.
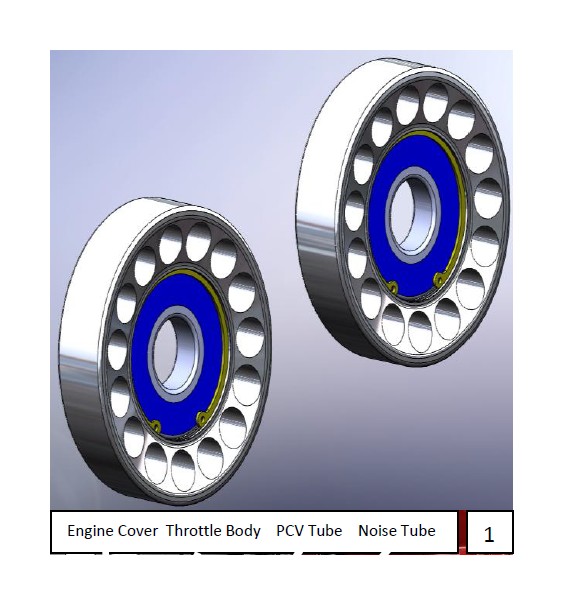
9. Remove the 15mm flanged head bolt from the tensioner pulley. Note: The bolt is left hand thread!! Note: Both pullies are to have their curved faces facing the front of the car. The face with the counterbore is to face the engine once installed.
10. Transfer the new pulley onto the arm of the tensioner. Reinstall the bolt into the tensioner without the steel washer. Tighten the bolt to spec.


Installation of the Steeda Autosports Billet Idler and Tensioner Pulley
11. Install the billet idler pulley over the boss on the front engine cover where the factory pulley bearing rode. Reinstall the bolt and washer to secure the pulley. Torque to spec.
12. With the new pulley installed on the tensioner, reinstall the tensioner on the car. Note: Ensure the small boss on the back of the tensioner is sitting in the bore on the front engine cover as it was originally. Once in place, tighten the bolt to spec.
13. Reinstall the serpentine belt by assuring the belt is properly centered and seated on all pullies except for one then load the tensioner with one hand and slide the belt onto the last pulley with the other. Note: For ease of installation we recommend sliding the belt onto a pulley that is not grooved, i.e the idler or tensioner pulley.
14. Reinstall the airbox (if removed), and intake tube in reverse fashion of how it was removed. Note: Be sure to have the MAF sensor plugged in and the PCV and noise tubes securely connected.
15. Reconnect the battery (if disconnected), and start the car. Run the engine for around 10 seconds then turn it off and check to see if the belt is on all the pullies properly, it must be centered or the belt may jump off. You are done!


