 FREE 1 to 3-Day Delivery on Orders $149+ Details
How to Install J&M Caster Camber Plates on your 1994-2004 Mustang
Installation Time
3 hours
Tools Required
- Jack stands X2
- Floor Jack
- Impact wrench
- Air compressor
- Drill
- Socket wrench (3/8” or ½”)
- Socket sizes 14mm, 21mm (3/8” or ½”)
- Drill bits ¼”, 13/32”
- Center punch

Shop Parts in this Guide
1. Loosen the lug nuts on the front wheels before raising the car. Jack up the car and support it on 2 jack stands. Remove the front wheels from the vehicle
1. Loosen the lug nuts on the front wheels before raising the car. Jack up the car and support it on 2 jack stands. Remove the front wheels from the vehicle
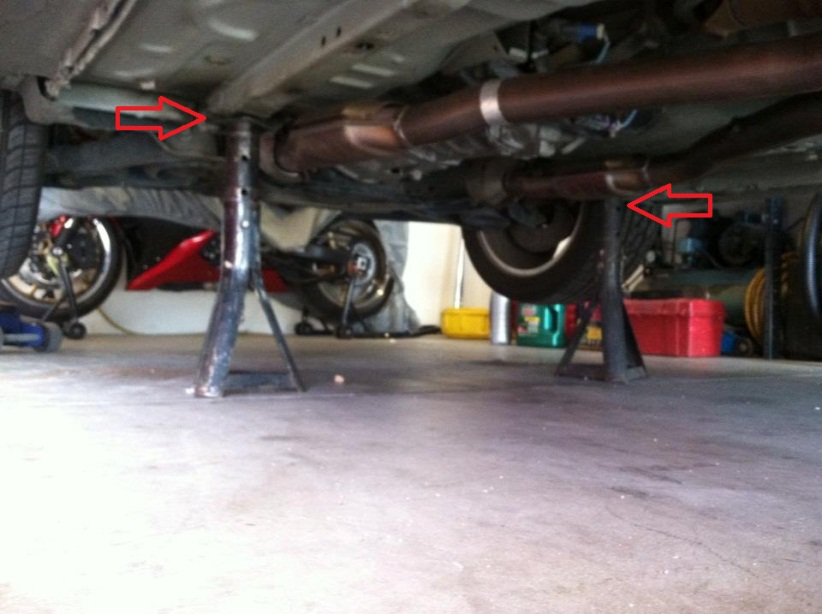
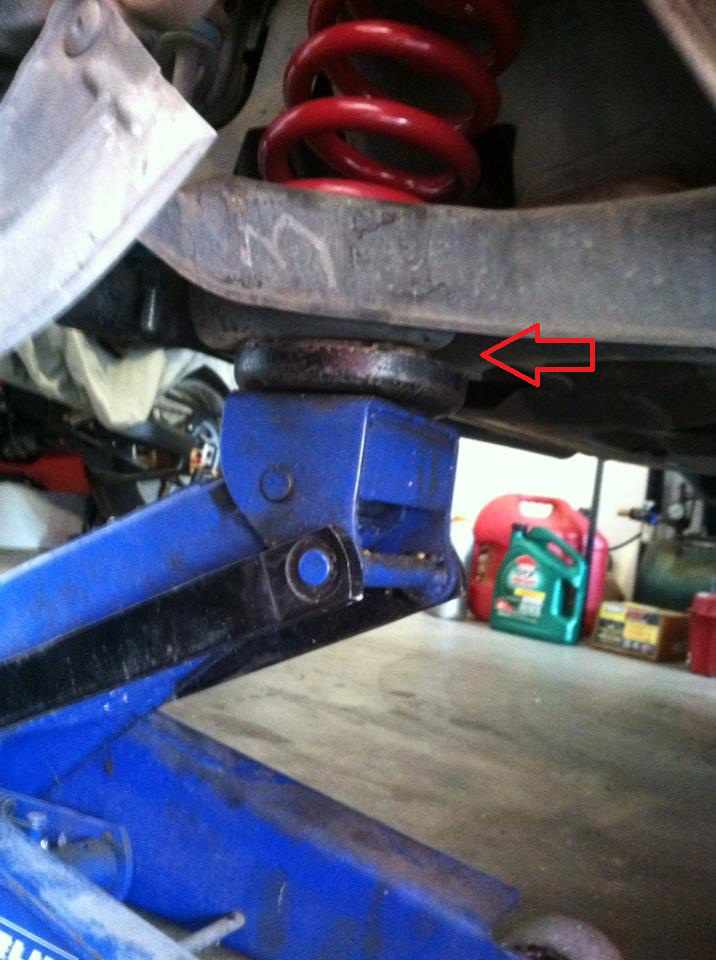
2. Place a floor jack under the control arm. Supporting the lower control arm raise the arm just enough to take the load off the strut.
2. Place a floor jack under the control arm. Supporting the lower control arm raise the arm just enough to take the load off the strut.
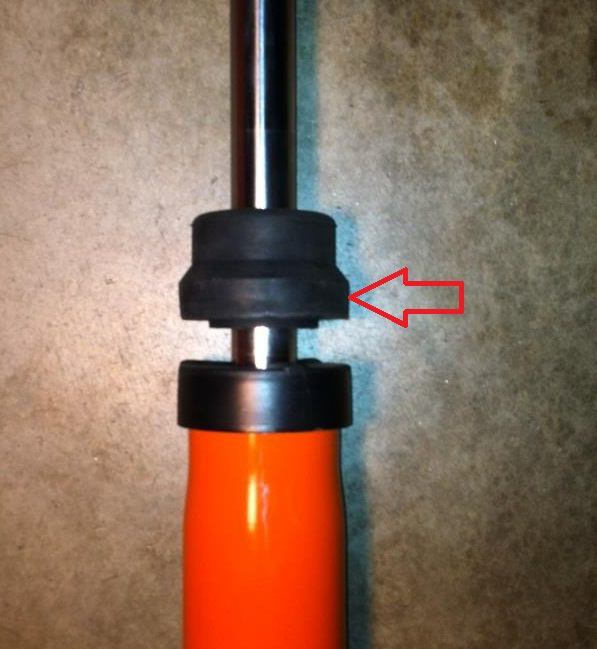
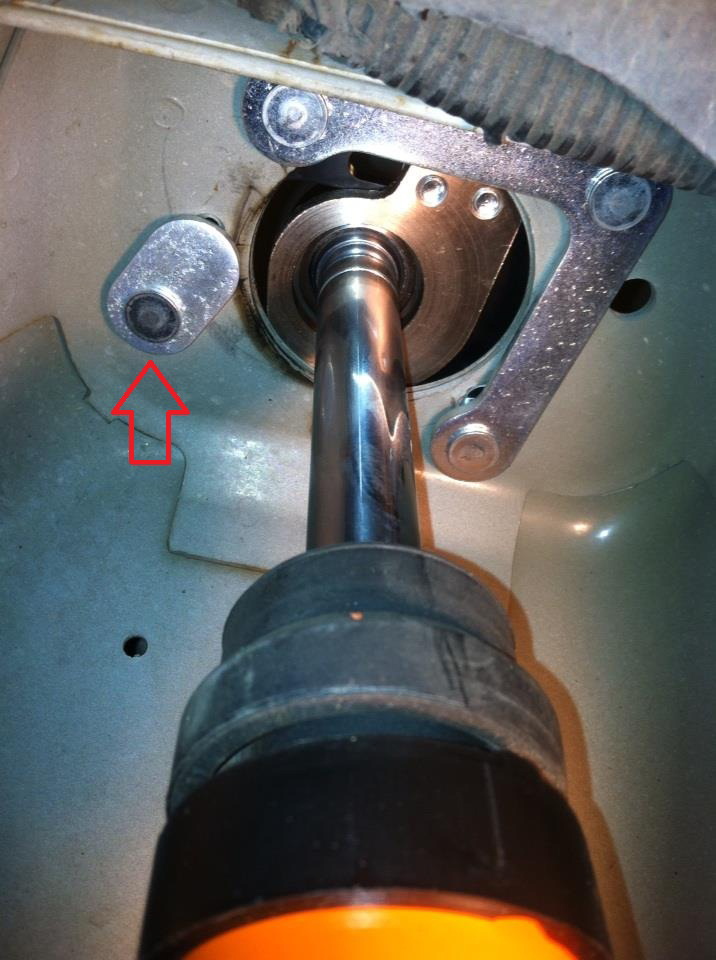
3. Remove upper strut mounting nut using 21mm socket. Removing the top strut nut requires an impact gun. Since the nut is torqued to 90 lb-ft, it's almost impossible to loosen any other way because turning the nut also turns the strut.
3. Remove upper strut mounting nut using 21mm socket. Removing the top strut nut requires an impact gun. Since the nut is torqued to 90 lb-ft, it's almost impossible to loosen any other way because turning the nut also turns the strut.
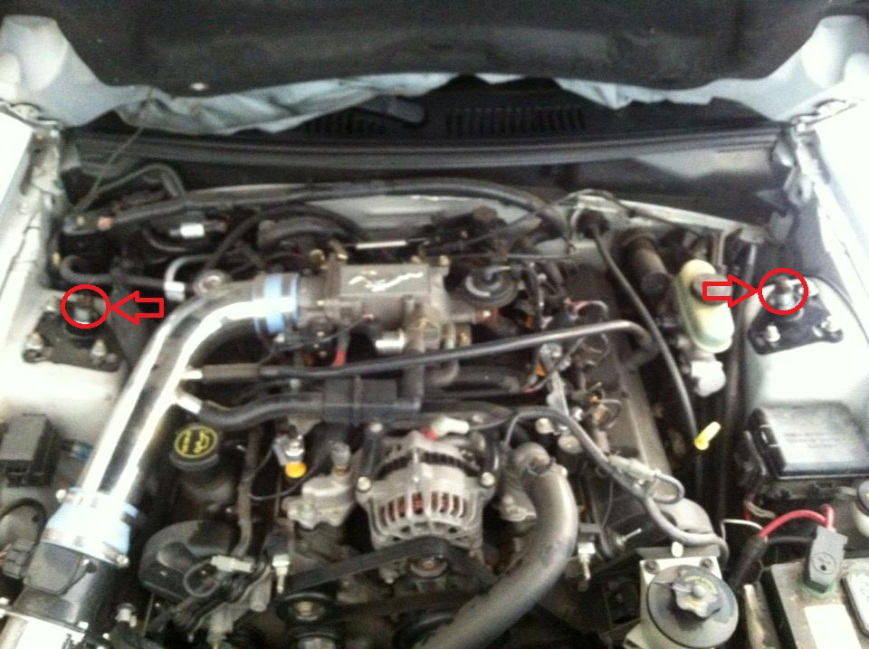
4. Loosen the three nuts that hold the strut mounting bracket in place, using a 14mm socket.
4. Loosen the three nuts that hold the strut mounting bracket in place, using a 14mm socket.
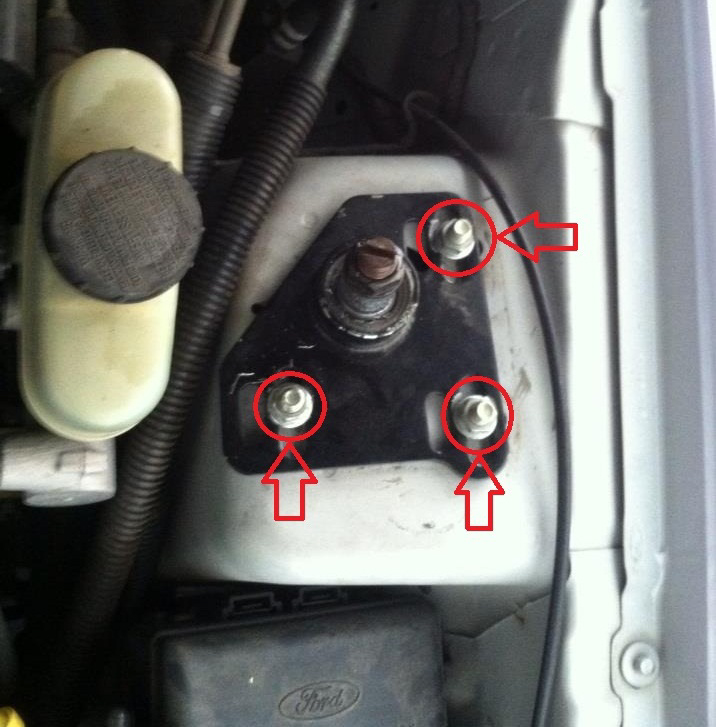
5. Remove top three nuts then remove the bottom plate.
5. Remove top three nuts then remove the bottom plate.

6. Carefully lower the control arm with the jack until there is enough room to remove the bottom plate. To gain clearance, push down on the strut until the rod is below the strut tower.
7. Remove top alignment plate from strut tower. (In some cases, a rivet or two from the factory may be holding the plates in place. Remove the rivets with a drill or chisel.)
8. Remove the factory dust cover from the strut leaving the factory bump stop in place.
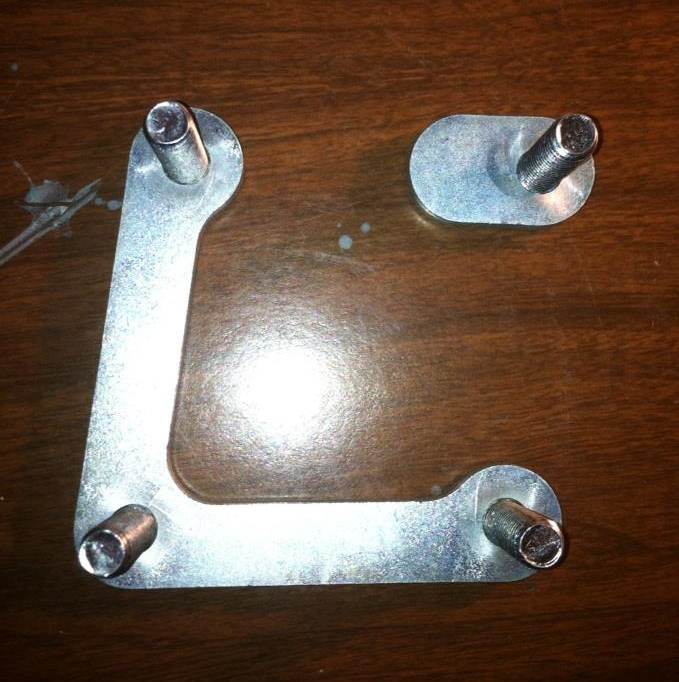
Note: use figure 1 for 99-04 model with four bolt option. New lower bolt plate may look like the factory 3 stud plate that came on vehicle with a separate stud and not like the one pictured below that has 4 studs on one plate. This separate stud is the one you will use after drilling the new hole. (Not recommended to run only 3 studs.)
Note: use figure 1 for 99-04 model with four bolt option. New lower bolt plate may look like the factory 3 stud plate that came on vehicle with a separate stud and not like the one pictured below that has 4 studs on one plate. This separate stud is the one you will use after drilling the new hole. (Not recommended to run only 3 studs.)
9. If using the 4th bolt option on 94-04 model please follow steps A-F
A. Locate the new lower bolt plate with three studs.
B. Install the lower bolt plate up from underneath the strut tower.
C. Slide the supplied bolt plate all the way to the most positive location in the factory slots (toward the outside of the vehicle.)
D. Place the main support camber plate without the bearing housing attached also in the most positive camber position possible.
E. Mark the 4th bolt location which will also be the most positive camber position on the optional slot.
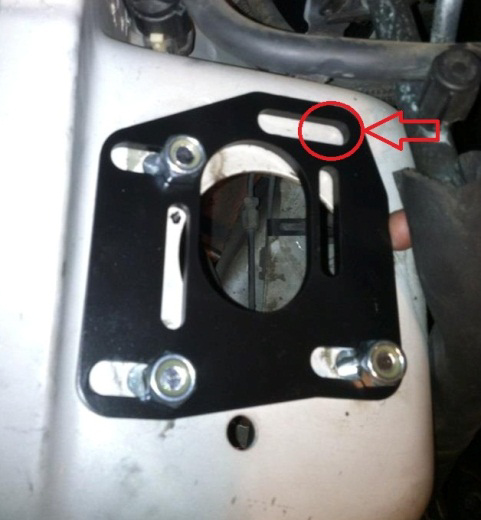
F. Center punch and drill using a 1/4" pilot hole to finish with a 13/34" drill bit. (Careful with hose when drilling hole.)
F. Center punch and drill using a 1/4" pilot hole to finish with a 13/34" drill bit. (Careful with hose when drilling hole.)
10. Install new bottom plate up through the 3 mounting slots of factory tower.
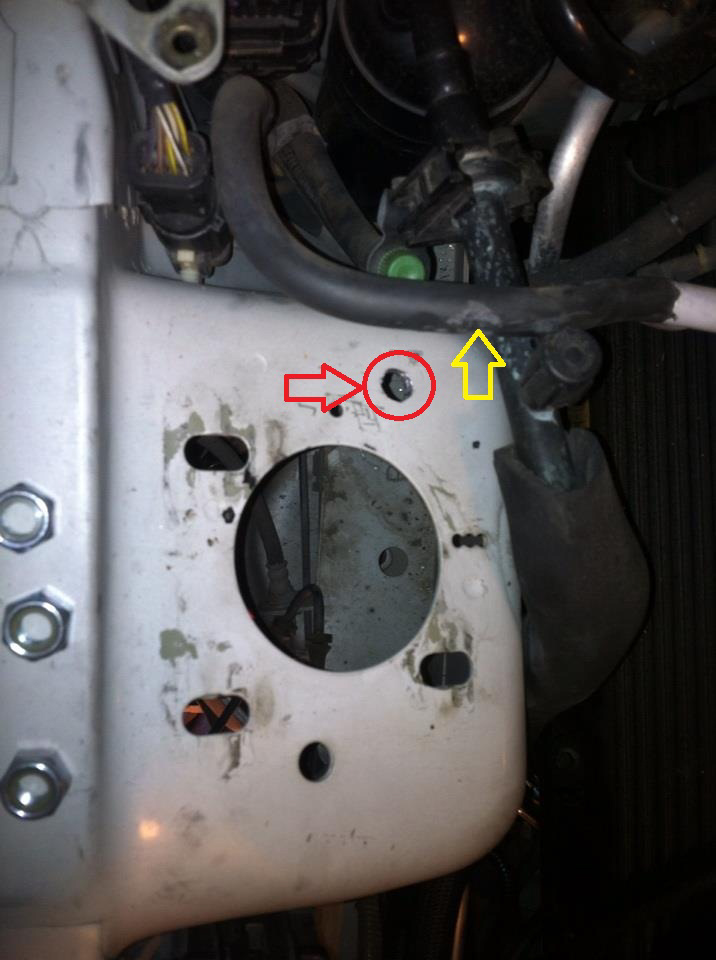
11. Install the fourth stud in the new drill slot.
10. Install new bottom plate up through the 3 mounting slots of factory tower.
11. Install the fourth stud in the new drill slot.
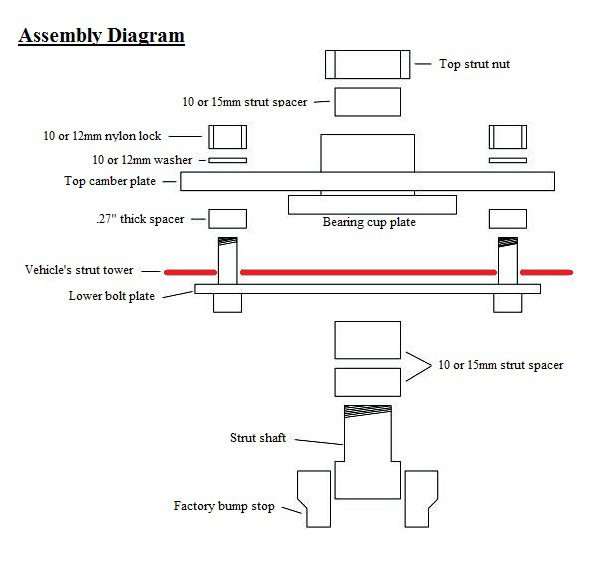
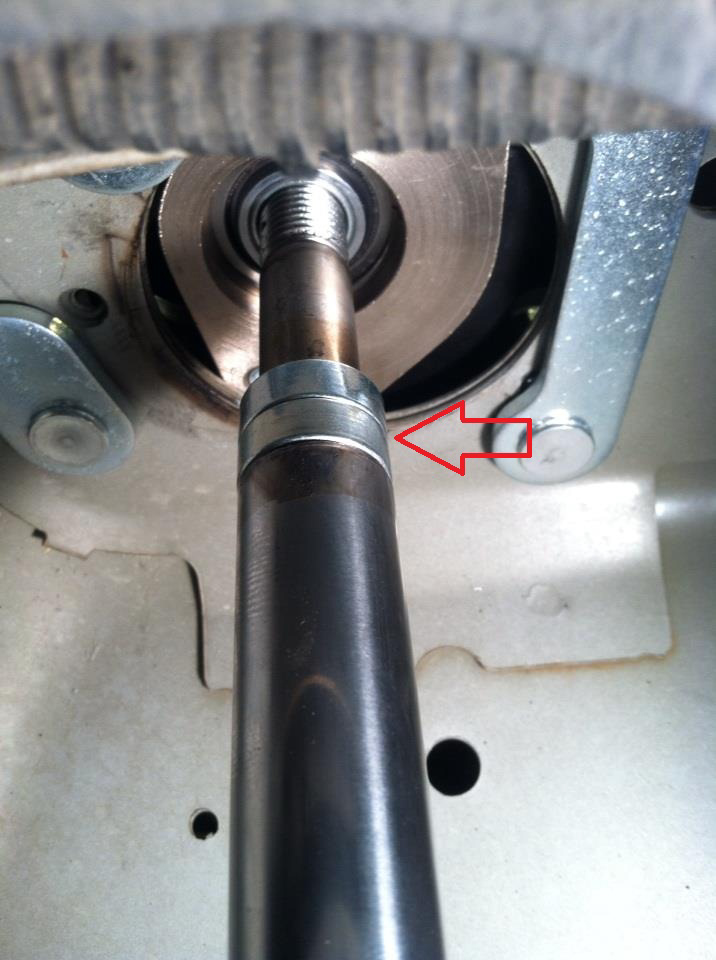
12. Install 10 or 15mm strut spacer. (I used 2 10mm spacers on my Koni struts.)
12. Install 10 or 15mm strut spacer. (I used 2 10mm spacers on my Koni struts.)
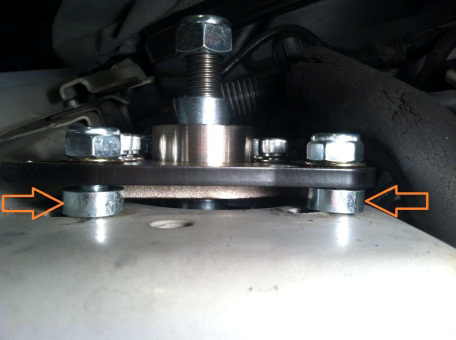
13. Install the.27" thick spacers onto the four bottom plate studs.
13. Install the.27" thick spacers onto the four bottom plate studs.
14. Install the new top plate. Place 2 nuts to hold it in place, slide the strut shaft thru bearing cup.
14. Install the new top plate. Place 2 nuts to hold it in place, slide the strut shaft thru bearing cup.
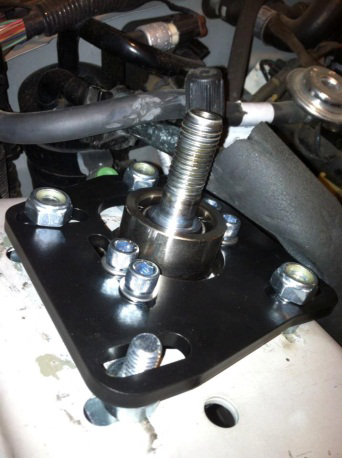
15. Depending on your strut and your hood, you will need to space the strut with the supplied (2-10mm and 1-15mm long spacers per strut) spacers to bring the strut as close as possible to your hood without hitting.
15. Depending on your strut and your hood, you will need to space the strut with the supplied (2-10mm and 1-15mm long spacers per strut) spacers to bring the strut as close as possible to your hood without hitting.
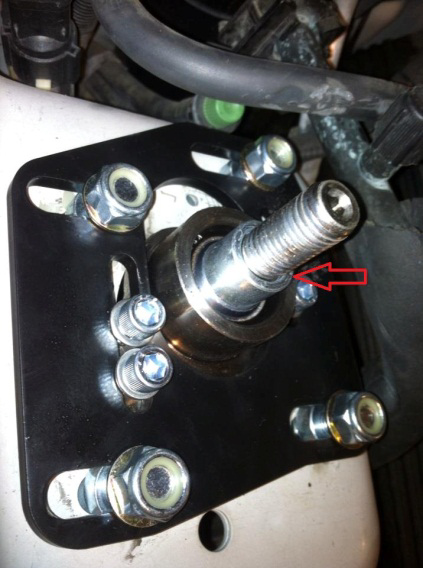
16. Once accomplished check to ensure strut does not bottom internally, then torque strut nut to 56-90 lb-ft. Now you can lower the floor jack and move to the other side.
Note: Have your vehicle professionally aligned after install of camber plates.
Installation instructions provided by AmericanMuscle Customer Miguel Rocha 1/08/2012
