 FREE 1 to 3-Day Delivery on Orders $149+ Details
SLP Loudmouth Catback Installation Guide ('99-'04 GT/Mach 1)
Installation Time
2 hours
Tools Required
- Jack stands (x2)
- Jack (x2)
- Metal cutting tool (For removing original exhaust from car)
- Socket set
- Squirt bottle full of soapy water (To check for leaks.)

Shop Parts in this Guide
Installation
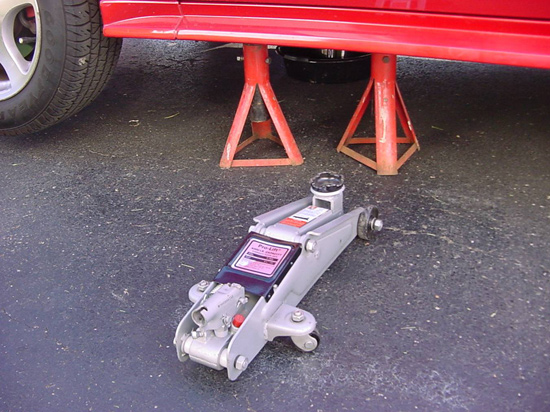
1. Start by jacking up the rear of the car. Place jacks and jack-stands on the rear frame. The higher the car is off the ground, the easier it is to install the new exhaust kit. I always use jack-stands with a regular jack next to it as a safety. It is never a bad idea to place a piece of cardboard underneath the car for comfort while working under the car.
2. The first step to installing the SLP Loudmouth exhaust cat-back system is to remove the original exhaust from the car. This can be accomplished by unbolting the two flanges that connect the cat-back system to the “H” pipe just after the catalytic converters. After unbolting the exhaust from the “H” pipe, remove the exhaust piping from the hangers that are on the car. Donotremove the hangers from the car as they will be used for the installation of the new kit.
3. Start the installation from the middle of the car and work towards the back. Begin with the two flange pieces, place the flanges onto the pipe as shown. Place the bolts nuts and washers through the holes in the flanges and the flanges on the“H” pipe on the car. Remember, the shorter of the two flange pipes goes on the driver’s side. Once they are in place, tighten them down slightly so that they stay in place. They will require some torque to fasten them but donottighten them completely until the entire exhaust is installed. Leaving them loosely fitted will provide you with room for adjustment
4. Once the two flange pipes are in place, it is now time to continue installing the system by now installing the SLP Loudmouth Resonators as shown in the image below. The “mufflers” that come with this kit are known as resonators and instead of certain mufflers; they have no internal “packing” or other insulation to reduce exhaust noise. The resonators create a widened area that allows the sound to bounce around the pipe and cancel itself out rather than using insulation to absorb the sound. Be aware that the resonator is considered a muffler but they are very loud especially on a V8. I have them installed on a V6 and they are loud so I can only imagine what they sound like with two more cylinders. Check local noise ordinances as well as state laws regarding the noise a vehicle can make. Some states have outlawed aftermarket exhaust systems altogether so it is a good idea to check to make sure that you are not breaking any laws.
5. The “mufflers” that come with this kit are known as resonators and instead of certain mufflers; they have no internal “packing” or other insulation to reduce exhaust noise. The resonators create a widened area that allows the sound to bounce around the pipe and cancel itself out rather than using insulation to absorb the sound. Be aware that the resonator is considered a muffler but they are very loud especially on a V8. I have them installed on a V6 and they are loud so I can only imagine what they sound like with two more cylinders. Check local noise ordinances as well as state laws regarding the noise a vehicle can make. Some states have outlawed aftermarket exhaust systems altogether so it is a good idea to check to make sure that you are not breaking any laws.
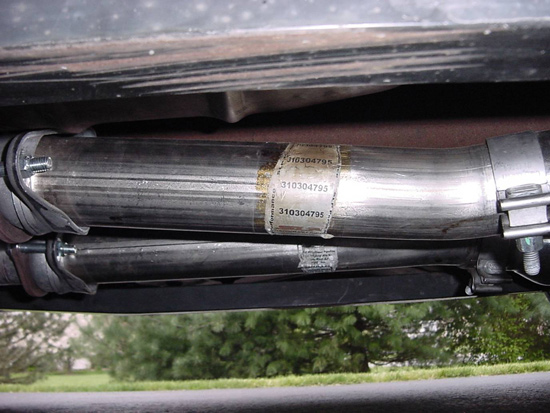
6. To continue with the installation, slide a band clamp onto the flange pipe and then place the resonator onto the end of the flange pipe. The way the end of the resonator is made, it will simply slide into place. Loosely snug the band clamp so that the resonator does not fall off and repeat these steps for the other side. An image of the band clamps provided is shown below.

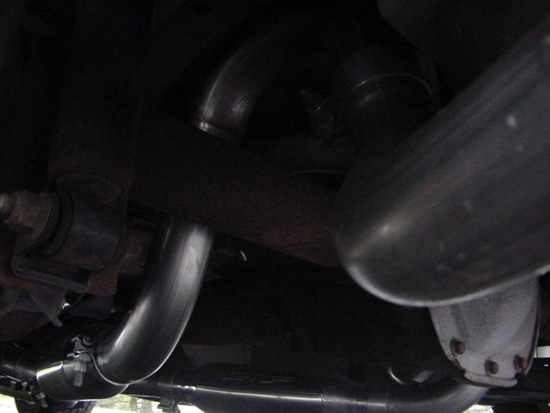
7. The next set of instructions is a bit confusing as well as slightly frustrating. Taking your time will save you a lot of time and effort. Slide the over-axle pipe over the axle and then fit it onto the end of the resonator. (Do not forget to place a band clamp over the pipe as well.) The over-axle pipe is pictured below with the resonators in the background.
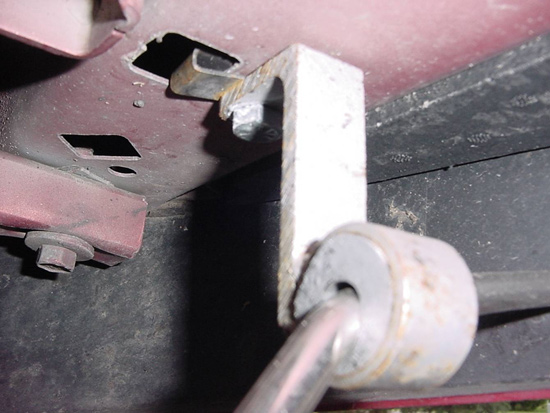
8. Looking at the metal hanging brackets welded onto the pipe should give you an indication as to which side each pipe goes onto. Once the pipe is in place, slide it onto the resonator and then slip the metal hangers onto the hangers on the car. Tighten the band clamp between the resonator and the over-axle pipe so that it does not slide off.
9. From here, it is best to work from the back of the car and meet up at the over-axle piece. It is easier this way so that the after-axle exhaust pipe does not slide off of the over-axle piece while installing. Place the tips into the tailpipe hangers on the back of the car. If you are installing this system on a GT, just use the exhaust hangers that are on the car. A picture of these hangers are shown below. If you are installing this system on a V6, use the tailpipe extenders.
10. Once the tailpipes are installed, place a band clamp over the tailpipe and then slide the after-axle pipe onto the tailpipe. After completing the same steps for the other side, it is now time to finish the installation. Make sure that you place a band clamp between the over-axle and the after axle, piece and then slide them together. You may have a little trouble because they will need to be tightened slightly for the after-axle piece to connect with the over-axle piece because of gravity.
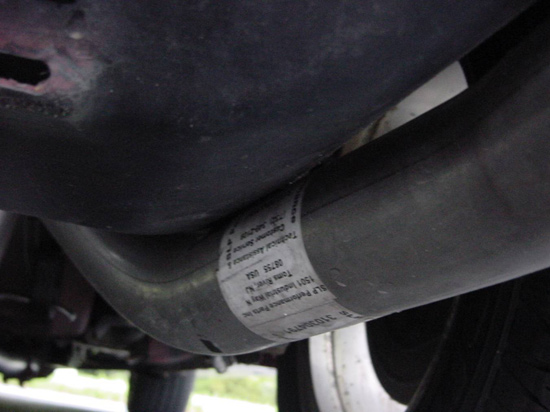
11. Once everything is installed, go around and make sure that all of the piping is fitted properly and that everything is snug. It is now time to look and make sure that none of the piping is close to the rest of the car. Special places that should be checked are the flange pipes and their distance from the drive-shaft. Another very important point is the after-axle pipe as it comes near the fuel tank. Especially on the passenger side, the piping has a tendency to rub up against the outer protector of the tank as shown below.
12. Also, make sure that when the suspension is compressed on the car, it does not touch the over-axle piping. Also, a problem that I had when installing the piping was the over-axle piece on the passenger side had a tendency to rub against the frame of the car at the top of the curve as it passes over the axle. Make sure that there is at least a good inch and a half clearance around the piping at all times. Remember, the exhaust pipe becomes very hot as the engine runs even for a short period of time. Just ask the burnt skin on my fingers.
13. After you are sure that the piping is all connected properly with no problems, start to tighten the band clamps with a 5/8”wrench. It may take a while, but make sure that everything is tight. Start the car to check for leaks and rattles.
MAKE SURE YOU ARE IN A WELL VENTILLATED AREA WHEN WORKING ON A CAR THAT IS RUNNING. EXHAUST GAS IS LETHAL.
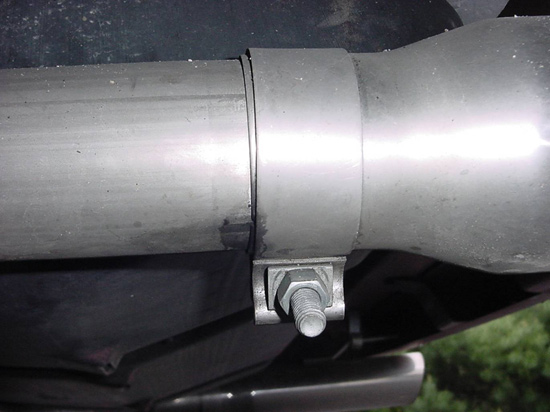
14. While the car is running, lie down next to the car and look for leaks and listen for rattles. Leaks can be spotted by black or very dirty water shooting out between the pipes. Take note of where the exhaust leaks and rattles are and then shut the car off. Wait a few minutes until the piping cools off and tighten the places where the leaks are. If you hear a rattle, try and determine what two surfaces are touching and then move the pipe as necessary to stop the rattling. If the pipes are leaking, tighten them and then turn the car on to see if you fixed it. If they keep leaking, repeat the past steps until it stops leaking. After I installed the kit and turned the car on, I had about five leaks in the system. Take it one step at a time and fix one leak at a time. Below is what the piping looks like if it has a leak in it. The black smudge by the band clamp is the exhaust leaking.
15. If a pipe does not stop leaking, fix as much has you can and then just drive the car around for about ten minutes. Usually, the pipes will heat up, expand, and stop leaking. The connections in the pipes will sometimes seal themselves. Remember, that just because it is not shooting water out, does not mean that it is still not leaking exhaust gases. Use some soapy water in a squirt bottle and spray it on the pipe and then look for air bubbles to indicate a leak.
MAKE SURE THAT ALL LEAKS ARE TAKEN CARE OF. A LEAK IN THE EXHAUST SYSTEM CAN BE FATAL IF THE CAR IS RUNNING BUT NOT MOVING WHILE THERE ARE PASSENGERS INSIDE!!
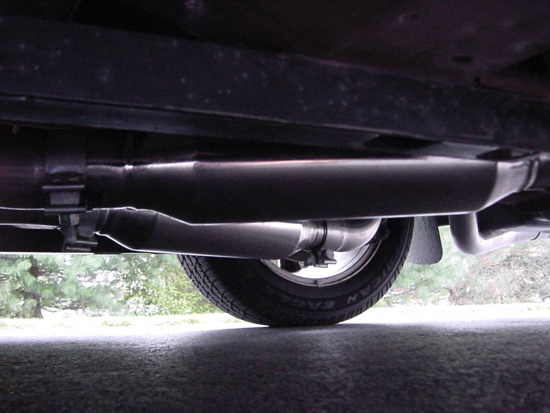
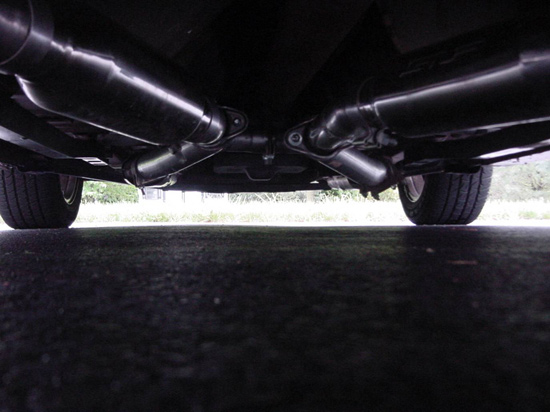
Below is a picture taken from behind the car of the SLP Loudmouth system installed.
16. Once all of the leaks and rattles are taken care of, shut off that radio and listen to the new loud tone of your SLP Loudmouth I system and GO OUT AND DISTURB THE PEACE!!

Installation instructions provided by AmericanMuscle customer Will Rimmler (5/13/08)
Related Guides
-
Installation
-
Installation
-
Installation

