 FREE 1 to 3-Day Delivery on Orders $149+ Details
SLP Catted X-pipe Installation Guide ('99-'04)
Installation Time
2 hours
Tools Required
- 8mm wrench or ratchet
- long screwdrivers (x2)
- 3/8's drive ratchet with long extension and swivel head attachment with 15 mm and 13 mm deep sockets
- Small adjustable light
- PB blaster (optional)

Shop Parts in this Guide
Installation
1. Disconnect the cars battery
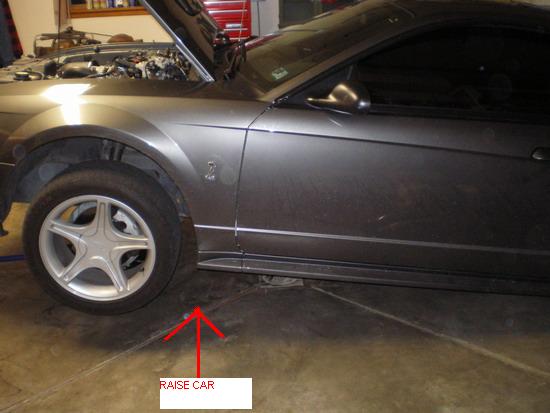
2. Securely raise the car with enough room to work safely under the car.
3. Remove the nuts from the exhaust manifold using a 15mm socket with long extension on the driver side. While on the passenger side you will need to use the swivel attachment. It is recommended to use "PB Blaster" (or other similar product ) to loosen the nuts.
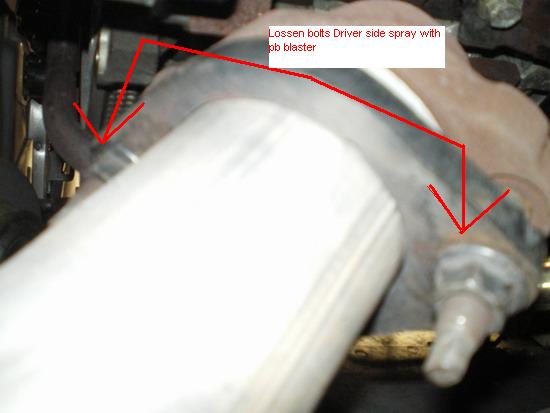
Above image of the car’s driver side
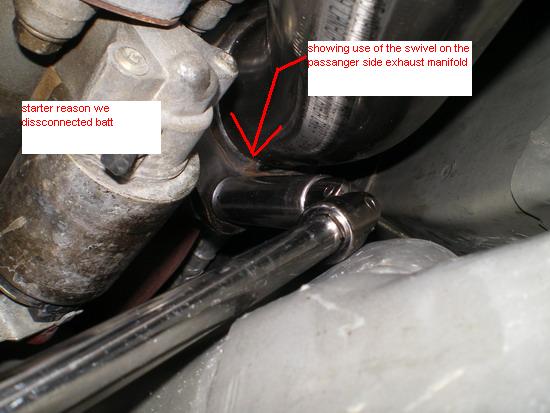
Above image of the cars passenger side showing swivel attachment in use.
4. Now that you have the front bolts loose turn your attention to the back of the car and remove the mid pipe from the cat-back a 15 mm socket will work here as well.
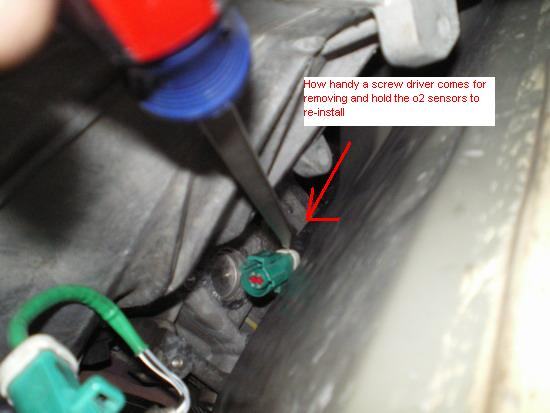
5. At this point your mid pipe should want to drop down on its own, the only thing that will be holding it in place is your O2 sensors. Carefully remove the O2 sensors using a long screwdriver or your hand if possible.
6. Now that the mid pipe is off the car you will now need to swap out the 02 sensors and install them into the new X-pipe. Be sure to keep the O2 sensors in the same locations that you removed them from the old mid pipe.

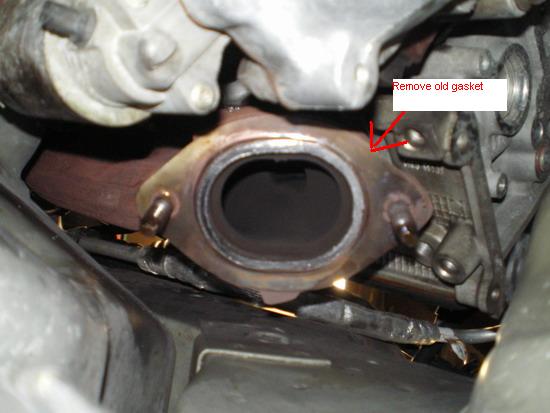
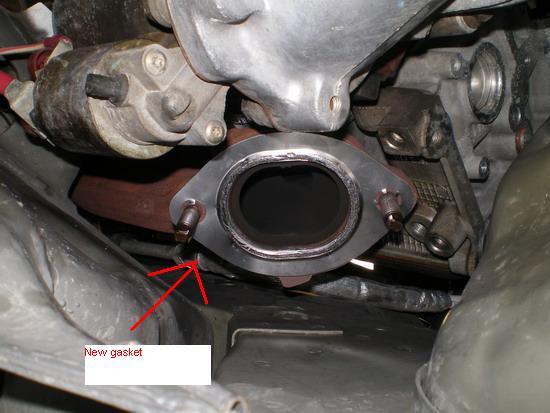
7. Now is the time to start installing the new X-pipe. You will want to replace the old exhaust gasket with the new one from the kit. In the below images you can see the old gasket verses the new gasket.
8. With the new gasket in place you can loosely install the passenger side down pipe, do not tighten. You can also reattach the front O2 sensor at this point, green to green.
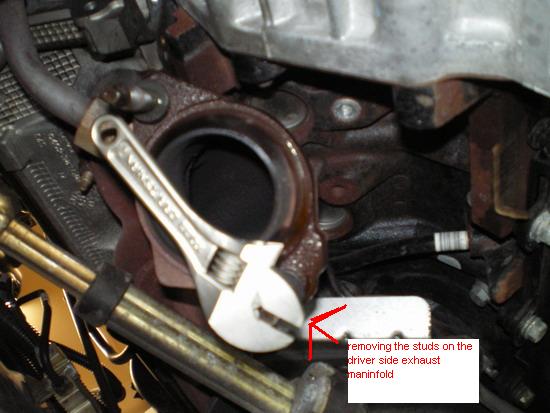
9. The driver side down pipe requires the removal of the old studs, so that they can be replaced the with regular bolts. Now loosely install the driver’s side down pipe, do not tighten. You can also reattach the front O2 sensor at this point, green to green.
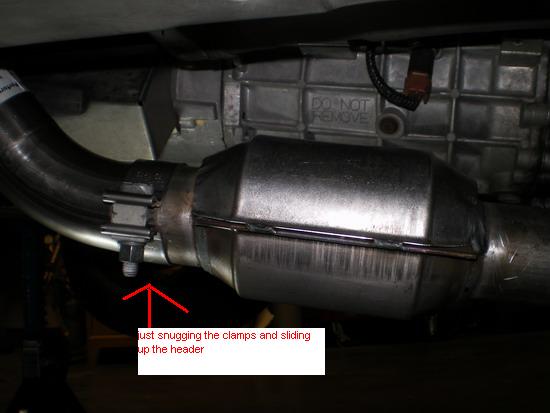
10. The next step will be to install the catalytic converters onto the down pipes. Be sure to slide the band clamps on to the piping before installing catalytic converters. Slide the catalytic converters into place with the heat shield facing up. Only snug the cats into place, do not tighten yet. Repeat for other side.
11. Once the cats are in place you can install the new X-pipe. I found it easier to insert the new X-pipe into the existing cat-back first. Then insert the X-pipe into the catalytic converters. Remember to keep everything loose for now, do not tighten. It should look like the image below.
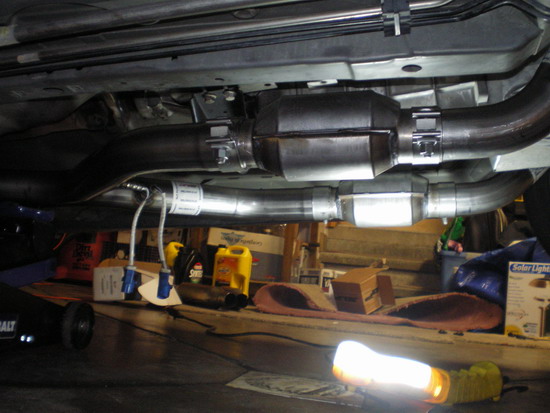
12. Now reattach the rear O2 sensors, blue to blue. Note: On the 2004 models you will need to use O2 extensions, you will want to run the extensions over the transmission cross member to keep them away from the heat of the exhaust.
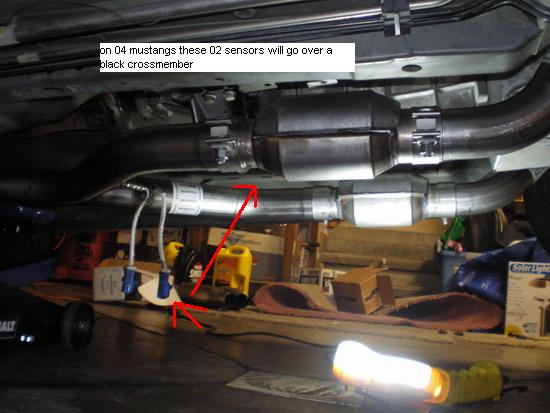
The above image pertains to the 2004 mustang's only
13. Now with everything in place check the entire exhaust system for clearance against the body and moving parts. Reposition the exhaust where needed so that everything fits correctly.
14. Now you can start tightening the bolts. Starting at the exhaust manifold tighten the bolts from front to back. The exhaust manifold's should be tightened to 30 ft/lbs and flange bolts should be tightened 26 ft/lbs.
15. Reconnect the battery. Start the vehicle, inspect for any exhaust leaks. Double check all fasteners adjust as necessary.
16. Now go to and enjoy the new sound and power your New SLP Catted X-pipe has to offer.
Installation instructions provided by AmericanMuscle customer by Chris Morris
Related Guides
-
Installation
-
Installation
-
Installation

