 FREE 1 to 3-Day Delivery on Orders $149+ Details
How to Install Airaid Race Cold Air Intake - Track Day Dry Filter on your Mustang

Shop Parts in this Guide
Component Identification
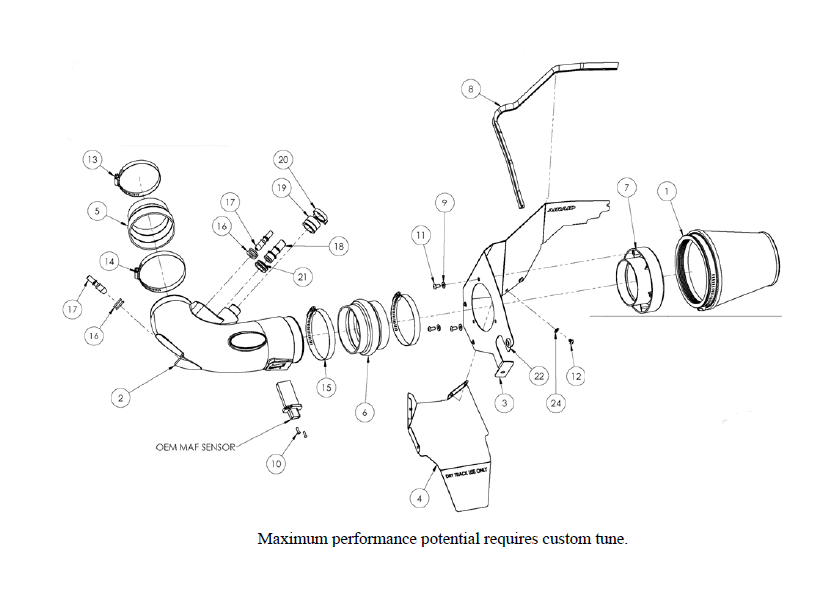
1 Airaid Track Day Filter 1
2 Airaid Intake Tube 1
3 Top Panel 1
4 Bottom Panel 1
5 Reducing Coupler 1
6 Hump Hose 1
7 Filter Adapter 1
8 Weatherstrip 23" 1
9 1/4" Flat Washer 3
10 8-32 Button Head Screw 2
11 1/4-20 Button Head Screw 3
12 ¼"-20 Button Head Screw 4
13 #56 Hose Clamp 1
14 #64 Hose Clamp 1
15 #68 Hose Clamp 2
16 1/2" ID Grommet 2
17 Aluminum Fitting 2
18 Aluminum Fitting 1
19 Resonator Cap 1
20 1-¼" Speed Clamp 1
21 13/16" ID Grommet 1
22 3/8” Grommet 1
23 Firewall Plug (not shown) 1
24 ¼" Lock Washer 4
25 Blind Grommet (not shown) 1
Full color instructions can be viewed on our web site at Airaid.com. If you need any assistance please call 1-800-858-3333 to speak with a representative in our Customer Service Center before returning the product.
1. Remove the battery box cover in the cowl and disconnect the negative battery terminal.
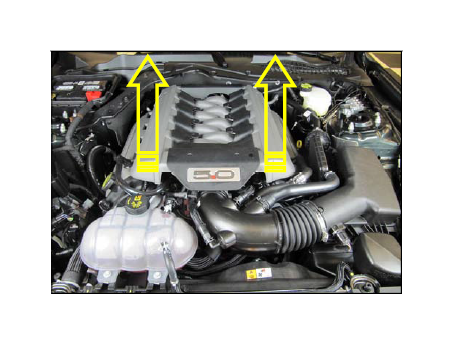
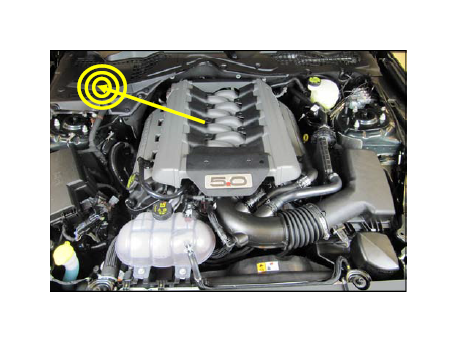
2. Remove the strut tower brace is so equipped. Lift up on the engine cover to unseat it from it’s mounting grommets and set it aside.
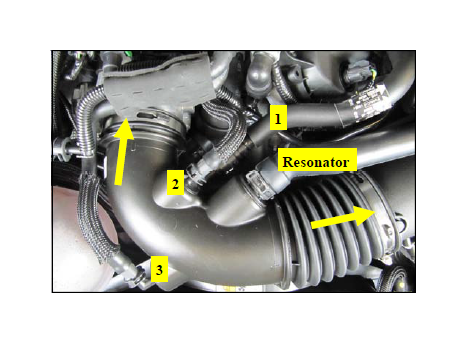
3. Disconnect the breather lines and resonator tube from the intake. Depending on your configuration, you may have two or three lines. Loosen the hose clamps and remove the factory intake tube.
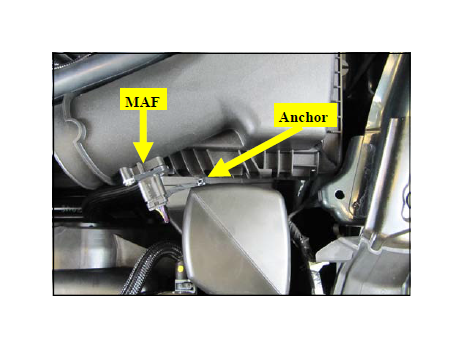
4. Gently pry the MAF harness anchor out of the airbox and disconnect the Mass Air Flow meter.
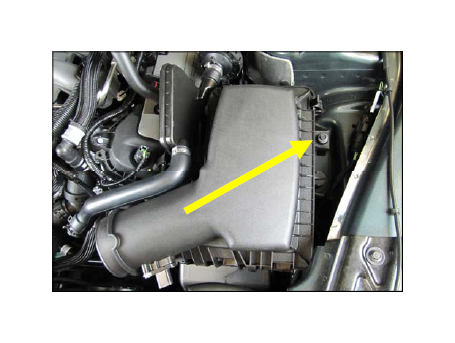
5. Remove the 6mm airbox mounting bolt in the inner fender and lift the entire airbox assembly out of the vehicle. Set the bolt aside for now. It will be reused.
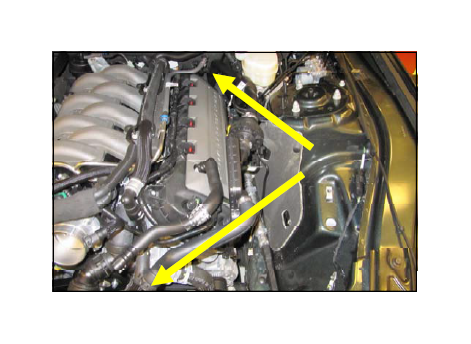
6. Remove the entire resonator assembly from the vehicle. It is held in place with two plastic retainers and a single 6mm nut on the firewall.
7. Be sure the speed clip remains inside the vehicle. It will be reused.
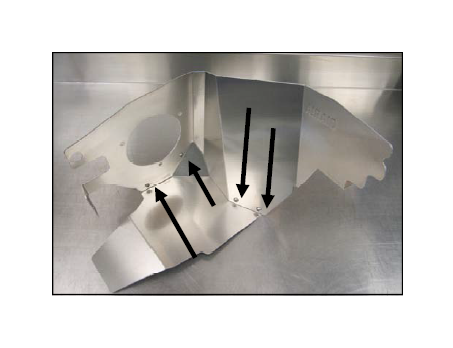
8. Remove the protective film from the Panels and create the assembly as shown using 4 1/4 -20 Button Head Screws and Lock washers.

9. Install the Filter Adapter onto the Panel Assembly as shown, using the three 1/4-20 Button Head Screws and Flat Washers.
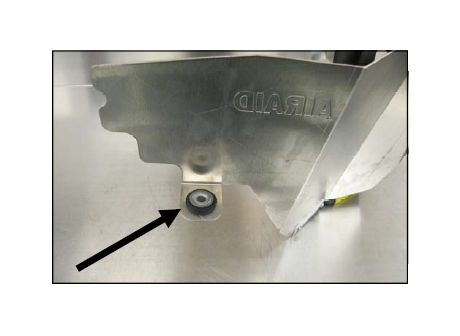
10. Transfer the OEM air box grommet and anti-crush sleeve into the Panel assembly as shown.
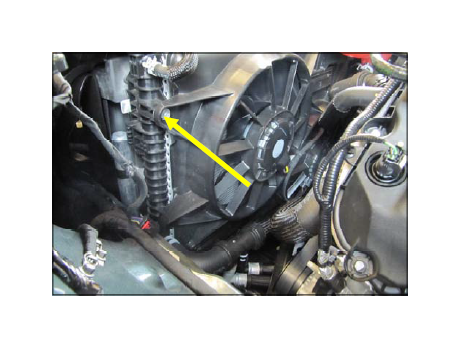
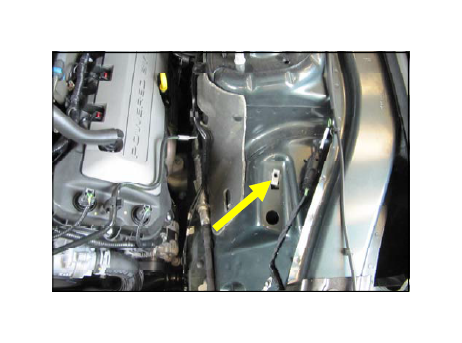
11. Remove the drivers side, upper fan shroud bolt and set it aside.
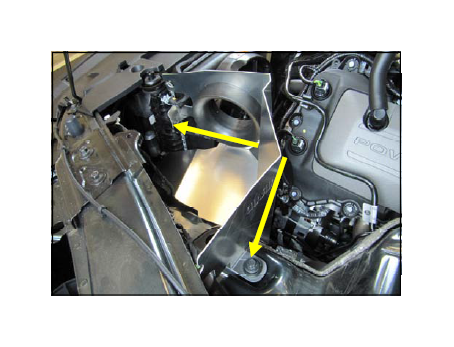
12. Install the Panel assembly into the engine compartment as shown and secure using the OEM hardware removed in steps 5 and 11.
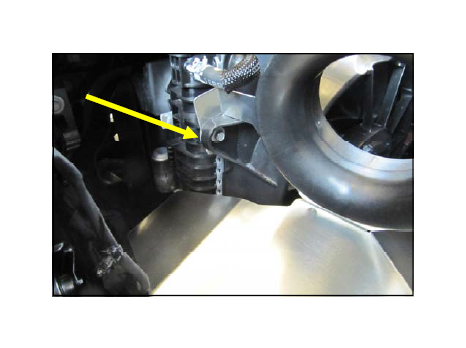
13. When properly installed, the Panel tab resides behind the fan shroud as shown.
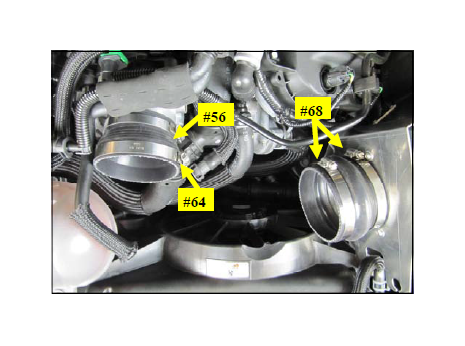
14. Slide the Hump Hose with 2, #68 Clamps onto the Filter Adapter and the Reducer with one, #64 and one #56 clamp onto the throttle body as shown.
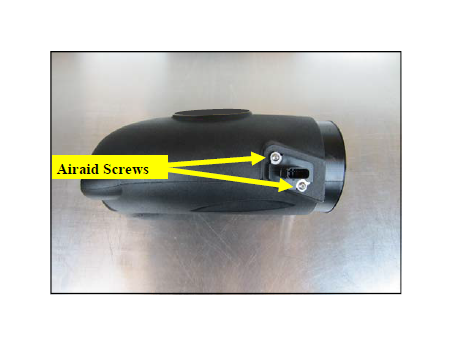
15. Transfer the Mass Airflow sensor into the Airaid Intake Tube as shown and secure it using the #8 Button Head Screws. Do Not Use the OEM hardware.
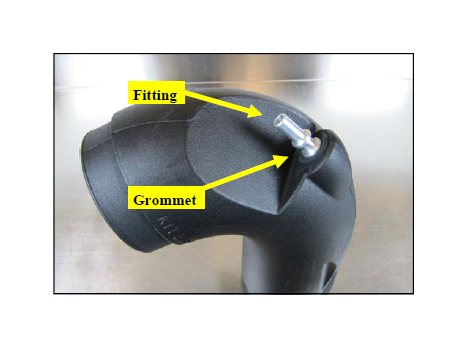
16. Insert a 1/2” Grommet and Fitting into the Intake Tube as shown.
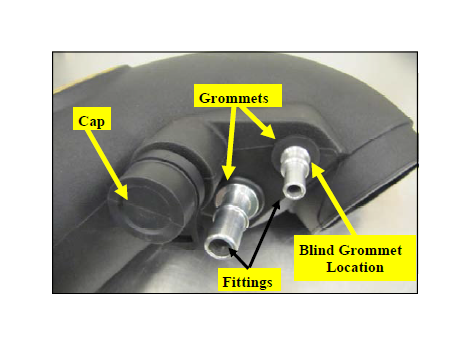
17. Insert the remaining 1/2” and 13/16”Grommets with Aluminum Fittings into the Airaid Intake tube as shown. Install the resonator Cap and secure it using the Speed
clamp. On vehicles not equipped with the small breather, plug the hole with the Blind Grommet.
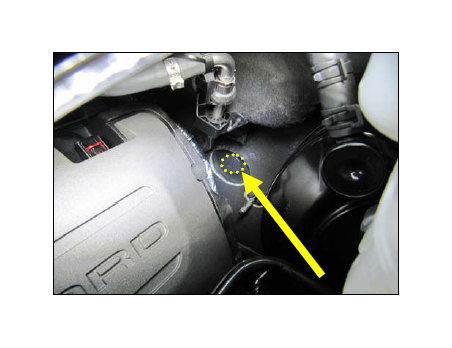
18. Insert the supplied Firewall Plug to prevent debris from entering the cabin as shown.

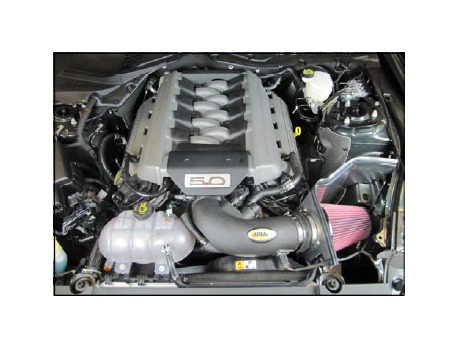
19. Insert the Intake Tube into the Hump Hose and Reducer then tighten all 4 Intake Clamps. Reconnect the factory breather lines. Apply the Airaid Bubble Decal onto the Intake Tube as shown.

20. Split one edge of the remaining Grommet with a sharp knife and run the MAF harness through it. Install the Grommet and harness into the Panel Assembly as
shown. Reconnect the sensor.
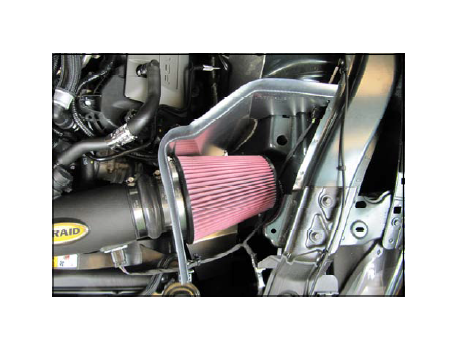
21. Install the Airaid Premium Filter onto the Filter Adapter. Install the weatherstrip on top of the Panel assembly as shown with the contour rolling away from the filter.
22. Double check your work. Make sure all clamps, hoses, bolts, and screws are tight. Double check the hood clearance. Reconnect the negative battery cable and reinstall the cover and strut brace, if so equipped.

