 FREE 1 to 3-Day Delivery on Orders $149+ Details
How to Install SpeedForm Aluminum Rear Window Louvers (15-19 Fastback) on your Ford Mustang

Shop Parts in this Guide
Note: First, this is not hard at all, but it really takes two people for the installation process.
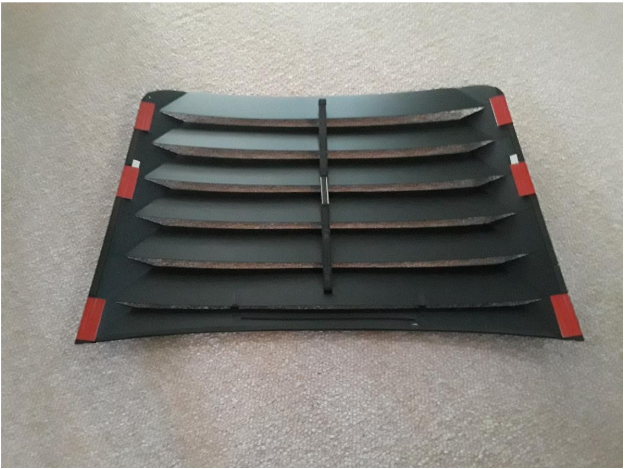
1. If your louvers came in two pieces, simply and carefully put the two pieces together.
Make sure both sides and the center support are properly aligned with the opposite piece, and then gently insert them together to make a tight fit. The fit should be close and firm.
2. Place louvers, outside down, on a soft carpet (curving upward). Take the 2 metal splints with only the sticky tape on one side. Place one each across the joint where the
two pieces went together on both edges, just inside the outer frame of the complete louver set. See instructions included with the louvers.
3. Use the third splint to connect the center support. See instructions included with the
louvers.
4. With the louvers still on the carpet curved side up, insert all 6 mounting plates through the 6 attachment holes. Secure all 6 mounting plates on the underside with the 6 washers and black thumb attachment nuts. See Picture below.
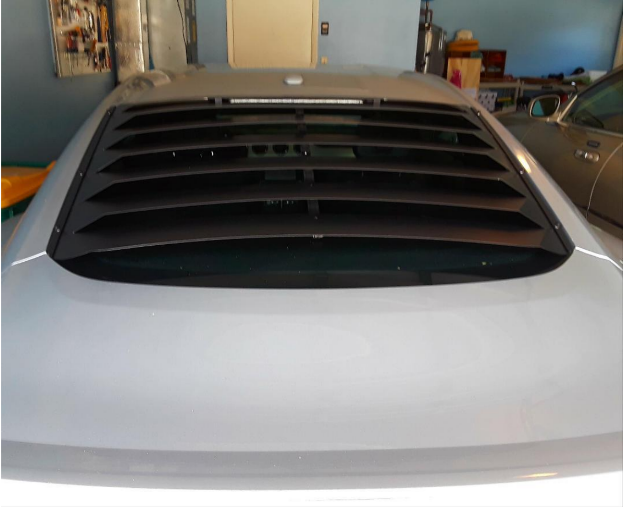
5. Now is when you need two people! Turn the louver set curved side down (right side
up). All 6 attachment plates should be held in place by a washer and a black nut. Have
each person hold one of the sides of the louver set and carry it to the car. Gently place it on the back window. Do not remove the red sticky tape on each of the attachment plates yet. Now with one person standing on each side of the car's back window, carefully slide the louver set around so it is centered in the best possible way on the rear window. Nether side, nor the top, nor the bottom of the louver set will be perfectly parallel with the outer edges of the rear window; just align it as best as you can. Carefully open and close the trunk to ensure the trunk lid does not interfere with the installed louver set. Do this a couple times just to make sure! Now you have the louver set just where you want it to be located, but it is not glued down yet. See Picture below.
6. Now the most important step! Remove the black nut and washer on one of the uppermost mounting plates, like the one closest to the roof. You should still have the louvers set placed exactly where you want it to be on the rear window.
7. With one person on each side of the car holding the louvers set exactly in its proper
place, have the person by the mounting plate with the nut removed gently lift the upper
corner of the louver set and remove the attachment plate that has its nut and washer
removed. Lower the louver set back into the exact position as the louver set on the rear window, but now with the one upper attachment plate removed.
8. Remove all the red sticky tape from the bottom of the attachment plate that was just
removed. Gently lift the corner of the louver set where the attachment plate had been
removed, and insert and replace the screw on the attachment plate back into the hole
where it originally was. The now-sticky tape side should be toward the glass window but not touching the glass. Ensure you haven’t moved or changed the overall location of the louver set on the rear window. Now, gently press down this upper corner of the louver set making sure the attachment plate is sticking to the glass. The outer edge of the mounting plate should still be parallel to the outer edge of the louver set. If it's not perfectly parallel, that is okay, as long as the attachment plate is resting completely on the window's glass. Put the washer and black nut back onto this attachment screw.
9. Now repeat this process with the upper attachment plate opposite to the one you just stuck down on the glass. Now you should have the two most upper plates stuck to the window. And they fit perfectly because you didn't move anything during the installation process!
10. Repeat this procedure moving down to the middle two mounting plates and then the bottom two mounting plates. Again, all the screws on their mounting plates fit perfectly into the holes in the louver set because you haven't moved the louver set during the entire process and have used its holes as a guide/template to place each attachment plate perfectly on the window!
11. Press down HARD on all the areas above all 6 attachment plates with all black nuts
and washers still attached to their mounting plates. You should repeat step #7 just to
ensure that when you open the trunk lid it still does not interfere with the louver set.
12. Gently remove all 6 screws and washers from their attachment plates. With two
people again, one on each side of the car, carefully lift the entire louver set straight up
and off all 6 mounting plates. Examine all 6 attachment plates as they are now glued to
the rear window. Press hard on each of them some more to ensure good adhesion of the attachment plates to the window glass.
13. Relax for a few hours and then put silicone sealant around all four edges of each
mouthing plate. Don't be sloppy, but don't be stingy either. You MUST seal all the edges of the mounting plates so water and moisture can't get in and attack the adhesive strips on the attachment plates. If you use a little more sealant than necessary, it isn't too bad either since these attachment areas are completely covered by the louver set when it is installed on the car.
14. Let everything set for 24 hours or more. Tug slightly back and forth, side to side, and up and down on each on the 6 attachment screws to ensure each entire plate is firmly attached to the rear window glass. Finally, have two people hold respective sides of the louver set and gently lower it back onto the 6 attachment plates/screws on the rear window. The fit should be perfect because you used it as a template for locating the mounting plates.
15. Replace the black thumb tightened nuts and washers on all 6 attachment screws.
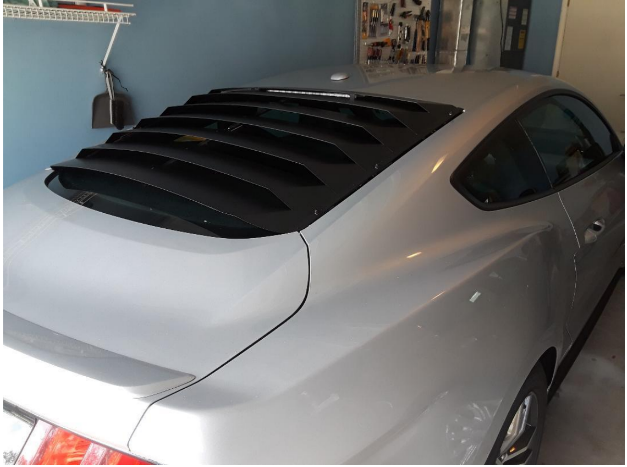
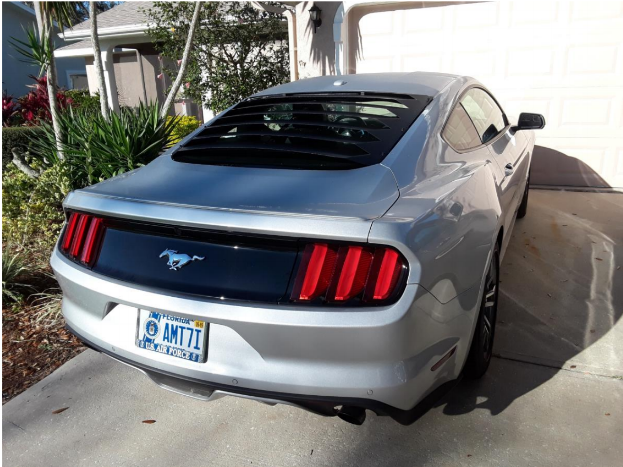
16. Enjoy your greatly improved Mustang!!!
Installation instructions written by AmericanMuscle customer Craig R. Jones

