Talk to a Camaro Sales Tech
1-877-887-1105
M-F 8:30A-11P, Sat-Sun 8:30A-9P
$20K Sweeps! 10 Chances to Win! Enter Daily >

Auto Addict USA Umbra LED Tail Lights; Gloss Black Housing; Smoked Lens (16-18 Camaro)

Item CC12884
Verify parts fit and get product recommendations.
Camaro Sales Techs: Connect Now M-F 8:30A-11P, Sat-Sun 8:30A-9P
$0.00
Our Price

$650.69 (pair)

FREE Shipping Market Price $741.99 You Save 12% ($91.30) Up to 10% off for Military & First Responders! See Details

Will this fit your Vehicle?

Select a different vehicle Help?
Update or Change Vehicle
Ship to: Ashburn - 20149
Sorry, please enter a valid US or CA postal code
We're sorry, zip can't be updated at this time.
Recommended Install Shops
How It Works
Install Shops are available near Ashburn - 20149

Add Local Shop Installation

Total cost of service $125.00
    Create a list
    Add to New List

    Saved - View your saved items

    We're sorry. We couldn't save this product at this time.

    or use

      Product Videos

      Justin: Hey, what's going on, everybody? Justin with americanmuscle.com. And today, we're taking a closer look at and installing the Auto Addict USA Umbra LED Tail Lights, available for all 2016 through 2018 Camaros. Now, you should be checking out these premium tail lights if you'd like to swap out those plain red stockers for a more aggressive combination of a black housing and smoke lens, along with something that's gonna be loaded with modern and bright LED lighting and very cool features. So, let's get right into 'em. First up, let's start with features because there is a lot to cover.Now, the Auto Addict options are gonna be loaded with those modern and bright LEDs, and some of those LEDs offer some very cool functionality. Now, first up, your running lights here, they're gonna sweep to kind of the outside of the tail light on each housing with a red diffused LED. Now, the pattern itself, I would say, is slightly similar to the stock tail lights, but because of the black housing and the smoke lenses, they just really stand out a bit more here with the Umbras. Now, just above those running lights in these portions up here, you're gonna find, I would say, the most interesting part of the tail lights, in my opinion, and that will be the blocks that will serve as things like your reverse lights, your brake lights, and also your sequential turn signals.Now, the sequential functionality, definitely my favorite part of the tail lights here, makes for a very cool look whenever your turn signals or hazards have been fired up. Now, when breaking the twin running lights here on the bottom portion that we already talked about along with those two blocks up top, well, they're just going to increase the intensity with the red here and really grab the attention of the person behind you. So, the plethora of LED lighting and just how it's implemented here, to me, is gonna be the biggest feature with these Auto Addict tail lights. But we cannot discount the radical change to the appearance, which is also a noteworthy feature.And that leads us right into our construction portion of the video. And the Umbra tail light is gonna feature, again, that gloss or piano black housing with a bit of that smoked lighting throughout. And that's gonna deliver an aggressive, some might even call it that Euro look, that, to me, is just a massive upgrade over the boring red stalkers. Now, honestly, I'm actually getting a bit of like C 706 vibes here out of these tail lights, and I really dig that. Now, the lenses themselves, they're gonna be made from a UV-resistant polycarbonate material, and the entire package is backed by a one-year warranty in case you run into any issues.Now, the Umbras are gonna come in right around that mid to high $600 price point, which does put this right on par with the rest of the options currently in the category for your Camaro. And also, keep in mind here, guys, that that does include free shipping right to your door. Now, one of the nice things about the Umbras is that even though they are loaded with a ton of features, including that sequential turn signal option, there really is no crazy wiring or modification needed to make it all work. Simple plug-and-play job here, guys. Bolt-on job that the site's calling pretty soft one out of three wrenches on the difficulty meter, about an hour at most, I would say, to complete from start to finish. But now, what do you say we head out to the shop, show you our detailed walkthrough and tool breakdown.Man: The tools you'll need for this project are a ratchet, an 8-millimeter socket, a trim removal tool, a small flathead screwdriver, and you'll also need to source some zip ties. Hi, everyone. Today, we're installing a set of tail lights on our Camaro, but, first, let's watch a short video on how to uninstall the stock tail lights first.Man 2: So, our first step's gonna be to remove these plastic trim panels on the top of the tail lights. Now, we have three push clips here, and I'm gonna get a clip remover tool to remove. So, next, we can come into the trunk right behind our tail light and we have one tree clip that we'll have to remove. So, I'll grab a clip remover tool and pop that out. Now we can pull back on our trunk liner, which will expose our nuts. We have two right up front here, and then there's one that's tucked back here in the corner. So, now we can grab an 8-millimeter socket to remove our first two nuts.And now, our last one's gonna be tucked behind this bracket. It's a little hard to see. That's gonna be that same 8-millimeter socket. So, now we're just gonna grab the tail light with even pressure and pull straight back. But don't pull too hard because we still have our wiring harness to disconnect. And then we can push up on the red tab, and then press the black tab to disconnect it. And now, once we have our first tail light removed, we can do that same procedure on the other side.Man: And before we install these new set of lights, what we have to do is we've gotta run a new wiring harness that is provided in the kit here. So, in order to get to that plug-in, we've gotta remove this trim panel underneath the bottom of the trunk lid. The first thing we're gonna do is remove this hood latch cover right here, and we're gonna use our small flathead screwdriver right in the center of this cover, push in, and pull out. Do that on both sides to release the clip, and you can remove that. Next thing we'll do is remove all these push pins around the edge of this trim panel here to get us access to the plug at the third brake light. So, we'll just use our trim removal tool and pull those plugs out. Once you got all the push pins out, you can just lift that off.Now, right behind the hood release latch here, there is a hole, and it's got a wiring harness that goes up inside. And what you're gonna have to do, because we can't show you this on camera, is reach up there and find out where that plug is located. And then you probably have to use two hands to hold one side. On the driver's side, you just hold that position still. And on the passenger side of this clip, you're gonna push it in towards the driver's side, and then pull the plug out. And this is what the plug looks like. So, when you reach up in there, you're gonna be pushing on this side here where that latch is at, push it over towards the driver's side, and then pull the plug down. All right. So, this is how it plugs into the third brake light.So, what you're gonna do is push on this side to hold it still, and then you're gonna push on the other side here on the latch till it releases and then pull it straight down. Now, the new wiring harness, you can see it's got two ends. The terminated end is what's gonna plug into the factory harness here, like so, just push it until it latches. And then this end is what's gonna go back up into the third brake light. And again, we can't show you this on camera just because the hole is very small, but you find the plug up in there, and then just push it in until it click.Now, once you've got that done, we can go ahead and route our wires behind the hood release cable and we'll tuck the factory harness back up inside the hole. And what we're gonna do is we're just gonna run this down along the side of this harness that's attached to the bottom of the trunk lid. Now, you will have to source some zip ties, of course, to tie this up because they do not come in the kit.All right. So, we'll go ahead and zip-tie this up to the existing harness here just to keep it in position while we finish wiring everything up. And we'll put another one here down towards the bottom. Now, you can trim the excess off of these zip ties once you're all done wiring everything. So, we're gonna run this wire for the passenger side behind the trim on the side of the trunk panel that we removed earlier so that we could remove the tail light.And what you're gonna find is that there's a grommet right behind where the tail light goes, and we'll show you that in a second. Now, I would recommend, go ahead and just put a hole in the center of this grommet to feed this wire through. We're not making a permanent addition to our vehicle, so we're not gonna put a hole in the grommet, we're just gonna remove the grommet temporarily for demonstration purposes. So, here's the grommet right in the center of where the tail light would go, and my recommendation would be to put a hole right in the center of it so you can feed your wire through. But we're just gonna go ahead and pull that grommet out for right now and just pull our wire through. Now, we can run the wire for the driver's side.Now, to run the wire for the driver's side, there's a support brace that runs right along the back edge of the trunk here. And what we're gonna do is we're just gonna zip tie our wire up. There's a couple of spots in here where you can just run the zip tie through, wrap it around your wire, and just snug it up. Now, we're only gonna put in a couple, you can put in as many as you want. We're just gonna put it in a couple in there just to hold it up and show you how it works. All right. Now, once you've got it zip tied in place, you can go ahead and run this wire behind this carpet trim on this side then run it through the grommet just like we did on the passenger side. All right. Now we can go ahead and plug in our light to our factory harness.And then you'll notice there's a single red wire coming off the back of the light, that's gonna plug into the wire that we just ran from our third brake light. Just plug that in like so. And you'll also notice that there are a couple of resistor packs. One of 'em is permanently attached to the headlight itself, the other one has some double-sided tape on it. So, just pull this backing off here and you can attach it to the back of the tail light section right there just to keep it from rattling around while you're driving. And like I said, we're not making a permanent addition to our vehicle, so we're not gonna go ahead and attach that. Now that you've got everything in place, go ahead and slide your light back in, then go ahead and secure it with the original hardware.And put our two 8-millimeter nuts on the outside, then the one back up in the corner. Tighten them down with our 8-millimeter socket and then go ahead and push our carpet trim back into place, and secure it with our push pin. Now, we'll go ahead and put on our trim piece for the corner, secure that with the original push pins that we pulled out. And then you can repeat that process for the other side. Now, we can go ahead and put our trunk lid trim, secure that with the original push pins as well. Finally, reattach the trim piece for the trunk latch push it in until it snaps. And we're done.And that wraps up our review and install of the Auto Addict USA Umbra LED Tail Lights in the Gloss Black Housing and Smoked Lens for the '16 to '18 Camaro. Thanks for watching, and remember, for all things Camaro, keep it right here at americanmuscle.com.

      Product Information

      Features, Description, Reviews, Q&A, Specs & Installation

      Features

      • LED Tail Lights
      • Trouble-Free Visibility
      • Ultra-Bright High-Beam Bulbs
      • Immune to Cracks
      • Anti-Glare Smoked Tinting
      • Highly Graded ABS Case
      • Limited 1-Year Warranty
      • Basic Installation
      • Fits All 2016-2018 Chevrolet Camaro Models

      Description

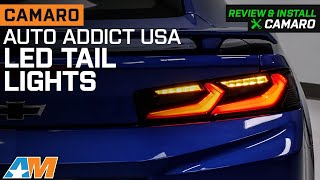
      Trouble-Free Visibility. Get yourself a better pair of tail lights to enhance your Camaro's presence on the streets by installing these Auto Addict USA Umbra LED Tail Lights; Gloss Black Housing; Smoked Lens. Molded with a more sophisticated and streamlined design, these premium tail lights offer better brightness than their stock competitors while also emphasizing your vehicle's looks and style.

      Highly Graded ABS Case. The Auto Addict USA Umbra LED Tail Lights; Gloss Black Housing; Smoked Lens is constructed with industrial-standard ABS synthetics and UV-shielded polycarbonate lenses that reduce heat strain while also eliminating the dangerous blaring beam generated by the strong LEDs integrated into these bulbs.

      Installation. This product is easy to install and should take about 1 hour.

      Warranty. There is a 1-year limited warranty on this product.

      Application. This Auto Addict USA Umbra LED Tail Lights; Gloss Black Housing; Smoked Lens fits all 2016-2018 Chevrolet Camaro models.

      Fitment:

      • 2016 Chevrolet Camaro
      • 2017 Chevrolet Camaro
      • 2018 Chevrolet Camaro

      Auto Addict USA AA_TL_UMBA_CMR16

      CA Residents: WARNING: Cancer and Reproductive Harm - www.P65Warnings.ca.gov

      Installation & What's in the Box

      Installation Info

      What's in the Box

      • (2) LED Tail Lights
      5.0

      Customer Reviews (24)

        Questions & Answers

        10 More Questions