FREE 1 to 3-Day Delivery on Orders $149+ Details
How to Install AWE Touring Edition Axle-Back Exhaust on your Mustang
Installation Time
2 hours
Tools Required
- 7/16” or 11mm Socket
- 13mm Socket
- 15mm Socket
- Metal cutting saw or cutting wheel

Shop Parts in this Guide
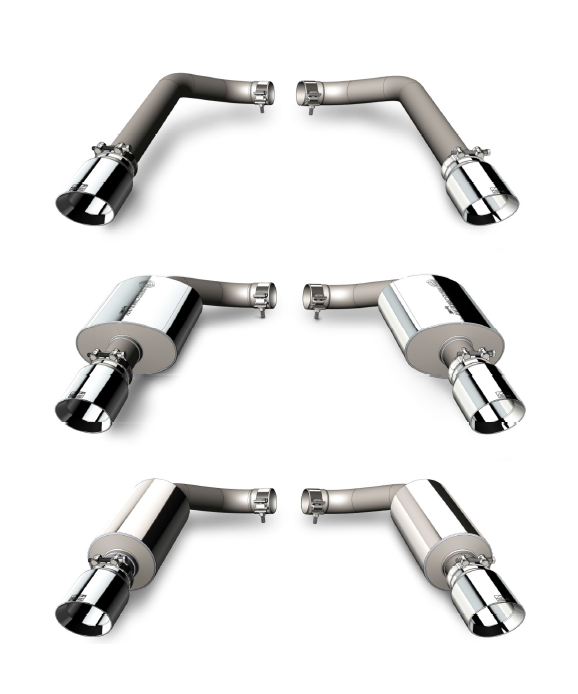
TOURING EDITION - GT
1 Driver axle back section (part XP)
1 Pass. axle back section (part XQ)
1 Driver axle back tube (part XR)
1 Pass. axle back tube (part XS)
1 Driver axle back section (part XT)
1 Pass. axle back section (part XU)
Additional Parts:
2 4” (102mm) Slash-cut tips (optional finish)
2 3.0” T-Bolt clamp
S550 Mustang GT Kit:
2 2.50” (63.5mm) Accu-Seal clamps
S550 Mustang EcoBoost Kit:
2 2.25” (57.2mm) Accu-Seal clamps
STEP 1:
Installation of the AWE performance axle-back system requires cutting of the OEM exhaust. To return back to stock will require additional components.
Always refer to the manufacturer service manual for precise torque specifications on all OEM fasteners.
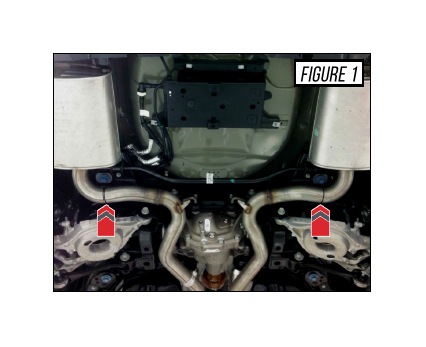
Use a metal cutting saw or wheel to make a 90° cut at the lines shown by the arrows in Figure 1. Note that the lines are placed at the transition point from straight to bent tubing. Wrapping a piece of masking tape evenly around the tube can help keep the cut straight.
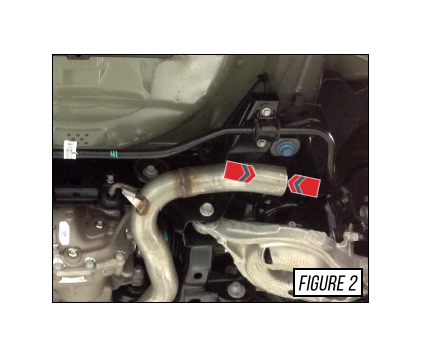
The arrows in Figure 2 show a straight section approximately 2 inches long. This is needed to properly attach the AWE axle-back tubes.
Once a clean guide is established, make the cut.
Repeat for the driver side.
File or sand the edge after cutting to remove any unwanted burs and help with fitment.
STEP 2:
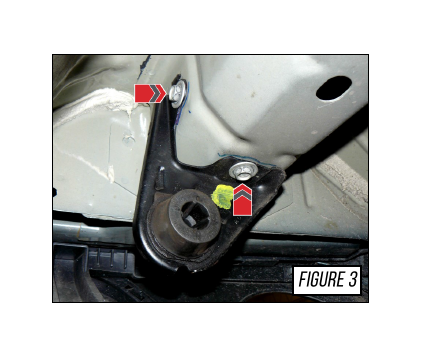
Remove the 13mm bolts shown by the arrows in Figure 3, located behind the rear valance to the inside of the exhaust tip for both driver and passenger rear muffler assemblies.
With all the bolts from the bushing brackets removed, the factory exhaust can be removed from the car.
STEP 3:
Transfer the hanger bushings and brackets to the correlating AWE performance exhaust components. Be sure to maintain the original side and orientation, as the brackets are handed.
Pre-install the Accu-Seal clamps at the inlet of each axle-back section.
Install each exhaust section to the modified OEM exhaust, as shown in Figure 4.
Secure the hangers with the original 13mm bolts, as shown by Arrow A in Figure 4.
Ensure the outlet of the exhaust is centered in the valance; then torque the Accu-Seal clamps to the recommended 40ft/lbs. or until secure, as shown by Arrow B in Figure 4.

STEP 4:
Install the exhaust tips with the included T-bolt clamps.
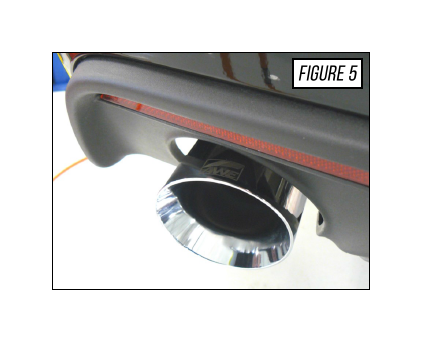
Center the exhaust outlet within the valance, as shown in Figure 5. The AWE logo should be visible at the top edge; make adjustments as necessary.
Secure the exhaust tips into location with a 7/16” or 11mm Socket. Tighten until the tip doesn’t move, then turn the bolt one (1) full turn.