Talk to a Mustang Sales Tech
1-877-887-1105
M-F 8:30A-11P, Sat-Sun 8:30A-9P
$20K Sweeps! 10 Chances to Win! Enter Daily >

BBK Cold Air Intake; Blackout (18-23 Mustang GT)

Item 406289
Verify parts fit and get product recommendations.
Mustang Sales Techs: Connect Now M-F 8:30A-11P, Sat-Sun 8:30A-9P
$0.00
Our Price

$399.99 (kit)

FREE Shipping Market Price $459.99 You Save 13% ($60.00) Up to 10% off for Military & First Responders! See Details

Will this fit your Vehicle?

Select a different vehicle Help?
Update or Change Vehicle
Ship to: Ashburn - 20149
Sorry, please enter a valid US or CA postal code
We're sorry, zip can't be updated at this time.
Recommended Install Shops
How It Works
Install Shops are available near Ashburn - 20149

Add Local Shop Installation

Total cost of service $175.00
    Create a list
    Add to New List

    Saved - View your saved items

    We're sorry. We couldn't save this product at this time.

      Product Videos

      Hey guys, Adam here with americanmuscle.com. And today we're taking a closer look at and installing the BBK Blackout Cold Air Intake for the '18 and newer Mustang GT. We've got our 2018 GT here with the BBK installed and guys, you should be checking this out if you're looking to ditch your factory intake to pick up more horsepower and torque numbers, a better throttle response, better acceleration, better engine noise and all over a better breathing engine. This particular one from BBK is boasting an increase of 75% as far as airflow goes which is a pretty good number over the stock intake. This one also has a washable and reusable oiled filter so you can just pop this off, pressure wash it, re-oil it, throw it right back in and you're good to go when it comes time for routine maintenance, making life a little bit easier, saving you money in the long haul. This also, because of the name Blackout, has a powder-coated mandrel-bent steel tubing which is a little bit different than some of the others in the category. Typically, you get some sort of plastic. This one here is a pretty hefty, thick metal tubing. It's also mandrel-bent meaning it has a streamlined airflow. Well break that down a little bit later on in detail comparing it to stock. On top of that, it comes with the BBK plate right on top and overall, I think it looks pretty good under the hood.This one comes in right around 350 bucks. Now listen, I'm not saying this is the most expensive option out there but it is close to being on par with some of the more premium options out there in which case I would like to see in a completely enclosed heat shield, but BBK usually uses a heat shield just like this one, leaving it a little bit more open. The open heat shield does pull in a little bit more cold air simply because it doesn't block any of this off but it is a little bit more susceptible to pulling in engine heat as well. So, there's a little bit of give and take there but I will say it does have really high quality materials and I do expect this to hold up in the long haul. As far as performance, you can definitely expect a horse power and torque increase. This one does not require a tune but you can definitely see the maximized potential if you were to pair this with a custom tune.Now that price tag's right around 350 bucks. The install I'm gonna say one out of three wrenches on our difficulty meter. Anybody can tackle this in the driveway at home. Now it does use more of a universal hose fitting situation so some of them are a little bit extra included in the kit simply because it's used for a number of different applications which makes the install just a little bit different but it is still very simple. Hand tools will do the trick. I'm gonna take you guys through every step of the process. Took me about an hour. Let's get to it.Tools used in this install include an impact gun, extension, 1/4-inch ratchet, 7, 8, 10 and 15-millimeter deep sockets, T20 Torx bit, small Allen key, pliers and wire cutters or snips. Now, guys, in order to uninstall our factory intake, we are gonna have to get our strut tower brace out of the way as well as our engine cover to get to our clamps at the throttle body. Now if you don't have the strut tower brace, you can skip that step, go straight to the engine cover. We have ours though so we're gonna grab a 15 deep socket, remove the two nuts holding on the studs here and on the other side. Now for this one, we are gonna have to pop our battery cover off. We're just gonna slide that out of the way. You also may have to take this plastic retainer clip off of your positive harness on the battery off of that stud. From here, you're gonna lift up, get that over the stud on both sides, feed it underneath of that harness and set this aside. Now, for your engine cover, you do have two nuts, a 10-millimeter in here and a 10 in here. We've got this one out of the way so let me show you how to get that one. Grab an extension and a 10-millimeter socket. Go in the engine bay here and gonna loosen that up. Now it's hard to get the nut out itself. So once that's loose, you can really just pull up on the cover and the nut will stay in that hole. Perfect. Set it aside.All right, so at this point we're gonna do our MAF sensor and our hoses. MAF sensor, you're gonna pull back on the red locking tab, pinch and disconnect. For the hoses, you're just gonna push down on the tab on the side here and release, and then for your black hose, push in, pull up on your gray tab and disconnect. It's a little tough to get to depending on its orientation. Once you get that off... This is your gray tab there. To remove that, you're really just pushing in here and pulling back. Now for your sound tube, we're gonna disconnect it with pliers, pinching this retaining clamp. Grab pliers, pinch that all the way closed and you're gonna pull back on your tubing and then release. Now on the right side by your filter, you're gonna see a 10-millimeter bolt that's holding on your factory airbox. Let's get that out of the way. Next, grab a 7-millimeter socket. You're gonna loosen up the clamp holding your tubing to the throttle body. If you don't have a 7, you can also use a flathead screwdriver. Now what I like to do is once it's loose, there's a little retaining tab there, just twist that and that should disconnect. Now you should be able to pick your entire filter, intake tubing and the air duct on the bottom all up in one piece.So we got our factory intake off of our 2018 GT behind me. It's on the table next to our BBK. I wanna take you through some of the similarities but mainly the big differences between the two and there are quite a few to mention here. We're gonna start with our filter. Now I took the factory filter out of the housing here just by snapping it apart. I wanna show you guys that factory, flat, paper element dry filter. This is pretty common off the factory line. We see this in Ford, Chevy, Dodge, pretty much everyone. They use this dry filter that does a pretty good job filtering out all the particles but it's really not maximizing any potential here. It's not gonna boost your intake gains. It's just, overall, pretty average filter. Moving over to your new conical option from BBK. Not only is this a 360-degree option that's gonna pull in cold air from every direction but it's also got multi-layer cotton gauze with a diamond wire mesh outer layer that's gonna help filter out way more particles than your factory paper element ever could. This is also a washable and reusable oiled filter. Washable and reusable basically means whenever this thing is starting to get clogged up or routine maintenance comes around, pop it out, wash it, pressure wash it, clean it, re-oil it, throw it right back in and you're good to go. That means you don't have to break your wallet out every time you need a new filter. You just clean this one and reuse it.The rest of your kit here, your tubing. This is a mandrel-bent stainless steel tubing which means it is going to be a lot different than the other options in the category. Normally you see a cross-linked rotomolded plastic or an ABS plastic, so on and so forth. Being mandrel-bent here, it is going to increase your airflow. There's less kinks. It has this smooth transition elbow which is really, really good for the airflow. It's also got a larger inlet here for your MAF sensor so it's pulling in more cold air, it's streamlining that cold air. The only thing about the stainless steel is it's gonna retain a little bit more heat than the plastic would. It's not really designed very well for heat dissipation but it also is very budget-friendly and the black powder coating on the exterior looks really, really good under the hood. Blends in really well with the black engine bay and of course, it has the BBK chrome plate welded on.The rest of the materials here, you do have a steel housing for the heat shield. This is going to use weatherstripping to block out all the excess engine bay heat trapping it under the hood while also pulling in all the cold air. Now it doesn't have all of the bells and whistles that a one-piece completely enclosed heat shield would have but for the price tag you are getting something that's gonna be a little bit better than your factory. So, moving forward, what we have to do is pop our factory MAF sensor out of the housing and transfer it over to our tubing.All right. At this point, you're going to grab a T20 Torx bit and you're gonna remove the two factory screws holding on that MAF sensor. Gently slide that out. Set it down on the table. Now we can set our factory stuff aside. Next up, grab your tubing and your MAF sensor. You're gonna slide that right into the slot on your tubing. It only goes on one way so if the holes don't line up, flip it, you'll be good to go. Grab the small Allen screws or the hex screws included in the kit. I'm gonna thread those in by hand at first just to get them started. Now you don't really wanna use an impact gun on this. If you have a ratchet, make sure you take it slow. You don't wanna strip these out. I'm gonna use a small Allen key that fits with these screws, then we're gonna tighten them down.Next up, we're gonna assemble some hose fittings and it can look a little confusing but know that this little component here is more of a universal fitment for the BBK option so some ports will be used by other gens and other vehicles but for this particular application, I'm gonna show you guys exactly how this is gonna fit. What you're gonna do is take this fitting, take one of the longer caps in the kit and you're gonna cap off the small port. That's not gonna be used. Take the shorter one, you're gonna cap off the bottom section. This one's a little bit more of a tighter fit but if you twist, you will get this on. Perfect. Bottom and side are not gonna be used, the smaller ones. The middle one is gonna be used by our right side vacuum line. The top is gonna be our sound tube connection. If you do wanna cap off your sound tube, you can do so if you're deleting that. We're gonna retain ours.What you're gonna do is take the larger cut off section of the hose and insert one of the hose clamps included in the kit. This is gonna insert over the fitting welded to the side of your tubing. Grab a socket, an 8-millimeter socket and tighten that down. If you don't have a socket, you can grab a small flathead screwdriver. On the other side of that, you're gonna take your fitting and you're gonna install it here but you're going to need another one of these hose clamps. Make sure it's loosened up before you try to insert it. Perfect. Now this is the way the BBK intake's going to install. You wanna make sure this fitting is facing downward and you're gonna insert this over the other end. Make sure that's facing down. From there, tighten up your clamp. On this end, connecting to your throttle body, you're gonna install the blue coupler. Now you'll see it has a little nipple on the end here which is gonna be for this hose fitting. We'll install this in a second but first, you wanna put this over your tubing. Doing so, you wanna make sure that the nipple here is facing the left side of the engine bay, so your passenger side. So, as you can see, it is on a curve. The curve is going to be facing downward like a downward arch. We're going to need one of the clamps as well. So make sure you have that handy, insert that over the end and then install it on your tubing. Grab your socket once it's halfway through and tighten it down. On the side, grab that chrome hose fitting. You're gonna insert the smaller ends inside of that nipple. Perfect. This is gonna be for your passenger side vacuum line. Another one of these clamps will go over the other end. I'm just gonna get it a little more snug for now so it holds itself in place.Let's take a closer look at our heat shield. We have a couple of weatherstrippings we need to put in place here to hold in the cold air and keep out the hot engine bay heat. Grab the really thin small strip. That's gonna go around this circle on the inside. It's gonna wrap around where your filter is going to insert. So you're just gonna slide this into place. It's already got a pre-cut slit so you're just gonna slide that through. It should be a perfect fit if you get it all the way around. Next up, grab the large weatherstripping. We're gonna line the top end of our heat shield starting on this end here. Now there is a little bit of excess so I'm gonna trim from about here and I'll place that excess on the bottom. It's better to have some of it used than to throw it out. Perfect. All right, at this point we can start installing in our vehicle.All right. First step, grab your heat shield. We're gonna drop that into place here, lining up our 10-millimeter hole to that factory location. This little section over here is actually gonna go dip down and just hook around right there. That's gonna secure it in place. Grab your factory 10-millimeter, slide that into place and you're gonna tighten it down. Next up, grab your tubing, insert that into the heat shield and then line up to your throttle body. Perfect. Now what we're gonna do is tighten down the throttle body clamp and then insert our filter. Now when doing your filter, you wanna make sure this chrome bar here is facing downward. Grab your socket and tighten this down. Now I know it's tough to see but this vacuum line here is gonna go straight down and connect to the middle section of our hose fitting. You may need to adjust its orientation but it'll click right in there. The sound tube is gonna go to your top portion there and again, you may need to adjust the orientation. We're gonna grab pliers and pinch this open. Once you get that on, you can release the clamp.Just a few more steps. We have one vacuum line here and as you can see, it needs to go over to this tube fitting. So we're gonna slide this underneath of our coolant line and connect that. Take your MAF sensor harness, connect that to your factory MAF sensor. You'll hear a click. Drop the red locking tab. Put your engine cover back on followed by your strut tower brace if you have one and you're good to go. Last step is our strut tower brace. Feed that under your harness connected to the studs and drop it into place on the driver side. Now you're good to go.Well, guys, that's gonna wrap up my review and install for the BBK Blackout Cold Air Intake for the '18 and newer Mustang. You can get yours right here at americanmuscle.com.

      Product Information

      Features, Description, Reviews, Q&A, Specs & Installation

      Features & Specs

      • Improves Horsepower and Torque
      • Provides Better Throttle Response
      • Designed to Provide 75% More Air Over Stock Intakes
      • Dyno Tested and Designed
      • Constructed From Mandrel Bent Steel Tubes With a Black Powder Coat Finish
      • Uses a Custom Integral Mass Air Housing
      • Easy Bolt-On Installation
      • Covered by a Limited 1-Year Warranty
      • Not CARB Certified
      • Fits All 2018-2023 Ford Mustang GT Models

      Description

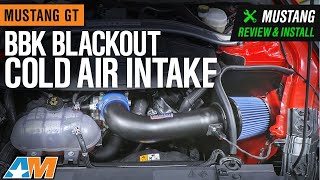
      Improved Torque and Horsepower. Whether you’re driving your 2018-2023 Ford Mustang GT on the road or on the race track, having a little extra horsepower is always a plus. You can get the power you’ve always wanted with this BBK Blackout Cold Air Intake kit. This cold air intake will blow your mind with its amazing gain of 20 HP/TQ and lightning-fast throttle response. The BBK Blackout Cold Air Intake uses a custom integral mass air house with mandrel bent tubes to increase airflow up to 75% more than stock intakes. This improved airflow translates into increased performance and fuel economy.

      No Tuning Needed. This BBK Blackout Cold Air Intake will effectively boost your Mustang’s torque, horsepower, throttle response, and fuel economy without re-tuning your computer. Each intake is DYNO tested to ensure maximum performance at all times.

      Reusable Air Filter. This BBK Blackout Cold Air Intake uses a high flow conical cotton filter that is completely washable and reusable. This allows the intake to filter out those power robbing particulates and improves the flow of air boosting your Mustang’s performance.

      Durable Steel Construction.  This BBK Blackout Cold Air Intake is manufactured using high-strength, CNC mandrel bent steel tubes with stainless steel clamps and silicone couplers designed for long-lasting use. Topping of this assembly is a black powder coat finish that not only protects the intake from rust and corrosion, but also gives your Mustang sleek, stealthy looks.

      Custom Integral Mass Air Housing. This BBK Blackout Cold Air Intake utilizes a custom integral mass air housing which is connected to the mandrel bent intake tube with a factory mass air calibration. This results in the improved performance of your Ford Mustang.

      Easy Bolt-On Installation. Installing this BBK Blackout Cold Air Intake only takes about half an hour. Only simple hand tools are required for this installation.

      Limited 1-Year Warranty. This BBK Blackout Cold Air Intake is covered by a limited 1-year warranty. For additional information, please visit the manufacturers’ official website.

      Not CARB Certified. This BBK Blackout Cold Air Intake and its parts are not CARD certified. They are not legal for use or sale in California or any state adopting California emission standards.

      Application. This BBK Blackout Cold Air Intake fits all 2018-2023 Ford Mustang GT models.

      Fitment:

      Details

      BBK 14525

      CA Residents: WARNING: Cancer and Reproductive Harm - www.P65Warnings.ca.gov

      Installation & What's in the Box

      Installation Info

      What's in the Box

      • (1) BBK Blackout Cold Air Intake
      • Mounting Hardware
      4.7

      Customer Reviews (500+)

        Questions & Answers

        10 More Questions

        Will It Fit My Mustang

        • GT - 18, 19, 20, 21, 22, 23

            Related Mustang Categories