 FREE 1 to 3-Day Delivery on Orders $149+ Details
How to Install BMR IRS Cradle Bushing Lockout Kit - Red on your Mustang
Installation Time
2 hours
Tools Required
- Lift OR Jack with jack stands
- Ratchet
- Torque Wrench
- 13mm Socket
- 21 mm Socket
- Extension
- Prybar

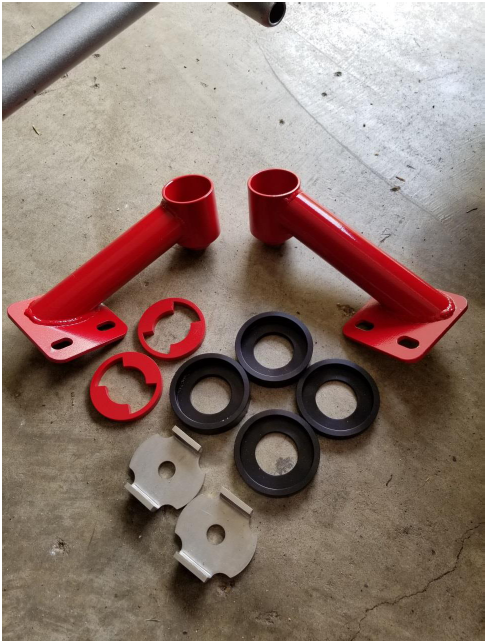
Shop Parts in this Guide
Removal Procedures:
1. First go ahead and jack up the rear of the car and secure on jackstands. Please ensure the jackstands are in the proper locations. Then remove the rear wheels so you can gain access to the rear cradle (if you aren’t using an impact gun, you may want to break loose the lug nuts prior to jacking the rear up.
2. Next, place the jack under the rear differential and jack it up until it comes into contact with it. This will make sure when you loosen the rear cradle that it stays in place for the time being.
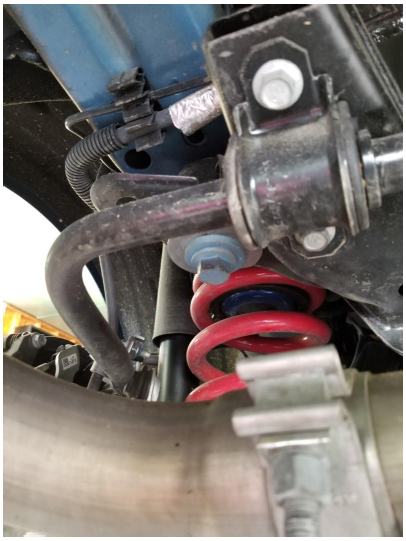
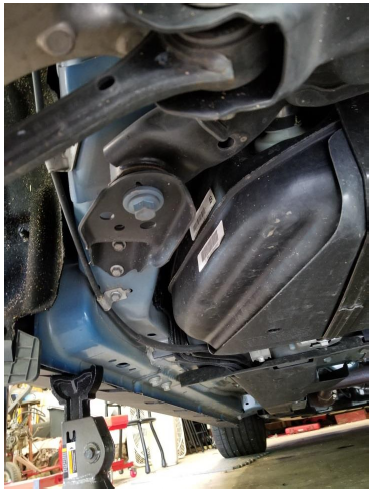
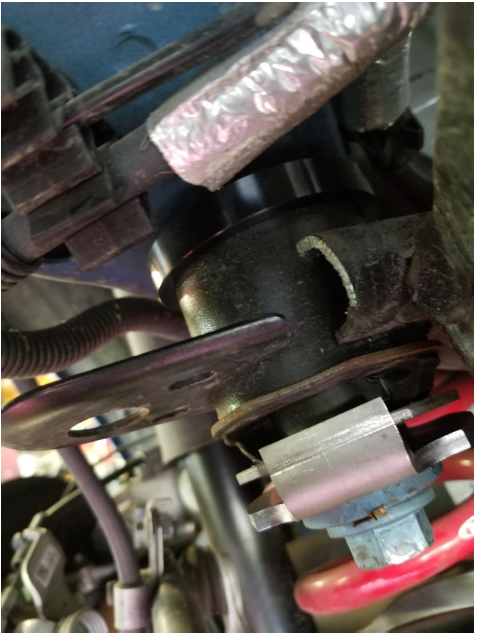
3. Now you want to lightly loosen all of the cradle bolts. Do not remove them entirely, just barely loose. There are four of them and they all should be a shade of light blue. The rear bolts are right in front of the sway bar/right behind the rear spring. The fronts are in front of the entire hub/control arm assembly as shown.
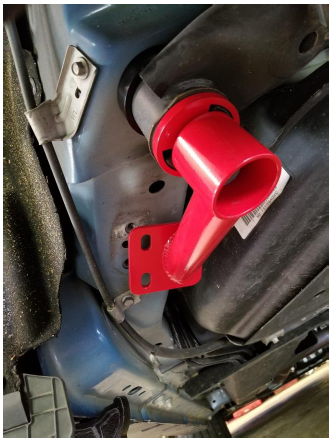
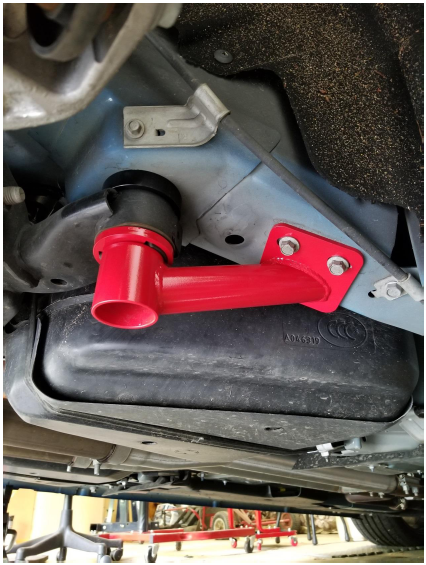
4. Now we will work each side one at a time. Remove both front and rear cradle bolts from one side. Then remove the two 10mm bolts that are holding the black bracket the front cradle bolt went through (note: the black bracket is not reused). Then slowly lower the jack so the side of the cradle you worked on first drops enough so you can slip the black cups over the top of the cradle bushing. There are 4 black cups in the kit. The 2 shorter ones are for the rear and the 2 taller ones are for the front. Grab one of each and slip them over the bushing. Now on the rear, grab the stainless steel bracket and slide it over the bottom of the bushing and follow that by threading the rear cradle bolt in by hand a few turns. The stack up of the items for the rear should look as follows.
5. Now onto the front. Line the lower bushing spacer up with the notches sticking out of the bushing. It is shown below in red but it will be black if you got the black colored kit. Follow that with the cradle support piece and finally the bolt. The stack-up should look as follows. If you are having any trouble hand threading either the front or rear check to make sure the cradle has not shifted, if it has you may need to pry it to the direction you need enough to hand thread it. Jack the cradle back up until it is flush with the frame and then thread both front and rear bolts back to the loose setting you had them at prior.
6. Repeat steps 4 and 5 for the other side of the cradle.
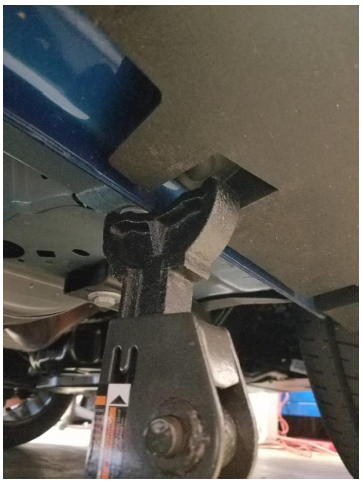
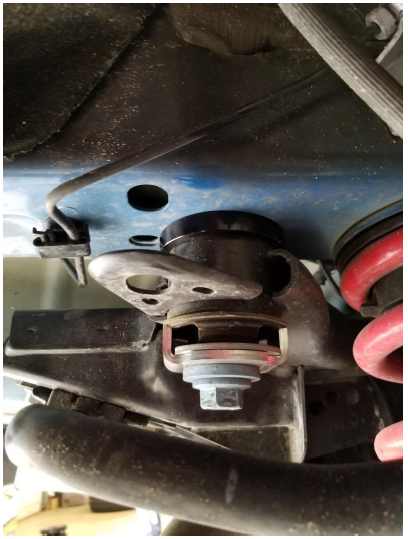
7. Once all four corners of the cradle have had the lockout kit installed you will need to align the cradle enough so that the 2 10mm bolts on the front cradle support can be hand threaded back into place. If they are off in some direction use the hole in the bushing carrier and hole in the frame on the rear of the cradle to pry from as shown below. This is why the other side we just completed was left loose, so in case the cradle does need to be shifted in some way.
8. Once it all lines up and the front 10mm can hand thread properly go ahead and tighten them down.
9. Now go to each of the subframe bolts and tighten each to 129 ft/lbs. Then tighten the front 10mm bolts to 41 ft/lbs.
10. Bolt the wheels back on the rear, remove the jack stands and lower the car. It is recommended to go ahead and get an alignment after as the cradle may have shifted slightly.
NOTE: This kit does require multiple pieces and hardware to all line up properly for a seamless install. If at any time a bolt or part seems like it is binding or not installing easily, take a step back and recheck everything else. Do not force any bolts into place.
