 FREE 1 to 3-Day Delivery on Orders $149+ Details
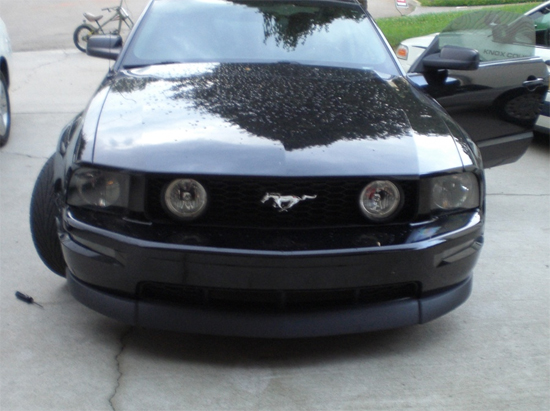
CDC Classic Chin Spoiler - 2005-2009 Mustang GT - Installation Instructions
Tools Required
- Phillips Screw Driver
- Sand Paper
- Prep and Paint materials (optional)
- Car Ramps, Jack Stands, etc. (optional)
Installation
NOTE:
Before beginning install, clean all areas where install shall occur with soap and water. Ensure areas are dry before beginning.
Painting:
1. Test fit chin spoiler (chin spoiler will hold by simply popping over sides of bumper)
2. It is recommended that a professional paint the chin spoiler to ensure optimum quality.
3. CDC recommends that paint curing temperature does not exceed 150 degrees Fahrenheit.
Applying 3M Tape
1. Use the sand paper to sand the inside of the chin spoiler where the tape will be applied.
2. Clean thoroughly with the supplied alcohol wipes and allow to dry.
3. Apply supplied adhesive promoter to both the lip of the lower grille and the inside of the chin spoiler where the tape will be applied. Allow drying for at least one minute, but do not wait more than one hour before applying tape. Avoid contact with skin or any area of paint not covered by tape, as discoloration may occur.
4. Apply double sided tape over area of the chin spoiler. Cut where continuous strand cannot be achieved.
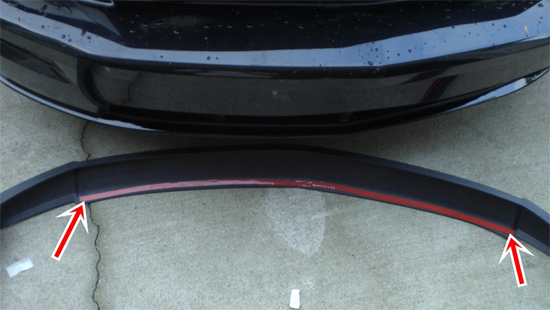
5. Apply even and steady pressure over the tape. Only 60% of the bond is created upon install, takes 72 Hrs for the tape to achieve 95% bond, so be gentle for the first few days.
Chin Spoiler Install
1. The chin spoiler can be installed while the vehicle is on the ground or while on ramps, jack stands, etc. Ensure the emergency brake is applied.
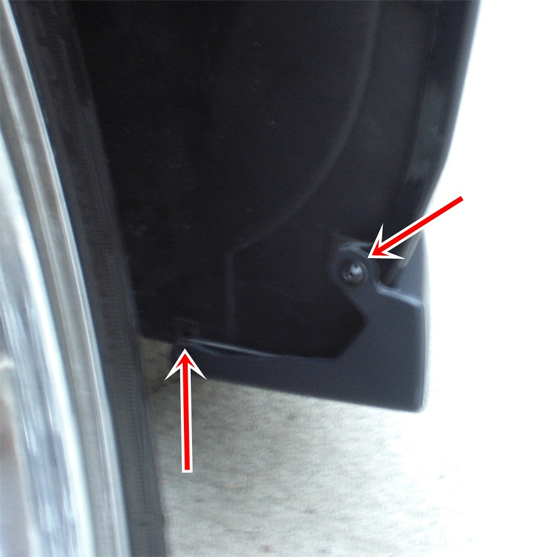
2. Remove the two screws on either side of the vehicle that secure the wheel well liner to the front bumper. These are simple Phillips head screws and come undone fairly easily. WD-40 can be applied if the screws do not come unscrewed. Some remove the wheel to gain access to these screws; however I found it easier just to turn the wheel to the extreme either direction which also allowed access to these screws. (See photo after step 5)
3. Clean areas around the front bumper with supplied alcohol pads and allow drying.
4. Peel the red edge of the bonding tape back slightly so that it can be removed once chin spoiler is in place. Ensure you place the lose edge where it can be reached when the chin spoiler is connected.
5. Place one end of the chin spoiler around the edge of the bumper and secure with the two factory screws. Ensure the edge of the chin spoiler is fully pushed around the bumper so that the edge reaches inside the wheel well.
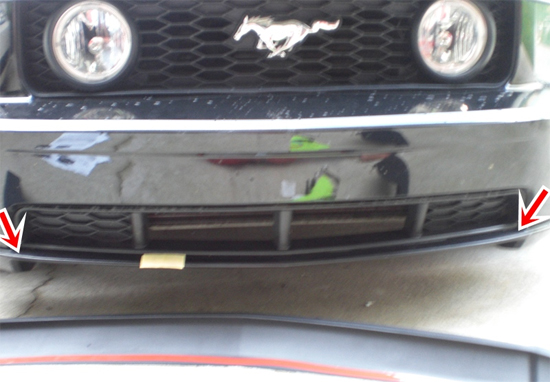
6. Place chin spoiler in place along the ledge in front of the lower grill.
7. Stretch the other end around edge of bumper and secure with factory screws.
8. Finish removing red backing and apply pressure over area where the tape is applied. Ensure even and steady pressure over bumper to promote a strong hold.
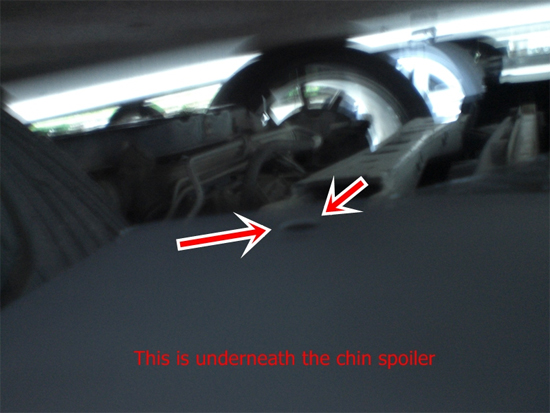
9. Install the two supplied push pin retainers in precut holes connecting bottom of chin spoiler to the bumper.
10. Take a picture, upload it to americanmuscle.com, and enjoy your new chin spoiler.
Installation instructions provided by AmericanMuscle customer Houston Ludwig 7.26.09
Related Guides
-
Installation
-
Installation
-
Installation
