Talk to a Mustang Sales Tech
1-877-887-1105
M-F 8:30A-11P, Sat-Sun 8:30A-9P
$20K Sweeps! 10 Chances to Win! Enter Daily >

C&L Blue Lightning High Output Ignition Coil (05-10 Mustang V6)

Item 413456
Verify parts fit and get product recommendations.
Mustang Sales Techs: Connect Now M-F 8:30A-11P, Sat-Sun 8:30A-9P
$0.00
On Sale

$67.99 (each)

FREE Shipping on orders over $119 Market Price $80.49 You Save 16% ($12.50) Up to 10% off for Military & First Responders! See Details

Will this fit your Vehicle?

Select a different vehicle Help?
Update or Change Vehicle
Ship to: Ashburn - 20149
Sorry, please enter a valid US or CA postal code
We're sorry, zip can't be updated at this time.
    Create a list
    Add to New List

    Saved - View your saved items

    We're sorry. We couldn't save this product at this time.

    or use

      Product Videos

      Noah: Noah here from AmericanMuscle. When you're looking to go fast, there are three things that you need more of, and I'm sure some of you already know what they are. That's gonna be air, fuel, and spark. Now, there are tons of upgrades for air like intakes and turbos, and fuel is the same way with injectors and fuel pumps. But I found that a lot of builds actually overlook the spark upgrade aspect past anything super basic like different spark plugs. So, if you're looking to support your 2005 to 2010 V6 Mustangs air and fuel upgrades with strong spark, then this blue lightning high output ignition coil from C&L is something that you might wanna look into.When you think about it, it really is amazing how engines operate. And just thinking about the role that spark plays in the combustion process is kind of mind-blowing, and it really is the bit in the horse's mouth. That's why upgrading your ignition coil to something like this guy from C&L is an important factor in the process of making more horsepower. A stronger spark makes for a better performance, and a stronger spark can increase horsepower and torque, as well as get you a few more miles to the gallon as well. That's right. A more effective and efficient combustion process not only results in more power, but it can also increase your gas mileage as well.So, in terms of construction, we aren't really looking at anything too complicated. We've got a nice blue hard plastic on the outside, and it does look pretty sweet in the engine bay as well. This does have a vertical connector here. So, the plug will go right on the side when the coil is mounted with the plug wires coming out of the top. It is designed to drop right in where that factory one went, and it will work with no other supporting mods. It would be a good idea to grab some plugs and wires off our site as well, so you can get a full refresh right out of the gate. And don't forget to gap your plugs properly either, that will also make a huge difference in engine performance. Coming in right around 100 bucks, this coil is a cheap upgrade that will really make a difference in terms of performance. Lots of reviews on this coil talk about noticeable differences in their idle, performance, and the amount of cranks it takes to get their car started. So, it's a great idea to grab an upgraded coil from C&L if you're looking to make some more power, or you just wanna replace that factory one that doesn't work anymore. Surprisingly, at that price point, it's not even that much more than a stock replacement.We are looking at a very simple install here for this coil. It's only gonna be one out of three wrenches, and a light one out of three at that. You can expect to spend about an hour on the install since it's important to take your time installing a coil so that you don't get the wires mixed up. That's enough from me though. Let's take a look at this video from an AM customer where you can see the install process more in-depth.Man: Hello. Today, I'm gonna be replacing the CL High Lightning Output Ignition Coil. That's gonna be replacing this part right here on a 2006. And here are the tools I'm gonna be using. Here's the CL Lightning High Output. The tools I'm gonna be using here is gonna be a ratchet with a socket. And then on this, I have the 930 seconds. And then you could also use a 7-millimeter with this adjustable edge here. I have the wrench here, and this will be to remove the battery power. This right here flathead, so we can take off the back clip here if needed. And then also is a marker and some masking tape, so we can make sure when we take off these connections right here that we put 'em in the same order. So, let's go ahead and get this started. So, first thing first, I'm gonna go ahead and take my wrench and disconnect the battery. And then I'm loosened it up. And I'm gonna go ahead and take that off here.Now, I'm gonna go ahead and start taking apart the ignition coil, which is this right here. So, what we wanna do is go ahead and take the tape and the marker. And what I'm gonna go with is I'm gonna go passenger, top, middle top, driver top. And then same thing, I'm gonna back, passenger, bottom. So, I'm gonna write that down real quick like that. And then we'll do top, TM. And then I'm going with TD, and that's top driver. Same thing for the bottom. So, we're gonna go bottom, PB... And this is what I did on the other side. And then we're gonna go the bottom middle. And then we're going with the bottom driver. Now, go ahead and put those two away. Next thing, now we just go ahead and start taking off these sparks right here. And these are the spark plug wires. And once you take these off, it'll make it a lot easier. So, when you're putting everything back on, you won't have to worry about anything, not knowing where it goes.So, on with these, it just had a clip, and we squeezed it, and we took it off there. Take the flathead, and I'm gonna just put that in there. I'm gonna take my hand, and I'm just gonna squeeze it back and take that off. And that's it. Now, we're gonna take off these bolts right here with that 930 seconds, one right there, and one back there. We're gonna take those bolts off. And once we get those, then we will...so, I'ma start taking those bolts off. So, like I said, I'm gonna get the ratchet with the 930 seconds, and I'll do one each. So, put on there, here we go, and coming off now. So, that's gonna come off here. And then make sure you put your screws in a good spot, so they don't get lost. There we go. It will also be best to have the ratchet available because sometimes if you're not able to get into positions, we can actually be able to take this one off, put it on here, and then be able to work. And be able to take it off as needed...one there.As I'm taking this off, I'm noticing that there is also a device that's connected to it. I'm not too sure what that is. With this one, you're gonna wanna make sure that goes back in there. It looks like a little fuse box. Let's put that to the side right now. And we have two more to take off. One in the back over here. Now... Screws are all the same size, so you don't have to worry about keeping them in order. I put the ratchet to the side now. We also don't need the flathead anymore. So, I'll go ahead and take this off with my fingers. All right. And vwah-lah, here is the two parts. There's the old ignition coil connection here, and this is the new one. Put these down. Those are the two parts right there. So, we're just gonna replace those two. So, let's get that finished up. Same thing, reverse the steps. So, we're gonna go ahead and put this back on here. And I'm gonna go ahead and connect the clip. Connect that first up, get that on there. And now let's just line it up. I'm gonna go with the one that now I need to put this fuse back in or connection. So, I'm gonna go here, and just finger-tighten them like that. Okay, you might have to reposition a little bit, so you can get that in there. We have one more. And the final one back over here. Let's put that one...Start tightening that one. Then we'll get our ratchets, so we can finish that off. Okay. Get our ratchet back, connect it up. Flip the switch... Put it down a little tight there, start on the next one, and then... Now go ahead and tighten them down. And the final step here is go ahead and read what I put. So, I put bottom passenger, and like I said, it just clips around that hose. So, let's pull a clip, push it down. There's that one. And go ahead and do what this one says, which is passenger top. So, pass it down in there...in there.Next one we got here. Top, middle, put it down there. Push it down... Top driver, all right. Got those clipped. Now the next one, the bottom, middle. And next one is bottom driver. That's it. Now, I'm just gonna go ahead and remove all the tape. You might wanna do it before you put the wire on there, but just in case, if you have any questions or anything happens. We can go ahead and put the battery back on. And we'll just leave it like that, and get the wrench. We're gonna go ahead and tighten it back up. Now we'll go ahead and start it up.Noah: That was the C&L Blue Lightning High-Output Ignition Coil for the 2005 to 2010 Mustang GT. For all things Mustang, keep it right here at americanmuscle.com.

      Product Information

      Features, Description, Reviews, Q&A, Specs & Installation

      Features

      • Performance Replacement Upgrade
      • Improves Power and Performance
      • Increases Fuel Economy
      • Vertical Connector
      • Direct Bolt-On Installation
      • Includes (1) Coil Pack
      • Fits 2005-2010 Ford Mustang V6 Models

      Description

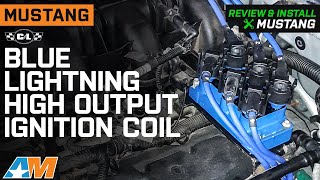
      More Power, Better Performance. C&L Blue Lightning High Output Ignition Coils make more power then the wimpy stock oem factory coils to help produce more power and torque out of your engine. C&L Blue Lightning High Output Ignition Coils are the ideal performance replacement upgrade for both stock and modified engines.

      Better Fuel Economy. A hotter spark burns the air/fuel mixture more completely releasing all of it's potential energy which translates into better fuel economy and more power that you can feel in the seat of your pants.

      Application. This C&L Blue Lightning High Output Ignition Coil is designed to fit 2005-2010 Ford Mustang V6 models.

      Fitment:

      Details

      C&L 413456

      CA Residents: WARNING: Cancer and Reproductive Harm - www.P65Warnings.ca.gov

      Installation & What's in the Box

      Installation Info

      What's in the Box

      • (1) Coil Packs
      4.8

      Customer Reviews (85)

        Questions & Answers

        10 More Questions

        Will It Fit My Mustang

        • V6 - 05, 06, 07, 08, 09, 10