 FREE 1 to 3-Day Delivery on Orders $149+ Details
Eibach Mustang Anti-Roll Kit ('05-'10) - Installation Instructions
Installation Time
2 hours
Tools Required
- 15mm Deep Socket
- 15mm Standard Socket
- 15mm Wrench
- 18mm Deep Socket
- 18mm wrench / Adjustable Wrench
- 21mm Socket
- 4mm Hex Key
- Ratchet
- Jack
- Jack Stands x2
- Wheel Chocks
- Torque Wrench
- Ramps

Shop Parts in this Guide
Installation
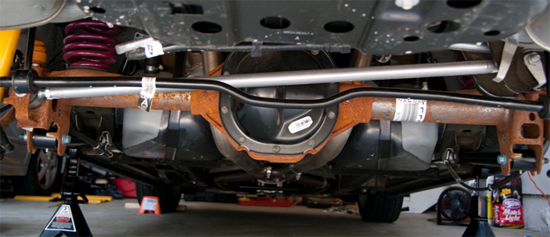
Front Sway Bar:
1. Loosen the lug nuts on both front wheels using a 21mm socket. Raise the front of the car and place onto jack stands. Place wheel chocks behind the rear wheels to ensure car does not roll back. After the front of the car is in the air and is secure, remove both front wheels.
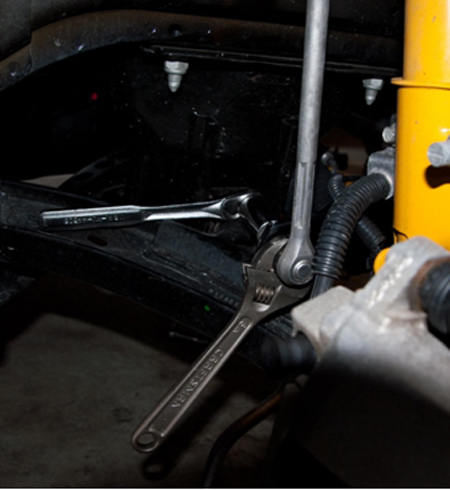
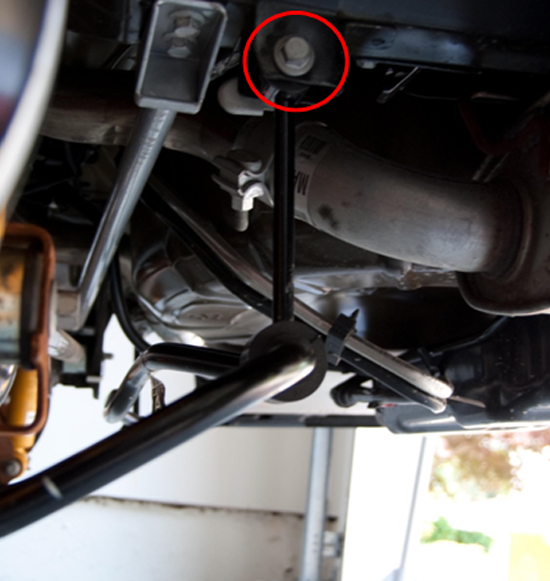
2. Disconnect front end links from the sway bar using an 18mm deep socket. You will need to use an 18mm wrench or adjustable wrench to keep the end link from spinning.
3. Remove the sway bar mounts from the radiator brace using a 15mm deep socket. There is a total of 4 nuts holding the two mounts on, 2 on each side of the car. After the mounts have been removed you can remove the sway bar from the car.
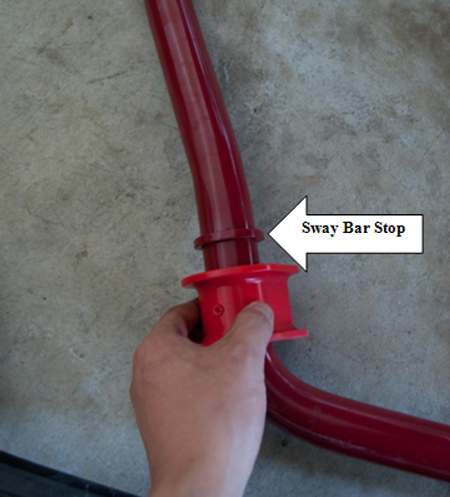
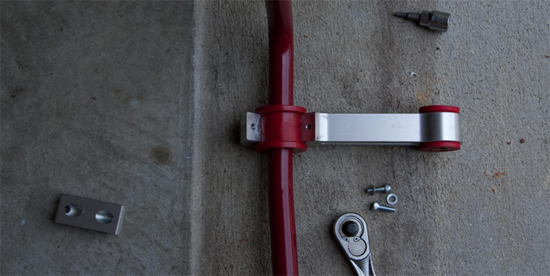
4. On the new sway bar, lubricate the two front sway bar mount bushings with the supplied grease. Place the bushings next to the sway bar mount "stops".
5. Reattach the sway bar to the radiator brace using the new supplied brackets. Tighten down the mounts to 52ft/lbs.

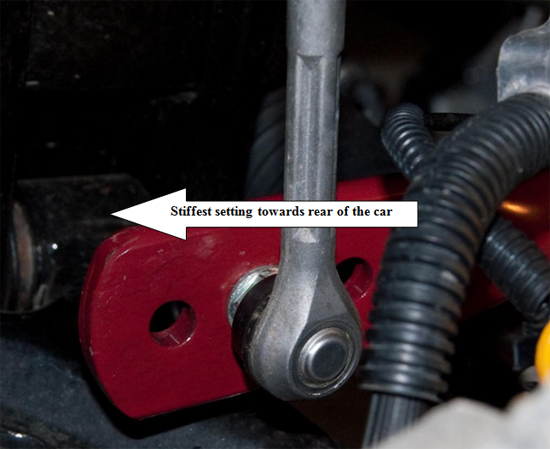
6. The front sway bar has 3 adjustments from soft to full firm. This is controlled through the placement of the front end links. The setting closest to the front of the car is the softest setting. The setting in the middle is recommended for the street and daily use. The setting closest to the rear of the car is the stiffest setting and is recommended for dry roads and track time. Attach stock end links to the sway bar and tighten end link to 85 ft/lbs.
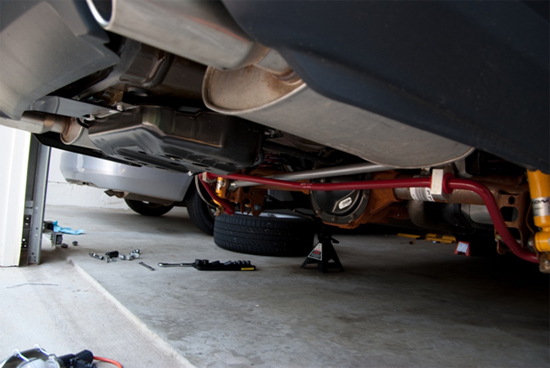
7. Put on wheels and lower the car off of the jack stands. Take car for a test drive, there should not be any additional noise.
Rear Sway Bar:
1. Jack the rear of the car and place on jack stands. Place wheel chocks in front of the front wheels to ensure car does not roll forward. Remove both rear wheels.
2. Remove the outer clamps and bushings using a 15mm standard socket. The factory hardware may be disposed since they will not be reused.
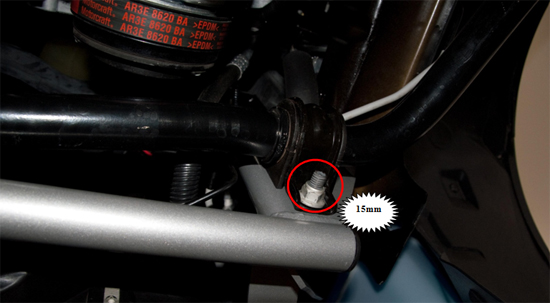
3. Remove the end links from the car using a 15mm deep socket and a 15mm wrench. Use the wrench to keep the bolt from spinning. Remove the rear sway bar from the car.
4. Lubricate the rear sway bar bushings with the supplied grease. Assemble the new supplied end links and tighten the assembly using a 4mm hex key.
5. Install the new rear sway bar to the car by attaching end links to the frame of the car and the sway bar to the shock mounts. Do not tighten any of the bolts. The rear suspension needs to be loaded before tightening.
6. Reattach wheels and lower car onto ramps. Tighten end links to 85 ft/lbs and shock mounts to 52 ft/lbs. Once completed take car for test drive, there should not be any added noise.
Installation instructions provided by AmericanMuscle customer James Yu 6.13.10

