 FREE 1 to 3-Day Delivery on Orders $149+ Details
How to install a Ford Racing BOSS 302 Engine Oil Cooler on your 2011-2012 GT Mustang

Shop Parts in this Guide
Installation
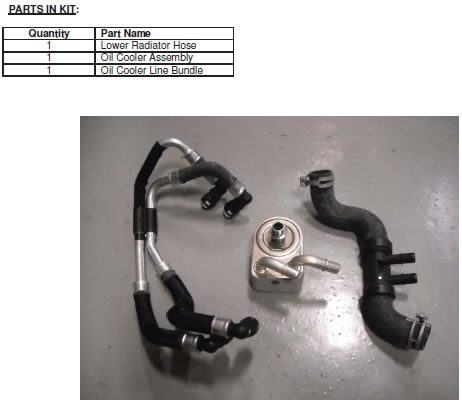
INSTALLATION INSTRUCTIONS:
STEP 1: Raise and support vehicle to gain access to underside.
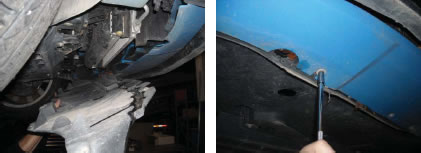
STEP 2: Remove (9) bolts securing under tray to front bumper cover, remove tray.
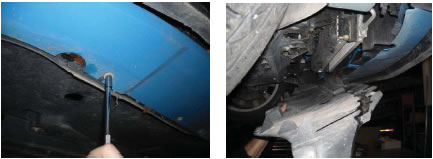
STEP 3: Loosen valve on radiator and drain the engine cooling system.
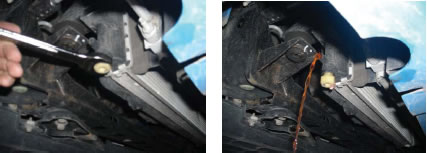
STEP 4: After engine cooling system is drained, tighten valve on the radiator.
STEP 5: Remove (3) bolts securing the rearward underbody shield and lower.

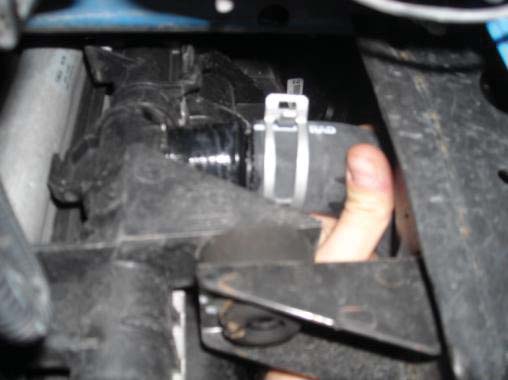
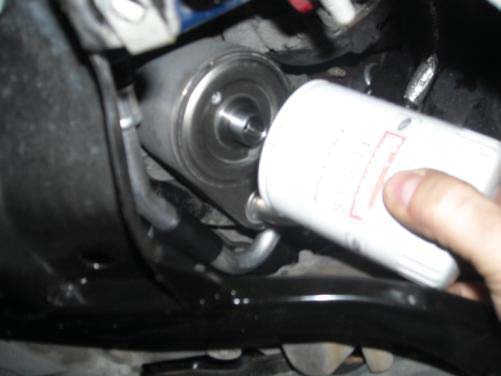
STEP 6: Remove and discard the oil filter.
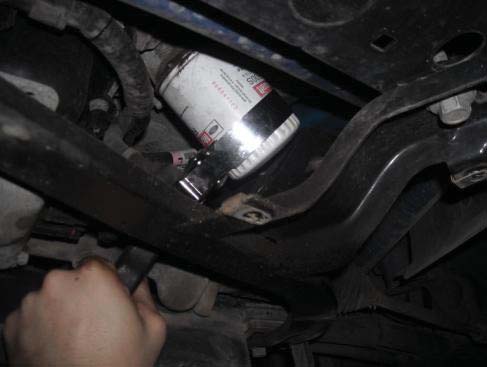
STEP 7: Remove the oil filter threaded fitting from the engine block.
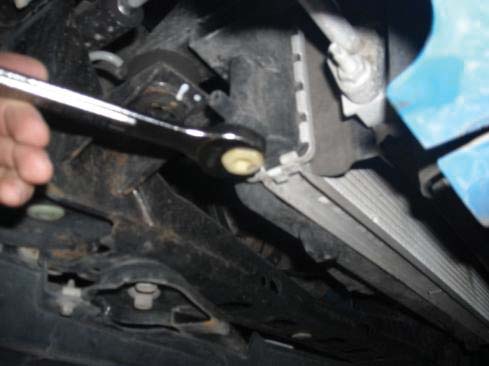
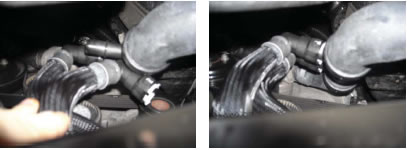
STEP 8: Remove the lower radiator hose from the radiator.
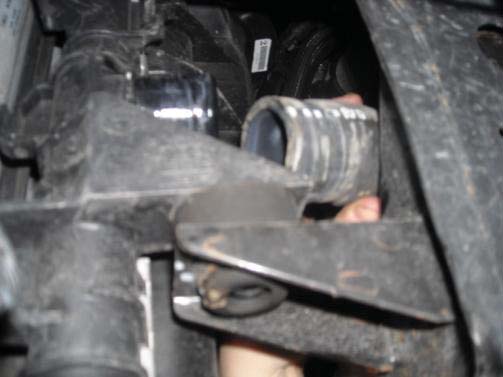
STEP 9: Remove the lower radiator hose from the upper housing and remove hose from vehicle.

STEP 10: Install the new lower radiator hose onto the upper housing and release the hose clamp.
STEP 11: Install the new lower radiator hose onto the radiator and release the hose clamp.
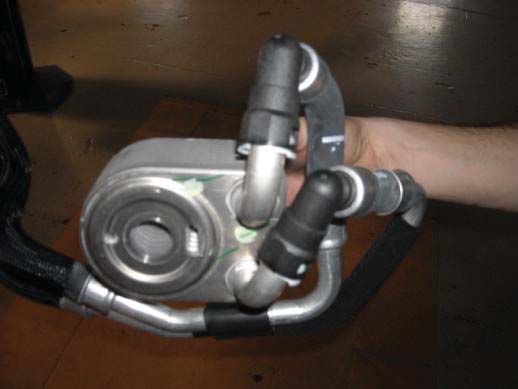
STEP 12: Install the oil cooler line bundle onto the oil cooler by firmly clipping the quick connect couplings onto the oil cooler.
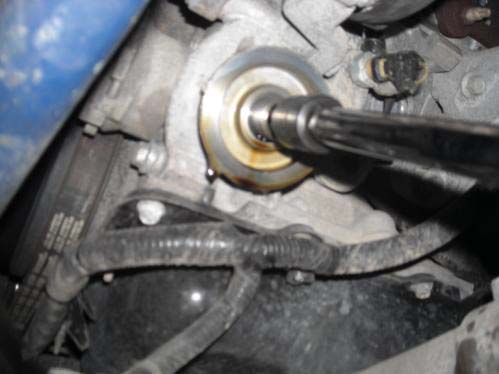
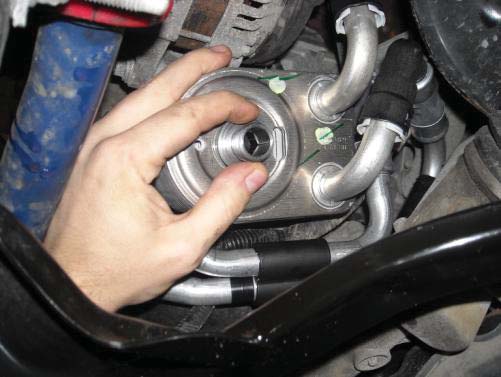
STEP 13: Place the oil cooler assembly against the engine block and install the new threaded fitting.
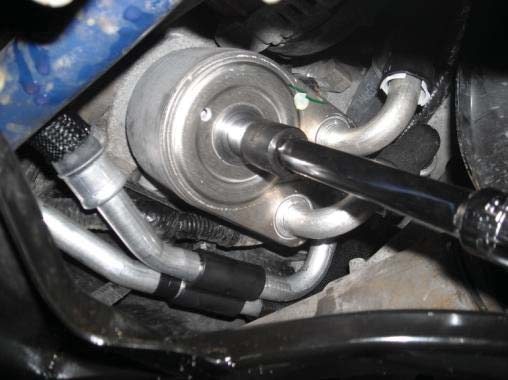
STEP 14: Tighten and torque the new threaded fitting to 58 Nm (43 lb-ft).
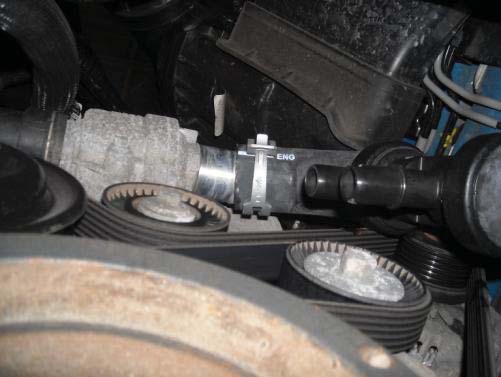
STEP 15: Install the oil cooler line bundle onto the lower radiator hose by firmly clipping the quick connect couplings into place.
WARNING: The hose attached to the upper most fitting on the oil cooler must be attached to the upper most fitting on the lower radiator hose.
STEP 16: Install a new oil filter and tighten to 16 Nm (142 lb-in).
STEP 17: Reinstall the rearward underbody shield with (3) bolts, tighten to 10 Nm (89 lb-in).

STEP 18: Reinstall under tray to front bumper cover with (9) bolts.
STEP 19: Fill the radiator through the degas bottle until the coolant level is between the “COOLANT FILL LEVEL” marks. Refer to your owner’s manual for Ford Motor Company recommended engine coolant.
STEP 20: Start the engine and check for leaks on the newly installed items. Turn off the engine and check engine oil level, fill if required.
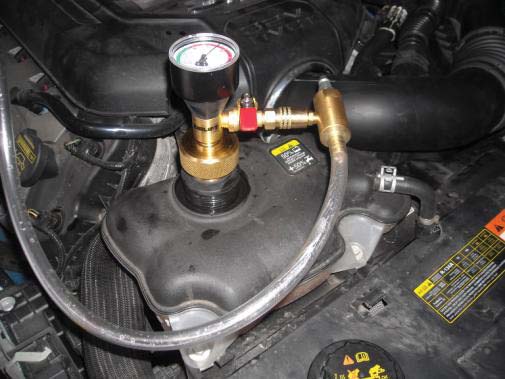
STEP 21: Filling and bleeding procedure may be accomplished with either a Vacuum Cooling System Filler, or without. Proceed to step 22a if using a Vacuum Cooling System Filler, or proceed to step 22b if a Vacuum Cooling System Filler is not used.
STEP 22a: Install the vacuum cooling system filler and follow the manufacturer’s instructions to fill and bleed the cooling system.
STEP 22b: Select the maximum heater temperature and blower motor speed settings. Position the control to discharge air at the A/C vents in the instrument panel.
Start the engine and allow to idle. While engine is idling, feel for hot air at the A/C vents.
NOTICE: If the air discharge remains cool and the Engine Coolant Temp (ECT) gauge does not move, the engine coolant level is low and must be filled. Stop the engine, allow the engine to cool and fill the cooling system. Failure to follow these instructions may result in damage to the engine.
Start the engine and allow it to idle until normal operating temperature is reached. Hot air should discharge from the A/C vents. The Engine Coolant Temperature (ECT) gauge should maintain a stabilized reading in the middle of the NORMAL range. The upper radiator hose should feel hot to the touch.
Shut the engine off and allow to cool. Check the engine coolant level in the degas bottle and fill as necessary.
