 FREE 1 to 3-Day Delivery on Orders $149+ Details
How to Install a Hawk Performance Brake Pads - Front Pair on your 2007-2014 Mustang GT500, Boss 302
Installation Time
1 hours
Tools Required
- Floor Jack
- Jack Stands
- Lug Wrench
- 15mm Socket Ratchet Wrench
- Wire or Wire Coathanger
- Center Punch or Very Small Screwdriver
- Channel Lock Pliers
- Brake Cleaner
- Brake Quite Grease
- Towels
- Latex Gloves
- Eye Protection
- Hammer or Rubber Mallet
- Breaker Bar
- Torque Wrench

Shop Parts in this Guide
- Hawk Performance Ceramic Brake Pads; Front Pair (11-14 Mustang GT w/ Performance Pack; 12-13 Mustang BOSS 302; 07-12 Mustang GT500)
- Hawk Performance HPS Brake Pads; Front Pair (11-14 Mustang GT w/ Performance Pack; 12-13 Mustang BOSS 302; 07-12 Mustang GT500)
- Hawk Performance HP Plus Brake Pads; Front Pair (11-14 Mustang GT w/ Performance Pack; 12-13 Mustang BOSS 302; 07-12 Mustang GT500)
Install time is 1 – 2 hours.
Tools:
Floor Jack
Jack Stands
Lug wrench
15mm Socket Ratchet Wrench
Wire or Wire Coat Hanger
Center Punch or Very Small Screwdriver
Channel lock Pliers
Brake Cleaner
Brake Quite Grease
Towels
Latex Gloves
Eye Protection
Hammer or Rubber Hammer
Breaker Bar
Torque Wrench
Removal Procedure:
1. Put your vehicle in park and apply the parking brake. Use the floor jack and jack stand to lift the whole front of your car off the ground.
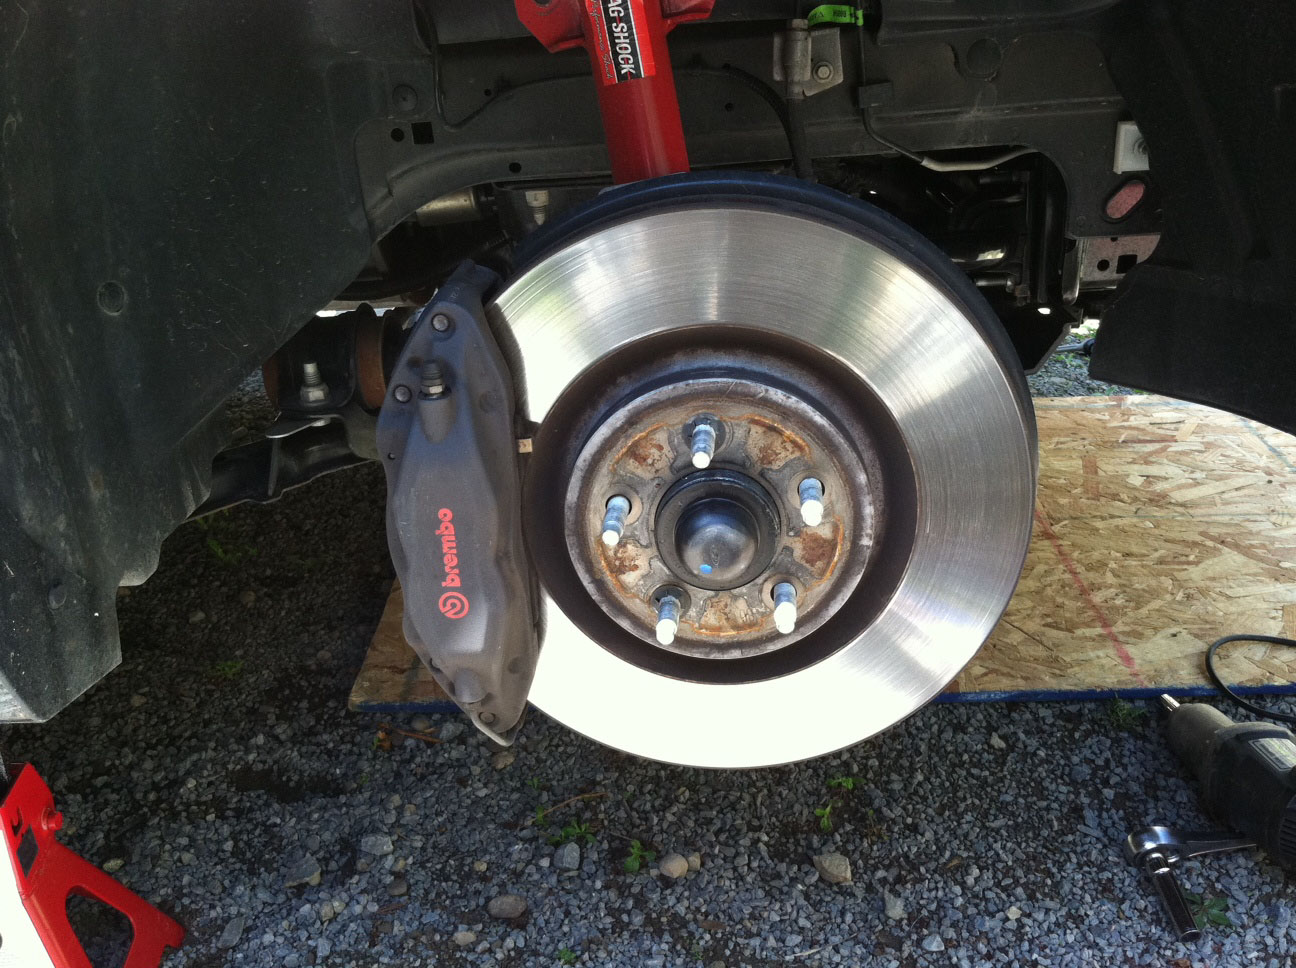
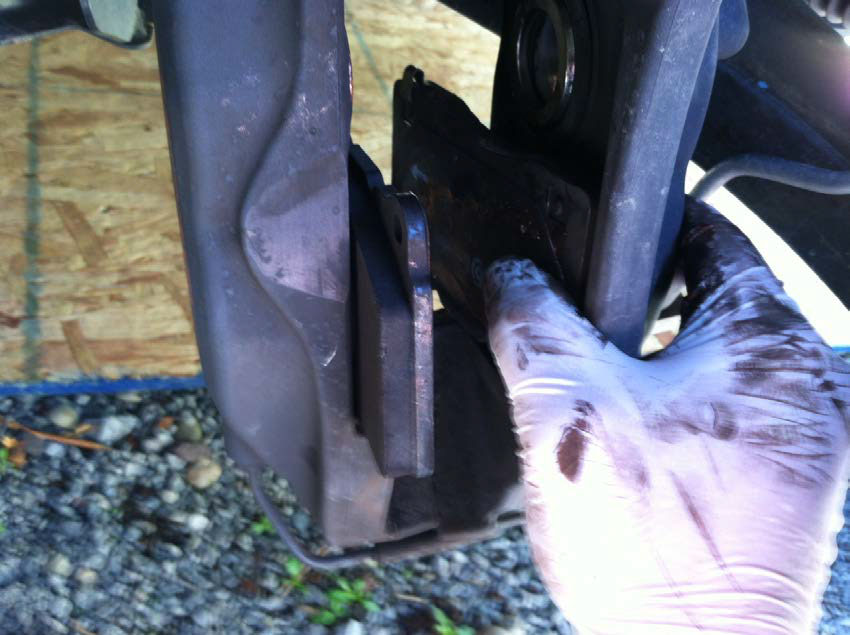
2. Remove the wheels. Turn your steering wheel so you access the caliper easily.
3. Use a hammer and center punch to begin to remove the pins holding the brake pads to the caliper. Note: Take a look at the depth of the pin before removing so you will know when they are fully seated later. Use CAUTION, the retainer clip that is held into place by the pins is under moderate pressure. Tap the pin until it is out far enough to grab with the channel locks. While removing the first pin the retainer clip will fly out, try deflecting the clip so it doesn’t fly far.

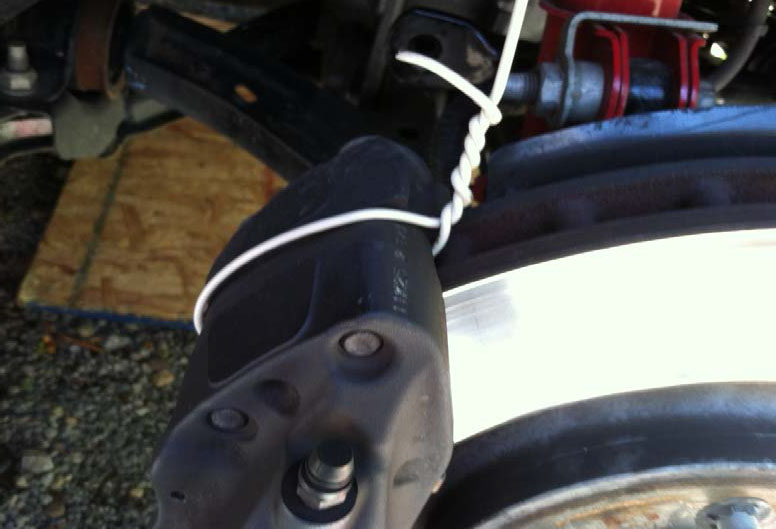
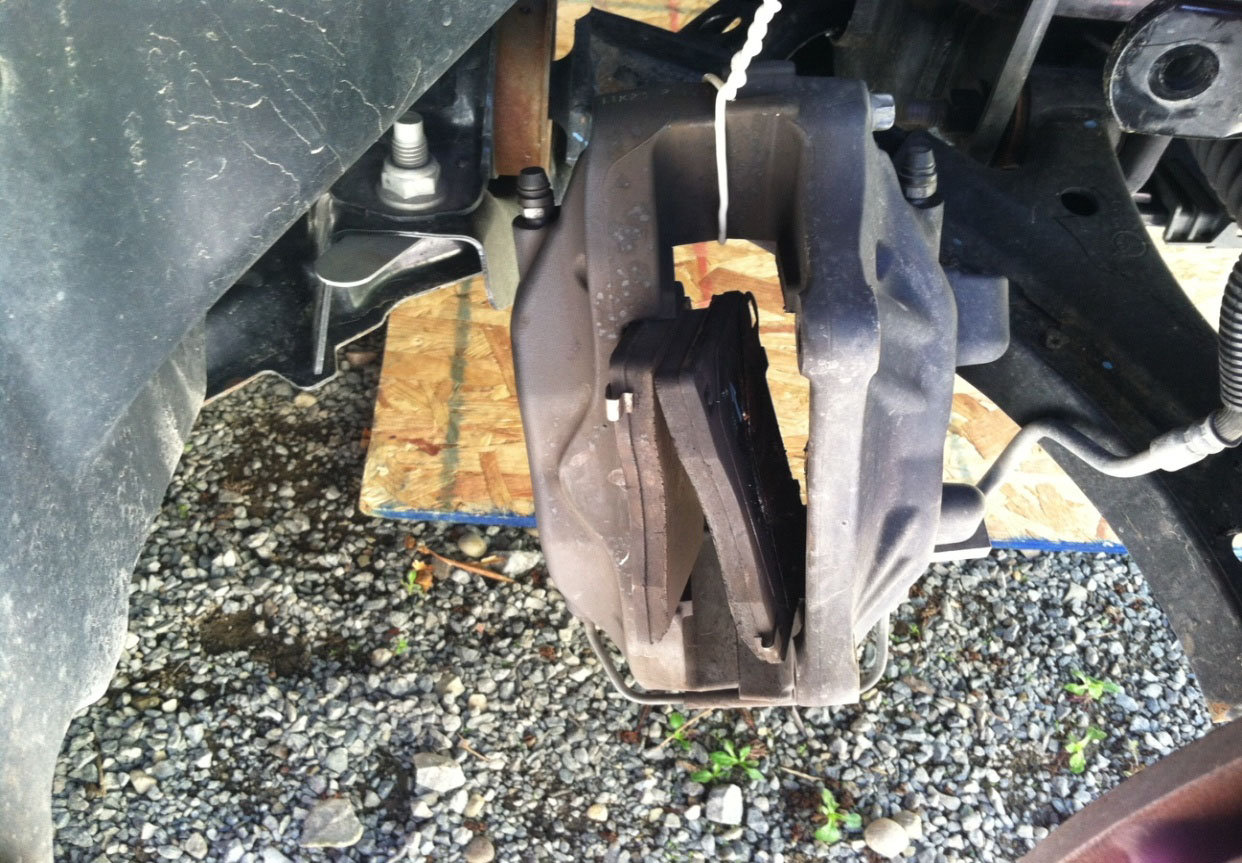
4. Once both pins and the retainer clip are removed you need to secure the caliper with wire to prevent brake line and caliper damage. I found it easiest to run the wire along the top of the rotor through the first part of caliper and then around the coil spring.
5. Now it is time remove the two caliper mounting bolts. Use the 15mm socket and breaker bar to loosen the 2 bolts then continue to remove with 15mm and ratchet wrench. The caliper will pull straight off toward the cabin of the car. The brake pads may fall to the ground as they will be loose.
Preparation:
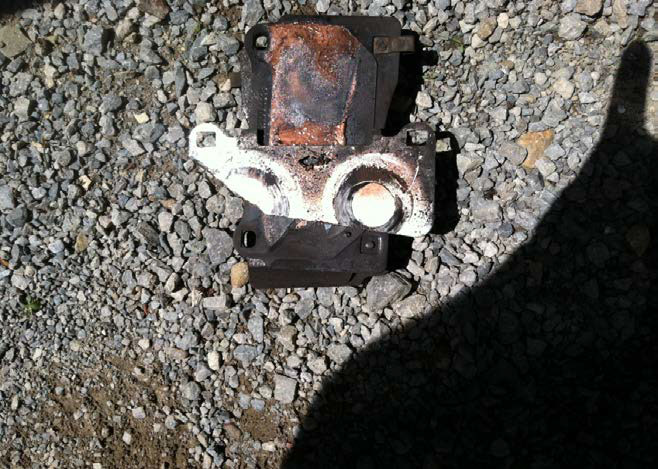
1. The caliper pistons need to be decompressed. You only want to try one at a time. I used the old pads (with the backs of the pads against piston) and the handle end of my ratchet wrench to apply pressure using different angles until each piston is flush with the inside of the caliper. If you have strong grip you can probably decompress with your hands.
2. Remove the metal piece that is sitting on the back of the old pads. Use brake cleaner to clean the pins, retainer clip, and the metal backing plates. I also sprayed a towel and lightly cleaned off the piston area of the caliper.
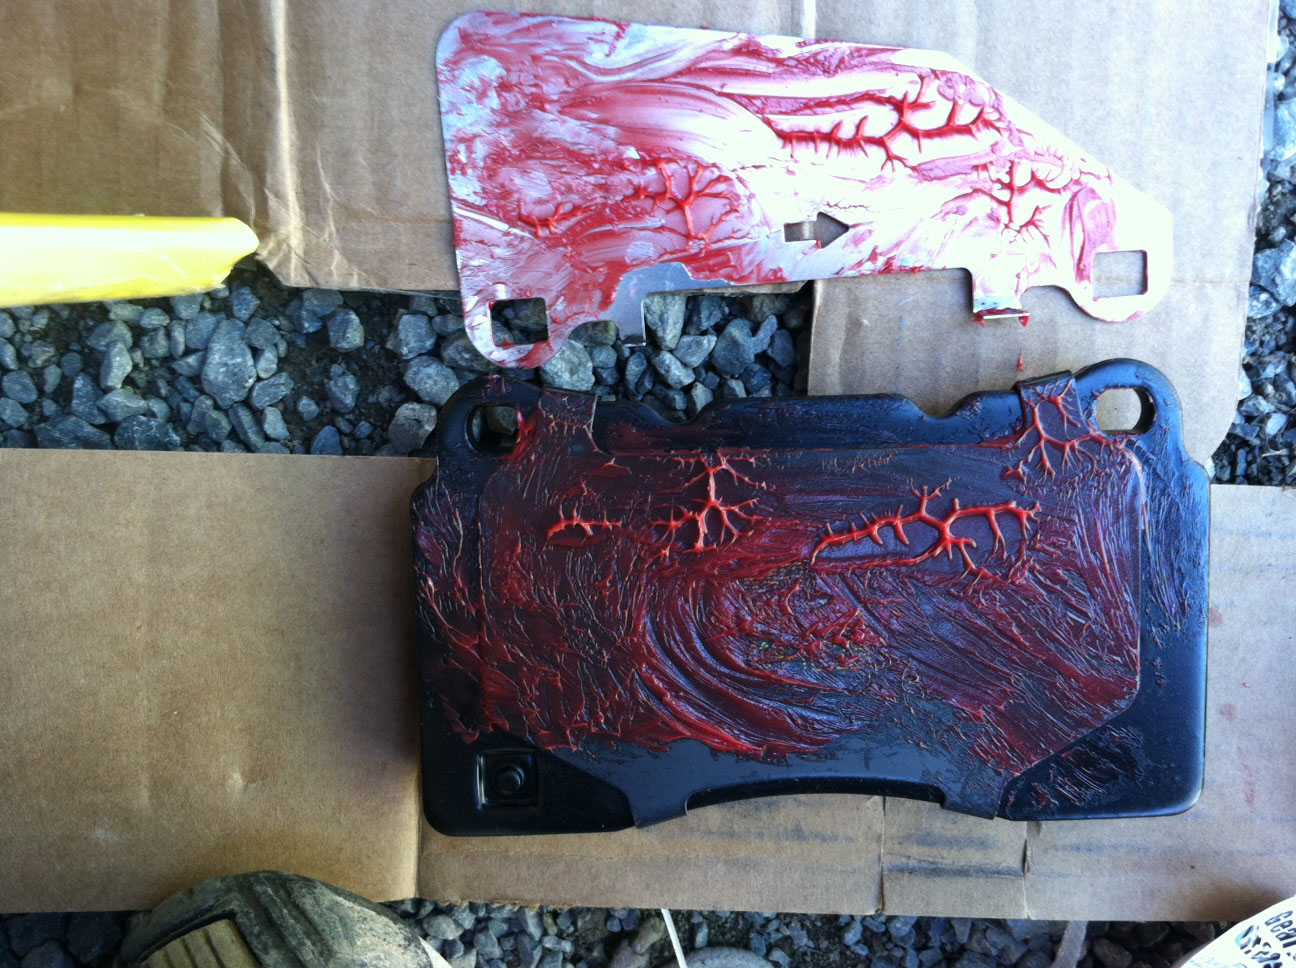
3. Now use the quite brake grease on the back of the new pads, both sides of the backing plates. Ensure that the arrows are pointing in the correct direction.
Reassembly:
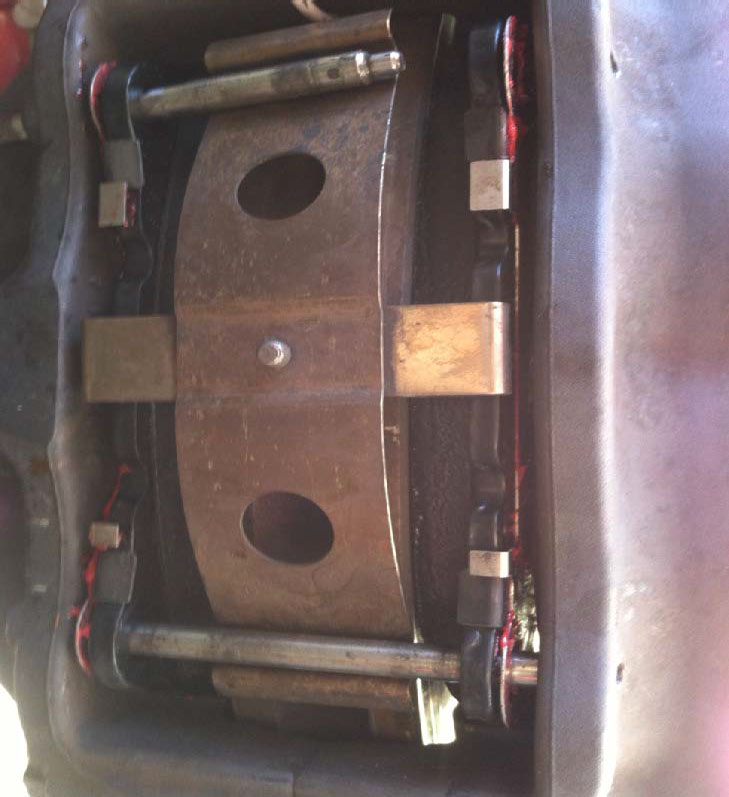
1. Place one of the pins back into the caliper and through both pads and the whole way through to the other side of the caliper back into it original position. The head of the pin should be a little bit below flush on the backside of the caliper. You may need to tap it a little to fully seat it in to place.
2. Slide the caliper back onto the rotor. Line up the mounting holes and get the bolts started. Now slide the retainer clip under the pin. Note: the retainer clip goes on in what looks like the opposite curvature of the rotor. You should see some wear marks where the pins rubbed on the clip. The second pin is ready to go in but you have to hold down the retaining clip as you slide into place. Once again when it is all aligned you may need to give it a tap with a hammer.
3. Tighten the bolts to 85 ft/lbs. Spray a towel with brake cleaner and wipe off the face of the rotor while turning the rotor to clean off any debris. Put wheels back on, torque to lug nuts to 100 ft/lbs.
Break-in Process:
1. Do 6-10 stops from 35 mph with moderate pressure. Let the brakes cool a little before each stop. Now do 3 harder braking from 50 mph to 5 mph. Do not come to a complete stop. You will feel the change in braking and pedal feel throughout the break-in process.
2. I recommend you do some light cruising before returning home to cool down the brakes. When you do stop do not apply parking brake as your rear brakes will also be very hot and you do not want to warp the rotors. Only do this process when the roads are dry.
Final notes: I used a lot of latex gloves to help keep the caliper, face of pads, rotors, and hands clean. I bought extra brake quite, Hawk provides you some but not enough for both sides in my opinion.
Installation Instructions Written by AmericanMuscle Customer David Kravits 5/12/2013
