FREE 2 or 3-Day Delivery on 10,000+ Items. Details

Talk to a Mustang Enthusiast
1-877-887-1105
M-F 8:30A-11P, Sat-Sun 8:30A-9P
$20K Sweeps! 10 Chances to Win! Enter Daily >
The AmericanMuscle Show is Back! Register Now>

MSD Blaster Coil Packs; Red (11-16 Mustang GT)

Item 404307
Call a Mustang Enthusiast at 1-877-887-1105
M-F 8:30A-11P, Sat-Sun 8:30A-9P
$0.00
Market Price $572.99 You Save 15% ($87.04)
Our Price

$485.95 (set of 8)

FREE Shipping

Will this fit your Vehicle?

Select a different vehicle Help?
Update or Change Vehicle
Ship to: Ashburn - 20149
Sorry, please enter a valid US or CA postal code
We're sorry, zip can't be updated at this time.
    Create a list
    Add to New List

    Saved - View your saved items

    We're sorry. We couldn't save this product at this time.

    or use

      Video Review & Installation

      Justin: The MSD Blaster Coil Packs that we have here today will be a premium option for the '11 to '16 GT owners who might be looking to replace a set of faulty or failing stock coils with something aftermarket and something from one of the most trusted names in aftermarket ignition. Now, the blaster coils will come in a set of eight and they will feature this nice bright red finish and corresponding one-year warranty, all for that mid-$400 price point. Site is gonna call this a very soft 2 out of 3 wrenches on the difficulty meter, and 30 minutes at most to complete from start to finish. But if you hang with me for a bit, we'll walk you through that job later in the video. The blaster coils from MSD are gonna be a very solid aftermarket option for the Coyote owners who are, again, looking to replace their stock coils which either might be faulty or on their way out.Now, a common misconception with something like this is that they add a ton of power, which isn't exactly true, and if they do, well, typically, that's because the coils that you are replacing weren't really functioning properly in the first place, therefore not allowing your Coyote to make or live up to its full potential. Now, what the MSD Blaster Coils here will do is help smooth out your idle along with your revs barring you got a good set of plugs in there, help clear up any high RPM misfires, and possibly even in some cases, improve your fuel economy, again, depending on just how rough a shape your factory coils were in the first place. Now, MSD claims all of this is possible, thanks to the increased voltage output over the stockers, 25,000 volts here with the blasters to be exact. Now, MSD does build these Coyote-specific coils using their patented primary and secondary winding technique in internals, and they do also feature that factory-style socket in coil wire design, which is basically just gonna make these things an extremely painless swap on any Coyote-powered GT at home. Finally, guys, my favorite part is, cheesy as it sounds, is that cool bright red finish here on the actual bodies, which will be noticeable with those factory coil covers off. However, if you're the type of owner who likes to rock those coil covers, well, you're really not gonna see them. But what do you say we stop talking about these darn things? Let's take them out to the shop and just show you what it takes to get them installed on your '11 to '16 GT at home. So without further ado, check out our detailed walkthrough and tool breakdown right now.Male: Tools used for this installation, 3/8 impact gun, 1/4-inch drive extension, a 1/4-inch drive ratchet, 13, 8-millimeter socket, pry bar, small flat-head screwdriver, dielectric grease. Hey, guys, I'm gonna walk you through the process of installing our MSD coil packs on our 2014 Mustang. It's a pretty easy installation. Let's get started. So first step we're gonna do is we're gonna remove our strut tower brace. This is a premium Mustang so this has one. Some of the Mustangs that are not the premiums don't have it. So we're gonna take our impact gun on our 13-millimeter, remove our two nuts. And you're gonna repeat this on the other side and remove the other two 13-millimeters. Now that I got the four nuts off, I'm gonna lift up on a strut tower brace, and remove it. Now we're gonna remove our upper engine cover. Now we're gonna remove our engine cover. You're just gonna give it a couple of tugs and then just lift up. And now that comes off. Next, we're gonna remove our PCV hoses on both valve covers. Now we're gonna remove the PCV hose on the driver side. If you look down inside, you're gonna see a little gray tab. You're gonna wanna take a short or small thin screwdriver, flat or pick, and you're gonna wanna get in there and push the tab back, and that will release the PCV and then you can get it out of the way.Next, we have a line on the back of this valve cover we're gonna remove, and then we'll work on the other side. Now we're gonna remove this plastic hose back here into this clip and get this out of the way. That way, we can get the valve cover off now. We're gonna take this valve cover off. We're just gonna lift up on it and it comes right off pretty easy right out of the way which exposes our coil packs on this side. Now we'll go over and take the valve cover off on the passenger side. Now we're gonna do the same thing with this PCV hose. We push that clip back, lift up, that pulls the PCV hose. Now you wanna be gentle because that is plastic. We're also going to remove our oil fill cover. And now once we got those two off, we can get our valve cover off and expose the coil packs on this side. Now we'll go and start removing the coil pack.So now we have all our covers off. We're gonna start removing our coil packs on the passenger side. To take these coil packs out it's pretty easy. You're gonna take your long flat-head screwdriver. You're gonna push down in the center here to pop up the red insert into this clip here, then you're gonna push down on the black part of the clip, and you'll hear a click like that. That will disconnect the wiring harness and leave it out of the way. Once we get it out of the way, you're gonna take your 8-millimeter, run your bolt out. And you're just gonna give a little twist and pull. Now we're gonna repeat this on the rest of them. I'll push up on all the clips, just the black tabs, and remove the wiring harnesses out of the way. So we'll stick them out of the way like that. Take my 8-millimeter, break all the bolts loose. If you want to keep your stock coil packs now is a good time.Once you start taking them out to mark them on the passenger side one, two, three, four if you ever decide that you're going to put your vehicle back to stock. Once I get all these bolts out, four coil packs out. The back one might be just a little bit tough to get to. [inaudible 00:07:54] and just pull up like that. Now we'll start installing our new MSD coil packs. Now we're gonna start installing our MSD coil packs. I'm gonna put a little dielectric grease inside the boot on each one of them, and then we can install our coil pack. We're gonna take our coil pack you must push down in like that. Start your 8-millimeter. Tighten it up. Install our wire connector. You push it down you're gonna hear a click, and then you're gonna push the red click back down in, and our coil pack is installed. Now I'm gonna repeat this procedure on the rest of the other seven of them. So the back one was the toughest one to get out. I was able to pull it out. It takes a little bit because of the battery box in the back. I have found a trick to get the back one in pretty easily. You take a smaller pry bar. You kind of just wanna lay it and wedge it between the battery box and the valve cover. Now you don't wanna pull and/or pull too hard because you don't wanna break the plastic. But if you pull just enough, it'll slide right down in and you can get the new one in and the old one out in the same way. The rest of them will fall right into place.The other side is not like this. It doesn't really have any interference. Once I push these all into place, I'm gonna start the 8-millimeter bolts. Once you push them down in, you get them started. And remember, again, when you do use that pry bar, you don't wanna pull too hard because you don't wanna break the plastic. You just have to pull a little bit just to get the clearance you need to slide that coil pack in. Take my 8-millimeter ratchet, snug them all up. Now we'll install our clips next. You're gonna hear them click and you know they're on all the way. Now once you hear them click, then you're just gonna push the red tabs down, and our coil pack insulation on the passenger side is complete. Now we'll repeat the same process on the driver side.Now that we have our coil packs installed, we're gonna reinstall our plastic valve cover. I'll slide it down into place. Get it into place and you're just gonna push it down on, that's all it does is pretty much snap into place. We're gonna reinstall our hose and our bracket back here and push our PCV down. You heard a click. That means it's on. We're gonna repeat the same procedure on the other side. Now that we got our valve covers back on and our PCV hoses, I'm gonna install our engine cover. Pretty much sits down in place. Give it a couple of smacks. We'll reinstall our strut tower brace. Install our 13-millimeter nuts. And that wraps up our installation of our coil packs.That wraps up our review and install of our MSD Blaster Coil Packs in red for 2011 to '16 Mustang GT. Thanks for watching, and for all things Mustang, keep it right here at americanmuscle.com.

      Product Information

      Features, Description, Reviews, Q&A, Specs & Installation

      Features

      • Blaster Coil
      • Plastic Material
      • Includes Coils
      • 25,000 Maximum Voltage
      • 0.510 Ohms in Resistance
      • 5.7K Ohms in Secondary Resistance
      • 100 mA in Current
      • Red Color
      • Sold as a Set of 8
      • Greater Horsepower
      • Improves Fuel Economy
      • Installation Requires Some Mechanical Skill
      • One-Year Limited Warranty
      • Fits All 2011-2016 Ford Mustang GT Models

      Description

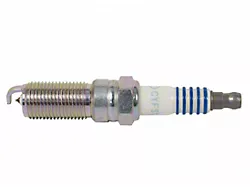
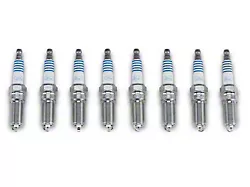
      Greater Horsepower. The MSD Blaster Coil On Plug Set (Red) will provide your Mustang GT with greater horsepower when compared to factory coils and will improve the performance of your engine. Additionally, the blaster coils, which are sold as a set of 8, improves your car's fuel economy.

      Precise Construction. The blaster coil kit is built using long lasting and durable plastic coils. The manufacturing provides precise values of 25,000 maximum voltage, 0.510 ohms in primary resistance and 5.7K ohms in secondary resistance, and 100 mA in current. The blaster coil kit comes in a red color.

      Installation Requires Expertise. The blaster coil requires some mechanical skill and expertise to be properly installed. The installation is mostly straightforward and it takes half an hour to complete.

      One-Year Limited Warranty. The blaster coil comes with a 1-year limited warranty. As such, the product is safe from structural and manufacturing defects for up to 1 year after the date of purchase. Be sure to check out the company website to learn more about warranty limitations.

      Application. The MSD Blaster Coil On Plug Set (Red) fits all 2011-2016 Ford Mustang GT models with no exceptions.

      Fitment:

      Details

      MSD 82488

      CA Residents: WARNING: Cancer and Reproductive Harm - www.P65Warnings.ca.gov

      Installation & What's in the Box

      Installation Info

      What's in the Box

      • (8) Coil Packs
      4.8

      Customer Reviews (77)

        Questions & Answers

        10 More Questions

        Will It Fit My Mustang

        • Boss 302 - 12, 13
        • GT - 11, 12, 13, 14, 15, 16

            Related Mustang Categories