Talk to a Mustang Sales Tech
1-877-887-1105
M-F 8:30A-11P, Sat-Sun 8:30A-9P
$20K Sweeps! 10 Chances to Win! Enter Daily >

RTR Grille with LED Accent Vent Lights (18-23 Mustang GT, EcoBoost)

Item 403287
Verify parts fit and get product recommendations.
Mustang Sales Techs: Connect Now M-F 8:30A-11P, Sat-Sun 8:30A-9P
$0.00
Our Price

$220.99 - $829.99

FREE Shipping Market Price $258.99 You Save 15% ($38.00) Up to 10% off for Military & First Responders! See Details

Will this fit your Vehicle?

Select a different vehicle Help?
Update or Change Vehicle
Ship to: Ashburn - 20149
Sorry, please enter a valid US or CA postal code
We're sorry, zip can't be updated at this time.
    Create a list
    Add to New List

    Saved - View your saved items

    We're sorry. We couldn't save this product at this time.

    or use

      Video Review & Installation

      Hey, guys, Adam here with americanmuscle.com. Today, we're taking a closer look at and installing the RTR Upper and Lower Grille Kit, available with the LED Vent lights, for the 2018 and newer GT and EcoBoost Mustangs. You should be taking a closer look at this kit for your own S550 if you really want to pick up that RTR super aggressive track-inspired styling for your front end. This is coming from Vaughn Gittin Jr. himself and the RTR team. We've seen this on the 2015 to 2017 models, and it has been redesigned to fit perfectly on the front end of that new 2018 look. It redesigns that upper and lower grille, and adds the LED accent lighting you see here. This is something that is super unique and hasn't really been done before in the category. We've seen it for the S550, but other than that, you've just seen it on the RTR Spec 1, 2, and 3 models that hit dealer lots in a limited production run.Now, if you're looking to pick up the combo kit here for the upper and lower grille and the light kit, it comes in right around about 750 bucks. Now, if you're looking for just the upper grille with a vent and accent lights, you can pick those up from 550 bucks. The lower grille by itself around $200, and then the accent vent lights by themselves around $300. It's something that I personally think would be my first mod if I was the owner of an S550. Now, if we take a closer look, you'll see some similarities between the factory grille and the new one, but quite frankly, a lot of differences that a lot of guys might argue should have come on the car from the factory line.Now, from the factory, we've seen in our past review last year of the 2018, we've seen that the factory grille is a nice gloss black material, but a lot of guys either love it or hate it. The gloss black upper grille from the factory didn't really match the lower grille and the chin splitter it comes with at least on the performance pack models. This particular grille from RTR has been completely redesigned. You see a new mesh center here that is made from an injection-molded TPO material, a real durable plastic. And it's got that matte black slightly textured finish matching the new RTR lower grille and a perfect match to the new chin spoiler we see on the 2018 GT here. These LED vent lights here, as you can see, are made perfectly to fit into the RTR upper grille. These will not work with the factory grille as you will need the specific cutout that this grille offers. These LED lights produce a super bright, pure white light that matches perfectly to the tri-bar lights or the finned lights in the headlights that are iconic to the S550 design. These are also made from an SMD technology for that super bright white light producing up to 100,000 hours of continuous use and consuming 1/10 of the power of a factory incandescent bulb. Super impressive numbers, so you can expect these to run the lifetime of your vehicle. The upper and lower grille are available together or separately. Personally, I'd just pick them up together. It's about 200 bucks for the kit here, super affordable, and they just blend together perfectly. Now, the lower grille really isn't too much of a redesign compared to factory, but it does get rid of those additional fins that you would've gotten on the side, and the grille mesh here in the middle matches perfectly to the upper grille. Together, they're a really nice package, and I think the matte black finish is a little bit better than the gloss black given that it didn't particularly match the lower chin splitter and grille.So, the last thing I want to talk about before we get into the installation here is air flow. This whole entire setup actually does improve the air flow to your engine bay. I know that sounds hard to believe, but since we are getting a redesigned upper grille and these LED lights here, there is a lot less blocking in the streamlining of the air flow. Behind the LED vent lights here, there's nothing actually blocking this. There's no mesh backing. There's no plastic backing. It's not a solid intersection. This is completely straight through to your engine bay. Now, air flow is going to streamline on the driver side here directly into your cold air intake airbox. That is a really good thing for power. And on the other side, it's going to streamline directly into your radiator for a better-cooled engine. Now, I'm not saying you should expect a 20 horsepower bump with the RTR upper and lower grille, but what you can expect is a better-cooled engine, which we all know can translate into a little bit of a power bump and acceleration bump. So, a better-cooled engine is a happier engine. And that's exactly what you get here with the RTR grille setup. Now, the installation for the RTR Upper Grille and the LED Vent Lights is going to get a soft two out of three wrenches on our difficulty meter. The installation itself isn't hard, but keep in mind, it does require you to remove your front bumper. So, you can expect about two hours from start to finish on the whole job.Tools used for this install were a drill, 7/32 drill bit, flat-head and Phillips head screwdrivers, 1/4-inch ratchet, 5.5-millimeter short socket, 7, 8, and 10-millimeter deep sockets, and an impact gun. All right. So, the first step of the installation here, grab your impact gun or your ratchet and a 7-millimeter socket. I'll recommend a deep socket because there are a couple of deep pockets here and you're going to remove seventeen 7-millimeter bolts or screws along with two pushpin clips or plastic rivets. Those are going to hold on the belly pan underneath our front end. So, we're going to start here under our front lip or front chin splitter, work our way around, and then we're gonna work our way to the back.All right. We've got four more of those 7-millimeter screws right in the middle here in these little indents. So, one, two, three, four straight across. We're gonna pop those out. All right. With those four out of the way, we have one and two plastic clips or pushpin rivets, and we also have a couple more of them in each of the wheel wells. So, we're going to grab our panel removal tool to pop these out. All right. Now, we have a couple of those plastic pushpin clips inside of the wheel well. We've got two right here and one more tucked in front of our tire. These are also holding up that belly pan. So, we're going to remove these three and then move on to the other side and do the same thing. For this last one in the wheel well, it is a little bit smaller. So, a flat-head screwdriver goes a long way in helping to get it out. You can pry them up from both sides.The next step here now that we have all of our bolts and screws removed from the belly pan is just pop it off our car. All right. The next step here, we're going to disconnect our accessory light now that our belly pan's out of the way and we can access it. So, you want to come up here and you're just going to pinch right where the wiring are coming out of, pinch the top, pull straight back. Repeat for the other side. The next step here is to work on the pushpins holding on this side of the wheel well. Now, there's one clip here and another one inside this little indent. Now, we're going to have to remove those two in order to fold back our wheel well liner. Now, it is also recommended that you could take the wheels off completely on the front end to make your life a little easier. I find that you can just turn them to the opposite direction and give yourself enough room. So, first things first, grab our panel removal tool, pry off those clips. This one might be a little difficult to see, but grab your panel tool, stick it in there as well. A flat-head screwdriver works just as well. The next step here is to peel back your wheel well liner and tuck it behind your tire if you still got your wheel on. If not, you can tuck it right behind your rotor. That'll give you access to the stud block with the two 10-millimeter nuts, holding your bumper to your fender. So, grab a deep socket, 10-millimeter, grab your ratchet, and take this nut off and one that's a little bit farther behind it. Repeat the same thing on the other side.The next step here is actually just remove that black stud block. So, we're just going to peel that back, and as you can see, it disconnects your bumper. Next step, you want to get your car on the ground here, pop open your hood, and we're going to remove our radiator shroud. Now, this is held on by eight more of these clips. So, grab that panel removal tool we've been using thus far, pop all eight of these out, all across the radiator shroud. Once those are out, we'll have access to some of the remaining bumper bolts. Now, we can get that shroud off.The next step here, since we're exposing the rest of our bumper bolts, there's a bunch going straight across the lip here. There's one on each corner that's a 5.5-millimeter bolt head. So, I'm going to grab my 5.5 socket, get that one off, and then I'm gonna work my way down to the rest of the 8-mil and then we'll finish off again with another 5.5. So, we're going to back this one out. Great. Now, we're going to swap that socket off to an 8-millimeter and remove the rest of these. And for this last one, we're going to pop the 8-millimeter off, put that 5.5-millimeter back on, and get this last one off. All right. It's about time that we actually remove our entire front bumper here. Now, it's a pretty easy process. You're just going to lift up on it and then outward toward the outside of the vehicle. Once it's off, you want to make sure you're setting it down on a safe place. You don't want to put it face down on the cement. Obviously, you want to protect your paint. So, first things first, let's lift it up and get it off the car.Now that we have our bumper off the car and on our table, we still have a couple of things we need to uninstall. First thing we're gonna uninstall on the back of our bumper here is this bumper support right in the middle of the upper and lower grilles. Grab a flat-head screwdriver and go right in here with these cover tabs. Those tabs are holding this bumper place in. You want to stick that in, rotate the flat-head, and pull as you're doing that simultaneously. That'll pop the tabs off. Some of them will be easier to get off than others. Some might fight you a little bit, so you'll have to use your flat-head, just like this one here. Go. Set this aside.Now, the next step here, we're gonna remove our upper and lower grille. We'll start with the bottom one because it's a little bit easier. We have a little bit more room to work with, and it's easier to show you guys how this is going to get done. Now, the directions do recommend using a pair of slip-joint pliers, as well as a large flat-head screwdriver. I actually found that it is doable by hand. If you need those tools, of course, you can use them, have them on deck just to give you a hand, make life a little easier. Because our car is red, our tabs are red. So, obviously, if you have a Lightning Blue Mustang, these tabs will be a different color. But for us, the Race Red Mustang has these Race Red tabs. You're going to push upward on the upper ones and pull back on the grille at the same time to disconnect. So, push up, pull back. Push up, pull back. You do that all the way around for all of them. And, of course, on the bottom, you'll be pushing down and pulling out. Once that's taken care of, you'll pop the lower grille out of place and do the same thing for the upper. So, doing the same thing here for the upper grille, gonna pry down on the bottom clips. It's also a good idea to have your hand on the outside of the grille pushing toward the inside here, helps you to dislodge the grille from the position.We're kicking the installation off with our lower grille. It's the easier of the two. There's no modifications we have to make. It just snaps right into place just like we removed our factory lower grille. Speaking of the factory lower grille, you can see the difference between the RTR versus the factory one. This is going to have a smaller honeycomb section. Doesn't have the fins on both sides, but otherwise, it shares the exact same shape and has a lot of similarities. Just looks a little bit more aggressive, a little bit more sleek. So, we're going to install this right into that factory location. It's got pretty much the exact same mounting points on the back of the grille here. So, we're going to slide that over our red mounting tabs on the back of our bumper.All right. So, now, we're starting on our upper grille for the RTR kit. There is a little bit of modification we have to make to adjust to get those lights to fit into the grille in those open slots you see cutout here. This is a really, really aggressive grille. It's one of those things that RTR design that everybody can recognize. You've seen them on the RTR Spec 3 that we talked about, and this is just a really badass grille. But we do have to do a little bit of drilling to get those lights into place. Not too big of a deal, but we're going to flip it around here. And as you can see, this is where those lights are going to sit into that upper grille. There's two indents on the top here and one underneath. We are going to have to take our drill and a 7/32 drill bit and drill holes right into that opening. Again, really not that hard to do. You just want to be careful not to drill straight through into the back here. So, just take it a little slow. Grab your drill bit and drill the hole. Just go pretty slow, it'll go straight through, and back it out. Simple as that. Now, we can do one for this one and one for the one underneath and then repeat on the other side of the grille.The next step here, we have our RTR LED lights on the table next to our grille. We have to assemble a couple of things on this. No more drilling, that's out of the way. Don't worry. So, we're going to be putting our little nut clips in place on the end of these lights. As you can see, it goes on just like this. You want to have the threading on the inside of this little tab here. You're going to do that for all three sections of the LED lights. Do the same thing on both lights. It is pretty simple. From here, we are ready to install it on the grille. Now, these are side-specific. So, you want to make sure you're putting them on the correct side and the clips are loose, so you might need to hold that really quick while you put it into the grille. So, you want to feed the lights through the back end, feed that wiring harness, and through that back. Pop on those clips if they're falling out, they can be a little pain in the butt. And once you have the wiring pushed through the back, you can snap them into place. All right. We'll do the same thing on the other side, and then we'll bolt them down.Now, we can bolt these down. We have Phillips head screws and small washers. Just pop the washer over that screw, grab your Phillips head screwdriver, put them through that hole that you drilled into the grille, and tighten them down into that push nut clip that you've put on to the LED lights. Repeat that three times for each of the lights. All right. Now, again, just repeat for the other side. With our LEDs in place, we got them bolted down. All we have to do now is take this little block here, this ballast, and what we're going to do is peel off the 3M tape backing and stick it into place so our wiring harness isn't all over the place. Gonna stick it right up here at the top on the backside of the grille. Put a little pressure on it, it'll dry up, and it'll have a really good bond. It's always a good idea to clean off that surface just a little bit just to make sure that 3M gets a really good, strong bond. Gonna flip the grille around here, do the same exact thing. We're going to peel off that 3M backing, pull it up top right in the middle.Now that this is all assembled, it looks really good, I can't wait to see what it looks like on the car. So, we're going to bring that factory bumper back up on the table, spin it around and install this onto the inside of that bumper. Once we have this installed, of course, the lighting harness will plug in once it's reinstalled into the vehicle but we also have to finish that off by putting in that bumper support bar that goes in between the upper and lower grille. I just want to point out before we go any further that if you're picking up the RTR upper grille with the LED lights or non-LED lights, without the lower grille, the process is exactly the same. Just leave that factory lower grille in place on your bumper. The same goes for the opposite. If you're picking up the RTR lower grille without the lights, and you're not messing with your factory upper grille, the process is the same. Just leave that factory one there and get to work on the lower one. Either way, you're taking out that bumper support bar between the two grilles, which we'll replace in just a little bit. So, for now, let's get that factory bumper back on the table.Reinstalling the upper grille from RTR is the same process as we took off the old one. It's got these snap clips right on the back here of this grille. So, you're going to line that up with the tabs on your bumper and snap them into place. Make sure everything is lined up all the way around. Start from left to right and snap them into place. It's a good idea to push from the front and the rear just to get them to get a really good bond and a really good snap in place.The last step here is just our bumper support bracket that goes in between the upper and lower grilles, and it snaps on the exact same way those just did. Once it's in place above the radiator, you're going to go into the wheel well here, make sure this lip is over the headlight, and snap it into place. Do that on both sides. All right. If you remember, we did a bunch of bolts up here at the top going straight across the top line of the bumper. The ones on each corner were 5.5-millimeter bolt heads. So, we got the 5.5 socket on our impact gun here. We're going to put that one on first. You don't want to overtighten these, just make sure you got them nice and snug, then we're going to swap it back over to our 8-millimeter socket, finish the rest, then we'll go back to the 5.5 for the other end. And before we go any further, it's a really good idea to plug your lights in, test them out, make sure they look good, make sure they work properly and everything's functioning as it should be. You'd hate to reassemble the entire front end on your 2018, just to find out that the lights didn't plug in correctly and you have to redo everything. So, we're going to take care of that now. So, what I'm going to do is put the car up in the air to easily show you guys where the plugs will go, where they're coming from, how that'll wire up. Now, for you guys working at home, maybe in the driveway, obviously, you might not have access to a lift. It's really simple to just go right into this gap here, right behind your intake filter on either side of your radiator for your headlights. On that side, right by the washer fluid reservoir, there's a pretty good gap, you can go straight down, unplug what you need to unplug, plug in what you need to for the lights, and keep it moving. But for us, I want to show you guys a really clean shot of where that's going to go. So, for that, we're going to put the car in the air.All right. So, now what we're going to do is we have our RTR harness here already, you know, untwisted from that wire twist. We've got it loose hanging down here. What you're going to do is reach your arm up and unplug your headlight bulb. This is the back harness for your factory headlights. The headlight harness is going to plug into your new RTR harness, and the other end of the RTR harness is now going to go into the back of your headlights. So, we're going to tuck to this all the way back up here. And with that plugged in, our driver side should work perfectly fine. This will plug right back in to the back of our fog light. All right. Now, we can repeat that for the other side.All right. So, we're testing our lights. We see that they work, they look really good, but we still have a couple of things left to finish up the installation. What we have to do now is bolt up the top radiator shroud and make sure everything's squared away under the hood. And then we can bolt up those stud blocks that we took out connecting the fender to the bumper itself in the wheel wells. We'll finish up with the belly pan. We got a couple of things to button up on the sides there. But for now, let's do radiator shroud, and then we'll move on to those stud blocks in the wheel wells.We're going to put on our radiator shroud. Of course, that just lays back down in place, and you'll line up the holes where your plastic rivets or pushpin clips will go. So, grab those. Gonna push that into place and push down the top plunger. Push it into place, plunger goes down. Super simple. We're going to do that across the entire shroud. All right, with that last plastic rivet in place for our radiator shroud, we're good under the hood. Next, what we're going to do is put the car back up in the air and we're going to get to work on those stud blocks that we took out connecting the bumper to the fender on each side. I want to point out here before we do that, you don't have to put your car up in the air. Because we have a lift here, we have access to one, it makes life a little easier for us. If you're using an hydraulic jack, that could also make life a little easier. Keep in mind, you are going to have to lift the car up just a little bit at least at some point to get your belly pan back in place. That's the last step in the entire process. For now, we're going to go into those wheel wells. We're going to put those stud blocks into place, tighten them down inside of the wheel well arches, and that'll connect to that bumper to the fender. So, let's get to it.All right. So, now that we have the car up in the air a little bit, we're rotating that wheel turning it toward the opposite side. So, we're on our driver side, we got the wheel face in the passenger. You can also just bend back the wheel well liner, if not completely remove it, whatever's easier for you. I have it bent back resting on the tire, it holds it in place there nicely. So, what we're going to do is we've got that stud block, staying in place there, we've got it through the holes and it's connecting that bumper to the fender. You want to make sure you're tightening that up against it as you're hand-tightening your 10-millimeter nuts on those studs. Tighten them all the way down by hand on both sides. Then grab your 10-millimeter deep socket with a ratchet and tighten it down. It is quite an awkward angle. So, if you need to remove the wheel well liner to make your life easier, you can do so. It would also be easy to take the wheels off, but again, it's not completely required. As you see, you just go inch by inch tightening them down, make sure they're nice and tight, and then repeat for the other side. Before we go over to the other side, though, what I want to do is bend back this wheel well liner, get it back into position, and we're going to take those plastic rivets or pushpin clips and secure them to the bumper. One of those rivets is going to go right here and the other one is gonna go in this indent. Do the same thing on the other side.All right. So, now, it's time to put our belly pan back in place. This is one of the last steps of the process. What you're going to do is slide it in right underneath the lip of your chin spoiler. Then on the opposite end, grab a couple of those pushpin or plastic rivets to hold it up so you don't have to hold all the weight. Once you have that on that side, we're going to do the same thing over here. You want to make sure each end of the belly pan is behind or on the inside of the wheel well liner. That way, everything lines up. So, we've got this there, holding itself in place, grab all the bolts from the front end, tighten those down. And then you're gonna repeat for the rest of the bolts at the back end. Grab your 7-millimeter factory screws and tighten down your belly pan. All right, now that we have all the screws in place, we have a couple of pushpin clips or those plastic rivets left for a couple of the wheel well liners here. We have each on the front end has a few that we need to put in, and then we can put the car on the ground and we're good to go. All right. Now, we can put those plastic rivets in place, the smaller one's going to go toward the outside of the car. Put that in place in the press down. All right. This is the last one. So, once you have this one in place on your wheel well, repeat this for the other side and you're good to go.Well, that's gonna wrap up my review and install of the RTR Grilles with the LED Vent Lights. Now, if you want to know a little bit more about RTR and you want to see an in-depth review of the RTR Spec 3 Mustang that we just gave away, my buddy, Justin, just did a full video on that, you can check that out on the AmericanMuscle channel. If you want to pick up the upper grille and lower grille combo kit or separately with the LED lights, you can do so for your own S550 right here at americanmuscle.com.

      Product Information

      Features, Description, Reviews, Q&A, Specs & Installation

      Features & Specs

      • RTR Aggressive Track Inspired Styling
      • LED Accent Vent Lighting
      • Increases Air Flow to Radiator
      • Durable Injection Molded TPO Material
      • OEM Fit and Finish
      • Straight Forward Installation - No Cutting Required
      • Accent Vent Lights is designed for RTR Upper Grille Only
      • Upper and Lower Grilles are Available Separately or as a Combo Kit
      • Compatible with Adaptive Cruise Control and Safe and Smart Packages
      • Fits 2018-2023 EcoBoost and GT Mustangs with Factory Front Fascia Installed

      Description

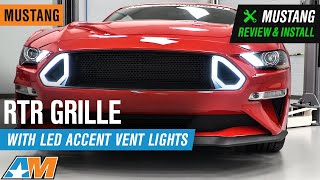
      Modern Aggressive RTR Styling. Let them see you coming by adding the same functional and aggressive styling of the 2018-2023 Mustang RTR to the front end of your 2018-2023 Mustang with a set of RTR Upper and Lower Replacement Grilles with LED Vent Lights. Designed and developed in conjunction with Vaughn Gittin Jr., these RTR Grilles are the same exact ones that are included as original equipment on the special edition 2018-2023 Mustang RTR.

      LED Accent Lighting. The RTR Upper Grille is available with the very popular integrated LED Accent Lighting around the vent openings for an impressive head turning appearance. The driver’s side vent also supplies fresh air to the factory air box. The LED Accent Lights simply plug directly into your Mustang's existing factory headlight harness with no cutting or splicing required. The LEDs are automatically activated in conjunction with your Day Time Running Lights, so they are always on when your Mustang is running. The LED Accent Lights are only compatible with the RTR Upper Grille, it is not designed to be used with factory or other aftermarket grilles.

      High Powered SMD Technology. The LED Vent Lights included with the RTR Upper Grille utilize SMD technology to produce a super bright white light while only consuming 1/10th of the power of standard incandescent bulbs. These LED accent lights are rated at 100,000 hours of continuous use.

      Improves Engine Cooling. These RTR Grilles not only add great aggressive styling to the front of your S550 Mustang, but they also increase air flow across the radiator when compared to the stock grilles. This additional air helps to improve engine cooling, which in turn increases performance.

      Increased Air flow to the Airbox. The driver’s side vent increases the amount of fresh air that reaches the factory Airbox location. More fresh cool air, more power!

      High Quality TPO Construction. RTR manufactures both their Upper and Lower Grilles from an injection molded thermal plastic olefin (TPO) material using the original OEM CAD data from Ford to ensure a perfect fit. TPO is an extremely strong material known for its light-weight, superior durability and impact resistance - making it perfect to withstand the hazards of daily driving.

      Simple Straight Forward Installation. Designed to be a direct fit replacement for the original factory grille, these RTR Grilles install reusing the stock hardware and mounting points. There is no cutting or modifications required for a clean straight forward installation. Please note that removal of the front fascia will be required for installation.

      Application. These RTR Grilles are designed to fit the 2018-2023 EcoBoost and GT Mustangs with the stock front fascia installed. The upper and lower Grilles are available separately or in a convenient combo kit (select from choices above).

      Application Note. Please note that both of these RTR Upper and Lower Grilles are 100% compatible with Ford's Safe and Smart Package, as well as Adaptive Cruise Control (ACC).

      RTR

      Fitment:

      Details

      RTR 403287-A

      403287-B

      403287-C

      403287-D

      CA Residents: WARNING: Cancer and Reproductive Harm - www.P65Warnings.ca.gov

      Installation & What's in the Box

      Installation Info

      What's in the Box

      Combo Kit Option:

      • (1) Replacement Upper Grille
      • (1) Replacement Lower Grille
      • (2) Accent Vent Lights
      • Mounting Hardware

      Upper Grille Option:

      • (1) Replacement Upper Grille
      • (2) Accent Vent Lights
      • Mounting Hardware

      Lower Grille Option:

      • (1) Replacement Lower Grille
      • Mounting Hardware

      Accent Vent Lighting Option:

      • (2) Accent Vent Lights
      • Mounting Hardware
      4.7

      Customer Reviews (451)

        Questions & Answers

        10 More Questions

        Will It Fit My Mustang

        • Bullitt - 19, 20
        • EcoBoost - 18, 19, 20, 21, 22, 23
        • GT - 18, 19, 20, 21, 22, 23

            Related Mustang Categories