 FREE 1 to 3-Day Delivery on Orders $149+ Details
How to Install an SLP Loudmouth Axle-Back Exhaust on your 2011-2012 Mustang GT or GT500

Shop Parts in this Guide
Installation
PACKING LIST
Before installation, use this checklist to make sure all necessary parts have been included.
| ITEM | QTY | PART NUMBER | DESCRIPTION |
|---|---|---|---|
| 1. | 1 Or 1 | 310034787 Or 310803787 | Muffler Assembly, DS, '11 Mustang Or Tail Pipe, Rear, DS, '11 Mustang |
| 2. | 1 Or 1 | 310034788 Or 310803788 | Muffler Assembly, PS, '11 Mustang Or Tail Pipe, Rear, PS, '11 Mustang |
| 3. | 1 Or - | 315012787 Or - | Muffler adapter pipe assy, DS, '11 Mustang Or N/A |
| 4. | 1 Or - | 315012788 Or - | Muffler adapter pipe assy, PS, '11 Mustang Or N/A |
| 5. | 2 | 310305787 | Tip, 4" OD, 3" Inlet, Polished, Slash Cut Dual Wall |
| 6. | 4 Or 2 | 308940020 Or 308940020 | Clamps, Torca, 3" Or Clamps, Torca, 3" |
| 7. | 2 | 308305001 | Clamp, Bell/Band, 3" |
| 8. | 1 | INSTR | Instructions |
WARNING: SLP Recommends allowing the vehicle to cool (not running) for five hours before beginning installation.
INSTALLATION INSTRUCTIONS – # M31022/M31023
1. Raise and fully support the vehicle (a vehicle lift is recommended). If you do not have access to a lift, you may raise the rear using a jack/jackstands or by using drive-up type ramps.
2. Loosen the 2 factory bell/band clamps near the rear axle and remove the factory exhaust system. You may remove the factory rubber isolators but will be reusing them. A few sprays of WD-40 on the isolators makes removal and installation easier.
3. Take a piece of wood about an inch thick and place it between the factory over-axle pipe and the upper panhard bar on each side to allow for adequate clearance when installing the axleback.
4. *If installing a powerflo system proceed with step 4a. If not, proceed to step 5.
5. place the Muffler Adapter Pipe with a 3” Torca Clamp onto into the muffler assembly. Snug the clamp but do not fully tighten. Repeat for other side.
6. Place the factory hangers back onto the axleback hangers. Repeat for other side.
7. Place a bell/band clamp over the ball flange on the system and raise into place. Insert the isolators onto the hangers on the vehicle. Repeat for other side. See figure 1.
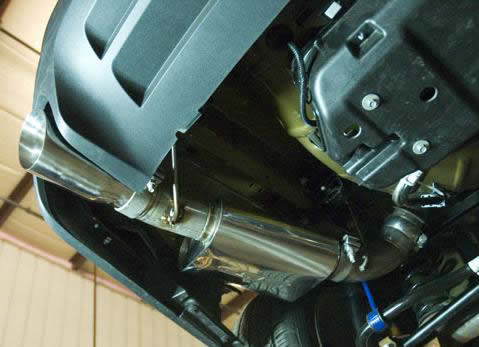
Figure 1: Installation of DS Muffler Assembly
8. Place a torca clamp onto the exhaust tip and slide onto muffler assembly/ rear tailpipe. Snug clamp but to not fully tighten. Repeat for other side.
9. Adjust system from front to back to allow for adequate clearance all around and tighten all clamps.
10. Test drive vehicle and inspect for any leaks.
11. The finished installation should look like Figure 2.
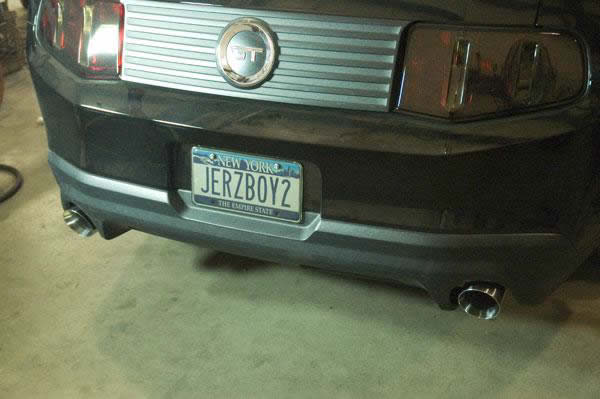
Figure 2: Finished Installation
12. The installation is now complete. Enjoy!
Related Guides
-
Installation
-
Installation
-
Installation
