FREE 1 to 3-Day Delivery on Orders $149+ Details
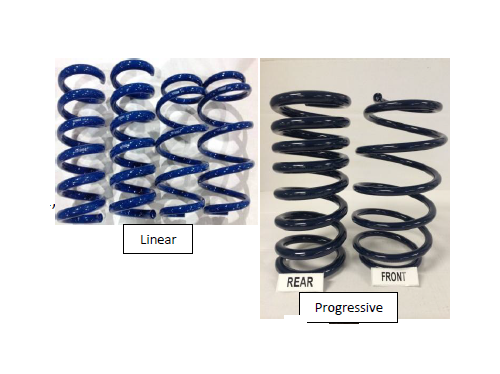
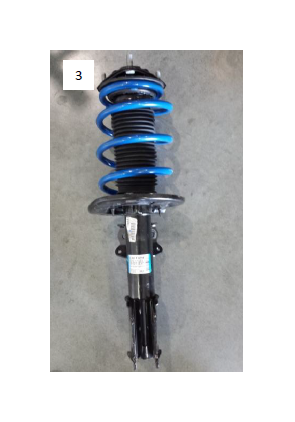
How to Install Steeda Sport Springs - Progressive on your Mustang
•A qualified technician should be used if you are not confident with removing and installing the vehicle’s front struts and springs.
•A suspension coil spring compressor must be used to allow for replacement of the mount and/or coil spring.
•Caution: Coil springs store a tremendous amount of energy. Failure to properly remove and install the springs can lead to severe injury.
•The vehicle will require an alignment following installation.
•Refer to a service manual for fastener torque specifications.
Front Spring Installation
1.Lift the car, by the chassis, on a vehicle lift or with a jack, and supported by jack stands, to work on the front suspension of the car.
2.Remove the front wheels.
3.Remove the ABS harness from the strut.
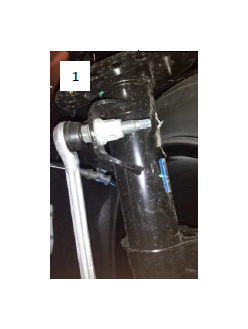
4.Disconnect the sway bar end link from the strut.
5.Remove the two bolts securing the brake caliper to the spindle.
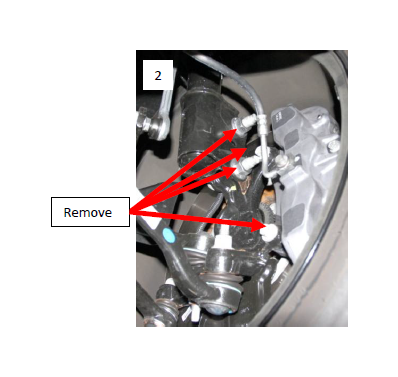
6.Remove the two nuts and bolts from securing the spindle to the strut.
7.From under the hood, remove the 3 nuts securing the strut to the strut tower. The strut can now be removed.
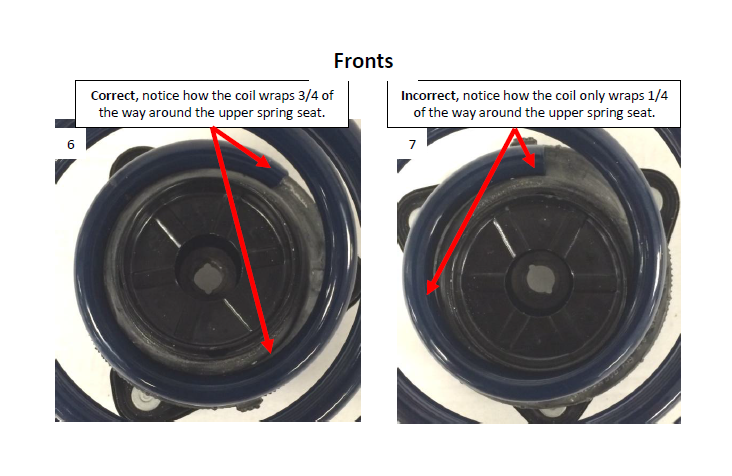
8.Using a coil spring compressor, compress the front spring until there is no tension on the upper strut mount. Once the spring is safely secured, remove the nut holding down the upper strut mount. Then, separate the strut from the spring and the upper strut mount. Carefully release the stock spring, and compress the new Steeda front spring. When putting the assembly back together, the larger diameter (ID/opening) of the spring should be upward and each pigtail should be against the spring stop. It doesn’t matter which way the logos are facing. See picture 6-7 for more information. Replace the strut nut, and repeat the process for the other front strut.
9.Reinstall in reverse order.
Rear Spring Installation
8.Lift the car buy the chassis, not the sub frame, and support with jack stands. The sub frame is going to need to be lowered, so the car needs to be supported by some other location.
9.Remove the rear wheels.
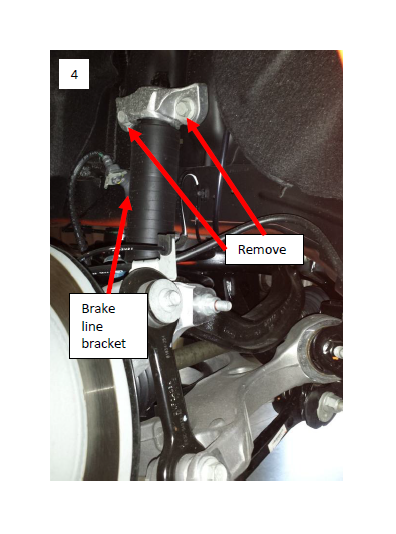
10.Disconnect the brake line bracket from the body.
11.Be sure the rear sub frame is supported by a jack, so that you can lower it independently of the car.
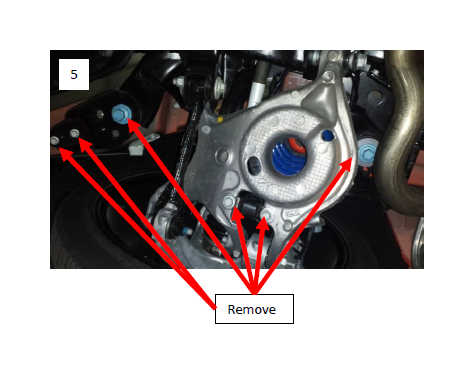
12.Remove the shock. There are two bolts securing it to the lower control arm, and two bolts securing it to the chassis on the top.
13.Work on one side of the car at a time. Remove the 2 main bolts securing the sub frame to the car. There is a bracket on the front of the sub frame, that has 2 more bolts that will also have to be removed.
14.Once the sub frame bolts , and the shock are removed, lower the sub frame until the spring is able to be removed. The sway bar end link may need to be disconnected to gain the necessary drop.
15.Remove the stock spring. Reusing the upper rubber spring seat, install the Steeda spring, making sure the pigtails of the spring are in the correct locations.
16.Raise the sub frame back up, and install and tighten the sub frame bolts.
17.Replace the shock.
18.Repeat the process on the other side.
19.Carefully test drive the vehicle in a controlled environment. Recheck all fasteners to be sure everything is secure. Be sure to have the car aligned following this procedure.