 FREE 1 to 3-Day Delivery on Orders $149+ Details
How to Install a Throttle Body Spacer for 2005-2010 Mustang GT

Shop Parts in this Guide
Installation
1. Remove air intake to gain access to throttle body.
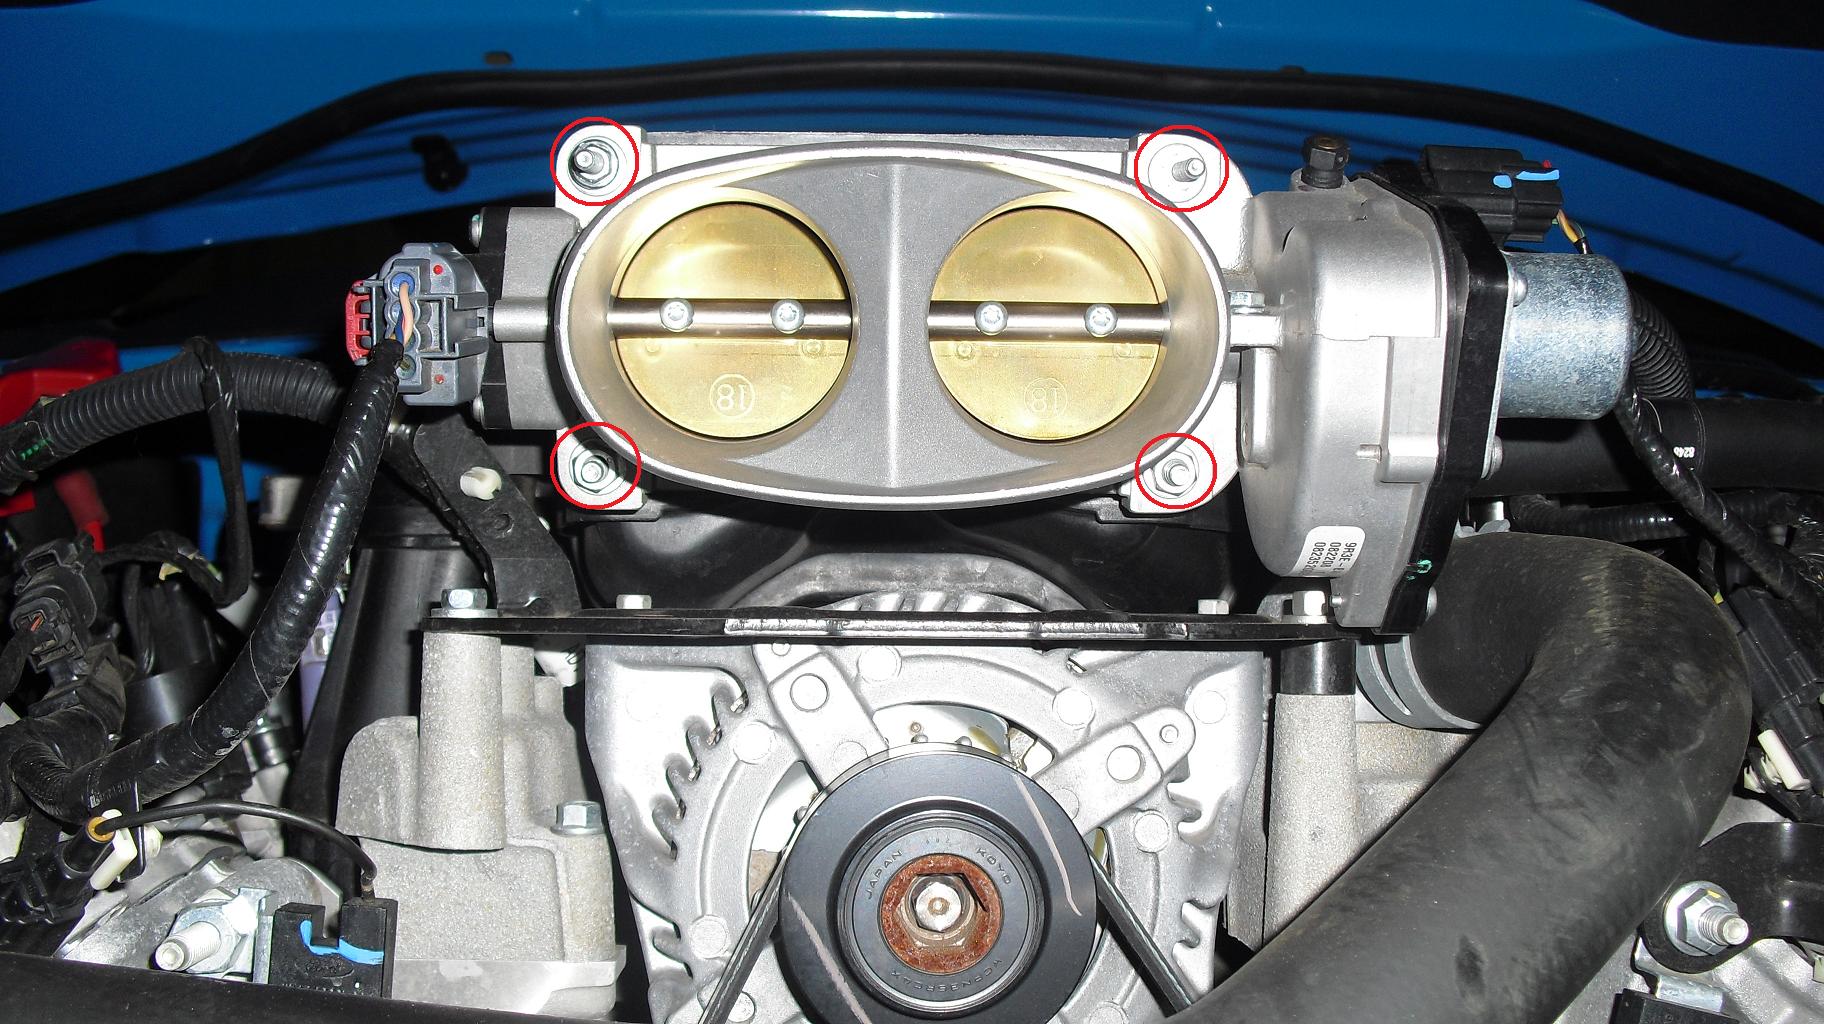
2. Once you have access to throttle body remove two 8mm bolts(top) and two 10mm bolts (bottom) securing throttle body to upper intake plenum.
3. Pull throttle body away from the plenum and slide in the spacer and supplied gasket. Make sure the gasket goes on the throttle body side as shown.

4. Re-install the throttle body to the plenum with the supplied bolts. Re-install you air intake to complete the installation.

