 FREE 1 to 3-Day Delivery on Orders $149+ Details
How to Install a Black Retro Mustang Billet Grille on Your 2005-2009 Mustang
Installation Time
30 minutes
Tools Required
- Flat‐head screw driver
- Phillips‐head screw driver
- 7mm wrench or socket (for optional Pony emblem)
- Phillips Head Screwdriver
- 5.5 mm Wrench or Socket
Step 1:
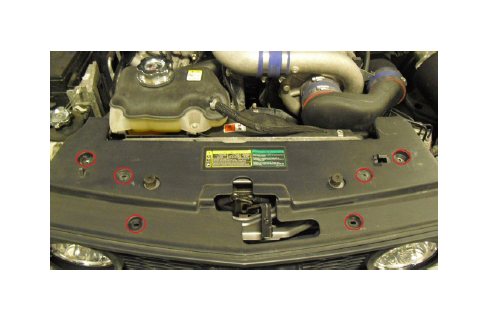
Remove the six push tabs holding on the plastic upper radiator cover and remove it from the vehicle.
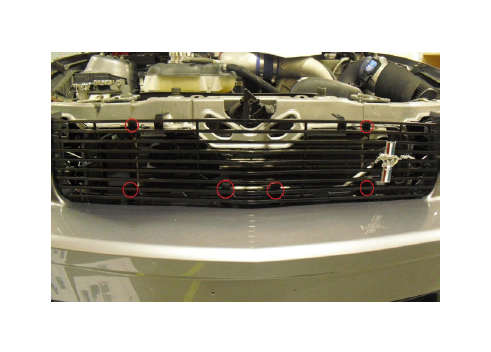
Step 2:
Remove the factory upper grille by pulling firmly and releasing it from the eight tabs that hold it to the front fascia. There are two on either side of the grille and four on the bottom lip.
Step 3:
Before the grille is completely removed from the vehicle, make sure to unplug the fog light harnesses and securely tie them to the radiator support so they do not make contact with the radiator itself.
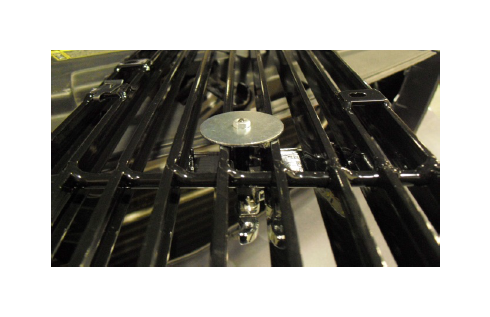
Step 4:
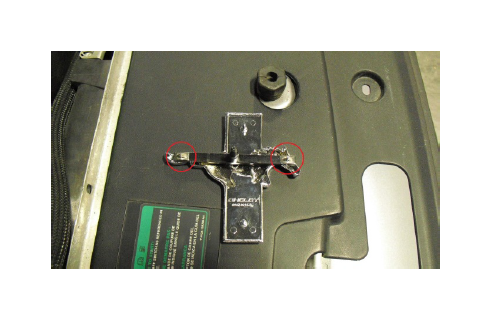
If you have chosen to install the optional Pony emblem assemble the bracket to the emblem using the two provided tabs as shown below. Once emblem is secure to the bracket, use the supplied 7mm nut to secure the emblem and bracket assembly to the grille as shown. If you have chosen not to install the Pony emblem, please skip to Step 5.
Step 5:
Place four of the supplied U nuts onto the 90 degree side of the four supplied U tabs and insert them into the tabs of the front fascia as shown. (Note: Narrow U tabs must be placed on the outside tabs)

Step 6:
Install a clamp tab onto each of the U tabs and secure to bumper with supplied screws as shown.

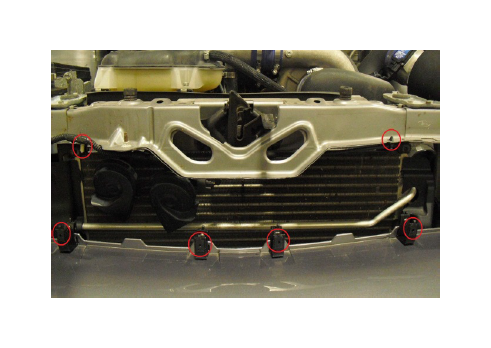
Step 7:
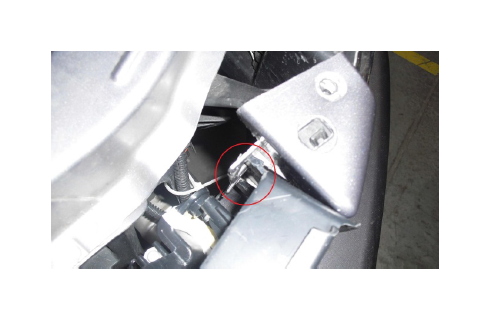
Place four U nuts onto outside of U tabs installed in Step 5. Remove two plastic fasteners from front radiator support, one holds a wiring harness and the other holds the hood release cable.
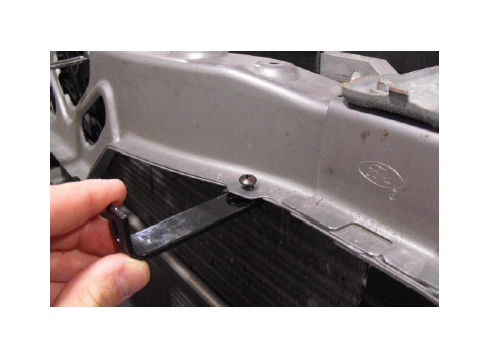
Step 8:
Place two U nuts onto the slotted portions of the long L tabs. Using the supplied screws, mount the long L tabs in the holes vacated by the fasteners you removed in Step 7. Do not fully tighten the screws as you may need to adjust them during final installation of the grille. Install the removed fasteners into the provided holes in the long L tabs.
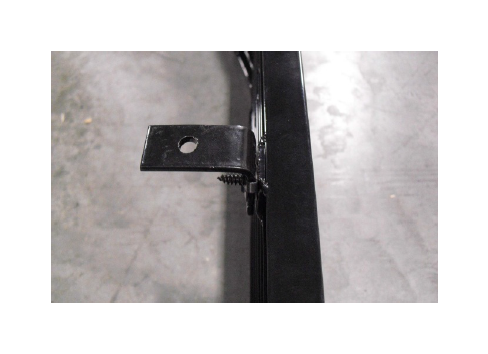
Step 9:
Place two U nuts onto the slotted portions of the short L tabs. Using supplied screws, mount the short L tabs to the inner holes of the grille as shown below. These will be used to reinstall your plastic factory radiator cover.
Step 10:
Complete installation of billet grille by using the final six supplied screws to secure it to the bracket you have installed in previous steps. When grille is properly aligned, fully tighten all screws on grille as well as the two screws holding the long L tabs to the upper radiator support. When grille is secure, reinstall the factory radiator cover using the six push tabs you removed in Step 1.
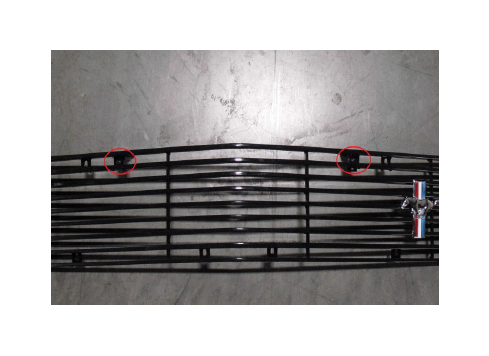
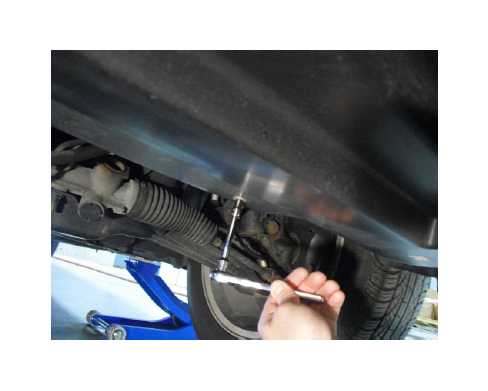
Step 1:
Safely raise the front end of the car to gain access to the plastic drip pan located behind the front bumper. Remove the seven 5.5 mm screws securing the pan and remove it from the vehicle.
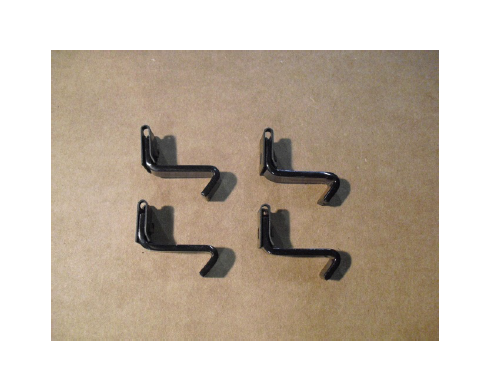
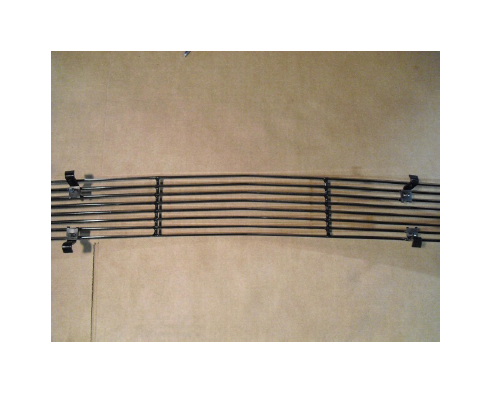
Step 2:
Place the four included U‐Clips over the four included J‐Hooks as shown.
Step 3:
Pre‐thread the hardware on the grille using the four U‐Clip / J‐Hook assemblies from Step 3 and the four included sheet metal screws. Do not fully tighten the screws, only thread them in 3‐4 turns.
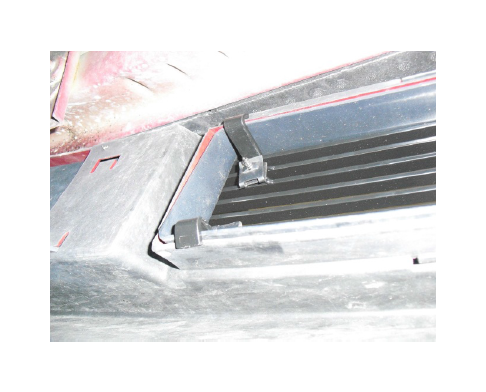
Step 4:
Place the billet grille over the factory grille. From underneath the car, adjust the J‐Hooks to wrap around the factory plastic grille as shown.
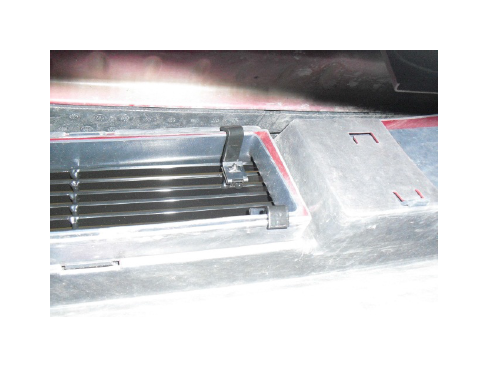
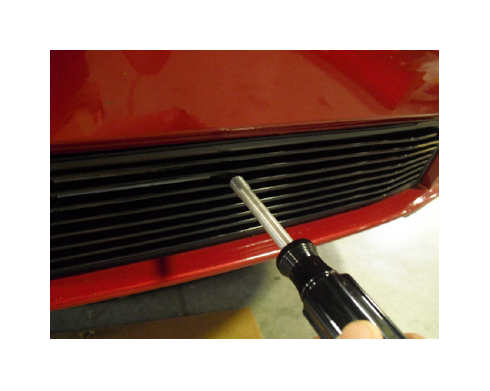
Step 5:
Once all of the hooks are secured around the factory bumper, use a Phillips head screwdriver to tighten the screws from the front of the vehicle.
Step 6:
After making sure grille is properly aligned and secured, re‐install the factory drip pan that was removed in Step1 to complete the installation.

