FREE 1 to 3-Day Delivery on Orders $149+ Details
How to install 3D Carbon Fender Vents on your 2005-2009 Mustang
Installation Time
4 hours
Tools Required
- Grease pencil
- Cut off saw, air saw or nibbler
- Measuring tape
- Zinc primer
- Phillips Head Screwdriver

Shop Parts in this Guide
Installation
NOTE: This 3dCarbon Fender Vent is designed for the 05-’09 Ford Mustang Only.
Installation requires cutting the fenders. A professional experienced installer is required. Ex: Installation by sunroof installation center If installation is attempted on another type of vehicle, check to ensure that the cut-out area is clear of any parts. 3dCarbon is not responsible for damage due to installation on any vehicle that this fender vent is not designed for. Please refer to www.3dcarbon.com for our full listing of products.
CAUTION!!!! IF A HEATED SPRAY BOOTH IS USED FOR BAKING THE PRIMER OR PAINT, DO NOT BAKE OR CURE GREATER THAN 120 F DEGREES FARENHEIT. THE PARTS CAN BE DISTORTED AND PERMANENTLY DAMAGED. PREPPING THE FENDER VENT PRIOR TO PAINT
The first step is to inspect the parts to make sure you have the correct parts. Refer to the part numbers on the back of the parts to confirm the Year – Make – Model. Parts that are prepped and painted cannot be returned or exchanged.
Using lacquer thinner and a clean cloth – clean the tape flange surface on the back of each part where the double sided tape will be applied. Using 1” masking tape, apply the tape 1/8” below the top edge of the part. This will protect the tape flange from getting contaminated during the prepping and painting process.
Refer to Prepping and Painting Instructions for “Step by Step” procedures.
APPLYING THE 3M TAPE TO THE FENDER VENT
After the fender vent has been prepped and painted, the double face tape should be applied to the parts. The tape is not pre-installed on parts prior to shipping because the tape can be contaminated during the sanding/ priming and painting process.
The first step is to clean the tape flange on the back of the parts where the tape will be applied. Make sure the complete tape flange is clean and free of all primer and paint. Using lacquer thinner on a clean rag, thoroughly clean the tape flanges on all parts of the kit.
Using the supplied 3M 94 Primer, apply it to the tape flanges – be careful not press too hard causing too much to be applied. The adhesion promoter will leave a thin clear polymer primer film that will increase the bonding strength of the double face tape.
The tape should be applied 1/8” down from the top edge of the part so that it cannot be seen after the kit is installed. The tape is to be applied from the wheel well to the center. Press the tape firmly to the surface to insure good adhesion. (See Image #1)
Repeat the cleaning and adhesion promoter steps on other fender vent.
INSTALLATION INSTRUCTIONS
STEP 1) Measure 7” from the corner of the fender to the body line of the fender. Using a grease pencil, make a mark to be used as a reference. (See Images #2-4)
STEP 2) Measure 21” down from the corner of the fender and make a mark with a grease pencil. (See Image #5)

STEP 3) Using the marks made in Steps 1 & 2, align the template along the edge of the fender. Tape the fender onto the car using masking tape. (See Images #6-8)
STEP 4) Using the template, trace the inside perimeter of the fender cutout area with a grease pencil. This will indicate the area which will be cut-out to allow for installation of the fender vent. (See Images#9-10)
STEP 5) Using an air saw with a metal cutting blade or nibbler, cut out the area outlined by the grease pencil. (See Image #11)
STEP 6) After the fender has been cut, use zinc primer to cover the edge where the metal has been exposed to protect the metal from corrosion.
STEP 7) Place the supplied powder-coated mesh over the fender vent and align with the pre-drilled holes. Screw the mesh onto the fender vent using the supplied (8) screws.
STEP 8) Pre-fit the fender vent by placing it in the hole in the fender. Using a grease pencil, draw a line along the top edge of the part for reference during final installation.
STEP 9) Remove the part from the car. Using lacquer thinner on a clean lint-free cloth, wipe the paint surface where the tape will attach. Be careful not to remove the grease pencil marks. Using the adhesion promoter supplied, apply the promoter to the paint surface where the tape will attach.
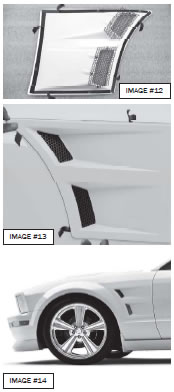
STEP 10) Peel back a small piece of the red plastic backing from the tape, making a tail that can be pulled when the fender vent is installed. (See Image #12)
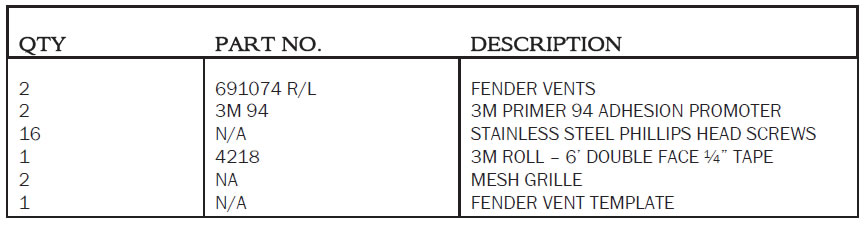
Place the fender vent on the car, positioning it using the grease pencil marks previously made as a reference. Starting with one corner, pull the red backing tail and press the fender vent to the paint surface to ensure good adhesion of the double face tape. (See Image #13)
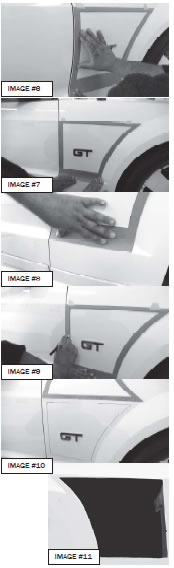
STEP 11) Correct installation will appear similar to image #14