 FREE 1 to 3-Day Delivery on Orders $149+ Details
How to Install Airaid PowerAid Throttle Body Spacer (94-98 V6) on your Ford Mustang
Installation Time
60 minutes
Tools Required
- 10mm Socket
- Ratchet and Extension
- 5mm Hex Key
- Plastic Chisel
- Flat Head Screwdriver

Shop Parts in this Guide
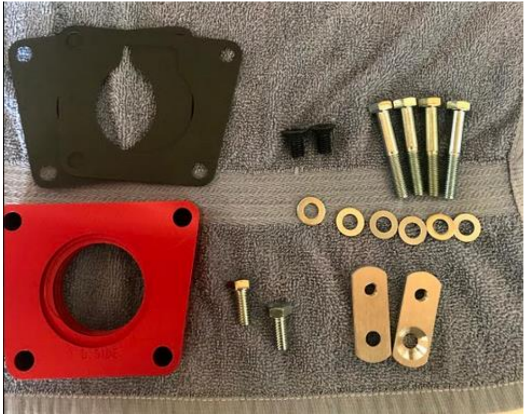
Before you start, ensure you have all the parts:
- Aluminum Spacer (1)
- Gaskets (2)
- 8mm x 50mm bolts (4)
- 8mm washers (4)
- 5/16-18 Linkage plates (2)
- 8mm x 16mm Flat head screws (2)
- 5/16-18 x 5⁄8 bolts (2)
- 5/16 Flat washers (2)
Installation:
1. Remove negative battery cable.
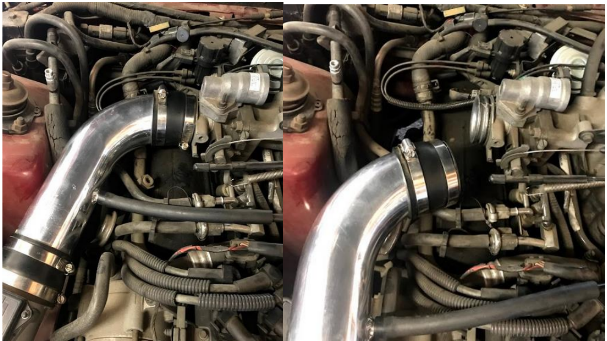
2. Using a flat head screwdriver, remove air cleaner housing from throttle body.
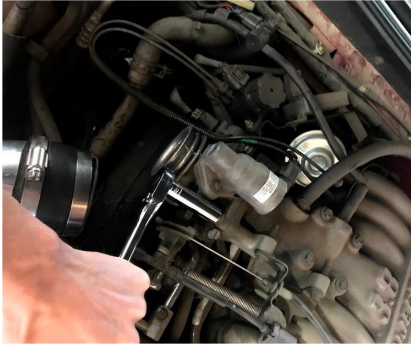
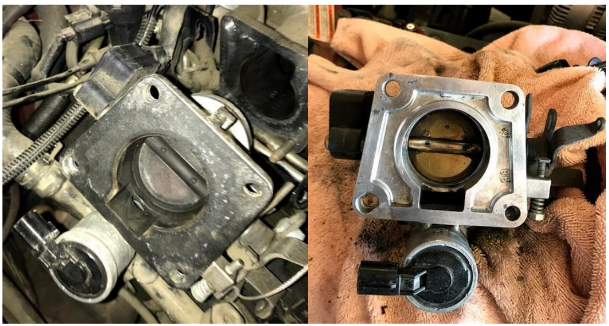
3. Using a 10mm socket and extension, remove the 3 nuts and 1 bolt (4 total) that hold the throttle body to the manifold.
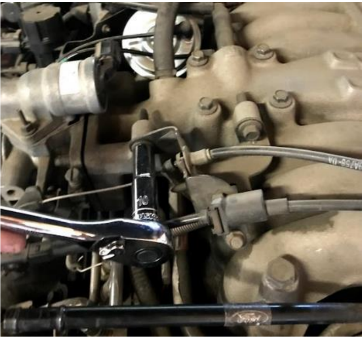
4. Using a 10mm socket, remove the 2 bolts from the throttle linkage bracket.
5. Some throttle bodies will be stuck, gently tap it with a rubber mallet to break the bond.
6. Remove the throttle body from the manifold and remove the gasket. NOTE: DO NOT USE A SCREWDRIVER TO REMOVE GASKET! YOU DO NOT WANT TO
GOUGE THE THE THROTTLE BODY OR MANIFOLD SURFACE! Take your time with this step and get the surface as clean as possible. Use carb cleaner and a plastic scraper to help remove the gasket. You want a good seal so there is no air leakage.
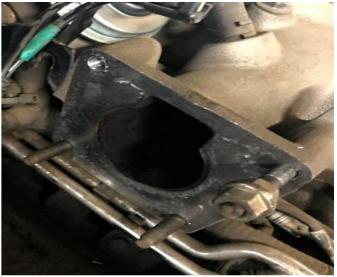
7. Remove the 3 studs from the manifold. To remove these, take 2 nuts that were removed from step 3 and put them on the same stud as shown below. Tighten the nuts against each other and then begin to remove the nut closest to the manifold. If this is done correctly, the stud will back out.
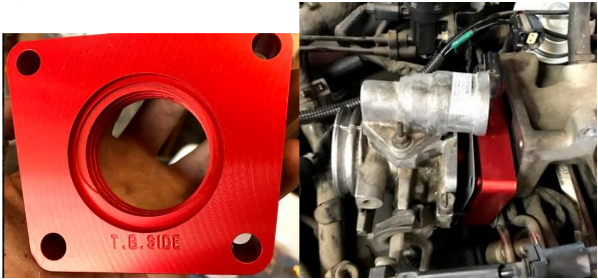
8. Now install the Aluminum spacer and the 2 gaskets. Make sure the side of the spacer that is stamped “T.B. SIDE” is facing the throttle body. (if you install this reversed the spacer will not operate correctly). Ensure there are gaskets on either side of the spacer and install the 4 8mm x 50mm bolts and the 8mm washers. Tighten the bolts down in a crisscross pattern to ensure the gasket is compressed evenly.
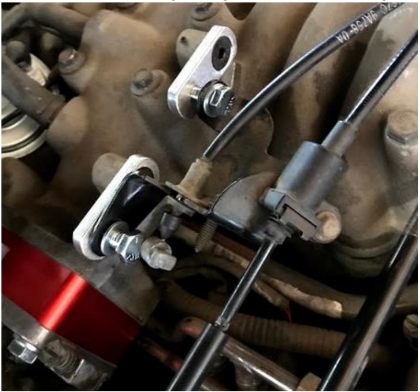
9. Using the 2 flat head screws and a 5mm hex key, install the 2 linkage plates.
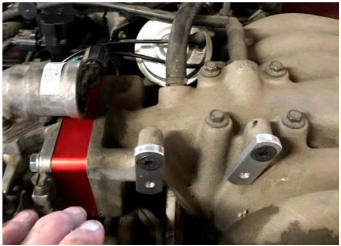
10. Tighten down the linkage plates so that they are horizontal and facing the throttle body. Now take the 2 5/16-18 bolts and washers and use them to install the throttle linkage bracket. NOTE: beware, when tightening the bracket, the linkages will want to rotate.
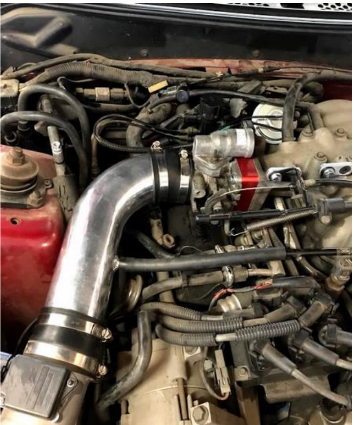
11. Inspect the throttle body area and ensure the all cables and springs are still connected to the correct areas.
12. Reinstall the air cleaning housing in the reverse steps you took in step 1.
If you live in California, this package comes with a CARB Approved sticker that is to be displayed somewhere in the engine bay that is noticeable. Pick a location, clean it off, and install the sticker.
13. Reconnect the battery and start the car.
14. Let the car warm up a little then rev to make sure that the throttle and gas pedal are reacting correctly.
15. Go for a ride and enjoy.
Installation Instructions Written by AmericanMuscle Customer on 5/7/18
