 FREE 1 to 3-Day Delivery on Orders $149+ Details
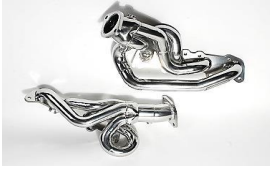
How to Install BBK Chrome Tuned Length Shorty Headers on your Mustang

Shop Parts in this Guide
STEP 1
Disconnect the negative battery terminal.
STEP 2
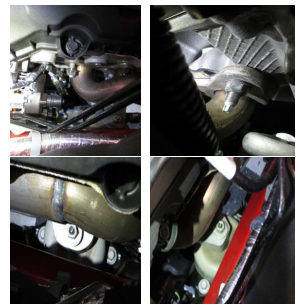
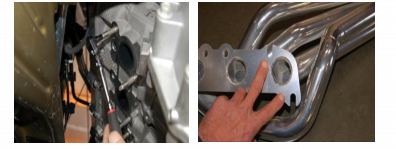
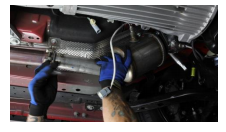
Remove the air filter box. Remove the first and second nuts on the top row of studs on the stock header of the driver side. On the passenger side, remove the first top nut that is behind the AC hose. Loosen the motor mount nut that faces up towards the header on each side, however do not remove completely at this time
STEP 3
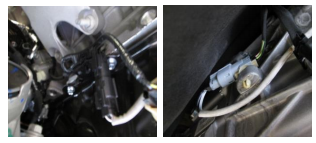
Lift the vehicle as high as possible utilizing approved jack stands or preferably a vehicle hoist. From underneath the vehicle unplug the four oxygen sensors from the wiring harness.
STEP 4
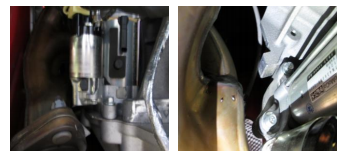
Remove the three 10mm bolts that hold the starter in place then remove the starter and hang it to the side.
STEP 5
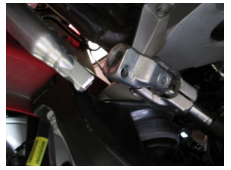
Remove the two bolts from the steering U-joint at the rack and pinion. Pull the coupler downwards toward the rack and pinion to separate the steering shaft from the coupler, allowing the steering shaft to hang out of the way to the side.
STEP 6
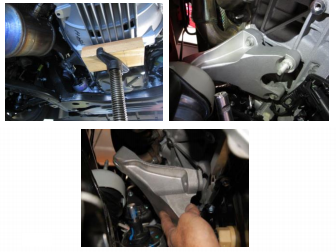
Utilizing a jacking device and a block of wood under the bell housing, remove the previously loosened nut on the driver side motor mount. Once removed, jack the engine upward enough to clear the motor mount stud. Remove the four bolts that secure the aluminum mount to the engine block and remove from the vehicle.
STEP 7
Loosen the ball flare clamp on the driver side pipe near the transmission cross member, then loosen the exhaust coupler at the resonator and remove the driver side pipe from the vehicle.
STEP 8
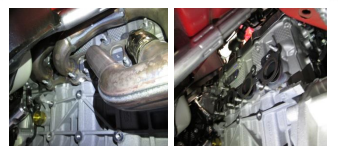
Remove the remaining exhaust manifold nuts, then remove the exhaust manifold along with the gasket from the vehicle.
STEP 9
Using an 8mm Torx Bit socket remove all the exhaust manifold studs from the engine block, except for the ones that correspond to the two notches in the BBK header flange that are closest to the firewall.
STEP 10
Remove the front oxygen sensor on the stock exhaust manifold and install it into the BBK tuned length header. Follow this same step for the passenger side exhaust manifold.
NOTE!!! Be sure to add a small amount of anti-seize to the top thread of each oxygen sensor using the supplied anti-seize packet. As you thread the oxygen sensor back into the part the anti-seize will spread evenly throughout the threads.
STEP 11
Install the supplied gasket and the BBK Header on the remaining studs and install the nuts and bolts. You may have to raise or lower the motor a bit to get the BBK header in place tighten all the nuts and bolts that you can reach from underneath the vehicle.
STEP 12
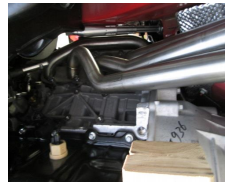
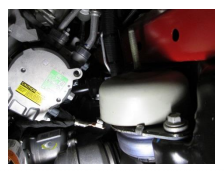
Re-install the motor mount and lower the engine back down onto the chassis mount. Re-install the nut onto the motor mount stud just get it started a couple of threads to allow movement for when you move onto the passenger side removal and installation. Pictured in step 2.
STEP 13
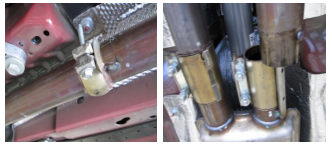
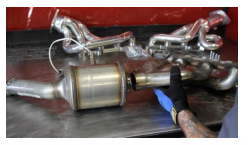
Using a Saws All or band saw cut on the weld that joins the stock exhaust manifold to the catted down pipe as shown in the pictures below.
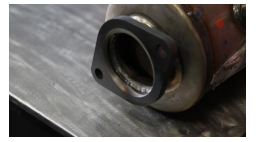
STEP 14
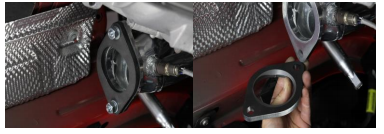
Using the supplied hardware install the supplied gasket and flange onto the BBK Tune length header . NOTE!!! Be sure to face the flange in the correct direction as pictured below.
STEP 15
Install the stock catted down pipe back onto the exhaust line up the catted down pipe to the new flange, and snug down the coupler that connects the mid pipe to the resonator. Then just snug down the ball flare clamp enough so that you can still rotate the catted down pipe and align it with the hole in the flange.
STEP 16
Using a welder or local muffler shop
While holding the catted down pipe in place against the flange tack, weld the catted down pipe to the flange with 3 good tacks to ensure it does not move during removal.
STEP 17
Remove the catted down pipe from the vehicle and fully weld the inside of the flange to the inside of the catted down pipe .
Reinstall the catted down pipe onto the vehicle be sure to tighten all clamps and bolts.
STEP 18
Repeat steps 8-12 for the passenger side installation.
NOTE!!! Remove the 2 bolts that hold the actual motor mount isolator to the chassis as the entire motor mount assembly needs to be removed on the passenger side to allow room to install the BBK Header.
NOTE!!! On the passenger side you do not need to separate the catted down pipe from the exhaust manifold as it will come out of the vehicle in one piece.
STEP 19
Re-install the starter, steering U-joint and shaft. Install the supplied bolts into the collector flanges .NOTE!!! When installing the steering u-joint make sure the joint is engaged the correct amount onto the rack and pinion and steering shaft allowing proper engagement for the bolts to go thru the corresponding slots in the shafts.
NOTE!!! Failure to install the steering shaft properly can result in complete steering failure.
STEP 20
From the top side of the vehicle in the engine compartment tighten the motor mount and header nuts that you couldn’t reach from underneath the vehicle. These nuts and bolts are easier to get to from the engine compartment looking down on them.
STEP 21
Re-install the air box. Reconnect the negative battery terminal. Start the engine and check for any exhaust leaks. NOTE!!! Header bolts and nuts should be rechecked and re-torqued after 500 miles of driving.
