 FREE 1 to 3-Day Delivery on Orders $149+ Details
How to Install BMR Subframe Connectors - Hammertone on your Mustang

Shop Parts in this Guide
NOTE: Although this installation can be performed with a hydraulic jack and stands, a 4-post service lift is recommended.
1. Lift vehicle and support with the suspension loaded.
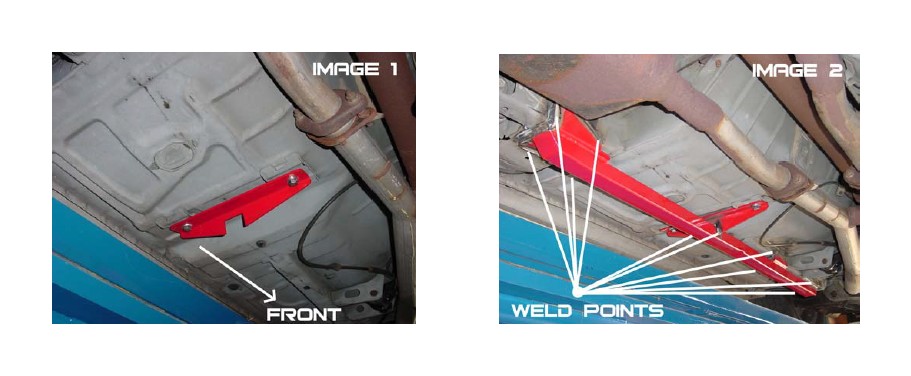
2. Locate the seatbelt bolts protruding through the floor pan. Install the supplied BMR seatbelt brackets as in Image 1 using the supplied nuts and washers. Leave nuts loose to allow the bracket to slide side to side for subframe connector alignment. There is a left and right bracket; the driver’s side has the square notch off-centered.
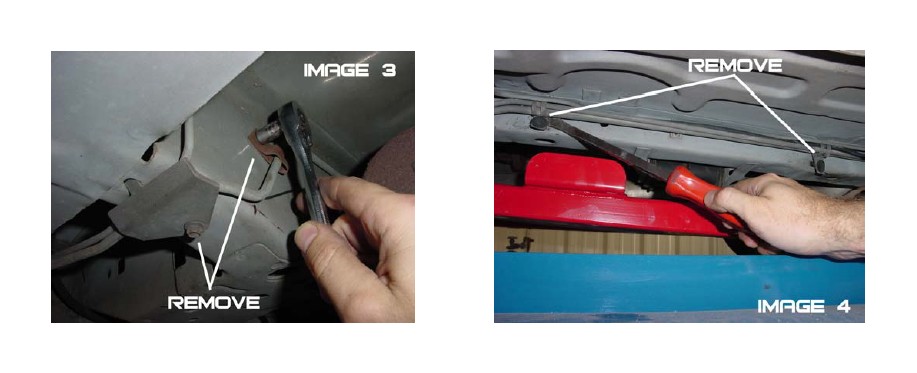
3. Start with the driver’s side connector. Lift subframe connector into place and support with stands. Using a permanent marker, trace all weld points onto the frame. Positioning and weld points can be seen in Image 2 below. Remove subframe connector.
4. Using a sander, prep all the welding areas on both the frame and subframe connector. It is important to remove all powder coat, paint, and undercoating to allow a spatter-free, strong weld.
5. Reposition the subframe connector into place and weld all weld points.
6. Repeat step 3 for the passenger side.
7. Using a 8mm socket, remove the two rear brake line tabs shown in Image 3 below. Using a pry bar or screwdriver, remove the two fuel line tabs shown in Image 4 below. Bend both sets of lines far enough away from weld areas to prevent damage. Wrap with a damp rag if necessary.
8. Repeat steps 4 and 5 for the passenger side.
9. Once both sides have been welded, wire wheel all the weld areas and then paint with a rust preventative paint. Reinstall the rear brake line tabs. Reinstall only the front fuel line tab; the other tab cannot be reinstalled. Tighten the seat belt bolts.
10. Lower vehicle.
