FREE 1 to 3-Day Delivery on Orders $149+ Details
How to Install a BOSS 302 Front Chin Splitter Kit on your 2014 GT, V6 and Boss 302

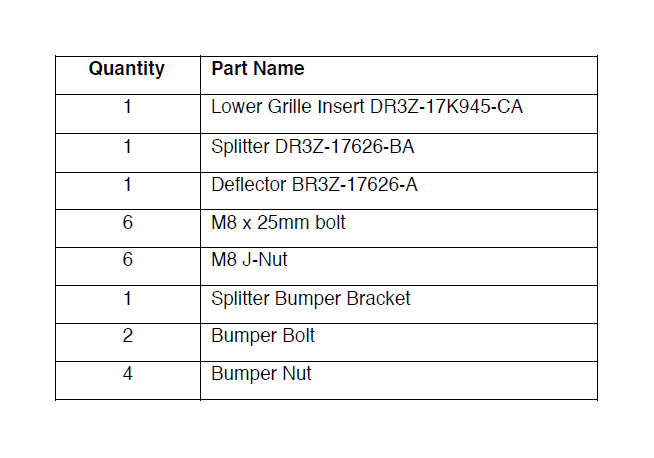
Shop Parts in this Guide
INSTALLATION INSTRUCTIONS:
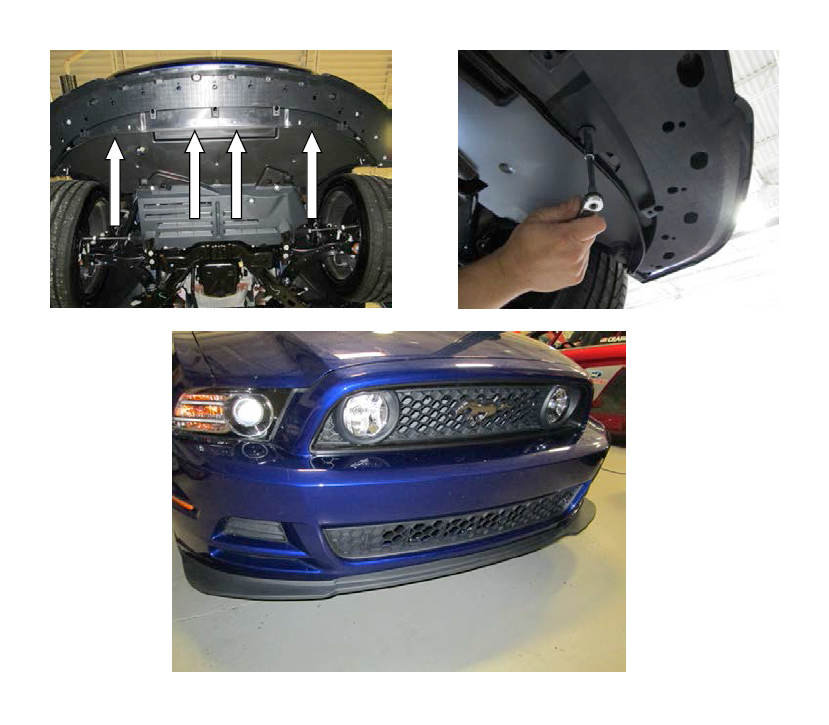
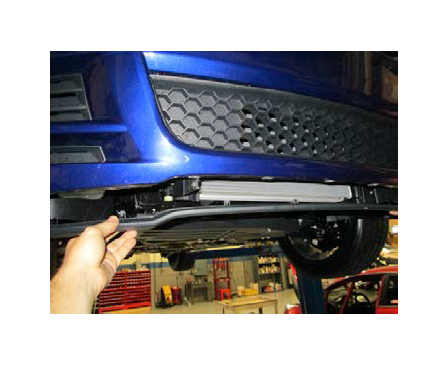
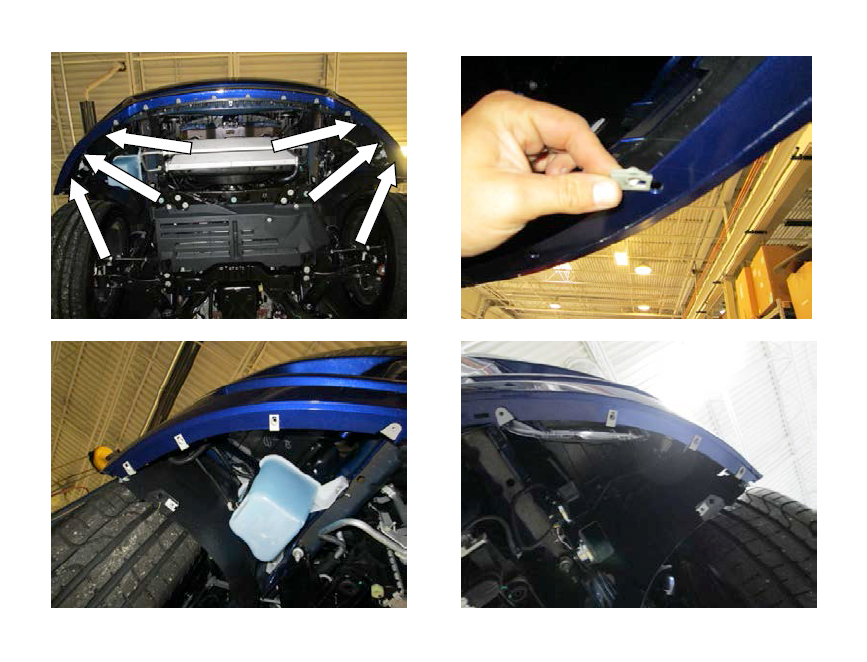
STEP 1: Support the vehicle to gain access to the undercarriage.
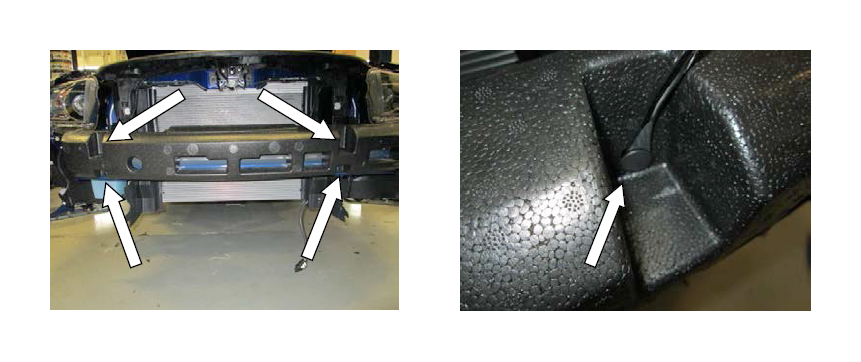
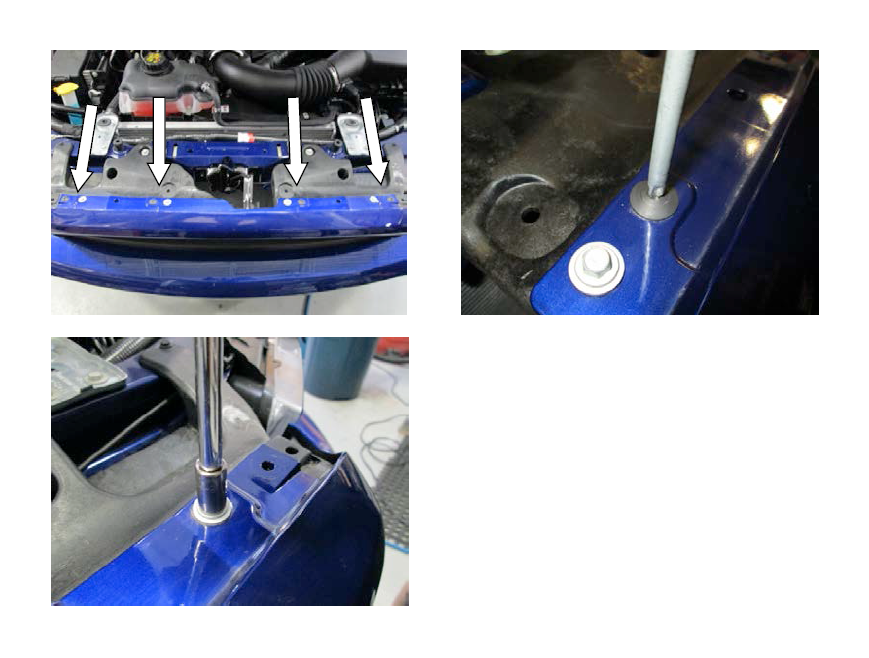
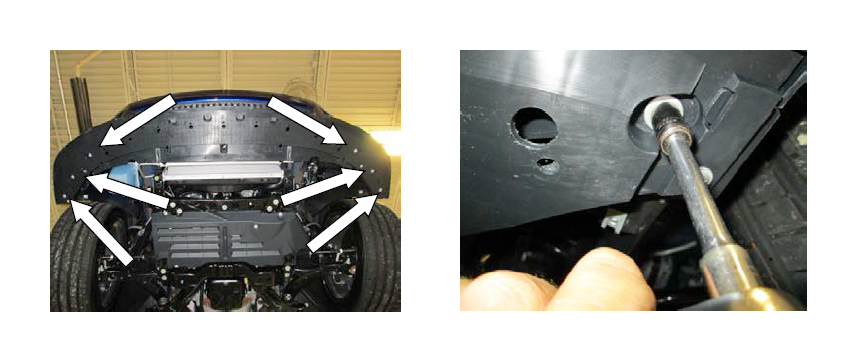
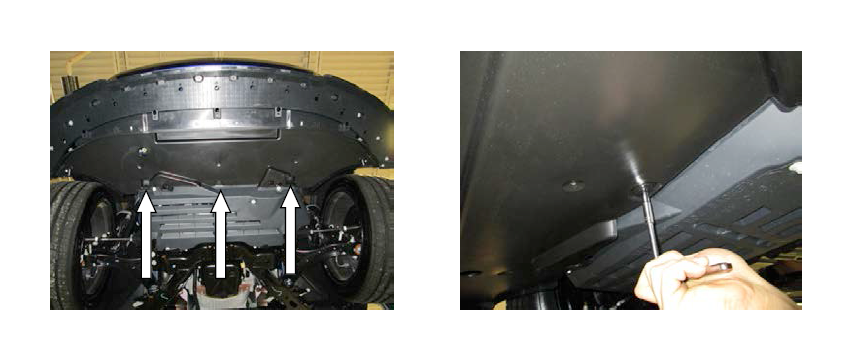
STEP 2: Remove the (2) outer and (3) center bolts holding the belly pan to the fascia.
STEP 3: Remove the (12) bolts holding the front edge of belly pan to the fascia.
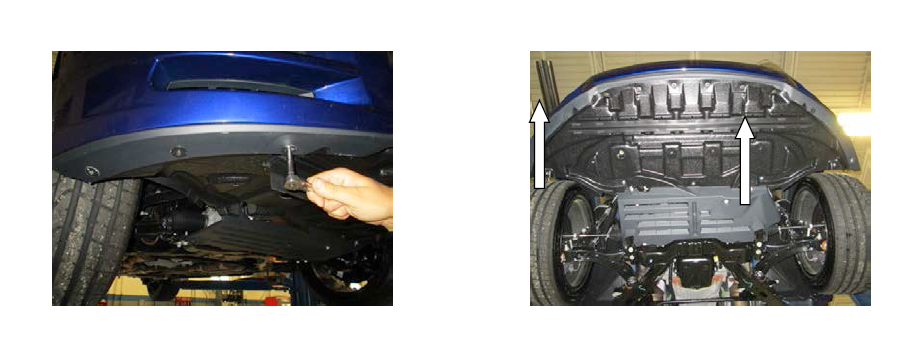
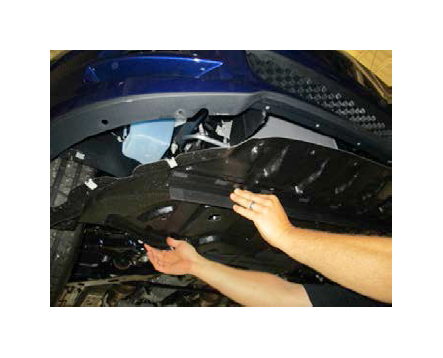
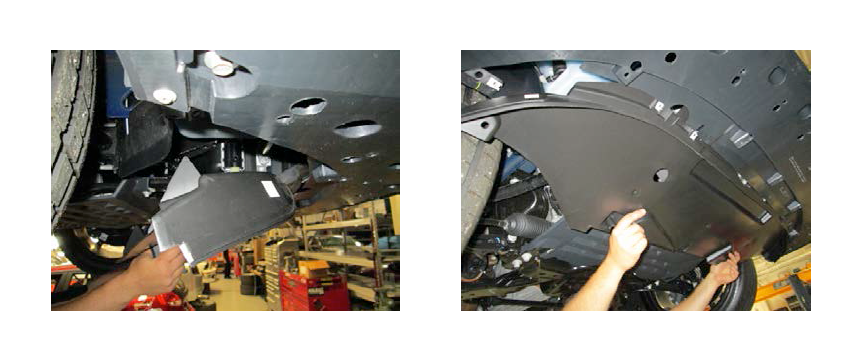
STEP 4: Remove the belly pan from the vehicle.
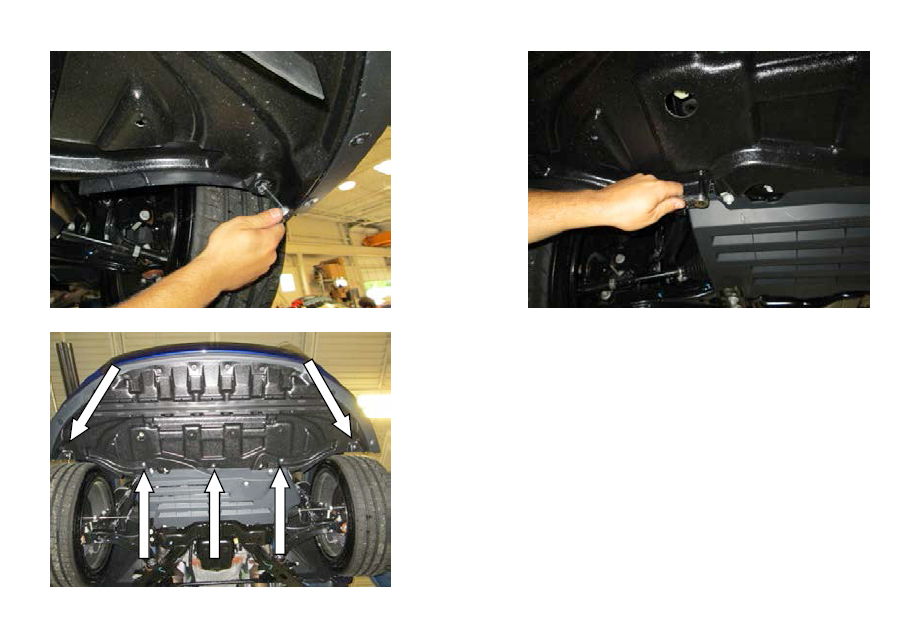
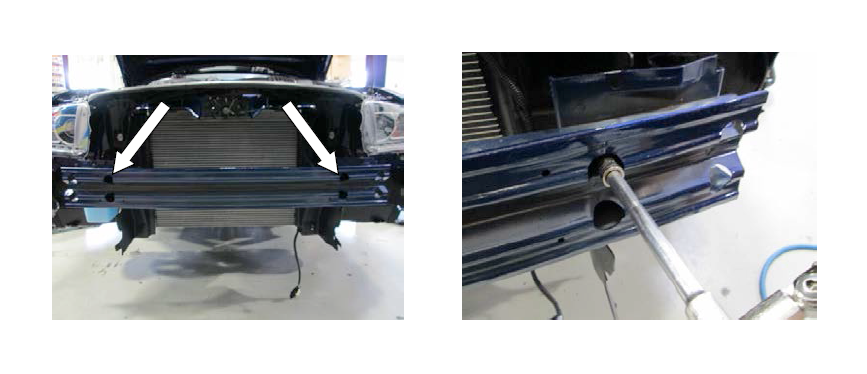
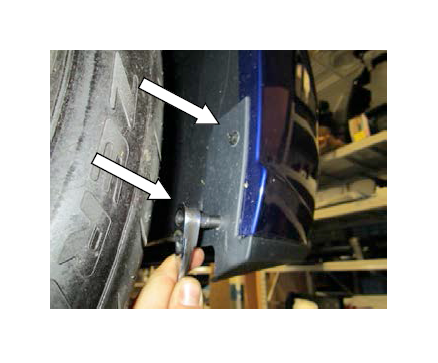
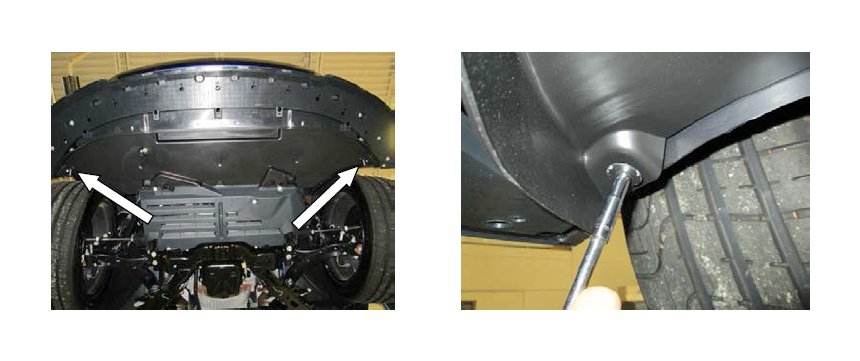
STEP 5: Remove the (2) bolts holding the production chin to the fascia.
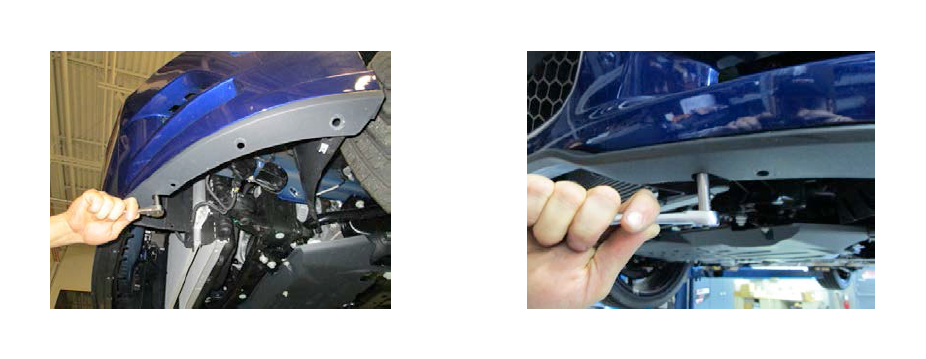
STEP 6: Remove the (4) bolts, (2) per side holding the production chin to the fascia outer edges.

STEP 7: From the backside of the fascia, remove the (6) push pins that retain the chin to fascia.
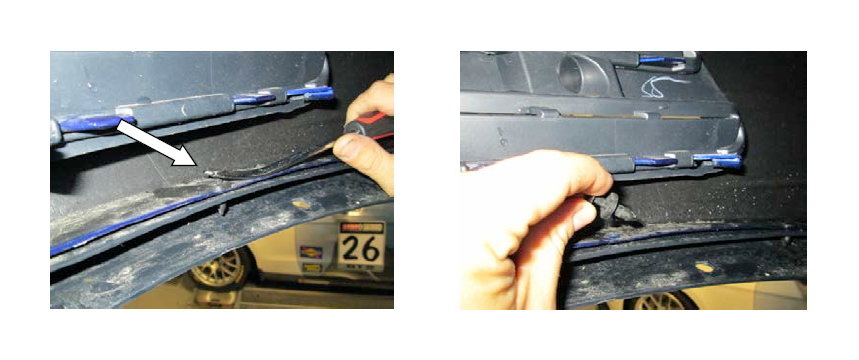
STEP 8: From the backside of the fascia, gently unclip the chin from the fascia by squeezing the tabs.
(6) locations.
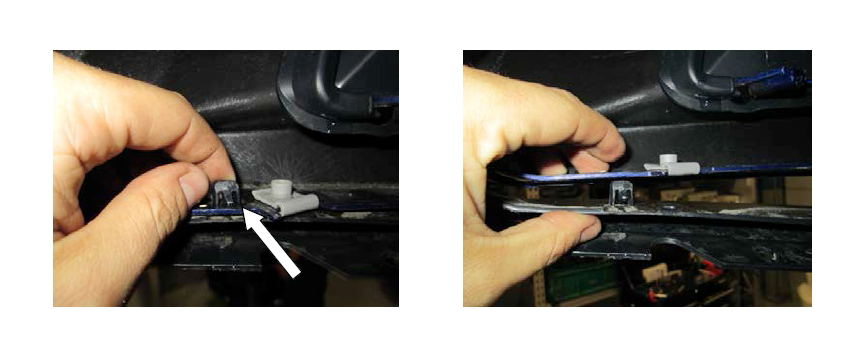
STEP 9: Remove the chin from vehicle.
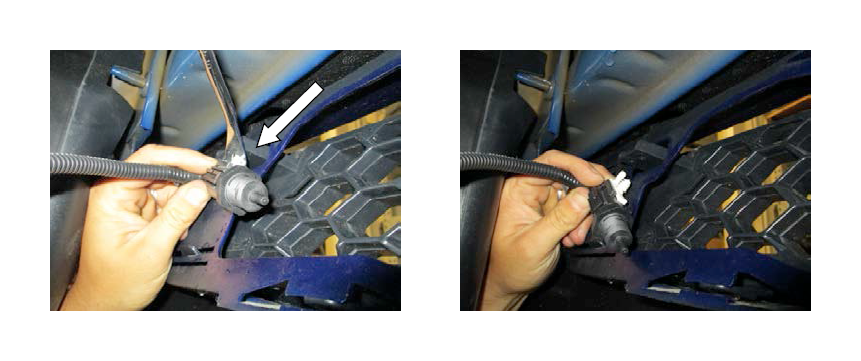
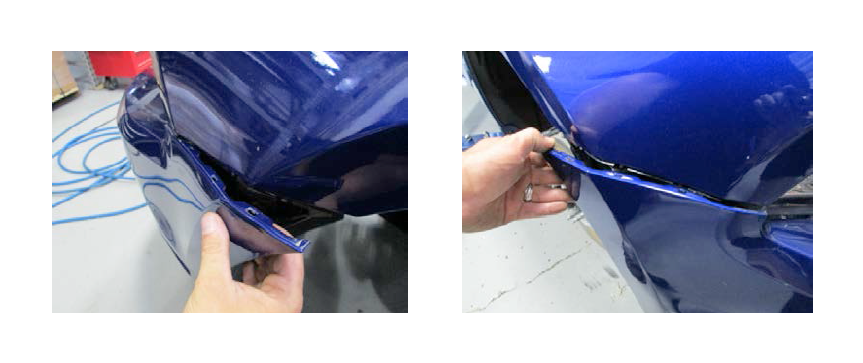
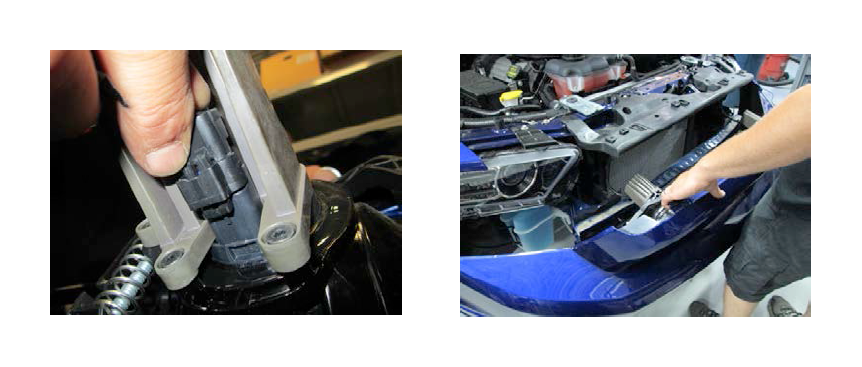
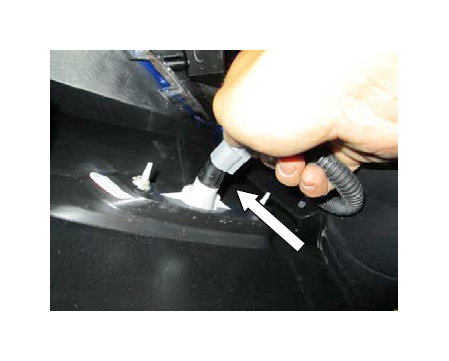
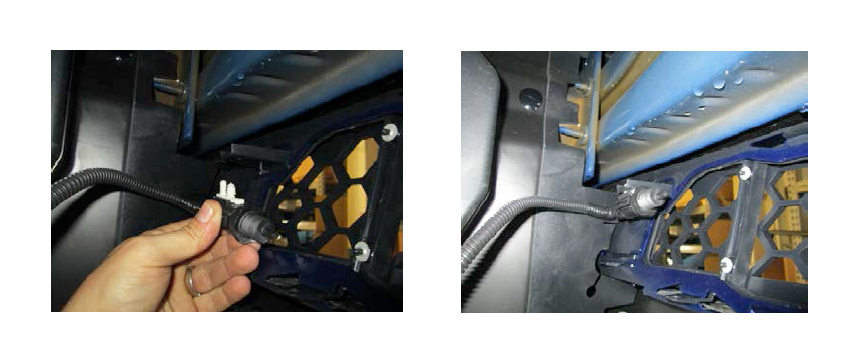
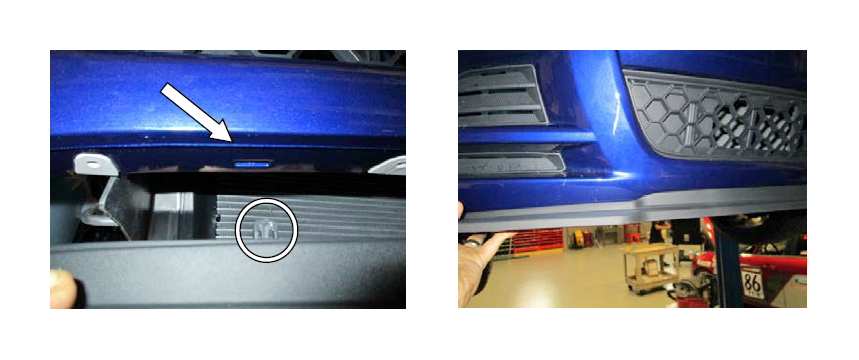
STEP 10: From the backside of the fascia, gently unclip the temperature sensor from the lower grille.
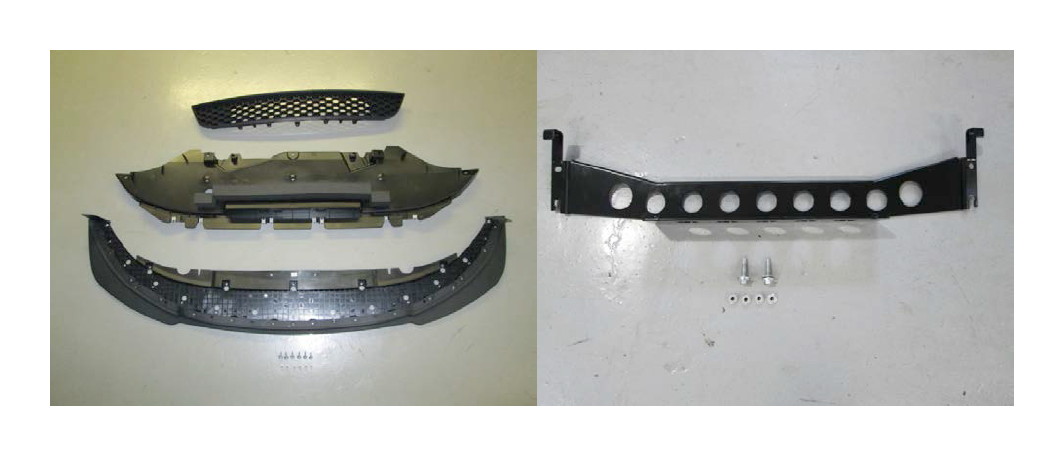
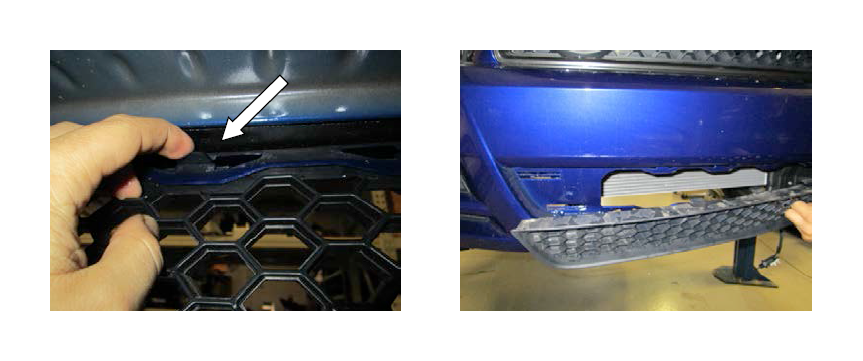
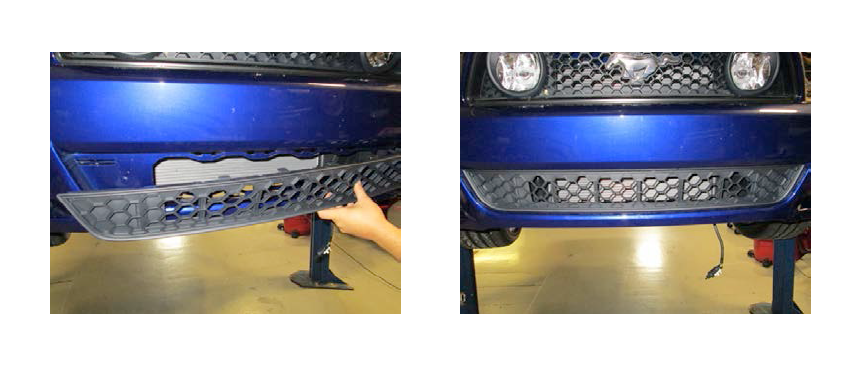
STEP 11: From the backside of the fascia, gently unclip the lower grille retaining clips from the fascia (12) locations. Remove the lower grille from the vehicle.
Skip steps 12 through 31 if you are not installing the M-16601-MBA Laguna Seca splitter
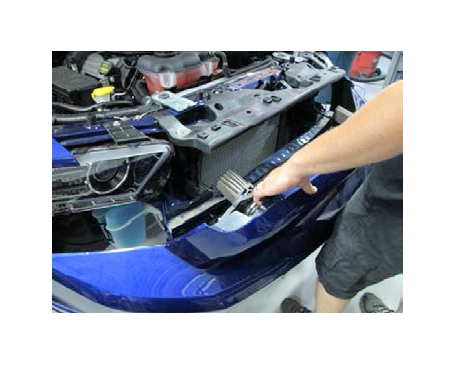
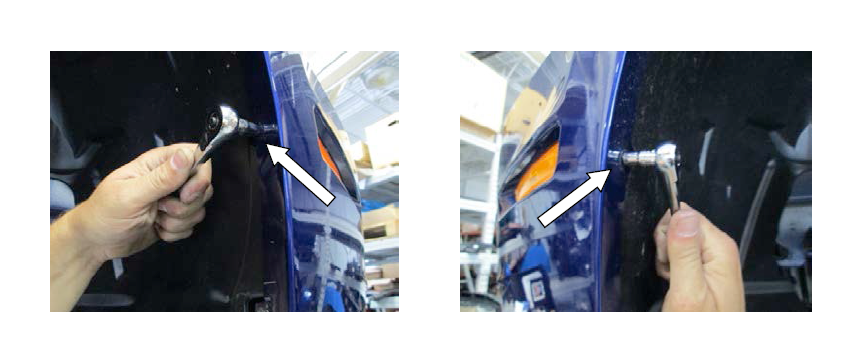
STEP 12: Remove the (2) bolts, (1) per side, retaining the inner fender liner to the front fascia cover.
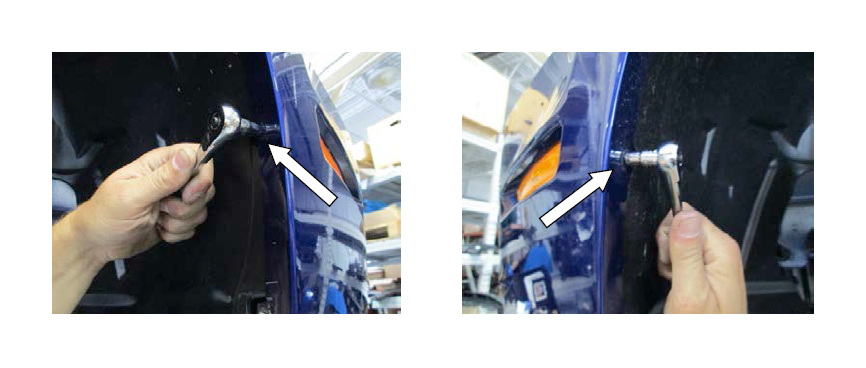
STEP 13: From the backside of the front fascia, unclip the (2) side marker lights.

STEP 14: Remove the (8) push pins retaining the upper radiator close off shroud.
STEP 14: Remove the (8) push pins retaining the upper radiator close off shroud.
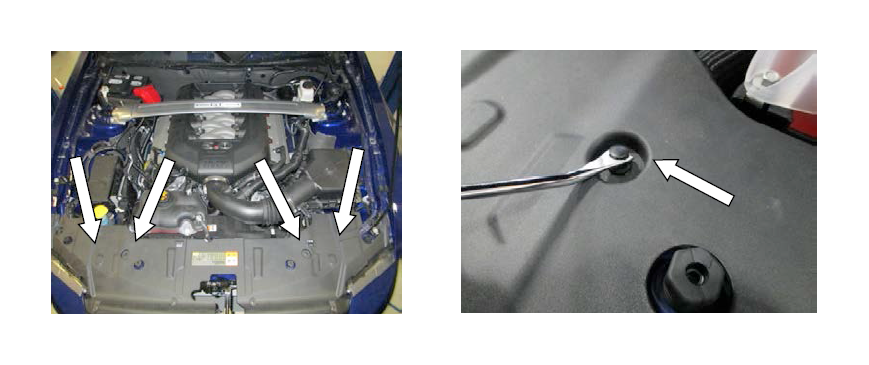
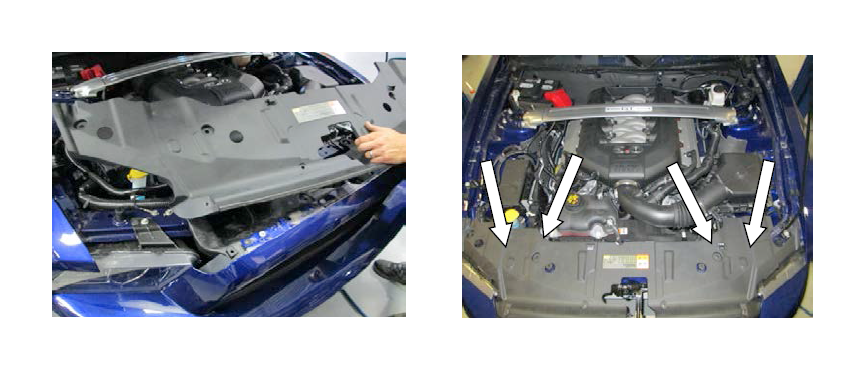
STEP 15: Remove the upper radiator close off shroud.
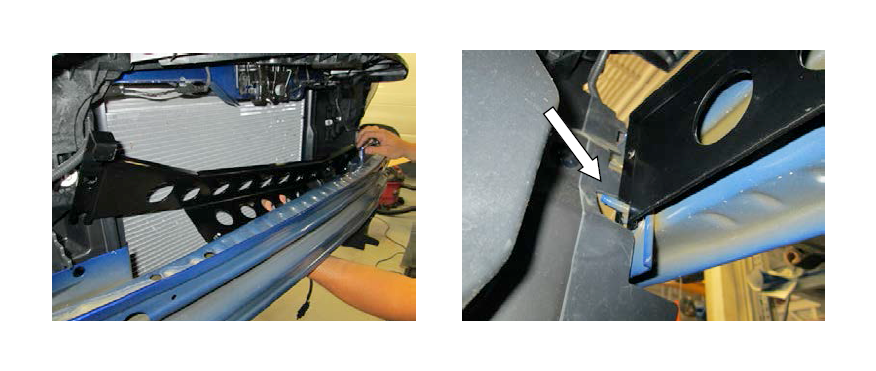
STEP 16: Remove the (4) push pins & (4) bolts retaining the upper fascia to the fascia support bracket.

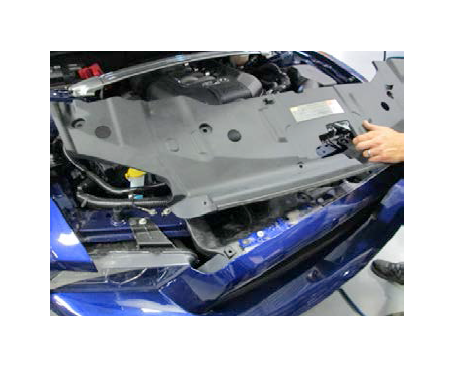
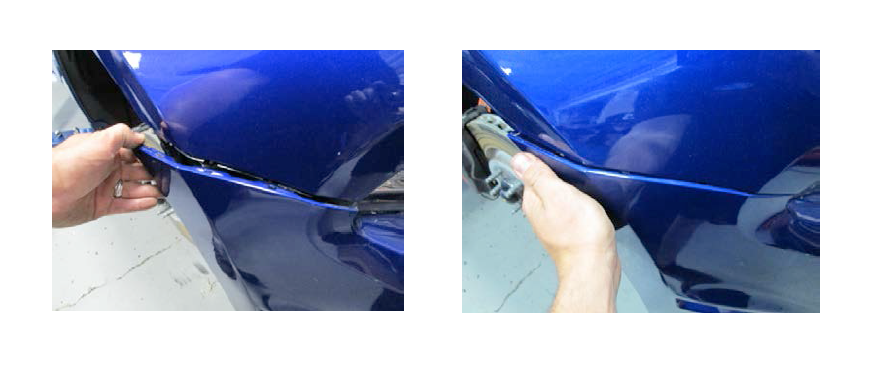
STEP 17: Gently unclip the outer edges of the front fascia from the fender fascia brackets.
STEP 18: Pull the fascia away from the vehicle and support.
STEP 19: If equipped, unclip both grille fog lamps and remove fascia from vehicle.

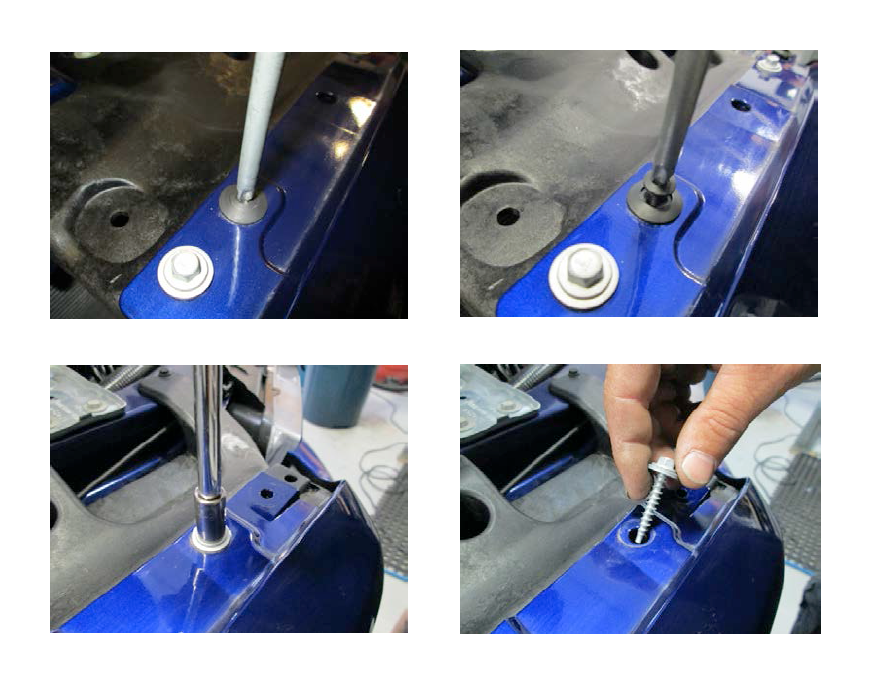
STEP 20: Remove the (4) push pins retaining the impact foam to the bumper and remove the foam.
STEP 21: Remove the (2) upper center most bumper bolts.
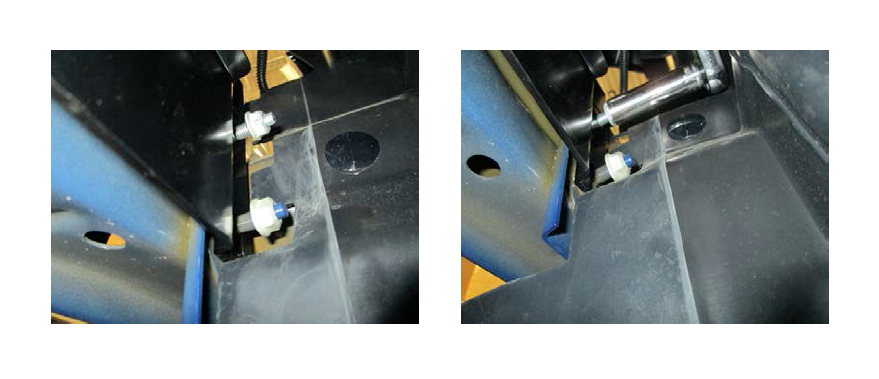
STEP 22: Insert the new splitter bumper bracket from the top side. Hang the bracket from the bumper verifying it aligns over the (2) remaining bumper bolts.
STEP 23: Install and tighten the new provided bumper bolts in the locations from STEP 21 and torque to 18
ft/lb.
STEP 24: From the backside of the bumper, install the (4) provided bumper nuts and securely tighten onto the newly install splitter bumper bracket, torque to 18 ft/lb.
STEP 25: Using the (4) push pins removed in STEP 20, reinstall the impact foam onto the bumper.
STEP 26: Align the front fascia and clip the fog light connectors into place if equipped. Then slide the front fascia over the fascia support bracket.
STEP 27: Install the (4) push pins & (4) bolts retaining the upper fascia to the fascia support bracket that were removed in STEP 16. Torque the (4) bolts to 48 in/lb and tighten the (4) push pins.
STEP 28: Clip the outer edges of the front fascia to the fender fascia brackets.
STEP 29: Install the upper radiator close off shroud and secure with the (8) push pins removed in STEP 14.
STEP 30: From the backside of the front fascia, connect the (2) side marker lights.
STEP 31: Install and tighten the (2) bolts, (1) per side, retaining the inner fender liner to the front fascia cover that were removed in STEP 12. Torque to 15 in/lb.
If installing M-16601-MBA Laguna Seca splitter skip steps 32 and 33
STEP 32: Install the new lower grille insert by aligning the grille clips with the receiving locations in the fascia, gently push into place verifying the (12) retaining clips are securely attached.
STEP 33: Install the temperature sensor by clipping it into the provided location on the backside of the lower grille insert.
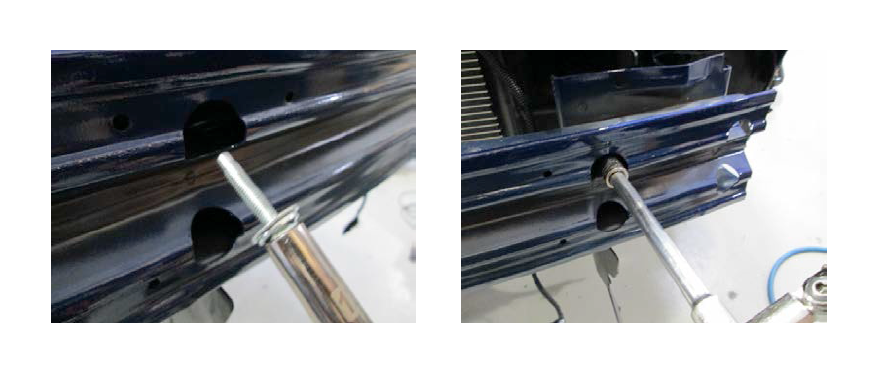
STEP 34: Install the (6) provided J-nuts onto the existing holes on the fascia as shown below.
STEP 35: Install the new splitter into the fascia by aligning the splitter clips with the fascia. Gently push into place and verify the (6) splitter clips are securely attached.
STEP 36 Install the (6) bolts provided in the kit through the splitter and into the J-nuts that were installed in
STEP 34 and torque to 28 in/lb.
If installing the M-16601-MBA Laguna Seca splitter, 4 of the 6 bolts will be removed in later steps.
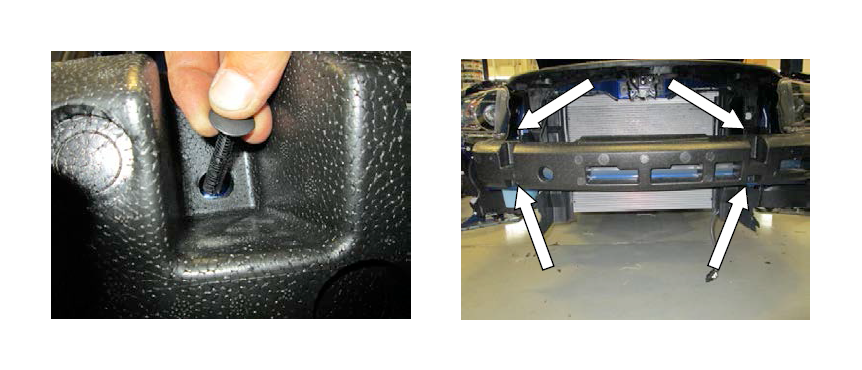
STEP 37 Using the bolts removed in STEP 3, Install (8) bolts into the remaining locations on the new splitter and torque to 28 in/lb.
STEP 38: Using the bolts removed in STEP 6, install the (4) bolts to attach the splitters outer edges to the fascia and torque to 15 in/lb.
STEP 39: Install the new deflector by sliding it forward verifying that its forward most lip is above the newly installed splitter.
STEP 40: Using the bolts removed in STEP 2, install the (3) rearward bolts and torque to 15 in/lb.
STEP 41: Using the bolts removed in STEP 2, install the (2) outboard bolts and torque to 15 in/lb.
STEP 42: Using the (4) of the bolts removed in STEP 3, install the (4) bolts on the front edge of the deflector and torque to 15 in/lb.