FREE 1 to 3-Day Delivery on Orders $149+ Details
How to Install Ford Performance 5.4L 4V Forged Iron Short Block (07-10 GT500) on your Ford Mustang
! ! ! PLEASE READ ALL OF THE FOLLOWING INSTRUCTIONS CAREFULLY PRIOR TO INSTALLATION. AT ANY TIME YOU DO NOT UNDERSTAND THE INSTRUCTIONS, PLEASE CALL THE FORD RACING TECHLINE AT 1-800-367-3788 ! ! !
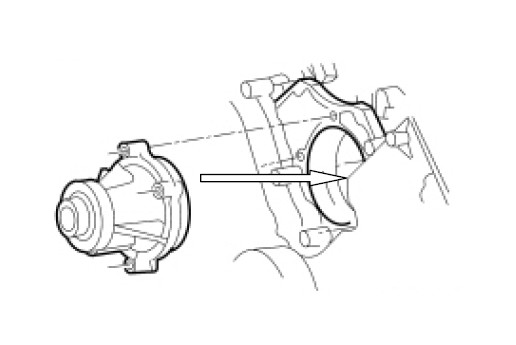
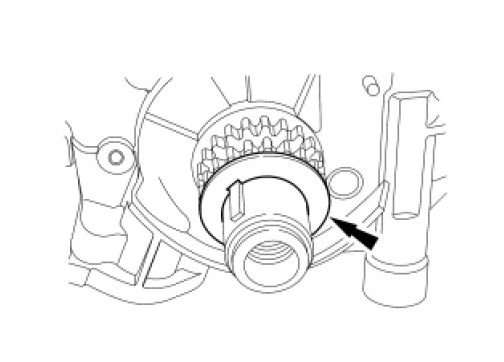
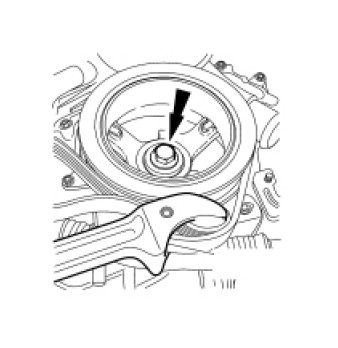
WARNING!!! For applications that use a water pump with attachment point for a lower hose, cup plug in block behind water pump must be installed. (see arrow)
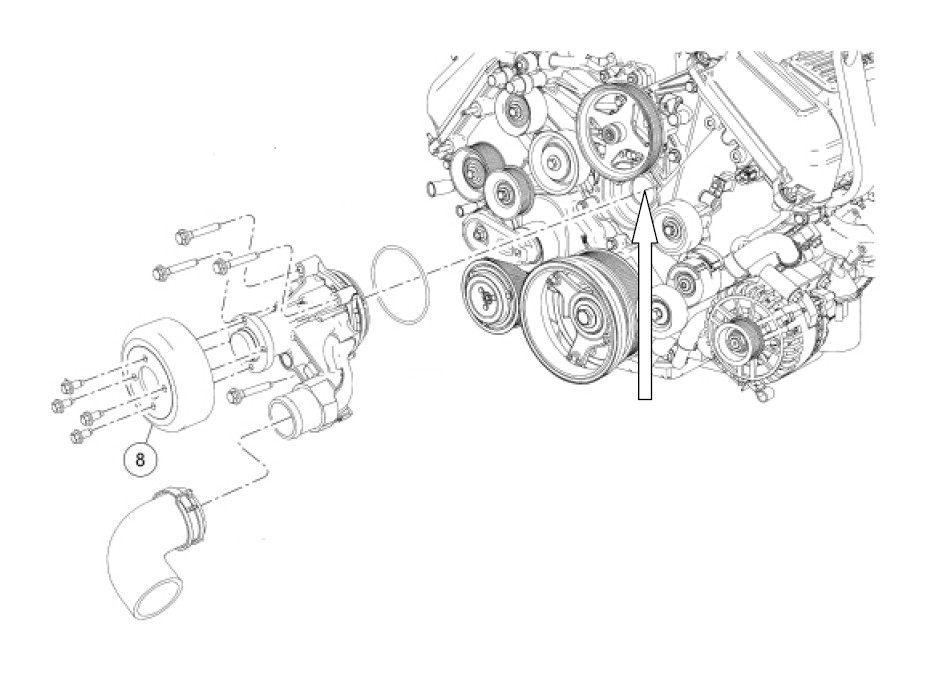
For applications that use a water pump without lower hose attachment point, cup plug in block behind water pump must be removed and coolant bypass nipple installed (see arrow). Position the flywheel on the crankshaft pilot and start the 8 flywheel bolts.
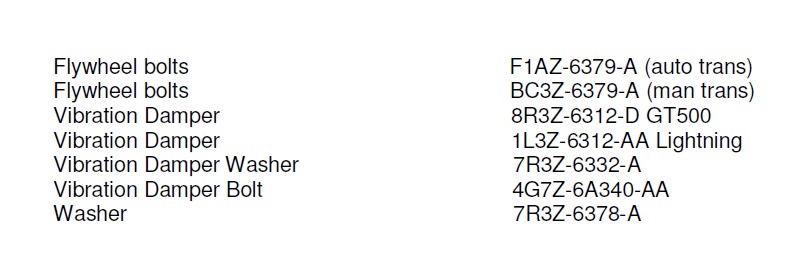
Additional recommended parts:
Assembly tips:
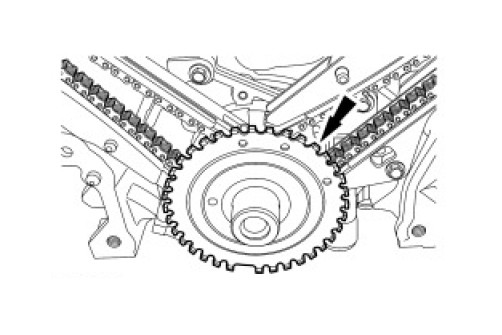
Install the crankshaft washer 7R3Z-6378-A after installing timing chain gear.
Install the crankshaft sensor ring.
Apply silicone gasket and sealant to the Woodruff key slot on the crankshaft pulley.
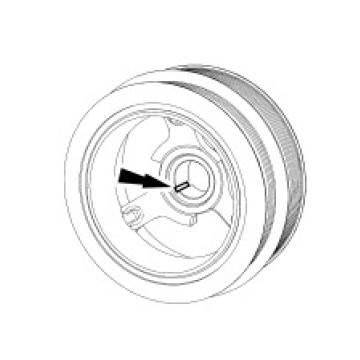
Lubricate the crankshaft pulley sealing surface with clean engine oil prior to installation.
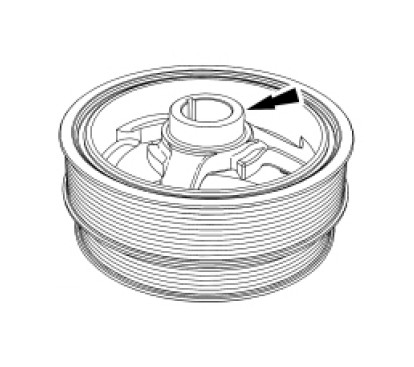
Using the Crankshaft Vibration Damper Installer, install the crankshaft pulley.
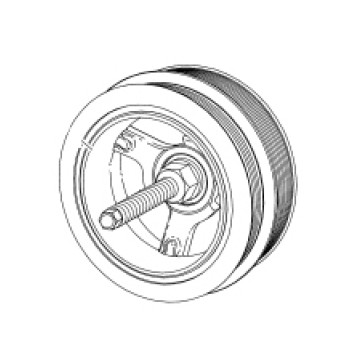
Using the Strap Wrench, install a new crankshaft pulley bolt and the washer, tighten the bolt in 4 stages:
• Stage 1: Tighten to 90 Nm (66 lb-ft).
• Stage 2: Loosen one full turn.
• Stage 3: Tighten to 50 Nm (37 lb-ft).
• Stage 4: Tighten an additional 90 degrees.
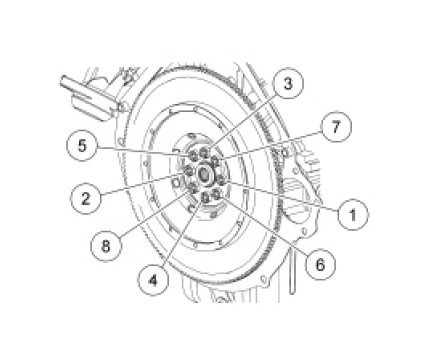
Position the flywheel on the crankshaft pilot and start the 8 flywheel bolts.
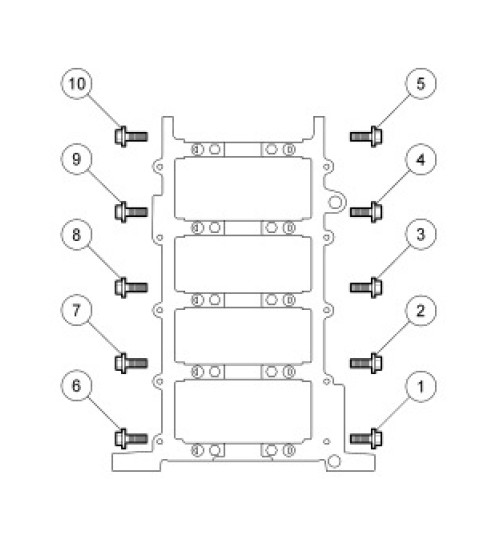
Tighten the flywheel bolts evenly in the sequence shown to fully seat the flywheel on the crankshaft pilot.
• Tighten to 80 Nm (59 lb-ft).
Additional info:
The Ford Racing Short block uses production torque to yield main bolts. Bolts must be replaced if removed.
Tighten the vertical main bearing cap fasteners in the sequence shown, in 3 stages.
• Stage 1: Tighten to 10 Nm (89 lb-in).
• Stage 2: Tighten to 40 Nm (30 lb-ft).
• Stage 3: Tighten an additional 90 degrees.
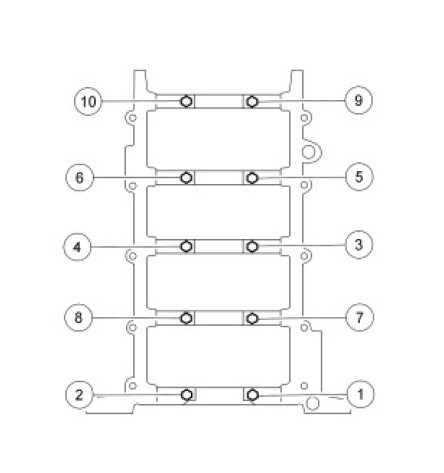
NOTE: Crankshaft not shown for clarity.
Install the new side bolts and tighten them in the sequence shown, in 2 stages.
• Stage 1: Tighten to 40 Nm (30 lb-ft).
• Stage 2: Tighten an additional 90 degrees.