FREE 1 to 3-Day Delivery on Orders $149+ Details
How to Install Cervini's Stalker Hood on your Mustang

Shop Parts in this Guide
Notice: Install new, unpainted parts according to these instructions! You can also download these instructions at: www.cervinis.com Then remove parts, paint them and re-install. Painted or Altered Parts are Non-Refundable!
Step 1 Remove the factory hood from the car, then remove the striker bar from the factory hood. Page 1 Notice: Install new, unpainted parts according to these instructions! You can also download these instructions at: www.cervinis.com Then remove parts, paint them and re-install. Painted or Altered Parts are Non-Refundable!
Step 2 Tools: 7/16” - 1/4” Drive Socket Tools: 7/16” - 1/4” Drive Socket
Bolt the new hood to the factory hinges using the new hardware provided with your new hood. DO NOT use factory bolts & washers. Adjust hood until proper alignment with fenders & rear cowl panel is achieved.
STEP 3: Tools: 7/16” - 1/4” Drive Socket
Install factory striker bar using two 1/4” x 20 1” bolts & lock washers. Use a small amount of medium strength Loctite®. Adjust primary latch if needed until striker bar aligns with the latch. Make sure when the hood is closed you can hear the striker bar “click” into the latch. The latch adjusts Up/Down/Left/Right.
STEP 4
After you hear it “click”, test it to be sure it is working properly by grabbing the front edge of the hood and slowly pulling upward with steady even pressure. If the hood opens, it’s not adjusted properly; Repeat Step 3 until hood cannot be pulled open after it’s closed.
STEP 5
WARNING: MAKE SURE THE SAFETY CATCH IS WORKING PROPERLY! To ensure the safety catch is working properly, close the hood, pull the hood release from inside the car and the hood will partially open. Slowly pull up on the hood while firmly shaking the hood up and down. If the hood opens without pulling the safety catch lever then the latch needs to be re-adjusted. The safety catch prevents the hood from opening in the event that the primary latch fails.
STEP 6
Locate the rubber hood stoppers found on the radiator support. Adjust upward until they apply a small amount of pressure to the underside of the hood when it is closed. This will prevent the hood from shaking or rocking.
Step 7: Tools: Razor Knife or Wire Cutters
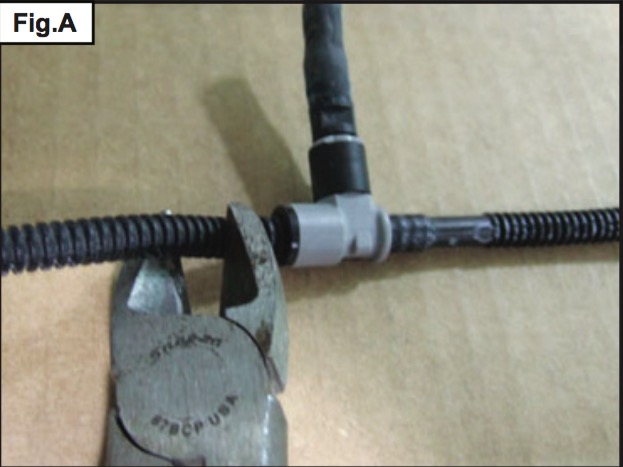
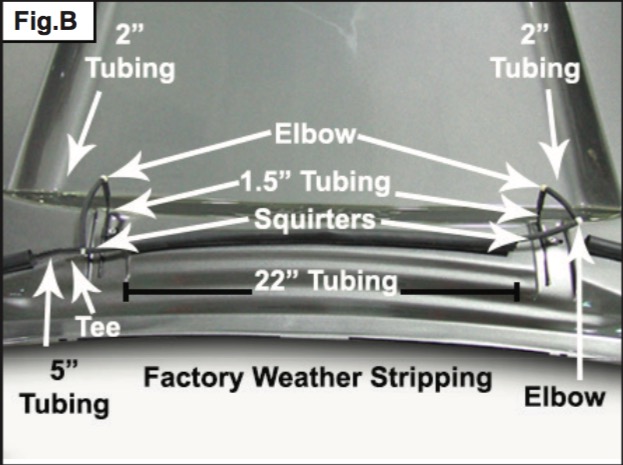
Cut the factory windshield washer line before the first “T” as shown in fig A. Add the straight connector and 6” of the rubber tubing supplied in the hardware packet. Reinstall the weather stripping to the hood, starting with the passenger side. Cut and remove the weather stripping so it does not crossover the area where the new squirters are to be installed. Feed the windshield washer squirter hose through the weather stripping on the passenger side. Install the squirter supplied in the hardware packet to the hood using the short black phillips screws. Make all final connections to the squirters as shown in fig B. (You may need to adjust the squirters by lightly bending them for proper spray direction to the center of your windshield.)
Installation of Vent Inserts for Hood #1209 & #1211
STEP 8
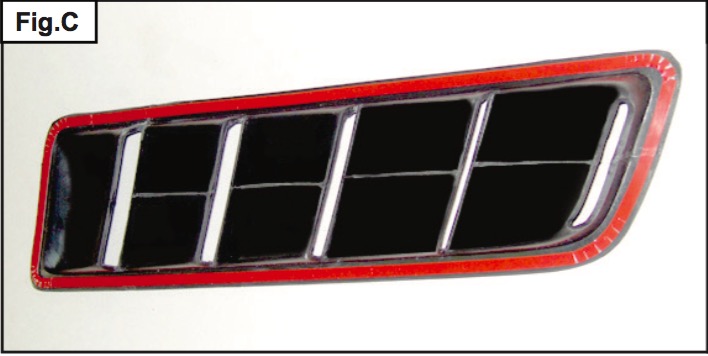
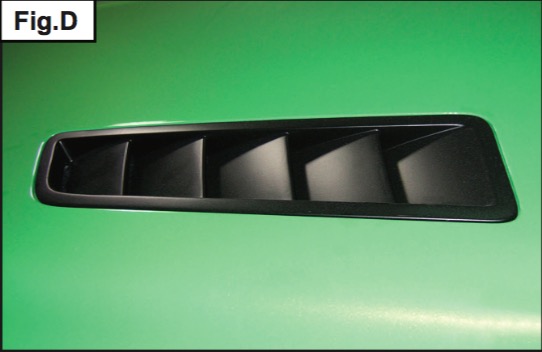
Installing the Vent Inserts: Included in the hardware packet is a roll of 3M double sided tape. After the vent inserts have been painted, install the 3M double sided tape along the inside edge of the inserts as shown in fig.C. After the hood has been painted remove the double sided tape backing from the vent inserts and place them in the openings located in the rear of the hood as shown in fig D. Be sure to center the inserts in the opening. Firmly press on the edges of the trim ring to secure it to the hood.