Installation Time
(approx) 3 Hours
Difficulty Level:
Light to Moderate mechanical skill required.
FREE 2 or 3-Day Delivery on 10,000+ Items. Details
$80.99 (pair)
FREE ShippingSaved - View your saved items
We're sorry. We couldn't save this product at this time.
or use
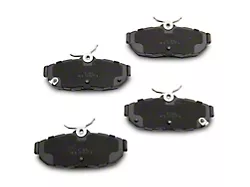
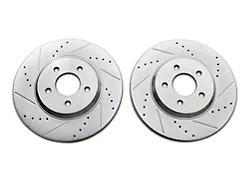
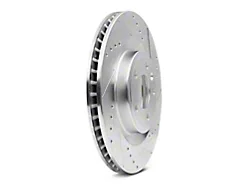
Hey, guys. It's Sara with americanmuscle.com. And today, we have a review and install of the C&L Super Sport Cross-Drilled and Slotted Rotors in a Rear Pair, fitting your '05 to '14 Mustang, excluding the '13 and '14 GT500. These are perfect for the Mustang owner who's looking to upgrade their rear rotors.This is an excellent performance option, but it will still fit into your budget when compared to those more pricey, drilled, and slotted rotor kits. They feature cast iron construction with a zinc-plated finish, and their drilled and slotted design will improve braking performance and minimize fade. This kit is perfect for street, as well as track performance, keeping those brake pads cool and clean.Now, while you're at it, you may wanna also change your pads and C&L offers a ceramic option to go with this rear kit. And, of course, you will get the most breaking performance out of a full front and rear kit. So, as far as price goes, this pair comes in at around $100, which is a budget-friendly upgrade option. Now, it will cost a little bit more than an OE replacement would.However, you're still gonna save a ton of cash over other drilled and slotted options. And as far as the install goes, I'm giving this one a two-out-of-three wrenches on the difficulty meter. They do feature a direct bolt-up install with no modification required and can be done within three hours. So with that said, let's check out the install.For this install, we used a 13 and 15-millimeter ratcheting wrench, but you can also use a ratchet as well as 15 and 13-millimeter sockets. You may also want a caliper hanger or a similar tool. All right. So the first step in our uninstall is to grab a 13-millimeter socket, or you can use a ratcheting wrench like I have here, and remove the two bolts on the back of the caliper. Now, the caliper bolts are out, you can wiggle it loose.And if you're having any trouble, you can use a pry bar and just pry backwards. And then wiggle it off. Once you have the caliper off, grab a caliper hanger or similar tool, and hang it out of the way to keep the tension off the brake line. Then grab a 15-millimeter socket or we're using a ratcheting wrench here, and remove the two bolts on the backside holding on your caliper bracket.Keep a hand on this bracket as soon as you get this bolt out, it is gonna come off of the car. Then go ahead and remove it. Now, you can go ahead and remove the rotor. If it is stuck for any reason, you can tap on the backside where the caliper was. But ours is pretty free so we're just gonna wiggle it loose. All right. And now that we have our factory rotor uninstalled from our car, we can check it side by side with our new rotor here.Now, as you can see, the biggest difference is that drilling and slotting of the new rotor. These features will help keep your brakes cool and clean to allow for some more breaking performance over this OE-style rotor. They are both vented, which is a nice feature to keep on the new one. So with that said, let's go ahead and finish up our install.Now, we can get the new rotor installed. Now, before you install this, you will wanna spray back and front with some brake clean to remove the oils that are on here from the factory. Once you've done that, go ahead and line it up over your studs, press it in place. And I like to throw a lug nut on here just to keep that in place while we finish installing the caliper.Now, you can slide the caliper bracket over top with your brake pads in it. This is a great time to take a look at those brake pads, just to see if they have enough meat left. And if you do need to replace them, now is a great time. Go ahead and thread in those bolts into the back of the caliper bracket. And now with your 15-millimeter socket, or I'm using a ratcheting wrench, go ahead and get these tightened down.Now, go ahead and line up that caliper over top of the pads. Now, if you did put new pads on here, or if you're having any trouble lining these up, you may want to twist in the caliper a little bit to clear, but because these are the old pads, they should line up just fine. And once you have your caliper lined up, go ahead and thread in both of your bolts. Then with your 13-millimeter socket or ratcheting wrench, go ahead and tighten it down.All right. So that is gonna do it for the review and install of these brake rotors. And remember, for all things Mustang, keep it at americanmuscle.com.
Subscribe to our YouTube Channel
Features, Description, Reviews, Q&A, Specs & Installation
Fitment:
C&L 410661
CA Residents: WARNING: Cancer and Reproductive Harm - www.P65Warnings.ca.gov
Installation Info
Installation Time
(approx) 3 Hours
Difficulty Level:
Light to Moderate mechanical skill required.
What's in the Box
10 More Questions