 FREE 1 to 3-Day Delivery on Orders $149+ Details
How To Install a C&L Cold Air Intake w/ 80MM MAF on a 1996-2001 GT or 2001 Mustang Bullitt
Installation Time
30 minutes
Tools Required
- 10mm Socket
- 8mm Socket
- 3/8 inch Ratchet or 1/4 inch Ratchet
- Flathead Screwdriver
- 1/4 inch Bit Driver for Supplied T20 Security Torx Bit

Shop Parts in this Guide
Note: The install was done on a 96 Cobra, but is the same procedure for any 96-98 Cobra and 01 Bullitt.
Removal Procedure:
1. (Optional) If strut tower brace is installed, continue reading, if no strut tower brace please move to step #4
2. Remove 8 x 10mm bolts holding strut tower brace to car.
3. Remove strut tower brace and set aside.
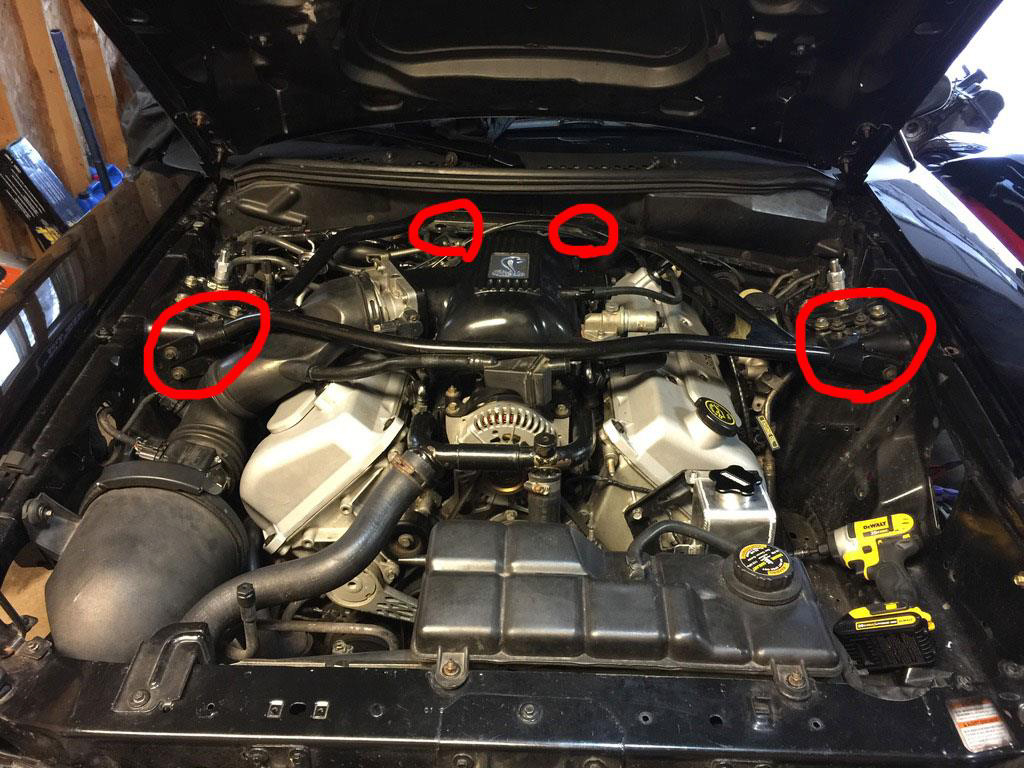
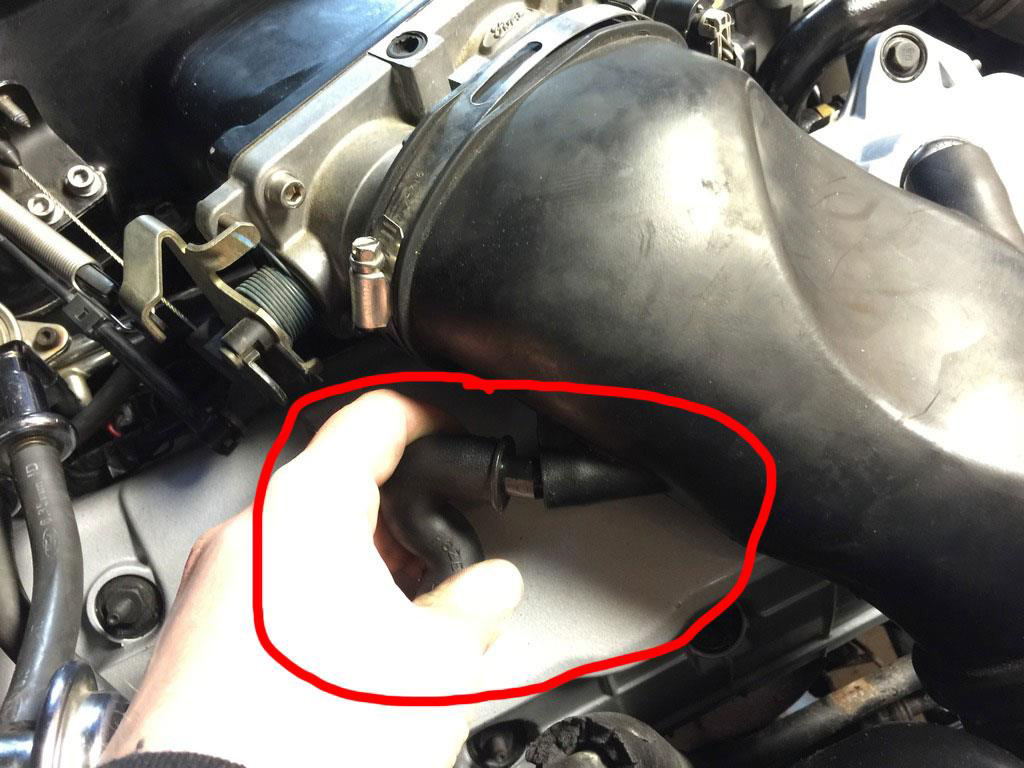
4. Remove vacuum tube the runs from stock intake tube to IAC.
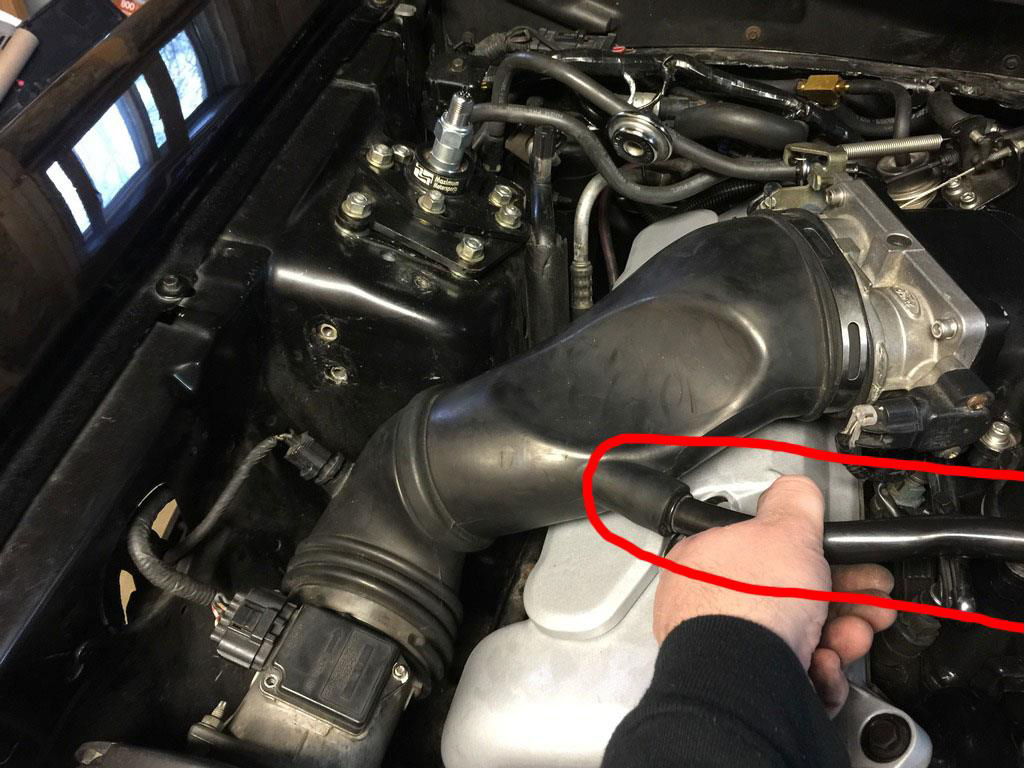
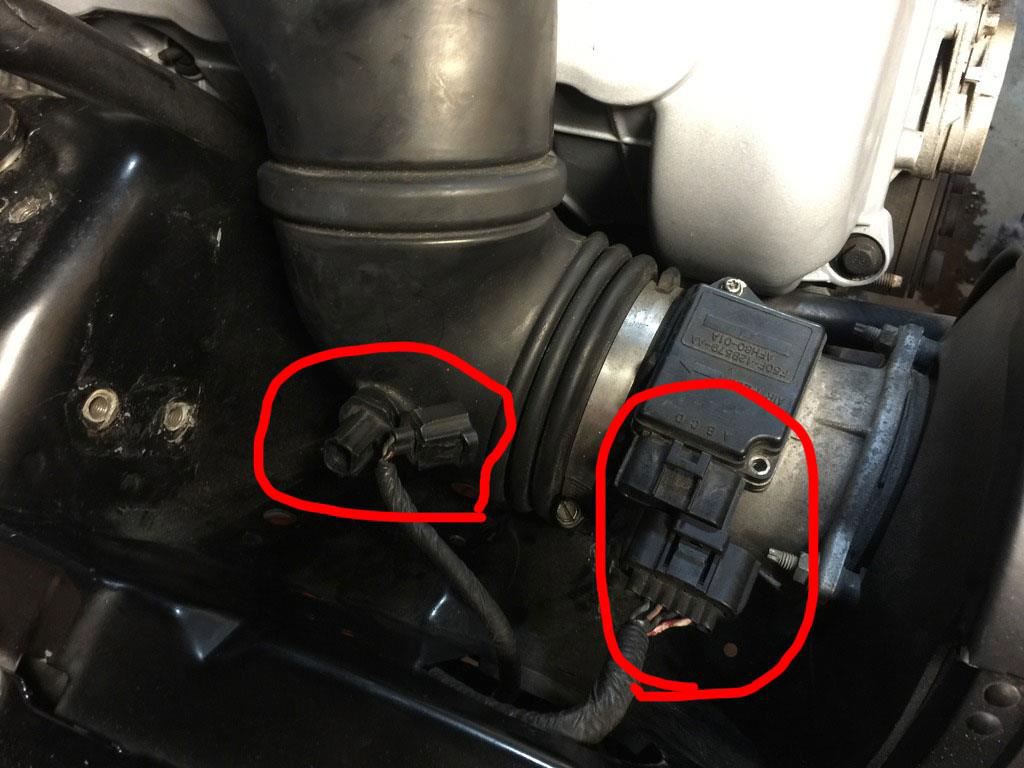
5. Remove vacuum tube that runs from intake to valve cover. (96-98 Cobras are on the rear of the intake tube as shown, 01 Bullitt has this tube on the front.)
96-98 Cobra \/
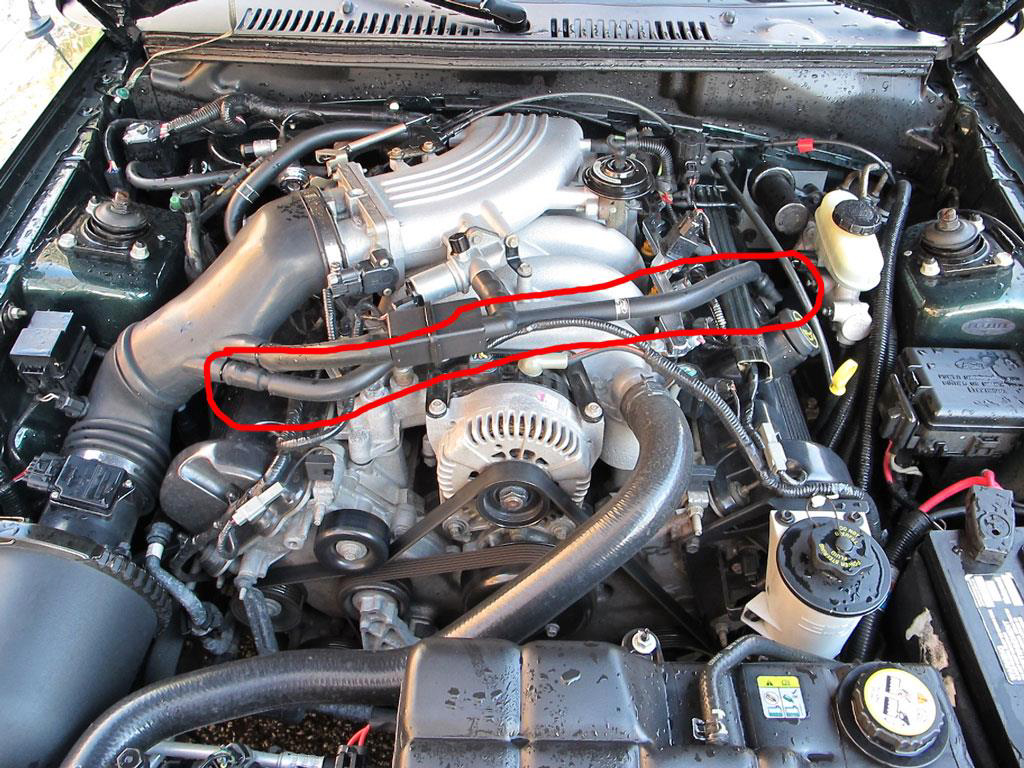
01 Bullitt \/
6. Unclip the MAF and Intake Air Temp sensors.
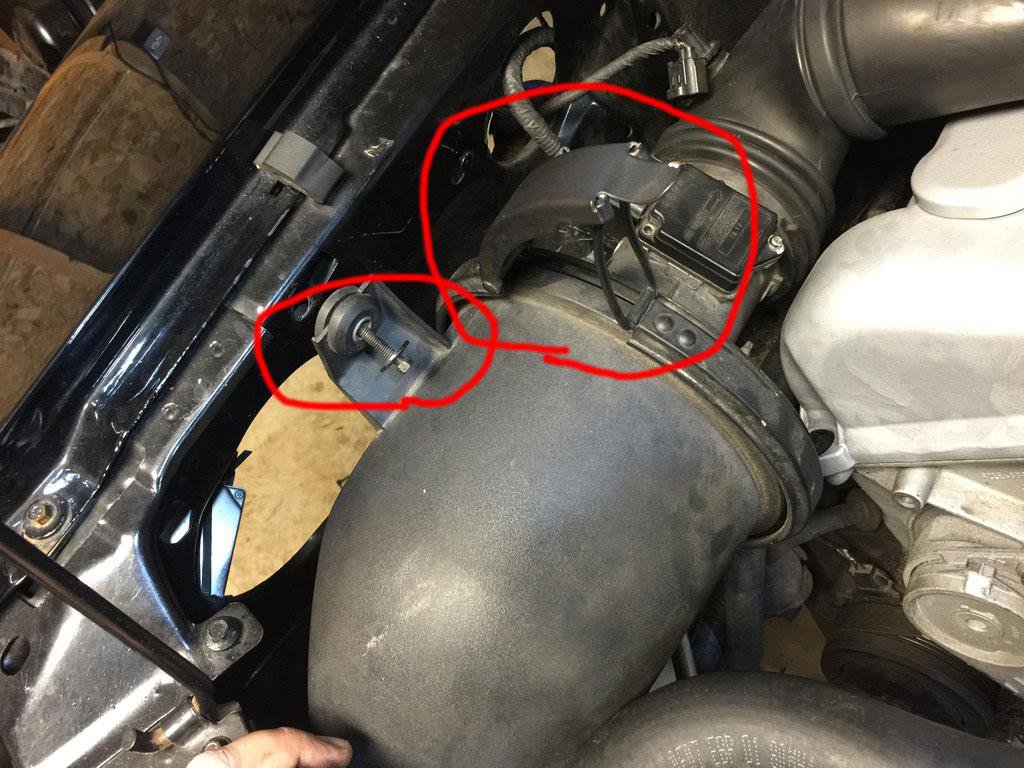
7. Release the clamp holding the intake tube to the air filter housing and remove the 8mm bolt holding the filter housing to the inner fender.
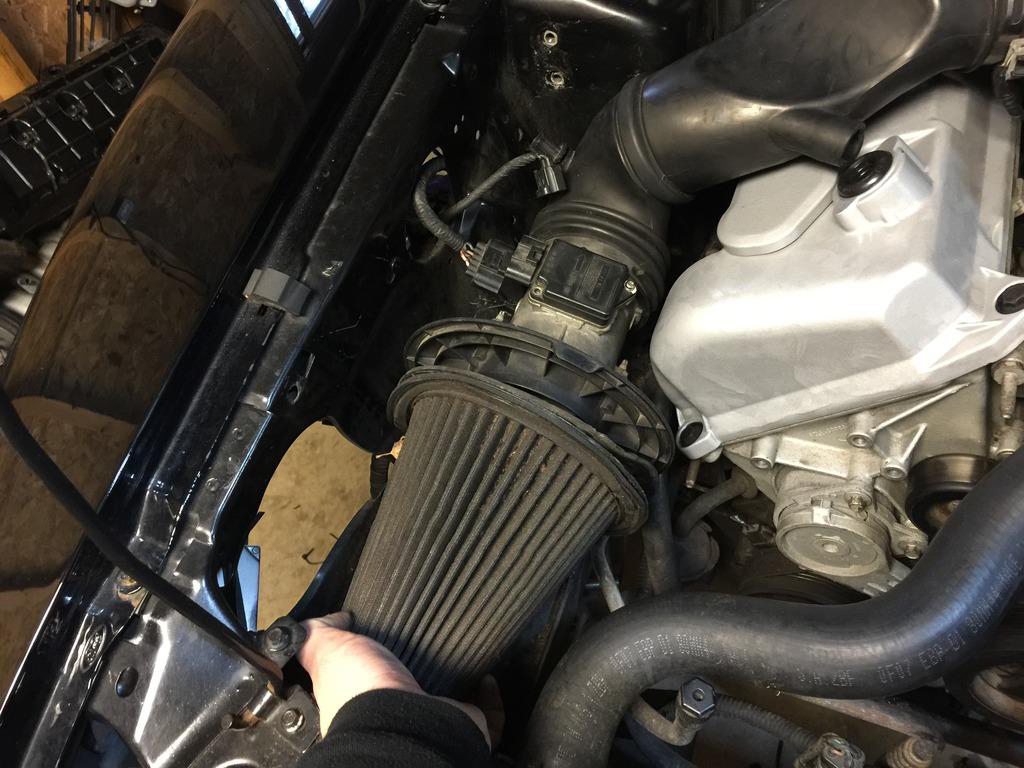
8. Remove the air filter housing.
9. Remove the air filter
10. Loosen the hose clamp on the intake tube where it meets the throttle body. You can use a flat head screwdriver or an 8mm socket.

11. Remove stock intake tube assembly along with MAF
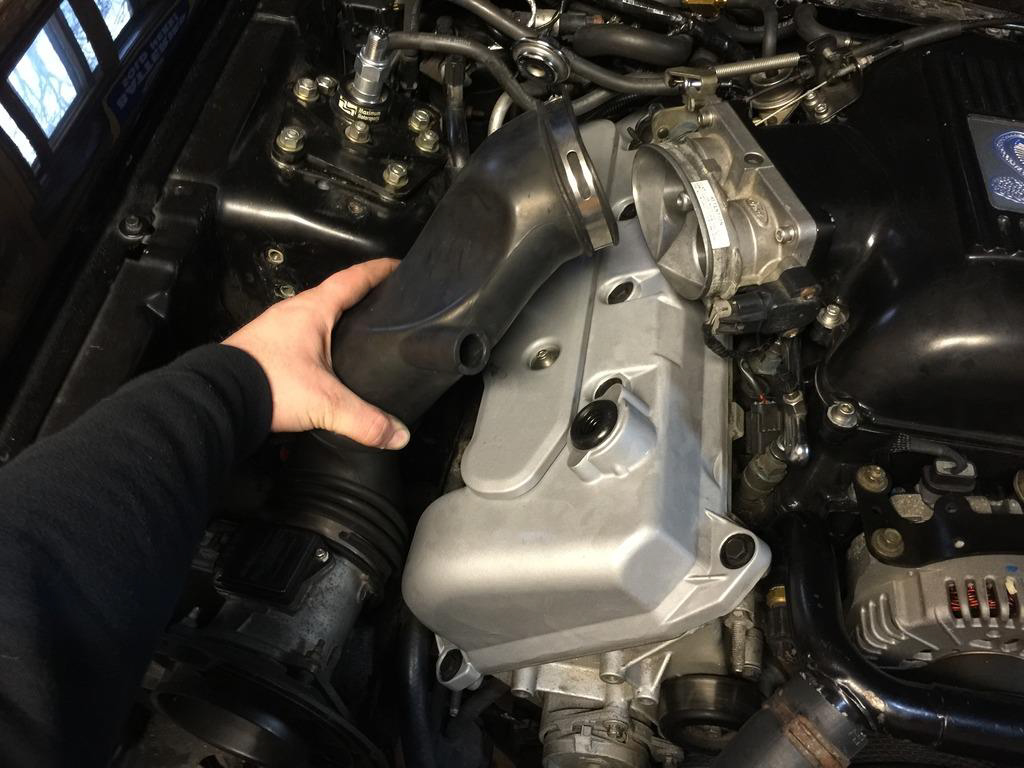
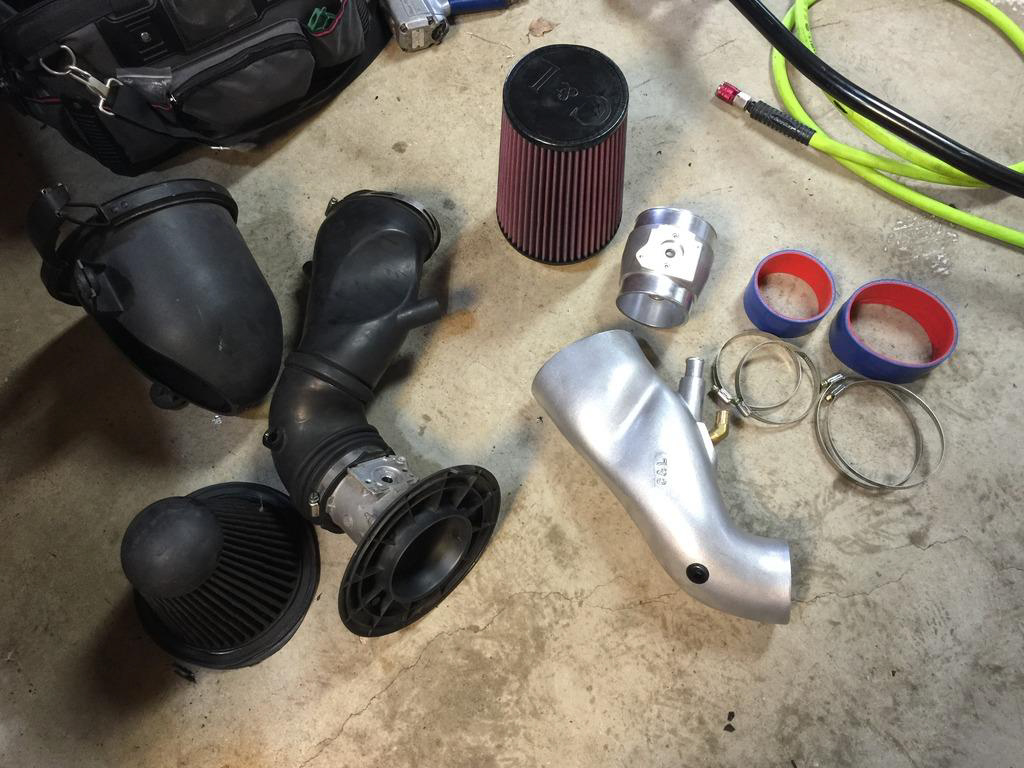
12. You should now have everything apart and ready to put it back together.
13. Remove stock MAF with supplied T20 Security Torx bit with 1/4in driver.
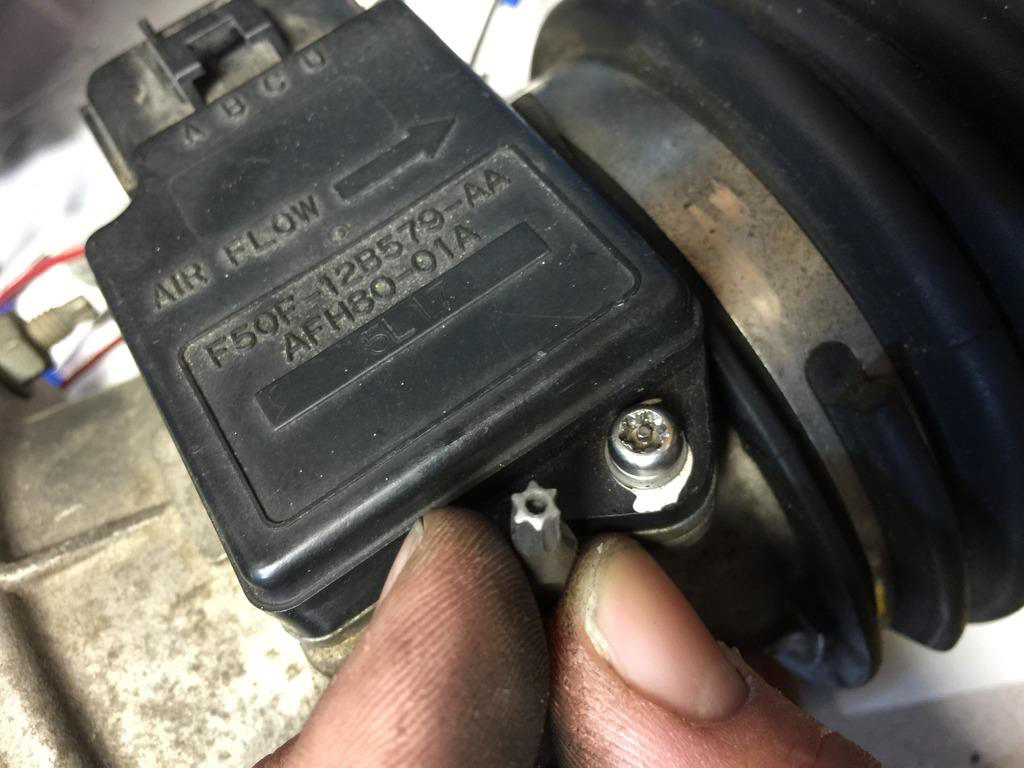
14. Make sure O-ring comes out with the MAF, this will seal the MAF from any outside air getting in or out. If this O-ring is not present when installed, your vehicle may not run correctly. Be careful while removing MAF, you do not want to damage the delicate parts.
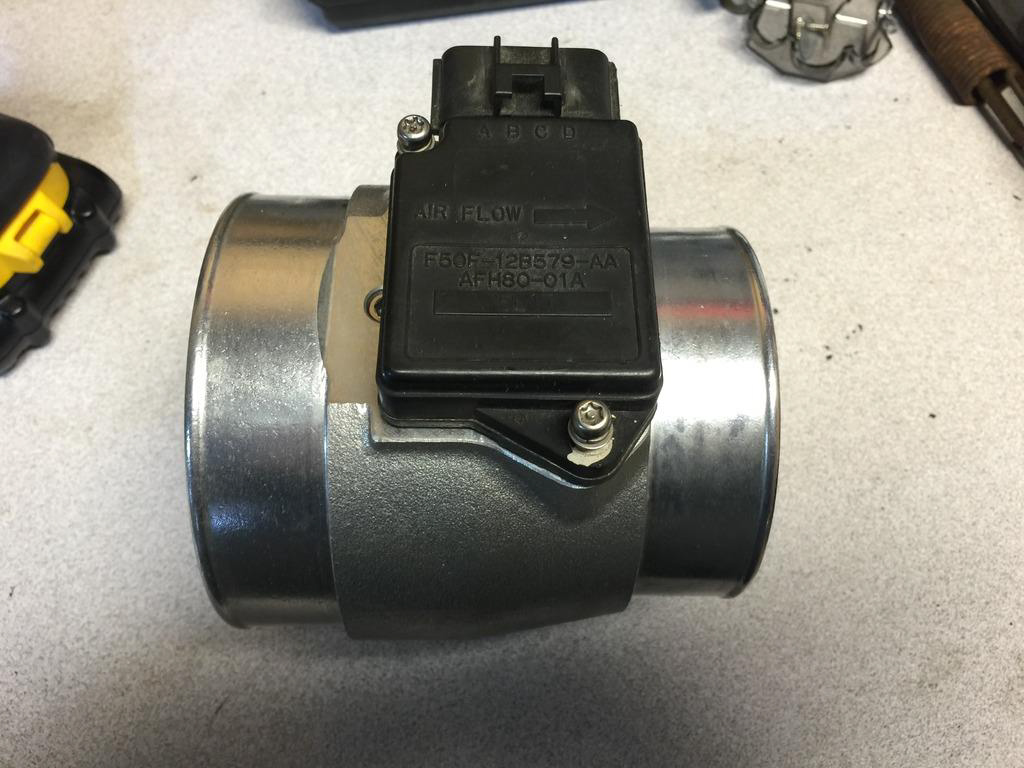
15. Tranfer stock MAF immediately over to new C&L unit, making sure the air flow indicator is in the correct orientation, which is arrow towards the throttle body. The smaller diameter outlet goes to the intake piping, the larger diameter inlet goes to the Air Cleaner.
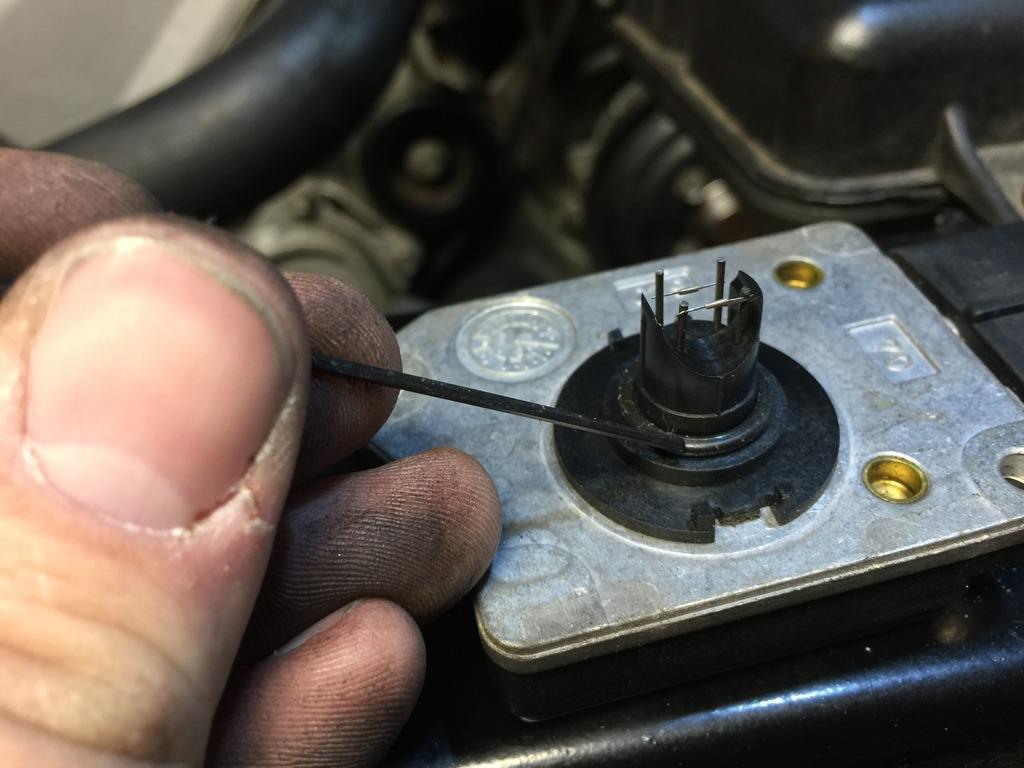
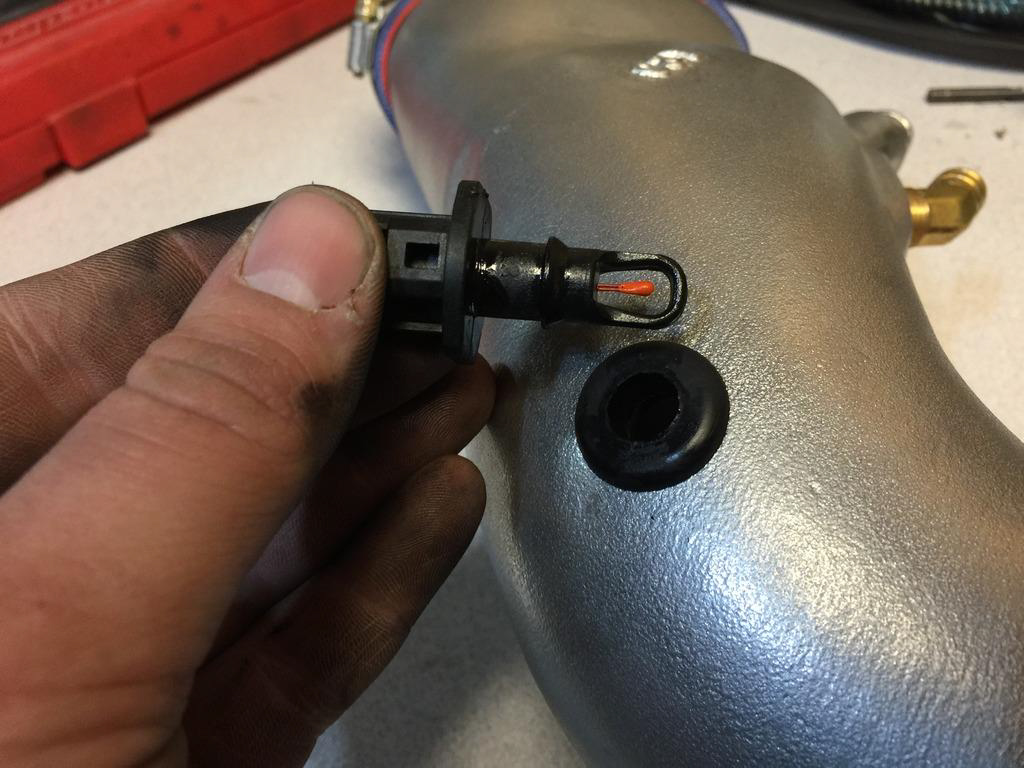
16. Remove the Intake Air Temp sensor. Pull straight up and it should pop out.

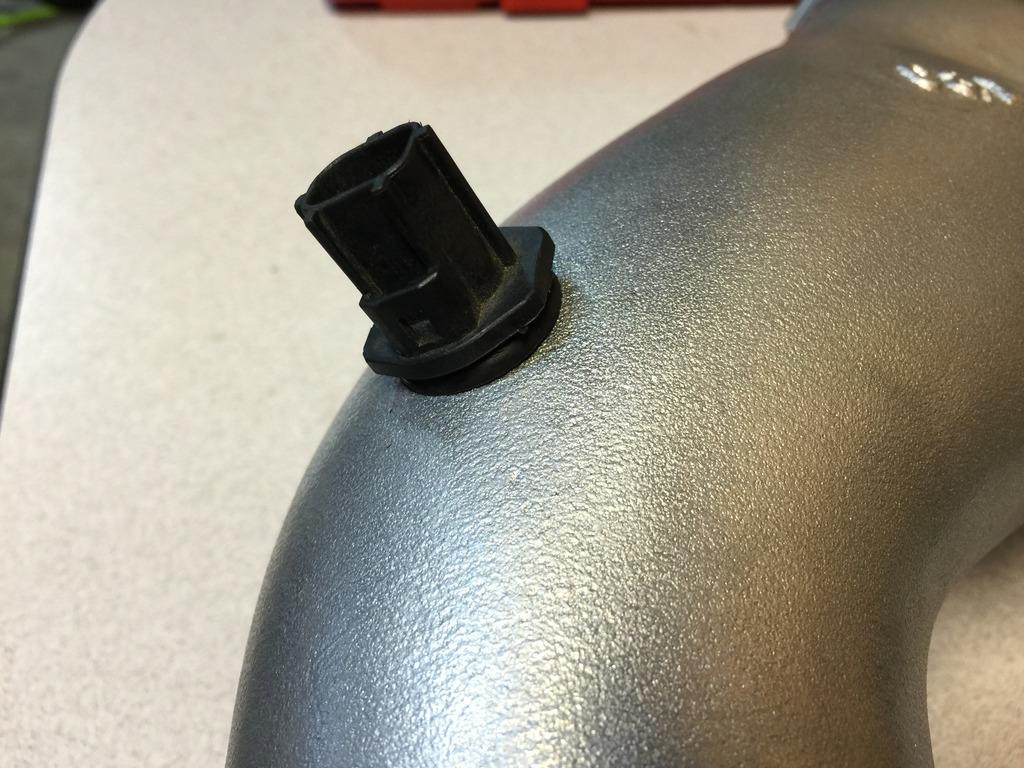
17. Insert Intake Air Temp sensor into C&L intake pipe, you can use a small dab of motor oil to help the sensor slide into place. Make sure it is fully seated before moving on.
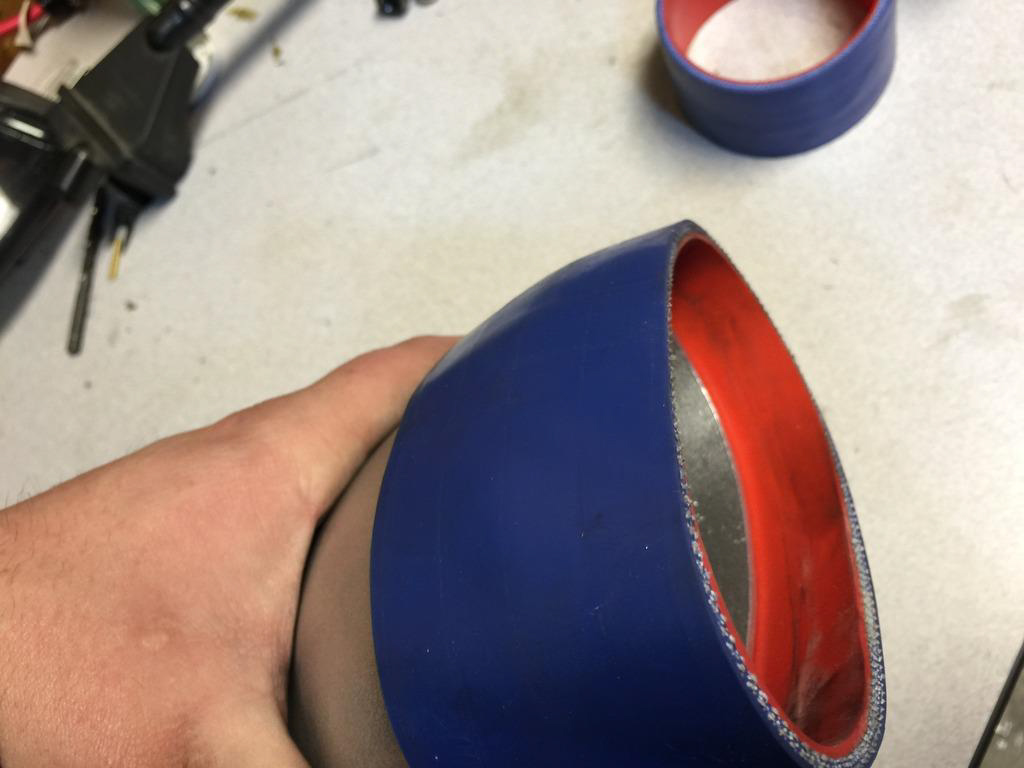
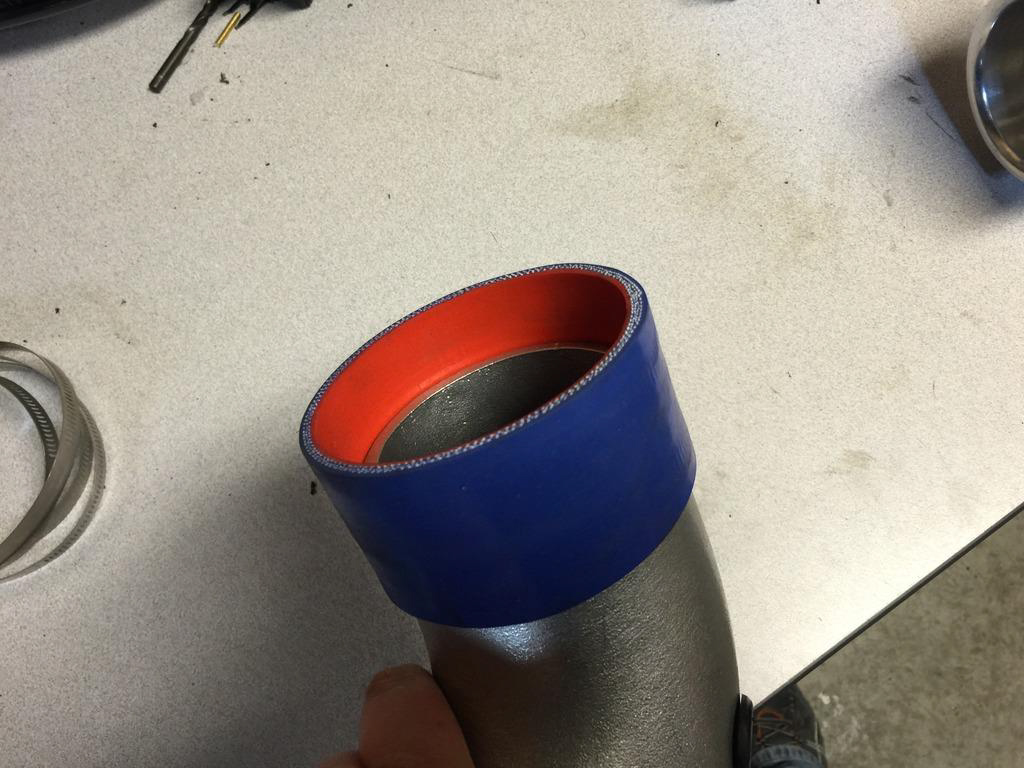
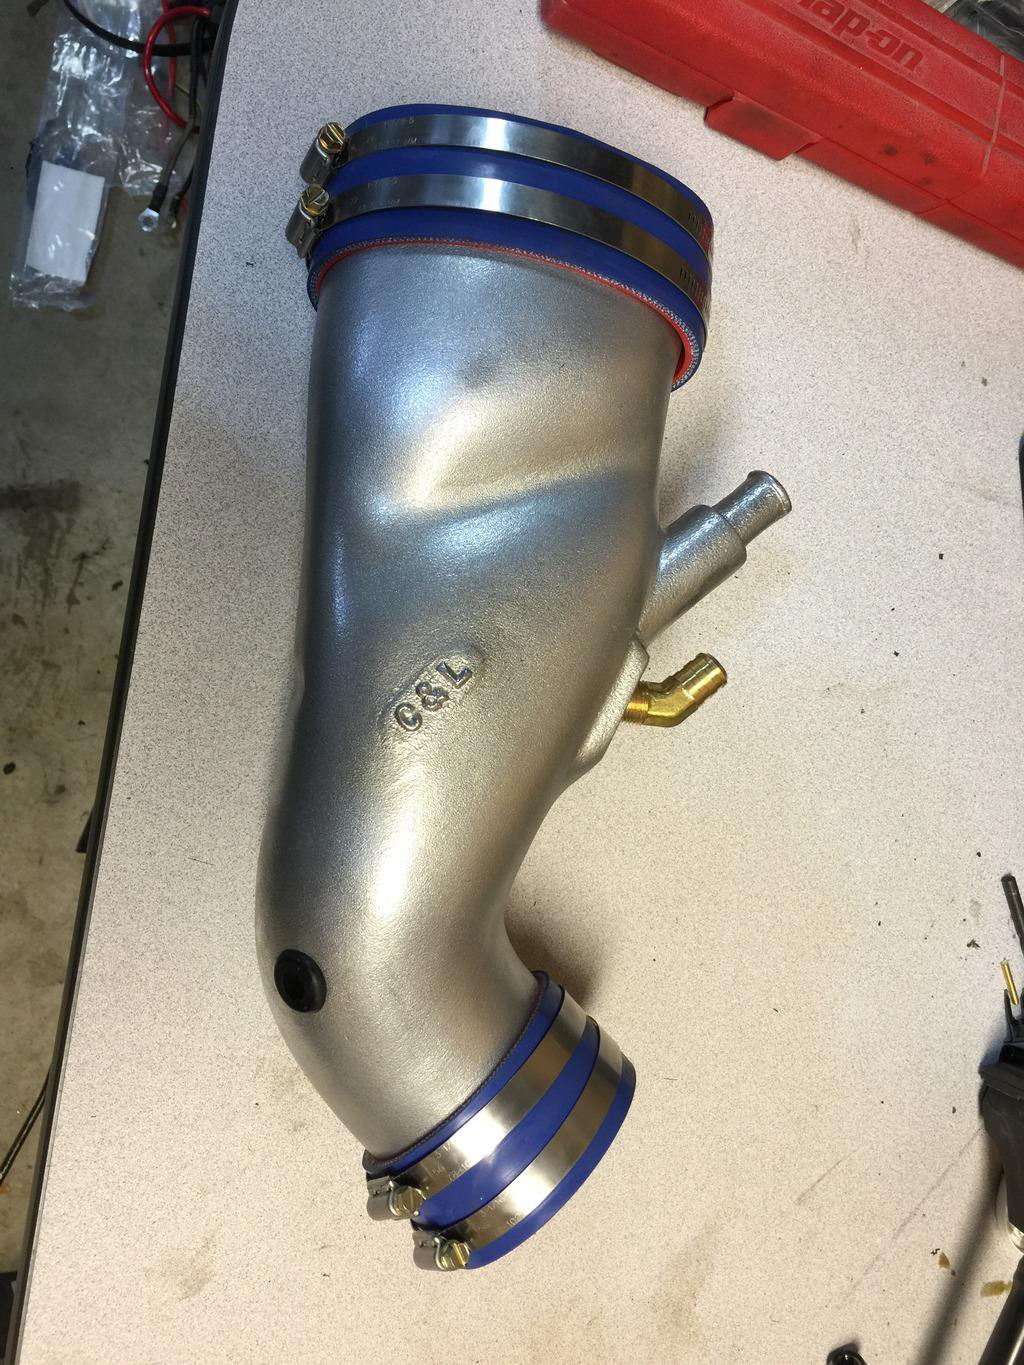
18. Put the largest supplied silicone hose over the oval opening on the C&L intake tube and put it about halfway on.
19. Put the smaller silicone hose over the MAF side of the intake tube.
20. Now put the supplied hose clamps over the silicone hoses, the larger ones go on the throttle body side, the smaller clamps go on the MAF side.
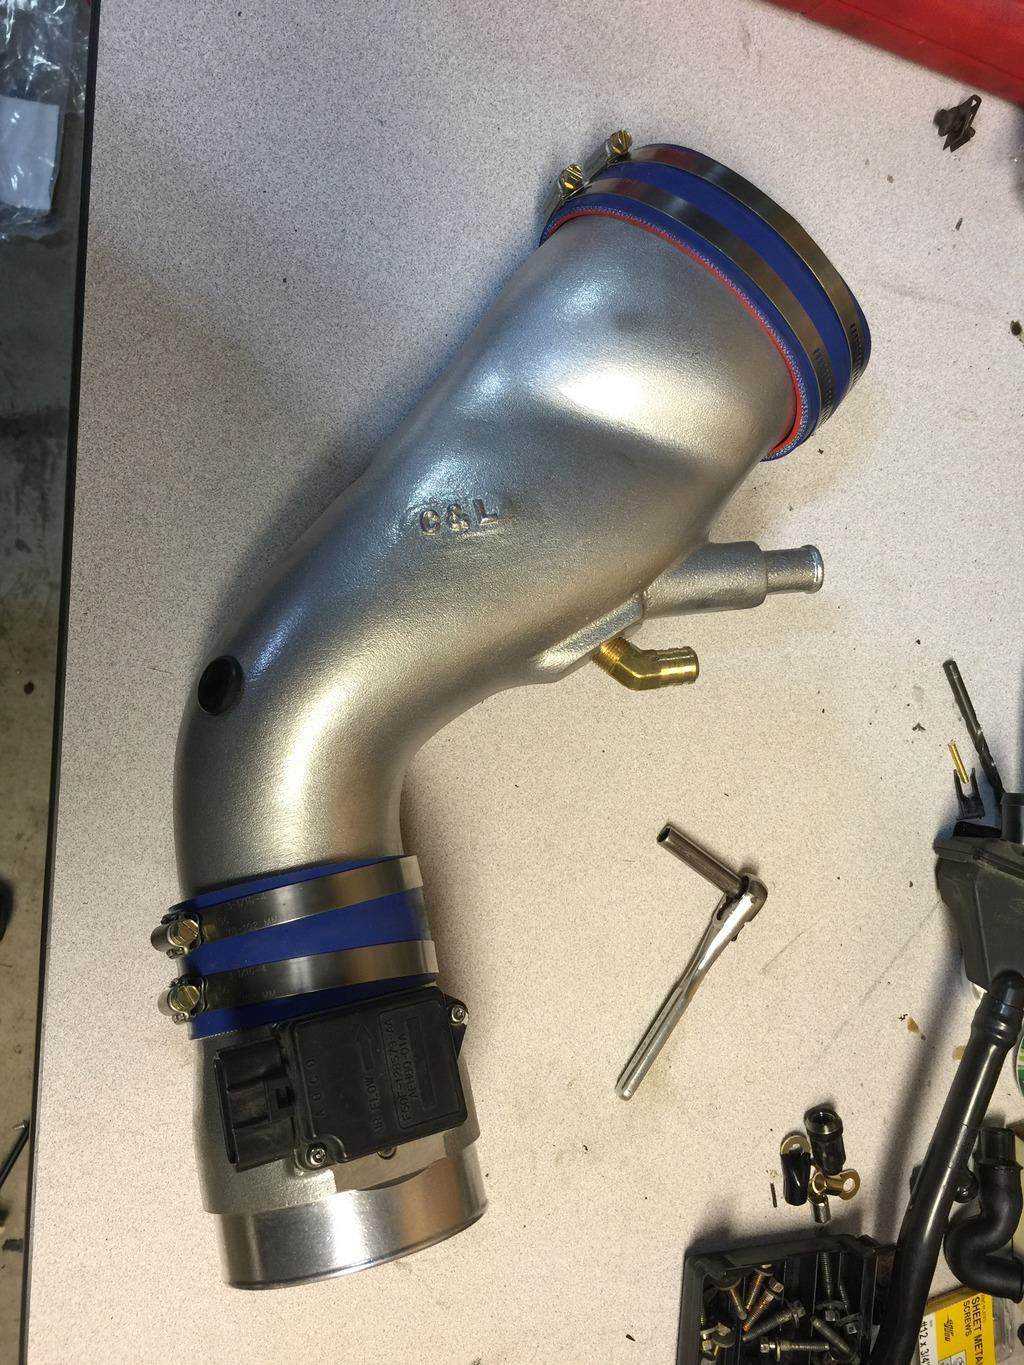
21. Now slip the C&L 80mm MAF onto the intake tube.
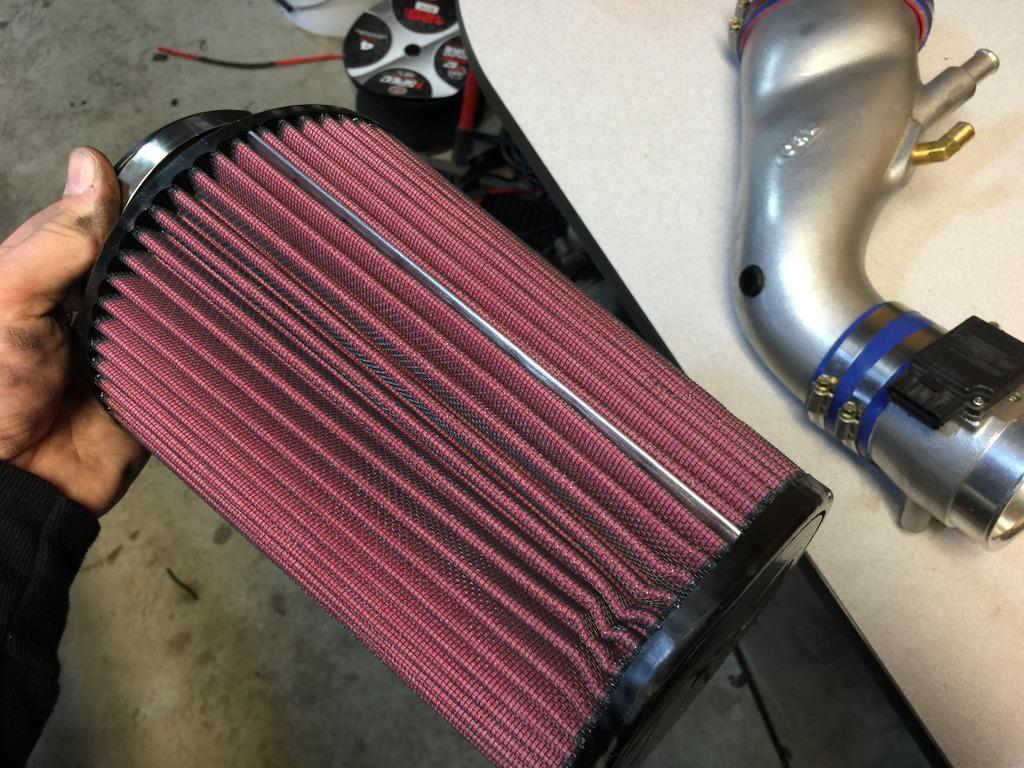
22. Install the new C&L supplied air filter. There is a piece of metal that holds the filter together; I chose to orientate that so it faces down, for aesthetic purposes.
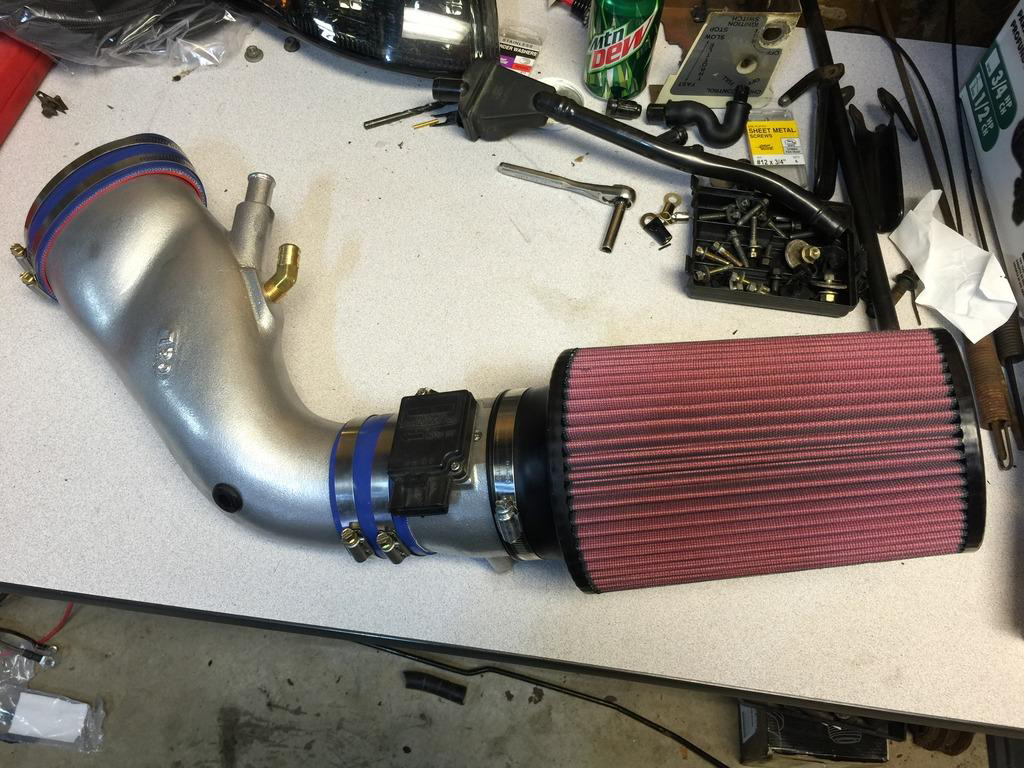
23. You can lightly tighten up the clamps just so they do not fall off, you will want to keep these loose so you can fine tune it once it’s in the car. Tip: Orientate the hose clamps so they are pointed UP. This makes them very easy to get at once installed on the car.
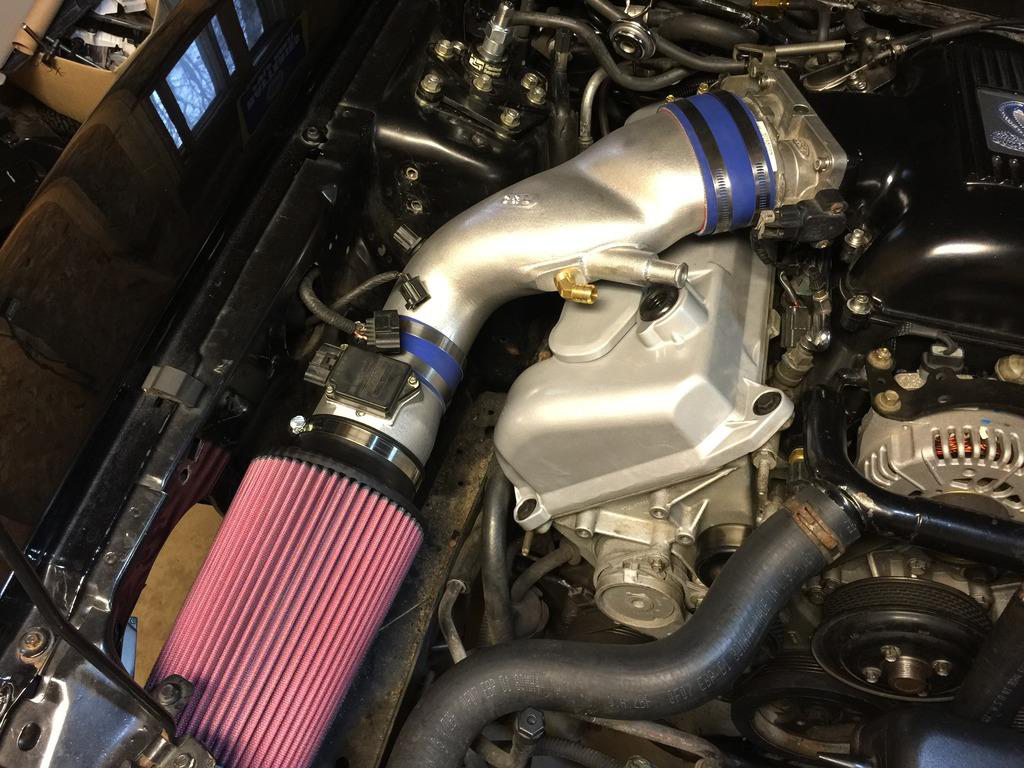
24. Install complete C&L intake assembly into car.
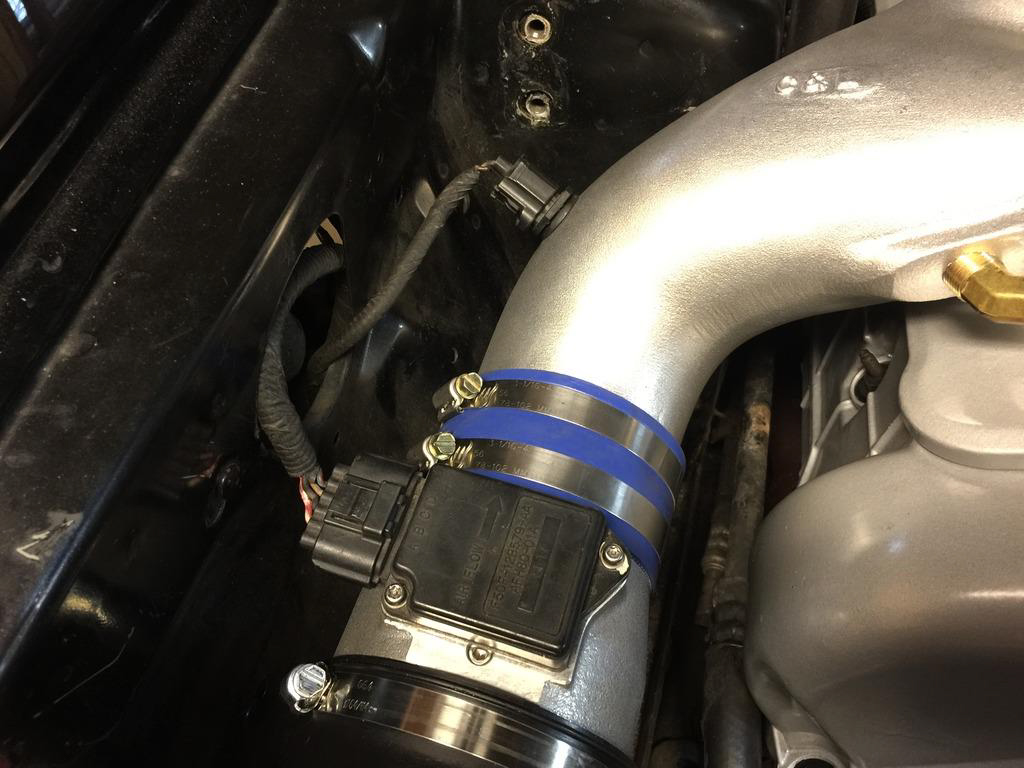
25. Hook up MAF and Intake Air Temp sensor. Double check your MAF is pointing in the right direction. Towards the Throttle Body.
26. If you have a strut tower brace, continue reading. If you do not have a strut tower brace, please go to step #30.
27. Put strut tower brace back on car.
28. Tighten down 8 x 10mm strut tower brace bolts.
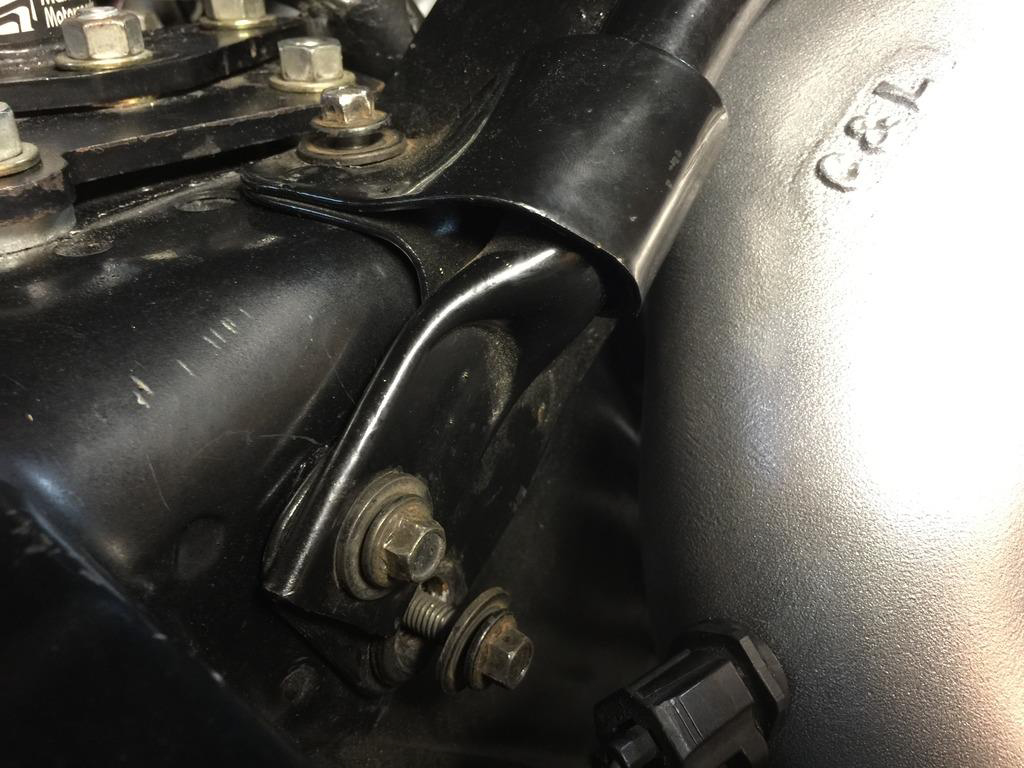
29. Now we want to fine tune the fitment of the C&L intake tube assembly so it is not hitting on strut tower brace.
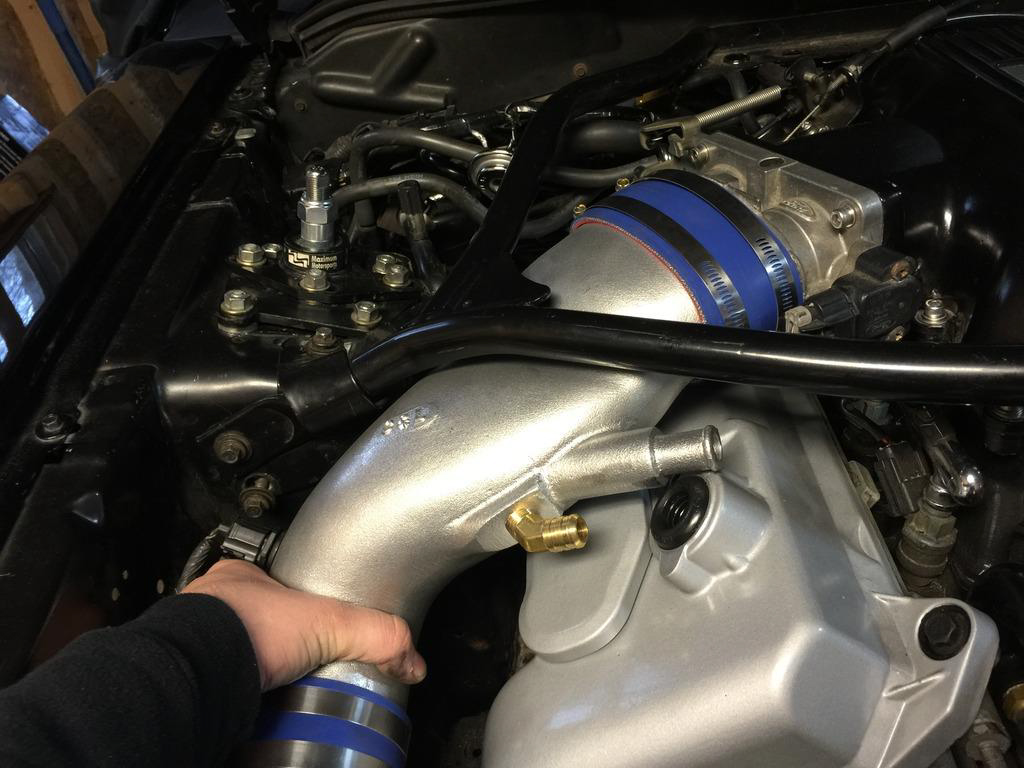
30. Once we have the C&L intake assembly where we want it, make sure the large silicone hose on the throttle body is positioned all the way over the opening and tighten down the 8mm hose clamps with a socket or flat head screwdriver.
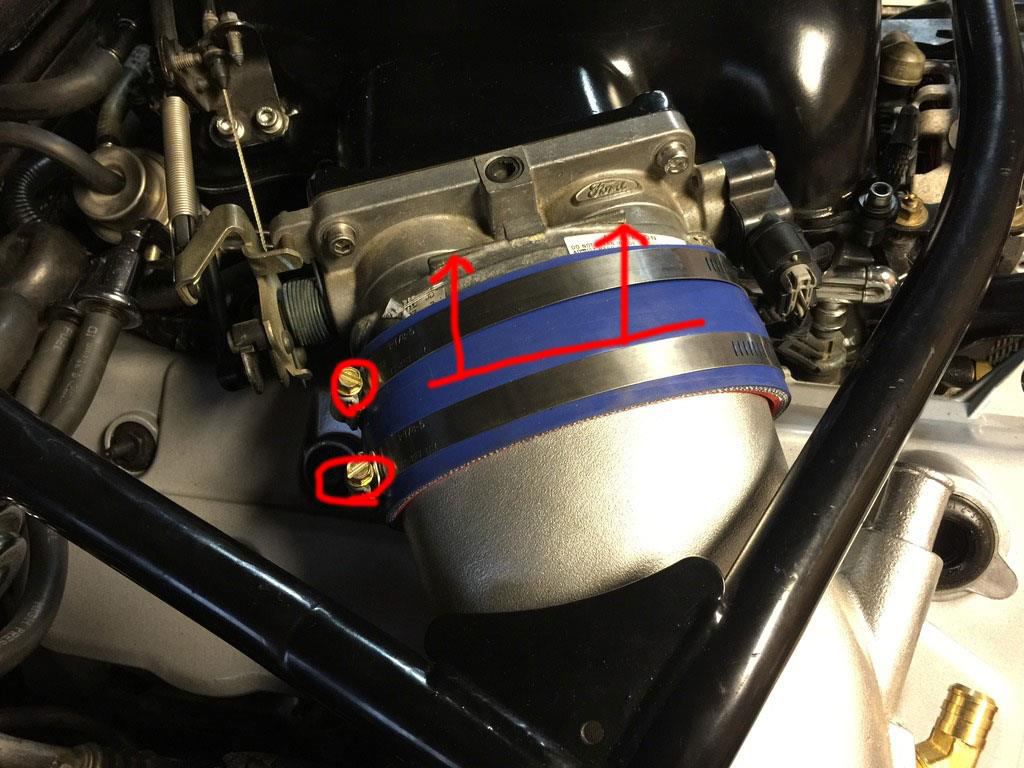
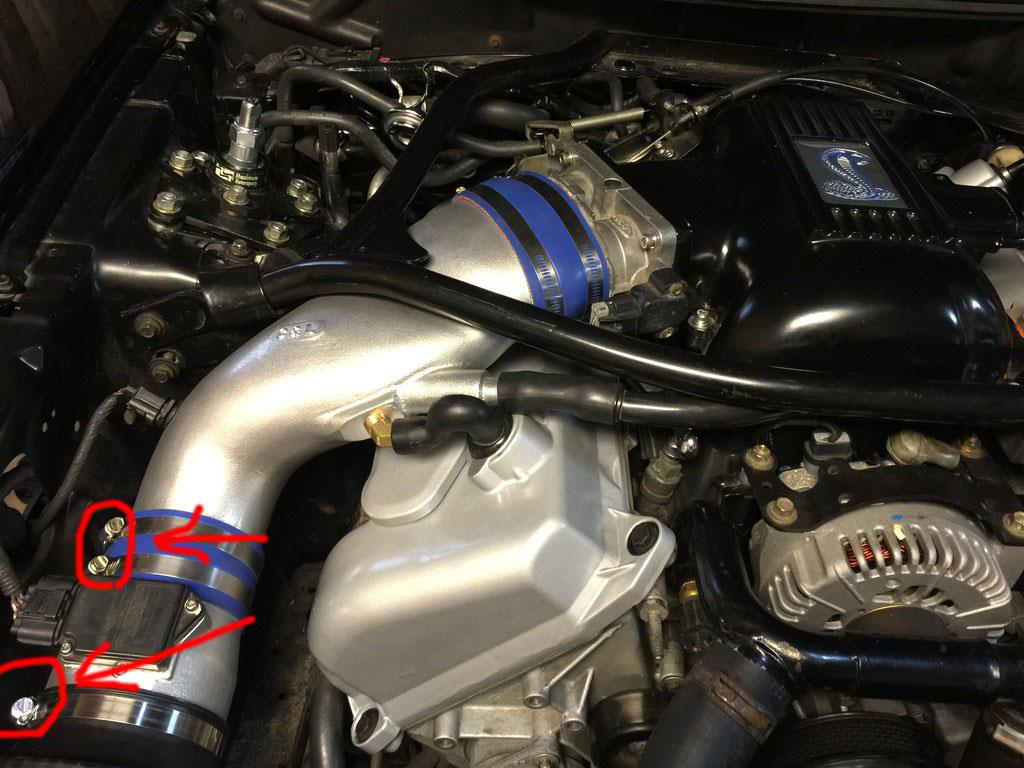
31. Now tighten down the MAF hose clamps and air filter hose clamp.
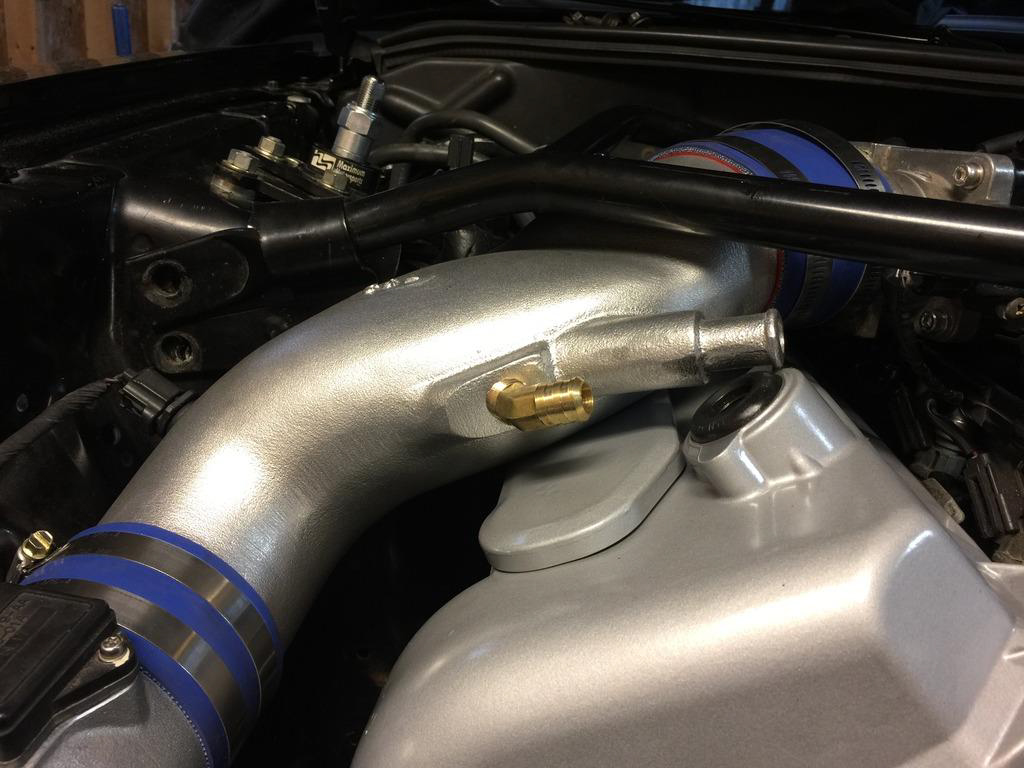
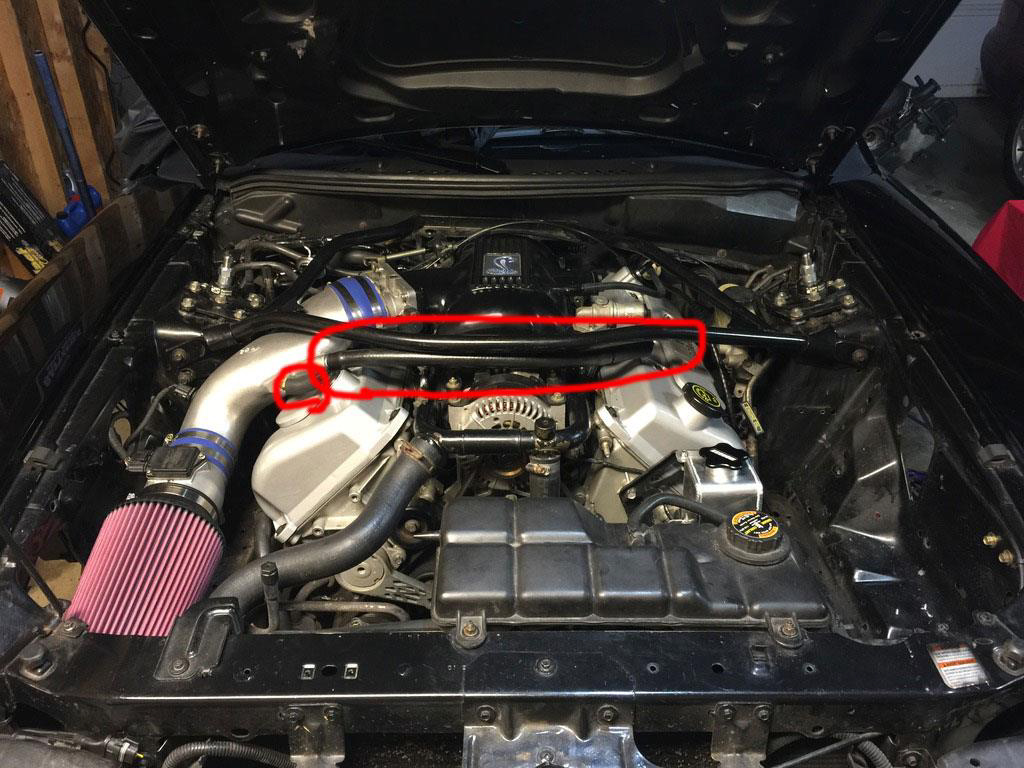
32. Now you can re-install the vacuum hoses running from the Valve cover and from the IAC.
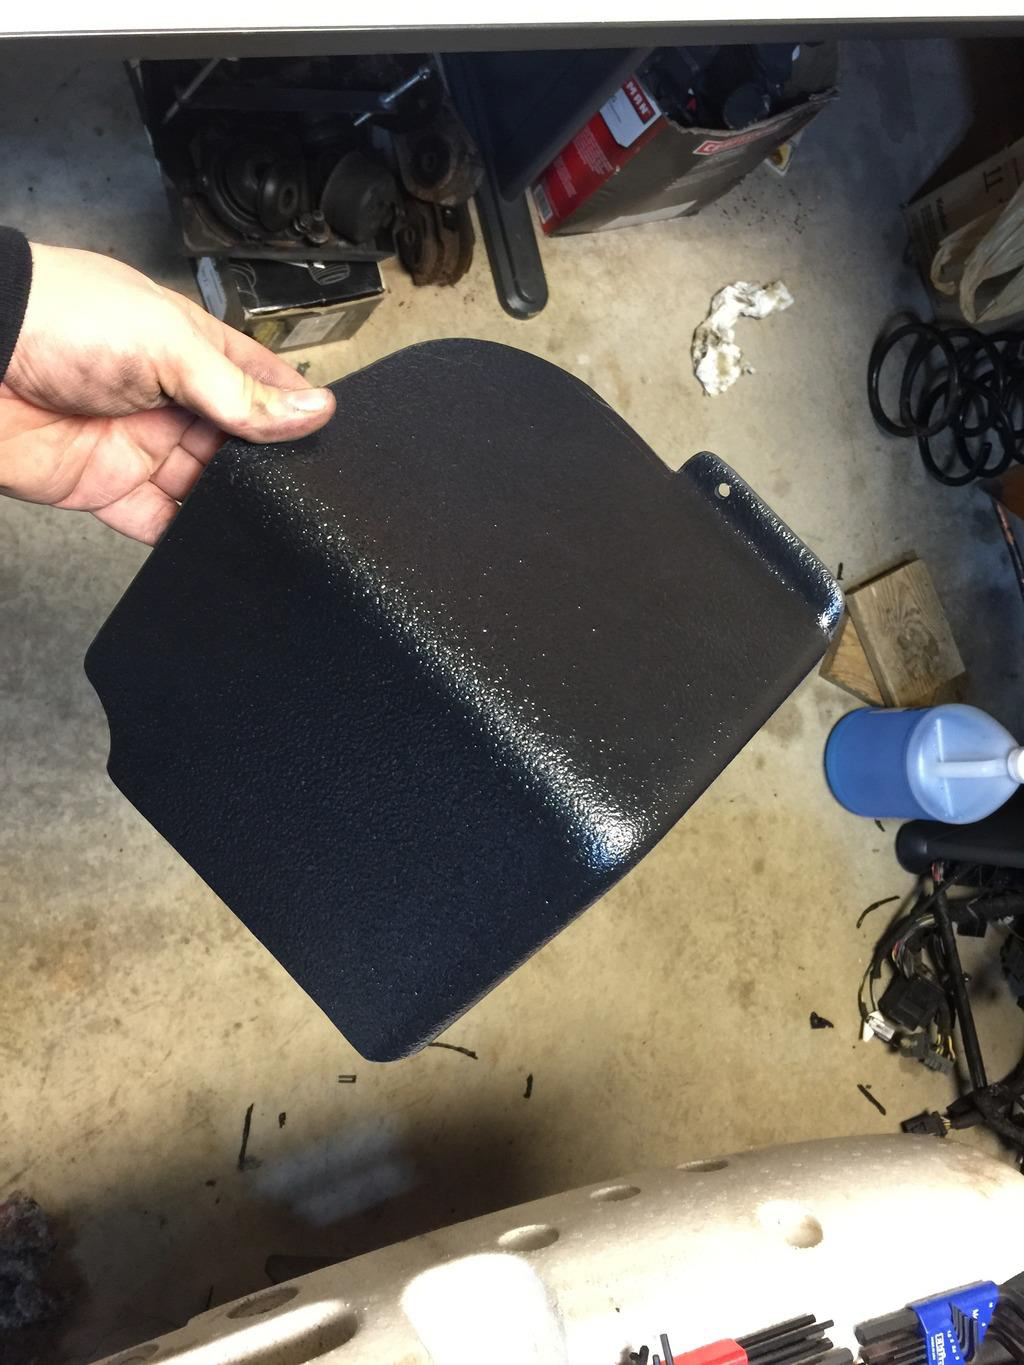
33. The last part of the install is the heat shield. It installs over the top of the C&L air filter and used the same 8mm bolt the stock air box used.
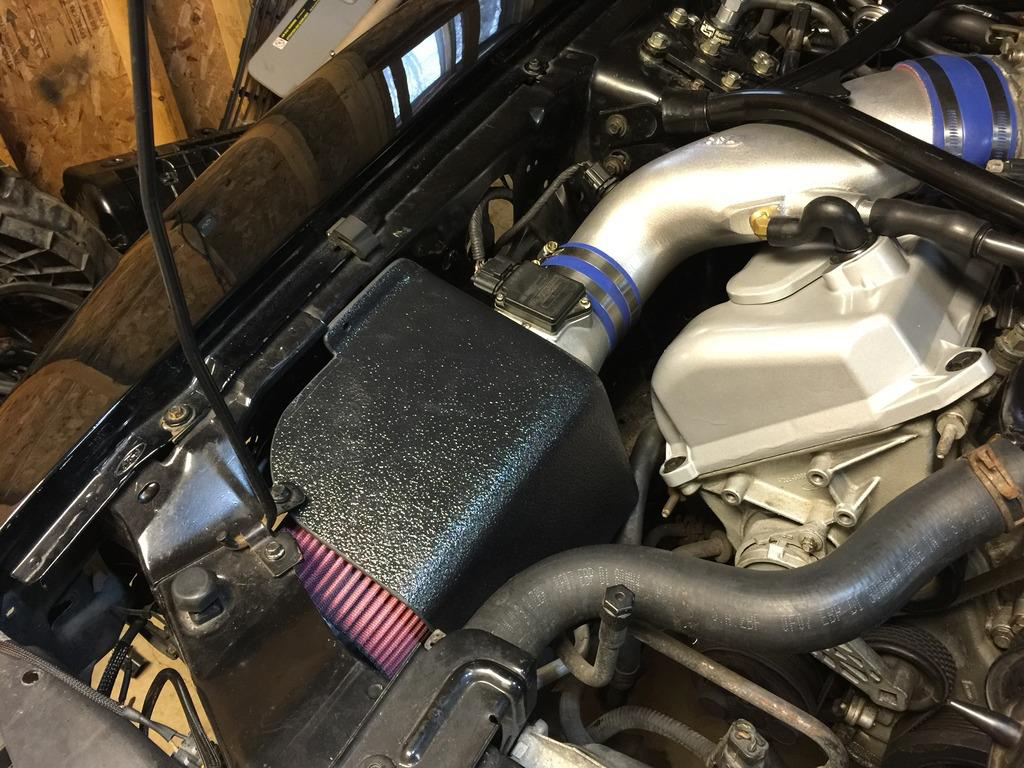
34. All finished!
Installation Instructions written by AmericanMuscle Customer Will Lukas 3/17/2015
