FREE 1 to 3-Day Delivery on Orders $149+ Details
How to Install Corsa Sport 3 in. Cat-Back Exhaust - Fastback - Polished Quad Tips on your Mustang
Installation Time
2 hours
Tools Required
- 3/8” drive ratchet
- 3/8” drive torque wrench
- 3/8” drive 13mm socket
- 3/8” drive 15mm deep socket
- Grommet pullers
- Soap and water solution
- Torque Wrench
- Penetrating lubricant spray
- Safety glasses

Shop Parts in this Guide
- Corsa Performance Sport Cat-Back Exhaust with Polished Quad Tips (15-17 Mustang GT Premium Fastback)
- Corsa Performance Sport Cat-Back Exhaust with Black Quad Tips (15-17 Mustang GT Premium Fastback)
- Corsa Performance Xtreme Cat-Back Exhaust with Polished Quad Tips (15-17 Mustang GT Premium Fastback)
- Corsa Performance Xtreme Cat-Back Exhaust with Black Quad Tips (15-17 Mustang GT Premium Fastback)
IMPORTANT WARRANTY & INSTALLATION INSTRUCTIONS ATTACHED
Please Forward All Attached Information to Consumer Warranty Not Valid Unless Returned to CORSA Exhaust
We ask that you take a few moments to complete our warranty registration form:
TO ACTIVATE YOUR LIMITED LIFETIME WARRANTY GO TO: CORSAPERFORMANCE.COM/WARRANTY

For Full-Color Installation Instructions, Please Visit:
CORSAPERFORMANCE.COM and Search by Part Number
Please be sure to review the enclosed instructions prior to beginning the installation process. If you have any questions about the enclosed parts, instructions or encounter a problem during installation: CALL CORSA PERFORMANCE TECHNICAL ASSISTANCE AT 800.486.0999
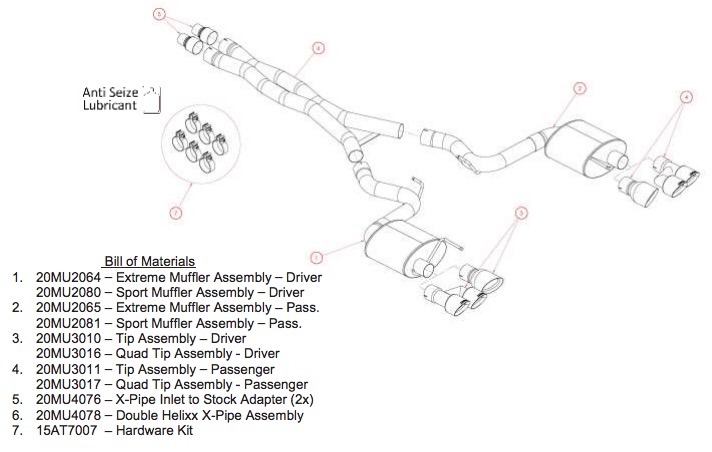
Exhaust System Installation
Cat Back Exhaust System
Dual Rear Exit w/ 4.5” Pro-Series Tips
2015 Ford Mustang GT 5.0L V8
PN 14328(BLK), 14332(BLK), 14335(BLK), 14337(BLK)
Please take time to read and understand these installation instructions.
CORSA recommends that the installation of this system be performed by a qualified service center or professional muffler installer who has the necessary equipment, tools and experienced personnel. However, if you decide to perform this install, the use of a hoist and an additional person will be required.
CAUTION: Never work on a hot exhaust system. Allow time for the vehicle to cool. Always wear eye protection when working under a vehicle.
Please confirm that all parts are present before beginning the factory exhaust system removal and CORSA exhaust system installation.
Factory Exhaust System Removal:
1. Using a 3/8” drive ratchet and 15mm deep socket, loosen the two sleeve clamps at the cat-back connection point. Both nuts must be loosened in order for the clamp to fully disengage. (Fig. A)
2. Using the 3/8” drive ratchet and 13mm socket, remove the bolt holding down the driver side hanger grommet assembly. (Fig. B) Once the bolt is removed, push up slightly on the exhaust and slide the hanger grommet assembly rearward to free it from the rear suspension sub-frame. Rotate the hanger grommet assembly a minimum of 90° so that it will not interfere with the rear suspension sub-frame. (Fig. C) Place the bolt in a safe location as it will be reused during the installation of the Corsa cat back exhaust system. Repeat this process for the passenger side hanger grommet assembly.
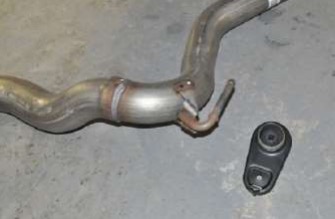
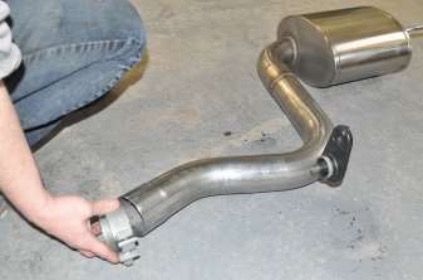
3. Slide the stock exhaust assembly rearward until the stock resonator inlet pipes are free of the sleeve clamps. Lower the front of the exhaust in order to create clearance between the resonator inlet pipes and the sleeve clamps, then slide the complete exhaust forwards to remove the rear driver and passenger side hangers from their respective hanger grommets. (Fig. D) The stock exhaust assembly will now be free from the vehicle. (Fig. E)
NOTE: The use of a soap and water solution may aid in the removal of hanger grommets.
4. Remove both the driver and passenger side hanger grommet assemblies from the front muffler hangers using grommet pullers or a similar device. (Fig. F) Set the hanger grommet assemblies aside, in a safe location, as they will be re-used for the installation of the Corsa cat back exhaust system. This concludes the factory exhaust system removal. NOTE: The use of a soap and water solution may aid in the removal of hanger grommets.
Factory Exhaust System Removal Pictures:
Fig. A
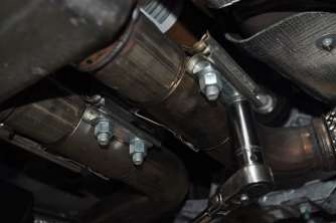
Fig. B
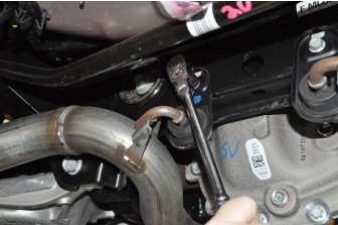
Fig. C
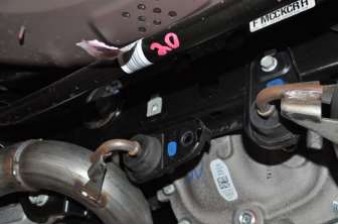
Fig. D
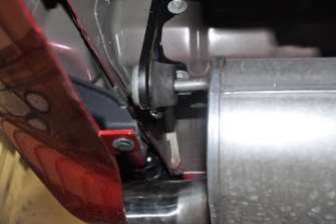
Fig. E
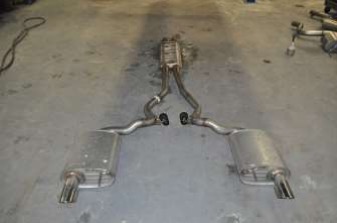
Fig. F
Installation of CORSA Exhaust System:
NOTE: Apply the anti-seize lubricant (supplied) to the threads ONLY of all the clamps and flange bolts. Failure to follow this procedure can cause nuts to seize on clamps and potentially destroy threads. After applying anti-seize lubricant, be sure to thoroughly clean your hands, as lubricant will tarnish stainless steel. All clamps should be tightened using a properly calibrated Torque Wrench. Using an air impact gun will damage the clamp and reduce its ability to effectively seal the joint. It may also cause the joint to separate, thereby causing damage to your exhaust system and to your vehicle.
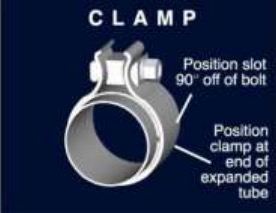
NOTE: Align all clamps so that the center of the clamp bolt is 90 degrees from the notch in the pipe. (See Fig. CLAMP)
1. Remove all exhaust system components from the shipping boxes, including clamps and hardware.
2. Locate the two x-pipe inlet adapters. Slide the adapters into the factory sleeve clamps, and tighten the clamps using the ratchet and 15mm deep socket, until the adapters are snug in the clamps. (Fig. G)
3. Locate the double helixx x-pipe and two 3” clamps. Install the clamps on the driver and passenger x-pipe inlets so that the bolt is vertical with the nut towards the ground and the bolts towards the outside of the vehicle. (Fig. H) Slide the x-pipe inlets over the x-pipe adapter outlets. (Fig. I) Position the x-pipe so that the x-pipe cross-brace located at the rear of the x-pipe is facing down and is parallel with the ground, and the x-pipe outlets are centered around the rear differential. Tighten the clamps using the ratchet and 15mm deep socket until the x-pipe is snug on the adapters. (Fig. J) Place a jack stand or similar device under the x-pipe for support.
4. Locate the passenger side hanger grommet assembly removed during step #5 of the stock exhaust removal process along with the passenger side muffler assembly. Install the hanger grommet assembly onto the front hanger of the muffler assembly in the same position as previously installed on the stock exhaust. (Fig. K)
NOTE: The use of a soap and water solution may aid in the installation of hanger grommets.
5. Locate one 3” clamp. Install the clamp on the passenger side muffler inlet pipe so that the bolt is vertical with the nut towards the ground and the bolt is towards the inside of the vehicle. (Fig. L) Slide the rear hanger into the rear hanger grommet located on the vehicle above and just inside of the passenger side tip cut out. (Fig. M) Next, slide the muffler inlet pipe over the passenger side x-pipe outlet. (Fig. N)
NOTE: The use of a soap and water solution may aid in the installation of hanger grommets.
6. Locate the 13mm bolt removed during step #2 of the stock exhaust removal process. Install the front passenger hanger grommet assembly onto the rear suspension sub-frame and tighten it down with the 13mm bolt, using the 3/8” ratchet and 13mm socket. (Fig. O)
7. Tighten the clamp connecting the passenger muffler inlet pipe to the passenger side x-pipe outlet using the ratchet and 15mm deep socket until muffler assembly is snug on the x-pipe. (Fig. P)
8. Repeat steps #4-#7 on the driver side of the vehicle. Once the system is secure, it is safe to remove the jack stand from beneath the x-pipe.
9. Locate the passenger rear tip assembly and one 3” clamp. Install the clamp on the tip inlet pipe so that the bolt is horizontal with the nut towards the inside of the vehicle and the bolt towards the top. Slide the tip assembly over the muffler outlet pipe and tighten the clamp using the ratchet and 15mm deep socket until the tip assembly is snug on the muffler outlet pipe. (Fig. Q & R) Repeat this process for the driver side tip assembly
NOTE: A premium package equipped Mustang with an installed Roush rear valance is required to install the quad tip assemblies.
10. Adjust the system accordingly, including the adapter overlap on the stock sleeve clamp, the rear muffler depth and rotation, along with the tip depth and rotation, so that the tips are centered in the bumper valence. Rotate the tips so that the Corsa etch is on top with the tip rotation matching the slanted tip cut out profile of the valance. (Fig. S & T) Check the position of all hangers to make sure they are properly seated within their corresponding grommets. Check clearances between the system components and chassis. At this time, tighten all clamps to 45ft-lbs using the torque wrench and 15mm socket.
NOTE: During cold weather start-ups, you may experience an exhaust sound that is deeper and louder in tone than usual. This is temporary and will diminish to normal levels once your engine has reached its normal operating temperature.
NOTE: Immediately following the installation of your exhaust system, you may experience a trace of smoke after initial start-up. DO NOT be alarmed. The smoke is caused by the burning of a small amount of forming oil residue used in the manufacturing process.
CORSA Installation Pictures
Fig. G
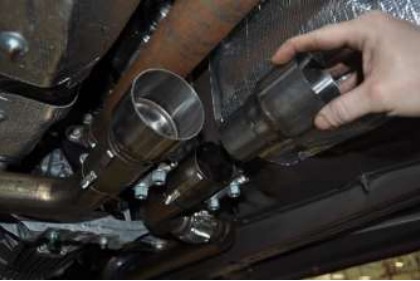
Fig. H
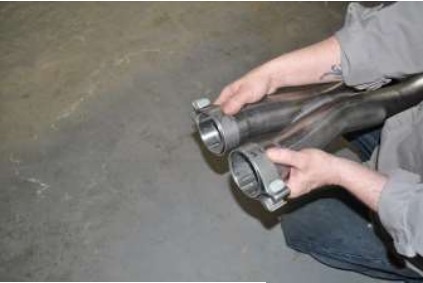
Fig. I
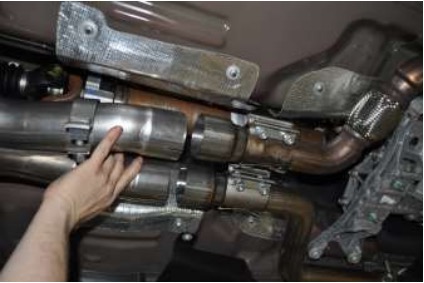
Fig. J
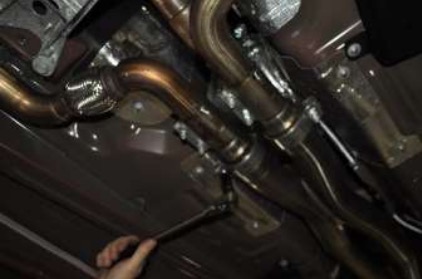
Fig. K
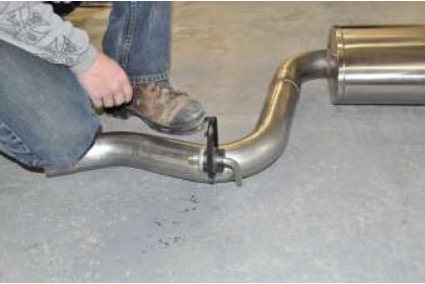
Fig. L
CORSA Installation Pictures
Fig. M
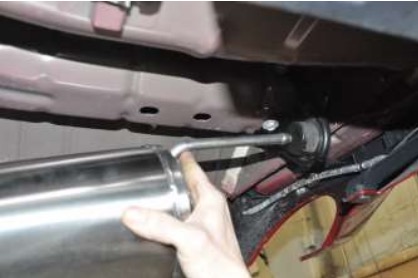
Fig. N
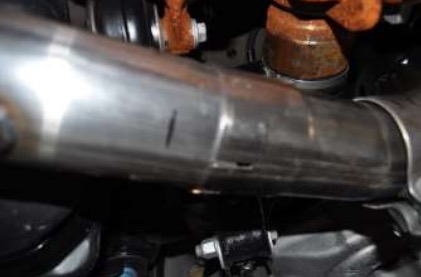
Fig. O
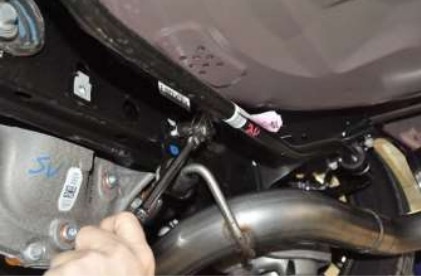
Fig. P
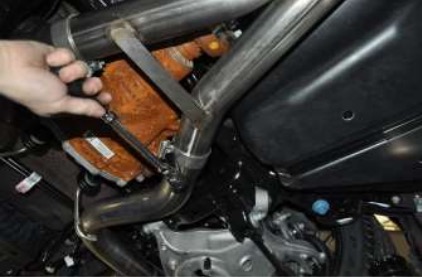
Fig. Q
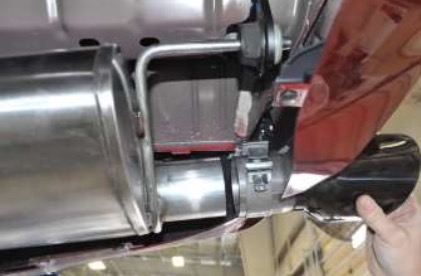
Fig. R
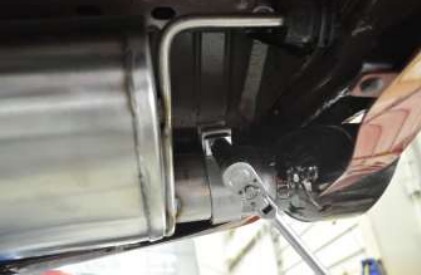
Fig. S
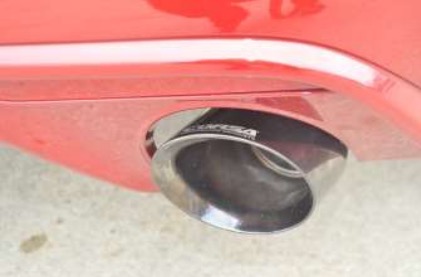
Fig. T