 FREE 1 to 3-Day Delivery on Orders $149+ Details
How to Install Eibach Anti-Roll Front Sway Bar (94-04 All) on your Ford Mustang
Installation Time
60 minutes
Tools Required
- Jack
- Jackstands (At least 2)
- Lug Nut Wrench/Socket
- Vice Grips
- Ratchet
- Breaker Bar
- 15mm Deep Socket
- 16mm Deep Socket

Shop Parts in this Guide
Note: The provided Eibach end-links were not long enough for my application. I already had a previously purchased set of American Muscle SR end-links that I used in their place. If the provided links don’t fit, you will need to re-use your factory end-links. If this is the case, I highly recommend installing new bushings, as the OEM ones are likely not holding up. Note: The size socket will differ depending on what brand of end-link you are installing.
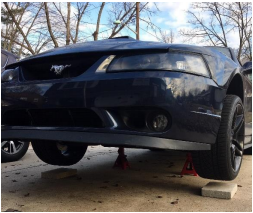
Step 1: Begin by safely jacking the front end off the ground. Place the car on jackstands on the frame rails. Remove both of the front wheels.
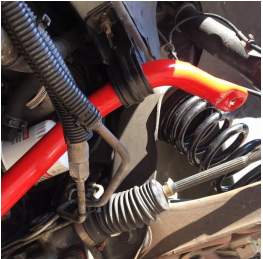
Step 2: Begin by removing the front sway bar end-links. You will need to place the vice grips in the middle, and use your 15mm socket to remove the nut on top. Repeat this on the side.
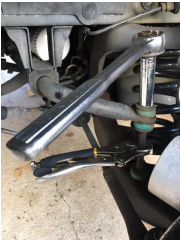
Step 3: With the nuts on both sides removed, you can now rotate the sway bar upwards. This will allow you to completely remove both end-links.
Step 4: Next, you want to make sure your sway bar is safely supported so that it doesn’t fall on you when we go to the next step. I used a jack stand to support it.
Step 5: Using your 16mm deep socket, begin removing the four (two on each side) nuts that hold the sway bar brackets to the car. These nuts are tight, so be careful not to strip them.
Step 6: With the brackets removed you can now lower the old sway bar out of the car.
Step 7: Take the supplied grease and coat the insides of the new provided sway bar bushings. You can now push the bushings onto the new Eibach sway bar. Try to position in them in the same place where they were located on the old bar.
Step 8: With the bushings in place. You can now slide the lower portion of the sway bar bracket over the bushing. After that, you can side the top portion into place.
Step 9: Raise your new assembled Eibach sway bar into place, and lightly tighten the bracket nuts to hold it down on each side.
Step 10: With the new sway bar in place, but not yet tightened down, you will want to be certain that the sway bar is centered on the car. I used the marking provided by Eibach on the bar as the center point.
Step 11: Once the bar is centered, tighten all four of the bolts all the way down.
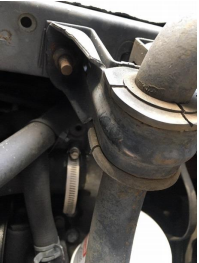
Step 12: Take your new endlinks and understand how they install. Every washer is beveled to support the bushing. The bushings have flat sides that sit in the washers, and pointed sides that are meant to sit in in the holes of the sway bar and the control arm.
Step 13: Take the end-link bolts, with a washer and a bushing stalled, and push it up from the bottom of the control arm. From the top side, install the rest of the bushings, washers, and spacer as pictured below.
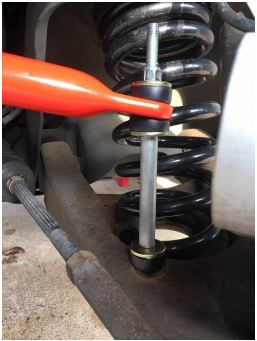
Step 14: Using your jack, slightly raise the control arm so that the bushings are resting in a completely horizontal position. You can now use the proper size socket to tighten the nut on top. Note: Tighten the nut until you see the bushings begin to SLIGHLTY flatten out.
Step 15: Re-install your wheels and lower your car off of the jackstands. Enjoy your new suspension!
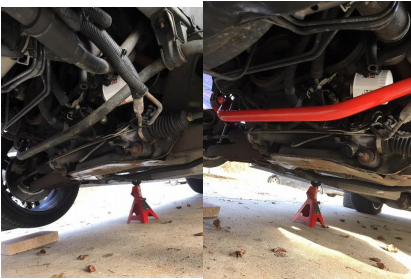
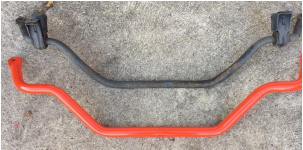
Before and After
Installation Instructions provided by AmericanMuscle Customer
